1
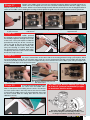
Stage 15
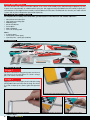
Now remove the fin and using a sharp
knife and a ruler CAREFULLY cut just
below the marked lines. Remove the
covering from the left and the right
side of the fin. Make sure you only cut
through the film and not the wood,
otherwise the fin may be severely
weakened. Remove the film from the
top of the fuselage in the same way.
15.1. Remove the film from the fin
15.2. Remove the film from the top of the fuselage
Stage 16
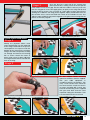
Now apply sufficient epoxy to both sides of the fin and
along the underside. Use 30 minute or 1 hour epoxy to
give yourself plenty of working time. Insert the fin in its slot in the fuselage and check
the alignment. Ensure that it is perpendicular to the tailplane. Excess adhesive should
be cleaned off with a rag or tissue before it cures.
16.2. Slide the fin in position
16.3.Remove any excess epoxy before it
cures
16.1. Apply plenty of epoxy
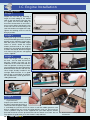
Stage 17
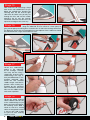
Locate the undercarriage
groove in the underside
of the fuselage. Carefully
trim away the film using a
sharp knife. Insert the main
undercarriage wire legs in
their pre-drilled holes in the
fuselage underside. Now
locate the two moulded
saddle clamps and hold in
position while marking the
fuselage for the mounting
holes. Pilot drill (1.5mm) the
holes for the saddle clamps
and screw in position.
17.1. Trim away the covering
17.2. Fit the undercarriage legs
17.3. Mark the position of the saddle clamps
17.4. Screw the clamps in place
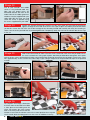
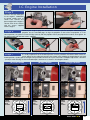
18.1. Fit a collet to the axle
18.2. Retain the wheel with a second collet
Stage 18
Locate the wheel retaining
collets. Slide the first one on
to the undercarriage to just
before the bend and tighten
the retaining screw. Slide a
wheel on, then fit a second
collet, ensuring that the wheel
is free to spin. Add a drop
of cyano to each retaining
screw to secure
6
Irvine Tutor 40 II