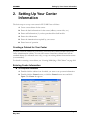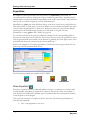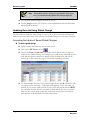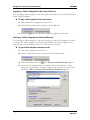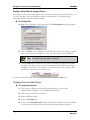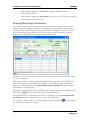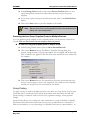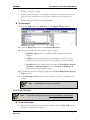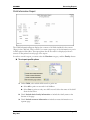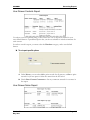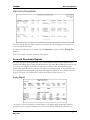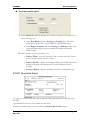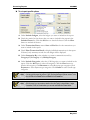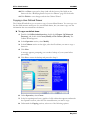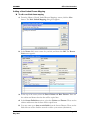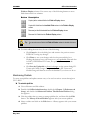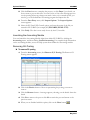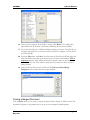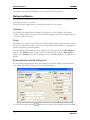
1
User Manual
EZ-CARE2
SofterWare, Inc.
EZ-CARE2 Version 7.0
May 2010
READ THIS BEFORE INSTALLING SOFTWARE
SOFTERWARE, INC.
Software License
YOU SHOULD CAREFULLY READ THE FOLLOWING TERMS AND CONDITIONS BEFORE
USING THIS SOFTWARE PACKAGE. USE OF THE SOFTWARE INDICATES THAT YOU
HAVE READ THIS AGREEMENT, UNDERSTAND IT AND AGREE TO BE BOUND BY ITS
TERMS AND CONDITIONS. IF YOU DO NOT AGREE WITH THEM, YOU SHOULD PROMPTLY
RETURN THIS PACKAGE, AND YOUR MONEY WILL BE REFUNDED.
LICENSE AGREEMENT: SofterWare, Inc. grants you a personal and nonexclusive license to use the
software in the United States, Canada and Puerto Rico only on a single computer at a time, unless you have
purchased a multi-user license. If a multi-user license is purchased, the software may be used only on a
single server accessible only at the licensed site by the licensed number of users through a local area
network. This license is non-transferable. You may not distribute, modify, prepare derivative works,
sublicense or copy any portion of the software or the Manual (except that 1 copy of the software may be
made for back-up purposes). You agree that the software belongs to SofterWare, Inc. and you agree to keep
confidential and to use your best efforts to prevent and protect the contents of the software from
unauthorized use or disclosure.
TERMS OF LICENSE: The license is effective until terminated. You may terminate this License at any time
by destroying the software. This license automatically terminates if you fail to comply with any term or
condition of this Agreement. On termination, you agree to destroy the software.
LIMITED WARRANTY: SofterWare, Inc. warrants to the original purchaser only that the software program is
free from defects under normal use for a period of 90 days from the date of purchase. If during this 90 day
period a defect in the program disk should occur, SofterWare, Inc. will replace the disk or repair the program
without charge to you. This Warranty does not apply to any copy of the software, use other than in
accordance with the Manual, or defects caused by the negligence of any other person other than
SofterWare, Inc. THIS IS YOUR SOLE REMEDY FOR BREACH OF WARRANTY OR FOR ANY OTHER
CLAIM ARISING OUT OF OR RELATING TO THE SOFTWARE OR THIS AGREEMENT.
DISCLAIMER OF WARRANTY; LIMITATION ON LIABILITY; AND WAIVERS: THE EXPRESS
WARRANTY AND ANY REPRESENTATIONS SET FORTH ABOVE ARE IN LIEU OF, AND
SOFTERWARE, INC. DISCLAIMS, ANY OTHER REPRESENTATIONS OR WARRANTIES
(EXPRESS OR IMPLIED) WITH REGARD TO THE SOFTWARE AND THE MANUAL, AND
SPECIFICALLY DISCLAIMS ANY IMPLIED WARRANTIES OF MERCHANTABILITY OR
FITNESS FOR A PARTICULAR PURPOSE. SOFTERWARE, INC. SHALL NOT BE LIABLE AND
YOU WAIVE YOUR ENTIRE RIGHT OF RECOVERY FOR ANY LOSSES, CLAIMS OR
DAMAGES INCLUDING, WITHOUT LIMITATION, ANY CLAIMS FOR ATTORNEYS' FEES AND
COSTS, OR FOR ERRORS OR OMISSIONS CONTAINED IN ITS SOFTWARE OR MANUALS,
ANY INTERRUPTIONS OF SERVICE, LOSS OF BUSINESS, LOSS OF DATA, OR
ANTICIPATORY PROFITS AND/OR PROFITS AND/OR FOR INCIDENTAL, PUNITIVE,
SPECIAL OR CONSEQUENTIAL DAMAGES, REGARDLESS OF WHETHER SOFTERWARE,
INC. HAS BEEN ADVISED OF THE POSSIBILITY OF SUCH LOSSES, CLAIMS, OR
DAMAGES. THE SOFTWARE AND THE MANUALS ARE SOLD "AS IS".
EXCLUSIVE AGREEMENT: You agree that this agreement is the complete and exclusive
statement of the agreement between us and supersedes any proposal or prior agreement, oral or
written, and any other communications between us relating to the software.
CHOICE OF LAWS; JURISDICTION: This agreement will be interpreted and enforced in
accordance with the laws of Pennsylvania without reference to principles of conflicts of law. You
consent to the jurisdiction of the Court of Common Pleas of Montgomery County, Pennsylvania
and the U.S. District of Court for the Eastern District of Pennsylvania. YOU WAIVE THE
DEFENSE OF INCONVENIENT FORUM AND YOU WAIVE ALL RIGHTS TO TRIAL BY JURY.
©COPYRIGHT 2010, by SofterWare, Inc., all rights reserved. No part of this software publication
may be reproduced, transmitted, transcribed, stored in a retrieval system, reverse engineered or
translated into any language or computer language in any form or by any means without prior
written consent of SofterWare, Inc. Portions Copyright Microsoft Corporation. All rights reserved.
EZ-CARE2
Table of Contents
Table of Contents
1.
GETTING STARTED WITH EZ-CARE2 .................................................... 13
Introduction to the EZ-CARE2 User Interface .................................................................13
The Main Screen .......................................................................................................13
Office Administration and Cabinet Icons ...................................................................13
Drawer Screen...........................................................................................................14
Tabs ...........................................................................................................................15
Pages.........................................................................................................................19
Grids ..........................................................................................................................20
Insta-Print...................................................................................................................25
How to Use Online Help.....................................................................................................26
EZ-CARE2 Support ............................................................................................................26
Before You Call..........................................................................................................26
System Configuration ................................................................................................27
What To Expect .........................................................................................................27
Time Considerations..................................................................................................28
Contact Options .........................................................................................................28
Accessing SofterWare’s Web Site From EZ-CARE2 ................................................28
Sorts and Selections..........................................................................................................29
Sorts...........................................................................................................................29
Selections ..................................................................................................................33
2.
SETTING UP YOUR CENTER INFORMATION......................................... 39
Creating a Cabinet for Your Center..................................................................................39
Entering Center Information .............................................................................................39
Entering Staff Information.................................................................................................40
Entering Class And Schedule Information ......................................................................40
Entering Class Data Using the Classes Tab .............................................................40
Schedule Templates ..................................................................................................41
Using Template Groups.............................................................................................45
Enforcing Enrollment Limits .......................................................................................46
Entering the Immunizations Required by Your Center ..................................................49
Entering Hours of Operation.............................................................................................50
3.
ENTERING CHILD AND FAMILY DATA ................................................... 53
Entering Family Information .............................................................................................53
Adding a New Family Record ....................................................................................53
Pictures on the Family and Child Tabs......................................................................53
Entering Child Information................................................................................................54
Setting Up a Child Record .........................................................................................54
Version 7.0
May 2010
Page 3
Table of Contents
EZ-CARE2
Family Only ................................................................................................................56
Entering Ledger Information.............................................................................................57
Entering Tuition Information.............................................................................................57
Entering Schedule Information.........................................................................................57
Entering Contracted and Actual Attendance ..................................................................57
Superfields..........................................................................................................................58
Notes Superfield ........................................................................................................58
Checklist Superfield ...................................................................................................59
Contacts Superfield ...................................................................................................60
Immunizations Superfield ..........................................................................................61
Changing a Child or Family Record Status .....................................................................62
Setting a Record to be Inactive .................................................................................62
Changing the Family that a Child Record is Linked To .................................................63
4.
USING THE ADVANCED ATTENDANCE & BILLING MODULE.............. 65
Setting Up Attendance & Billing .......................................................................................65
Confirm Hours of Operation.......................................................................................65
Manual Schedule Entries...................................................................................................66
Schedule Tab.............................................................................................................66
Contracted Tab ..........................................................................................................68
Actual Tab..................................................................................................................71
Schedule Templates ..........................................................................................................72
Maintain Schedule Templates ...................................................................................72
Using Schedule Templates........................................................................................73
Generate Attendance .........................................................................................................77
Edit Attendance Entries.....................................................................................................78
Removing Scheduling and Attendance Data ..................................................................79
Removing Contracted or Actual Times......................................................................79
Removing Scheduled Times......................................................................................80
Removing Attendance ...............................................................................................81
Attendance Reports ...........................................................................................................82
5.
MAINTAINING DATA ................................................................................ 83
Searching for Records.......................................................................................................83
Browsing Records Using the Toolbar Navigation Buttons.........................................83
Selecting Records Using the Family and Child Lists.................................................83
Searching for Records using EZ-Finder ....................................................................83
Maintaining Data Using EZ-Viewer...................................................................................85
Using Select-A-Merge with EZ-Viewer ......................................................................86
Page 4
Version 7.0
May 2010
EZ-CARE2
Table of Contents
Changing Data in EZ-Viewer .....................................................................................87
Removing Duplicate Records ....................................................................................87
Updating Records Using Global Change.........................................................................88
Accessing the Library of Saved Global Changes ......................................................88
Setting Up or Modifying Global Changes ..................................................................89
Displaying and Selecting Global Changes ................................................................90
Running the Global Change ......................................................................................90
Exporting Data Using EZ-Viewer ......................................................................................91
Sending Email From a Record ..........................................................................................92
6.
USING THE ACCOUNTS RECEIVABLE MODULE .................................. 95
Accounts Receivable Setup ..............................................................................................95
Accumulate YTD Payments.......................................................................................95
Setting Beginning A/R Numbers................................................................................96
Entering Balance Forward Records...........................................................................97
Maintaining Categories ..............................................................................................97
Maintain Ledger Templates .....................................................................................101
Maintain Rollup Categories......................................................................................102
Enabling the QuickBooks Interface .........................................................................104
Setting Discount Rounding Preferences..................................................................104
Changing the Currency Type...................................................................................105
Maintaining Rate Masters................................................................................................105
Accessing the Library of Saved Rates.....................................................................105
Creating Rates with the Rate Definition Wizard ......................................................106
Setting Up Rates......................................................................................................107
Entering Tuition................................................................................................................110
Tuition Tab ...............................................................................................................110
Tuition Templates ....................................................................................................112
Posting Tuition .........................................................................................................116
Removing Tuition Entries.........................................................................................118
Billing for Activities and Services ..................................................................................119
Entering Ledger Transactions Manually ..................................................................119
Charging Fees for Late Pickup ................................................................................122
Handling Security Deposits......................................................................................123
Setting Up Sibling Discounts ...................................................................................124
Charging for the Difference between Contracted and Actual Times .......................125
Handling Charges When a Child's Schedule Changes Mid-Billing Cycle ...............125
Entering Other Ledger Transactions .......................................................................126
Ledger Templates....................................................................................................127
Template Groups .....................................................................................................131
Group Posting..........................................................................................................135
Processing Cancellations ...............................................................................................139
Handling Refunds ............................................................................................................140
Handling Cash Receipts ..................................................................................................142
Enter New Payments ...............................................................................................143
Version 7.0
May 2010
Page 5
Table of Contents
EZ-CARE2
Modify Existing Transactions ...................................................................................145
Handling Credit Card Payments with Insta-Charge.................................................145
Emailing Receipts ....................................................................................................146
Printing Receipts......................................................................................................148
Post Cash Receipts .................................................................................................149
Removing Posting (Group, C/R, EZ-EFT) ...............................................................151
Setting Up Customized Cash Receipts ...................................................................152
Sending Out Invoices ......................................................................................................153
Printing Invoices ......................................................................................................153
Emailing Invoices.....................................................................................................154
Printing Customized Invoices ..................................................................................155
Processing Transactions Electronically........................................................................156
Click to Pay ..............................................................................................................156
Insta-Charge ............................................................................................................156
EZ-EFT ....................................................................................................................156
Year-End Procedures.......................................................................................................156
Collapse Transactions .............................................................................................156
Accounts Receivable Reports ........................................................................................157
7.
GENERATING REPORTS ....................................................................... 159
Working with Reports ......................................................................................................159
Creating Reports......................................................................................................160
Browsing Reports ....................................................................................................160
Previewing a Report ................................................................................................163
Printing a Report......................................................................................................165
Setting Standard Report Options.............................................................................166
Copying a Report.....................................................................................................169
Renaming a Report..................................................................................................169
Deleting a Report.....................................................................................................170
Printing a Report to a File ........................................................................................170
Moving Reports between Cabinets Using Import/Export.........................................171
Database Reports.............................................................................................................174
Birthday List .............................................................................................................174
Check List Report ....................................................................................................175
Child Directory .........................................................................................................176
Child Information Report..........................................................................................177
Child List ..................................................................................................................178
Contacts Report.......................................................................................................178
EZ-Entry Barcodes ..................................................................................................179
Family Information Report .......................................................................................181
Immunization Report................................................................................................182
Mailing Labels..........................................................................................................183
Notes Report............................................................................................................184
Staff Check List Report............................................................................................185
Staff Contacts Report ..............................................................................................186
Staff Development Report .......................................................................................187
Staff Directory ..........................................................................................................188
Staff EZ-Entry Barcodes Report ..............................................................................189
Staff Information Report...........................................................................................191
Page 6
Version 7.0
May 2010
EZ-CARE2
Table of Contents
Staff Mailing Labels .................................................................................................192
Staff Notes Report ...................................................................................................193
User Drawer Check List Report ...............................................................................194
User Drawer Contacts Report..................................................................................195
User Drawer Notes Report ......................................................................................195
Waiting List Reports ........................................................................................................197
Mailing Labels..........................................................................................................197
User Drawer Checklist Report .................................................................................197
User Drawer Contacts Report..................................................................................197
User Drawer Notes Report ......................................................................................197
Wait List Statistics....................................................................................................198
Wait List by Class/Priority/Date ...............................................................................198
Wait List by Priority/Date .........................................................................................199
Accounts Receivable Reports ........................................................................................199
Aging Report............................................................................................................199
Child Tuition Report .................................................................................................201
Deposit Report.........................................................................................................202
EZ-EFT Information Report .....................................................................................203
EZ-Entry Category Barcodes...................................................................................205
EZ-Entry Family & Child Name Barcodes ...............................................................206
Invoices....................................................................................................................207
Ledger Audit Report.................................................................................................208
Ledger Report ..........................................................................................................209
Ledger Variance Report...........................................................................................211
Payment Receipts....................................................................................................212
Period Analysis Report ............................................................................................213
Period Variance Report ...........................................................................................214
Revenue Summary Report ......................................................................................215
Revenue vs. Labor Cost Report ..............................................................................217
Year to Date Payment Summary Report .................................................................217
Year to Date Summary Report ................................................................................218
Attendance Reports .........................................................................................................219
Child Attendance Analysis Report ...........................................................................220
Child Attendance Detail Report ...............................................................................221
Child Class Attendance Summary by Period...........................................................223
Child Contracted vs. Actual Hours Report...............................................................224
Child FTE Report .....................................................................................................225
Child Hours Analysis Report....................................................................................225
Child Loading Report ...............................................................................................226
Child Schedule Report.............................................................................................227
Child Schedule Worksheet ......................................................................................228
Child Sign In Sheet ..................................................................................................229
Child Weekly Attendance Summary ........................................................................231
Child Weekly Class Attendance Report...................................................................232
Export Attendance Spreadsheet..............................................................................233
Staff Attendance Analysis Report............................................................................234
Staff Contracted versus Actual Hours Report..........................................................235
Staff Expected Hours Report ...................................................................................236
Staff Export Attendance Spreadsheet .....................................................................237
Staff Hours Analysis Report.....................................................................................238
Staff Payroll Hours Report .......................................................................................239
Staff Schedule Detail Report ...................................................................................240
Staff Sign-in Sheet...................................................................................................241
Version 7.0
May 2010
Page 7
Table of Contents
EZ-CARE2
Staffing Level Analysis Report.................................................................................242
Administrative Reports....................................................................................................243
EZ-Views Report......................................................................................................243
Ledger Templates Report ........................................................................................245
Linked Drawers Report ............................................................................................246
Picklists Report ........................................................................................................247
Rate Masters Report................................................................................................248
Template Groups Report .........................................................................................249
Tuition Templates Report ........................................................................................250
Answers to Common Report Questions........................................................................251
How do I modify System Reports? ..........................................................................251
How do I create a print (.PRN) file?.........................................................................251
How do I export accounts receivable (A/R) information into Excel?........................253
8.
GENERATING MAILINGS AND EMAIL .................................................. 255
Performing a Mail Merge with Word...............................................................................255
Creating the File Export in EZ-CARE2 ....................................................................255
Creating a Merge Document in Word 2007 .............................................................256
Updating a Mail Merge in Word 2007 ......................................................................256
Creating a Merge Document in Word 2002 and 2003 .............................................256
Updating a Mail Merge in Word 2002 and 2003 ......................................................257
Creating a Merge Document in Word 2000 .............................................................258
Updating a Mail Merge in Word 2000 ......................................................................259
Generating Email Messages ...........................................................................................259
9.
OFFICE ADMINISTRATION .................................................................... 261
Administering Users, Groups and Security ..................................................................261
Maintaining User Accounts with the Library of Users..............................................262
Maintain Cabinet/System Security Groups..............................................................264
Registering New Modules........................................................................................265
Enabling or Disabling Password Protection.............................................................266
Maintaining Passwords............................................................................................267
Maintaining File Cabinets................................................................................................267
Creating a New File Cabinet Based Off the Standard Template.............................268
Copying a File Cabinet ............................................................................................271
Modifying a File Cabinet ..........................................................................................274
Renaming File Cabinets ..........................................................................................277
Deleting File Cabinets..............................................................................................277
Restoring Cabinets ..................................................................................................277
Optimizing Cabinets.................................................................................................279
Maintaining File Cabinet Drawers ..................................................................................280
Creating a User-Defined Drawer .............................................................................280
Copying a User-Defined Drawer..............................................................................282
Modifying a Drawer..................................................................................................283
Deleting Drawers .....................................................................................................285
Linking Drawers .......................................................................................................285
Print Drawer/Record Format....................................................................................290
Renaming Drawers ..................................................................................................291
Page 8
Version 7.0
May 2010
EZ-CARE2
Table of Contents
Defining the Data Table Fields in a Drawer.............................................................292
Modifying Screen Layouts in a Drawer....................................................................302
Removing Records from Superfields.............................................................................308
Backing Up Your System ................................................................................................309
Overview ..................................................................................................................309
Backing Up Cabinets Manually................................................................................310
Scheduled Backup...................................................................................................311
Restoring from Backups .................................................................................................316
Preferences & Setup ........................................................................................................317
Calculate Child Ages ...............................................................................................317
Date Format & Century Settings..............................................................................318
Confirm Adding New Child.......................................................................................319
Confirm Cut/Delete ..................................................................................................319
Incremental Search Settings....................................................................................319
Locale Settings ........................................................................................................321
Maintaining Audit Trails ...........................................................................................322
Maintaining EZ-Finders............................................................................................322
Maintaining EZ-Views ..............................................................................................324
Maintaining Picklists ................................................................................................325
Maintaining Staff Labor Costs .................................................................................329
Maintaining Template Groups..................................................................................330
Importing Data..................................................................................................................330
Recalculating Formulas...................................................................................................330
Primary Key Cleanup .......................................................................................................331
System Updates ...............................................................................................................331
Installing an Update .................................................................................................331
Manual System Updates..........................................................................................332
Setting Up Printers for EZ-CARE2..................................................................................332
Recovering from a System Crash or Hardware Failure ...............................................333
End of Year/End of Season Procedures ........................................................................334
10.
CUSTOMIZING EZ-CARE2 ..................................................................... 337
Customizing EZ-CARE2 Using the Create/Modify a File Cabinet Wizard...................337
Macros...............................................................................................................................338
Setting up Macros....................................................................................................338
Using Macros ...........................................................................................................339
Printing the Macro Report........................................................................................340
Changing the Appearance of EZ-CARE2 Screens ........................................................340
Adding a Field to Calculate Anniversaries ....................................................................341
Version 7.0
May 2010
Page 9
Table of Contents
EZ-CARE2
Managing Inquiries and Prospects ................................................................................343
Using Mapping Software with EZ-CARE2 to Determine Transportation Routes.......343
Offering Online Registration ...........................................................................................344
11.
OPTIONAL MODULES............................................................................ 345
Accounting Module..........................................................................................................345
Posting to General Ledger.......................................................................................345
Launching the Accounting Module ..........................................................................346
Removing G/L Posting.............................................................................................346
Accounts Receivable Module .........................................................................................347
Click-to-Pay Module.........................................................................................................347
Custom Report Writer Module ........................................................................................347
EZ-EFT Module .................................................................................................................347
EZ-Entry Module...............................................................................................................348
Printing Barcodes using EZ-Entry Reports..............................................................348
Scanning in Barcodes using EZ-Entry.....................................................................348
EZ2-Post2 Module (QuickBooks Integration)................................................................349
EZ2-Import Module...........................................................................................................349
Insta-Charge Module........................................................................................................350
Insta-Merge Module .........................................................................................................350
Create a New Merge Template ...............................................................................350
Printing a Merged Document ...................................................................................351
Previewing a Merged Document .............................................................................352
Editing a Merged Document ....................................................................................352
Duplicating an Insta-Merge Template......................................................................352
Renaming an Insta-Merge Template .......................................................................352
Deleting an Insta-Merge Template ..........................................................................352
Sending Email from Insta-Merge .............................................................................352
Using Select-A-Merge with EZ-Viewer ....................................................................353
Staff Module......................................................................................................................356
Overview ..................................................................................................................356
Staff Tab ..................................................................................................................356
Development Tab ....................................................................................................359
Schedule, Contracted, and Actual Tabs ..................................................................359
TimeClock Module ...........................................................................................................359
Waiting List Module .........................................................................................................360
Overview ..................................................................................................................360
Setup........................................................................................................................360
Entering Names into the Waiting List ......................................................................360
Handling Admittance................................................................................................361
Page 10
Version 7.0
May 2010
EZ-CARE2
Table of Contents
APPENDIX A: FOXPRO FUNCTIONS............................................................. 363
Basic Functions ...............................................................................................................363
Advanced Functions........................................................................................................364
APPENDIX B: SETTING UP OUTLOOK EXPRESS AND OUTLOOK TO
SEND EZ-CARE2 EMAILS ...................................................................... 367
Choosing the Default Email Program for Your System ...............................................367
Setting Up Your Email Program for Use with EZ-CARE2.............................................368
Setting Up Outlook Express.....................................................................................368
Setting Up Outlook...................................................................................................369
INDEX............................................................................................................... 371
Version 7.0
May 2010
Page 11
Table of Contents
EZ-CARE2
This page intentionally left blank.
Page 12
Version 7.0
May 2010
EZ-CARE2
Getting Started with EZ-CARE2
1. Getting Started with EZ-CARE2
Introduction to the EZ-CARE2 User Interface
The Main Screen
EZ-CARE2 is set up to represent the way an office is organized. An office may include file
cabinets; each cabinet has drawers and folders (or tabs) inside those drawers.
When you first enter EZ-CARE2, the screen looks similar to the following graphic. The
screens in EZ-CARE2 have a default size of 800x600, which makes them easy to read and
use.
Office Administration and Cabinet Icons
Each file cabinet represents a separate database that you manage. The Office Administration
icon lets you access a number of procedures you would use in managing your databases or
performing other administrative functions.
The File Cabinet within the red box is the active cabinet, meaning, choosing any menu item
will perform that function (for example, Generate Reports) on that cabinet.
You can make another cabinet the active cabinet by single-clicking on it. You can then select
Drawers from the menu, and open the drawer of your choice within the active cabinet.
Version 7.0
May 2010
Page 13
Getting Started with EZ-CARE2
EZ-CARE2
Note: To see the data folder for a specific cabinet, right-click the cabinet. The Cabinet Data
Directory box appears.
Note: If your system has only one file cabinet, it opens automatically when you start your
system.
Drawer Screen
A Drawer screen displays all the information associated with the drawer. For Family and
Staff drawers, separate tabs organize the information you need into logical sections.
Page 14
Version 7.0
May 2010
Getting Started with EZ-CARE2
EZ-CARE2
Tabs
This section details the tabs in each drawer.
Center Drawer
The Center drawer contains information pertaining to the operation of your center. This
information is referenced in other areas of EZ-CARE2 (such as the Child tab in the Family
drawer and Reports). This drawer features four tabs:
•
Center Tab: basic information for your center - Name of Center, Address,
Phone Number, FAX Number, and Federal ID Number. The summer address is
the address that the system uses as its return address in the invoice. If you have
purchased the optional EZ-EFT (Electronic Funds) module, the bottom portion
of the screen is where you’ll enter EZ-EFT information (see page 347 for more
information on this module).
•
Classes Tab: Allows you to define the classes in your center. See “Entering
Class And Schedule Information” page 40 for details.
•
Immunization Tab: Allows you to define what immunizations are required by
the state you operate in. This in turn allows you to track the immunization status
of children through the Immunization Superfield. See “Entering the
Immunizations Required by Your Center” page 49 for details.
•
Hours of Operation: Allows you to set up the hours of operation of your
center. See “Entering Hours of Operation” page 50 for details.
Version 7.0
May 2010
Page 15
Getting Started with EZ-CARE2
EZ-CARE2
Family Drawer
The Family Drawer stores information about each family in your center. It has the following
tabs:
•
Family Tab: The Family tab stores basic demographic information about the
family, such as name and address of parent or primary guardian, marital status,
and record status.
•
Ledger Tab: The Ledger tab stores accounts receivable information for each
family.
•
Child Tab: Every family must have at least one child associated with it. Each
child in the family will have his or her own record stored on the Child tab.
•
Tuition Tab: This tab allows you to specify who is paying for the tuition of
children and what percentage they are paying.
•
Schedule Tab: This tab allows you to set up the standard basic schedule of
classes that a child will attend.
•
Contracted Tab: This tab allows you to take the standard schedule of classes
and add on planned changes, one-time occurrances, and other details.
•
Actual Tab: This tab allows you to record the actual attendance of the child.
For details on how to customize the color of your tabs, see page 17.
Staff Drawer
If the Staff Module has been purchased, the Staff Drawer is part of your system. It has the
following tabs:
•
Staff Tab: this is where information is stored about the staff member.
•
Development Tab: this tab enables you to keep track of your staff member's
professional development.
•
Schedule Tab: This tab allows you to set up the standard basic schedule of
classes that a staff member will attend.
•
Contracted Tab: This tab allows you to take the standard schedule of classes
and add on planned changes, one-time occurrances, and other details.
•
Actual Tab: This tab allows you to record the actual attendance of the staff
member.
Other Ledgers Drawer
The Other Ledgers drawer contains only one tab; it contains transactional and basic
information for third party payers such as other parents, center scholarships, or other family
members paying tuition.
See “Entering Other Ledger Transactions” on page 126Error! Bookmark not defined. for
details on using this drawer.
Page 16
Version 7.0
May 2010
Getting Started with EZ-CARE2
EZ-CARE2
User-Defined Drawers
EZ-CARE2 provides the ability to create your own User-Defined drawers. They can be very
useful to maintain information such as volunteer records, supply inventory, or any other
information important to your center. These drawers don’t have other tabs (Ledger, Tuition,
Schedule) associated with them.
User-Defined drawers are set up in Office Administration, Chapter 2 (Cabinets & Drawers), using
the Create/Modify a Cabinet Wizard. To understand the process, see “Maintaining File Cabinet
Drawers” on page 280, which includes a section on User-Defined drawers.
Note: You can add Superfields (Contacts, Notes, Checklists) to User-Defined drawers, and
you can also report on this Superfield data.
Waiting List Drawer
If you have purchased the optional Waiting List module, the Waiting List drawer will appear
in your file cabinets. It allows you to maintain a waiting list of families and children who
want to attend one of your centers. See “Waiting List Module” on page 360 for details.
Customizing the Color of Tabs
You can set the color of tabs to make it easy to differentiate among them (for example,
quickly distinguishing between the various tabs). User-defined and Other Ledger drawers
don’t have tabs, but you can still customize the color for the screen. Each user with a
separate login can define their own colors for tabs and screens.
X To customize the color of tabs or screens
1. Right-click anywhere on the tab or screen for which you want to customize the
color. The following menu appears:
Version 7.0
May 2010
Page 17
Getting Started with EZ-CARE2
EZ-CARE2
2. Click Choose Tab Color. The Color dialog box appears.
3. To choose one of the colors in the Basic colors section, click it.
4. To define a custom color:
a. Select one of the dark gray rectangles under the Custom Colors heading.
The custom color you define will go into this spot, so don't pick one that has
another color you are using in it.
b. Click the Define Custom Colors button. The Color dialog will expand to
display the color selector tools:
c. Select your color using one of the following methods:
•
Enter RGB (Red, Green, Blue) or HSL (Hue, Saturation and Luminance)
values for the color in the fields provided.
•
Select the color from the palette above:
o Click on a point within the large multicolored square to select the hue
and saturation of the color. Hue is the shade of the color: red,
Page 18
Version 7.0
May 2010
Getting Started with EZ-CARE2
EZ-CARE2
orange, yellow, green, blue, etc. Saturation is the amount of color in a
given area, where pastels have low saturation, and vivid colors have
high saturation. The hues vary left to right, the amount of saturation
varies from fully saturated at the top of the square to zero saturation
along the bottom.
o Click on a point on the right-hand slider to select the luminance (the
lightness or darkness of the color). For instance, to get browns or
golds, choose a red, orange or yellow tone and select a point lower
down on the slider.
5.
Once you have selected the custom color you want, click the Add to Custom
Colors button to save the color to the swatch you selected.
6. When you’ve selected your color, click the OK button. The tab and/or screen
changes to the color you selected.
X To remove a custom color from tabs or screens
1. Right-click anywhere on the tab or screen for which you want to remove the
color. The following menu appears:
2. Click Restore Default Color. The tab and/or screen returns to the default
color.
Pages
In EZ-CARE2, Family, Child and Staff tabs can have up to 9 pages. When you access a tab
initially, the page displayed is page 1. Additional pages can be added to personalize the look
of your screen and placement of data.
You may have several pages already set up on some tabs, depending on your initial
configuration when you purchased EZ-CARE2. On the lower right of the drawer screen,
you will see a summary of available pages. For example:
The current page you are on is inverted and yellow. Available pages are white, and unused
pages are gray. Click on the pages you want to access or use the PAGE UP or PAGE
DOWN keys on the keyboard. Often, you can “hover” the pointer over a page, and a “page
tip” appears, telling you what information is on the page, as illustrated below. For details on
setting up page tips, see page 307.
Version 7.0
May 2010
Page 19
Getting Started with EZ-CARE2
EZ-CARE2
Grids
EZ-CARE2 uses grids throughout the system. Each grid consists of a series of rows and
columns, like a spreadsheet. Each row represents a "line item" which could be a transaction
or a record, depending on the grid. Columns have titles on the top of the grid to indicate the
type of information they contain.
The boxes in the grid that contain your data are cells. On the left of the column titles is a box
with a red M . The gray boxes below that M are the Mark Indicators for each row . By
clicking on the gray box, you can mark one or more lines of data. For example, if you want
to delete a number of lines all at once, you can mark each line’s M column and then delete
them all together.
Note the last row of the grid. This row is light blue and ready for data entry. You may see
several numeric columns that contain 0.00. This is normal, and the row is not used until you
enter information into it.
You can do many different things with your data in a grid, including:
•
Enter new line items
•
Cut, copy, or paste rows
•
Change column widths
•
Move columns
•
Sort columns
•
Turn off the reordering feature
•
Save current sort settings
•
Save grid settings as system defaults
•
Revert grids to default settings
Entering a New Line Item (New Row)
X To enter a new line item
1. Click in the first column of the first empty row (Note: this row is colored light
blue and is the same row as the cells that contain 0.00). You can also click on the
Add button .
2. Enter the information in each cell. Press ENTER or TAB when you have
finished with each cell. Or, you can also use your mouse to click on a specific
cell.
Page 20
Version 7.0
May 2010
Getting Started with EZ-CARE2
EZ-CARE2
If a cell has a picklist of options associated with it, a drop-down button
appears when you move to that cell. Click on the drop-down button to choose
from the picklist. You can also use the arrow keys or type the first letter to
choose an item on the picklist.
The system automatically arranges the rows according to the sort options
specified (if you wish to disable this—see the “Turning off the Reordering
Feature” section on page 24.
Some cells are “read-only.” Those columns will be skipped when you press
ENTER, and the system will not let you select those cells when you click on
them with the mouse.
You need to complete a row before you can exit from the grid. If you enter data
by mistake, complete the row, then delete it.
3. When you have finished entering all the information for that row, the system
brings you back to the Mark Indicator of the row you have just completed.
Cutting a Row
You would normally “cut” a row to either delete it or to move it (paste it) to another row.
You can cut one row at a time or multiple rows at once.
X To cut one row
1. Click on any cell of the row you want to cut. The row will turn light blue.
2. Click the Cut button
. The system prompts you to cut the current row.
3. Click Yes.
X To cut multiple rows
1. Click on the Mark Indicator on the left of that row (in the
column). A red
check mark indicates the row is selected . To deselect a row (if you clicked on
the wrong row, for example), click on the Mark Indicator again and the red
check mark disappears . You can also use the spacebar to select and de-select
the Mark Indicator for a row when the mark indicator is highlighted (you can use
the Up-arrow and Down-arrow keys and spacebar to mark rows in this way).
2. Mark as many rows as you want to cut.
3. Click the Cut button
. The system prompts you to cut all marked rows.
4. Click Yes.
Version 7.0
May 2010
Page 21
Getting Started with EZ-CARE2
EZ-CARE2
Note: Some grids do not allow you to cut rows. For example, you cannot cut rows with
posted transactions on the Ledger tab.
Moving a Row
To move a row, combine the Cut and Paste options.
X To move a row
1. Click on any cell of the row you want to move.
2. Click on the Cut button
. The system prompts you to cut the current row.
3. Click Yes.
4. Click on the row above where you want to place the row.
5. Click on the Paste button
.
The same procedure can be used to move several rows by marking them, cutting them, and
then pasting them below a highlighted row.
Note: Some grids do not allow you to move rows. Posted transactions on the Ledger tab, for
example, cannot be moved.
Changing Column Width or Making Columns Disappear
To change the width of a column, use the pointer and the left button on your mouse.
X To change column width or make columns disappear
1. Move the cursor to the titles on the grid, right above the first row. In some cases,
the down-arrow appears on the title . Ignore the arrow for now.
2. Move your cursor to the right border line of the column you want to resize. When
you are on or close to the border line, the Down-arrow will change to a resize
symbol
.
3. When you see the resize symbol, press and hold down the left mouse button.
4. Drag the column to the desired size. Move the mouse to the right to make the
column larger; move to the left to make the column smaller. The column to the
right moves accordingly—its size is not affected.
5. When the column is adjusted to the size you want, release the mouse button.
Note: Columns can be made to disappear or close by resizing an entire column
shut. This produces a thick vertical line to indicate the presence of a closed
column. This allows you to close columns you may not need. To re-open a
closed column, click on the thick line, hold down the mouse button, and
drag the line to the right.
Page 22
Version 7.0
May 2010
Getting Started with EZ-CARE2
EZ-CARE2
Moving Columns
To move a column, use the cursor and the left button on your mouse.
X To move columns
1. Move the cursor to the title of the column you want to move. Notice the down-
arrow that appears on the title .
2. Press and hold down the left mouse button.
3. Using the mouse, drag the column heading in the direction you want to move the
column (either right or left).
4. When your selected title is in the place you want it to be, release the left mouse
button. The columns shift accordingly.
Note:
Some grids do not allow you to move columns.
Sorting Columns
The following instructions allow you to change the sort sequence of the rows in a grid. The
sort settings you define are unique to each grid and cabinet.
X To sort columns
1. Move the cursor to the title of the column you want the grid sorted by. Notice
the Down-arrow that appears on the title .
2. Double-click the column name. The Sort Options dialog box appears. The
column you selected appears in the First Sort Column section.
3. The default is set to sort on one column. If you want to sort on the one column
you chose, click on the Apply button. If you want to specify a second or third
column to sort by, change the Sort On field from 1 to 2 or 3. Then select the
columns to sort on by clicking the picklist in the Second Sort Column or Third
Sort Column sections. A picklist displays all of the grid columns. Use the up and
down arrow keys (and slider if necessary) to find the desired column name. Click
once on your choice to select it.
4. Choose ascending (A-Z) or descending (Z-A) order by clicking on the radio
buttons.
5. When you have your sort options set, click on the Apply button to sort the grid.
If you have decided you do not want to sort, click on Cancel.
Version 7.0
May 2010
Page 23
Getting Started with EZ-CARE2
EZ-CARE2
Saving a Column Sort
To use the same sorts the next time you open the grid, right-click on the grid and click on
Re-sort each time the grid is initialized. You can also choose to save your sort as a
system default. For more details, see “Grid Options” on page 24.
Turning Off the Reordering Feature
When you type in a row of information, the grid is automatically sorted according to your
last sort specifications.
If you wish to keep your information in the order that you entered it, you can turn off the
automatic reorder feature.
X To turn off the reordering feature
1. Double-click on any column title to display the Sort dialog box.
2. Select Sort on 0 Columns
3. Click on Apply.
Grid Options
The Grid Options dialog box allows you to specify whether you want to filter the entries
that appear on the grid by date, whether you want to advance to the next row after entering
data, and whether to re-sort the grid each time it is opened. It also allows you to set your grid
back to the system defaults (sorting and column displays). Lastly, it allows you to make your
current grid settings the new system defaults.
X To access the grid options
1. Right-click anywhere in the grid. The Grid Options dialog box appears. See the
following sections for details on what options you can set.
Date Filter
Page 24
If you want to filter the entries that appear on the grid by date, enter the
From date and To date (you don’t have to enter a To date if you just want
entries after a certain date to appear). When you set a filter, a calendar
icon appears in the Date column on the grid to show you that you’re
filtering the entries based on dates. In addition, if you hover your mouse
anywhere in the date column, a field tip shows you the dates you’re
filtering for.
Version 7.0
May 2010
Getting Started with EZ-CARE2
EZ-CARE2
To clear a current date filter, right-click anywhere in the grid, and then
click the Clear Date Filter and Show All button.
Advance to
Next Row
If you want to move the cursor to the next row after you enter information
in the last column of the current row, click the Advance to next row when
leaving last column check box. If unchecked, the cursor stays in the row
you just entered.
Re-sort Each
Time Grid is
Initialized
If checked, the items on the grid will be resorted each time the grid is
opened. For example, you typically will want the Ledger tab to sort by
Date, Child, and then A/R Category.
Save Grid
Settings as
System
Defaults
System Defaults are saved settings you can revert to if you make changes
to the grid, then at a later date decide to override your changes. For
example, if you change the layout of the grid on the Sessions tab, and
save the grid settings as System Defaults, you can revert back to these
settings, no matter how many times you change the layout of the Sessions
tab.
If you do not save grid settings as System Defaults, there will be no
changes made to the current System Default settings. The changes you
make to the grid will still apply to this cabinet, for that type of grid, but if
you make further changes, you can only revert back to the System Default
settings.
Note: This saves both the column settings and the sort
order.
Reverting
(Returning) the
Grid to Its
Default Settings
After making changes to the grid, you may want to return it back to its
original settings. This is done in the sort dialog box by pressing the Revert
grid settings from System Defaults button. The results of this feature
are:
• All columns are placed back to their System Default settings.
• All rows are arranged in the order they were entered.
2. When finished adjusting the settings, click the OK button to save the settings, or
the Cancel button to abandon changes and return to the grid.
Insta-Print
The Insta-Print button
in the main toolbar prints the information from the active
screen or tab in a printer friendly format (without buttons, lines, menus, etc.).
Not all screens support the use of the Insta-Print feature. If a screen is not supported, the
Insta-Print button will be disabled.
Insta-Print uses the Windows default printer.
Version 7.0
May 2010
Page 25
Getting Started with EZ-CARE2
EZ-CARE2
How to Use Online Help
As you use the system, online help is available to you. There are several ways to access the
EZ-CARE2 help system:
•
When you are using the EZ-CARE2 system, click on the Help button
or
press the F1 key. This brings up context-sensitive help on the default or chosen
item on the screen. If you need to see help on a particular screen, click the Help
button or press F1.
•
You can also click Help on the main menu at the top of the screen, and then
click Contents. This brings you to the first help screen. Or, hold down the ALT
key and press H, then C.
•
To search for a particular topic, click on Help on the main menu at the top of the
screen, and then click on Search for Help on…. Or, hold down the ALT key
and press H, then S.
•
When you click on a link to another topic, you may jump to another topic screen.
To get back to the previous topic, click the BACK button on the top of the Help
window. Other times, a link may take you to a pop-up—to close it, click on the
pop-up.
•
For more details about using the EZ-CARE2 online help system, go to the
Introduction chapter and choose the help topic Using This Help System.
EZ-CARE2 Support
We know how important support is to our customers. Here are a few tips to help you get the
quickest, most effective support.
Before You Call
PLEASE, if possible, call the SofterWare Support Line when you are sitting at the
computer. It is more efficient to work with you on the phone if you can reach the computer.
Be ready to explain:
•
what you did
•
what happened
•
what you thought was going to happen
•
when you last made a backup of your data files
If an error message appears, write down the error message, the name of the screen where the
error appears, and what you were doing when you received the error. If you have this
information handy, we can usually troubleshoot the problem more quickly.
Page 26
Version 7.0
May 2010
Getting Started with EZ-CARE2
EZ-CARE2
System Configuration
It is also helpful to our support personnel to know your computer hardware, operating
system, configuration, and registered EZ-CARE2 modules. EZ-CARE2 provides an easy
way to obtain this information. Click on the Help menu, and then click on System
Configuration. The System and EZ-CARE2 Configuration dialog box appears:
There are several ways to convey this information to a Support Representative:
•
Read it over the phone.
•
Print it and fax to SofterWare Support at 215-542-4394
•
Send to a text file, save it, and email it to [email protected]
•
Email it directly to SofterWare Support by clicking the Email button (requires
your system to be set up with Microsoft Outlook or Outlook Express).
* If you are on our Enhanced or Premium Support Plans, you will have an 800 number to
use for faxing or calling SofterWare.
What To Expect
When you call, you will be asked for:
•
Your organization name or User ID (your User ID is a unique combination of
letters and numbers that identifies you as a SofterWare client).
•
Your name
•
Your telephone number
We will provide you with a quick and accurate response to your problem or concern. Our
goal is that you should always be able to reach a support person when you call. However,
sometimes the volume of calls requires us to route your call to our voice mail system. By
Version 7.0
May 2010
Page 27
Getting Started with EZ-CARE2
EZ-CARE2
leaving us a detailed message, you will help us to be better prepared to answer your question
or resolve your problem.
Time Considerations
Our standard support hours are Monday - Friday, 8:30 A.M. - 7:30 P.M. EST. Extended
hours are available under our Premium support plan.
If you need assistance during off-hours, try calling. If we’re not available, leave your name,
User ID, and phone number on our voice mail, and we’ll call you back as soon as possible.
Contact Options
Phone
FAX
Support:
215-628-0401*
Sales:
800-220-4111
Main:
215-628-0400
215-542-4394**
* 800 numbers provided for Enhanced and Premium Support plans.
Web Site
http://www.softerware.com
Our web site includes a Clients Only area where you can:
•
Submit a question to SofterWare Support
•
Send enhancement requests or suggestions
•
Download updates
•
Review current and back issues of our newsletter
•
Register for training
•
Documents that help you use the system more efficiently
•
Interact directly with our EZ-CARE2 staff in the User Forum
Note: You need your User ID, which is usually located on the lower right side of the EZCARE2 main screen, to log on to the Clients Only area.
Mail
SofterWare Inc.
132 Welsh Road, Suite 140
Horsham, PA 19044-2217
Note: We are always looking for suggestions on how to improve this manual, our Online
Help, and our software! If you want to submit a suggestion, feel free to use the
Suggestion Form accessible in the Clients Only section of our Web site.
Accessing SofterWare’s Web Site From EZ-CARE2
You can access the EZ-CARE2 section of SofterWare’s Web site within EZ-CARE2 to get
the most up-to-date information on the system. To do this, click on the Help menu, and
then click on EZ-CARE2 Web site.
Page 28
Version 7.0
May 2010
Getting Started with EZ-CARE2
EZ-CARE2
Sorts and Selections
EZ-CARE2 gives you the ability to specifically define your data for reporting, viewing, and
billing capabilities through two features: sorts and selections.
•
Sorts (see below) organize the data from your system the way you specify (for
example, alphabetically by parent last name, date order by birthdate, or ZIP code
order).
•
Selections (see page 33) identify a group of data from your system based on criteria
you select (for example, children older than 12 or families that live in a particular
city or ZIP code).
Neither of these features change or remove your data; they simply give you the flexibility to
view data in different ways, depending on your needs.
Sorts
EZ-CARE2 provides the ability to sort your data in any order you choose. For example, you
could produce a list of children ordered by Last Name, by Birthdate, or by ZIP code. You
can sort in ascending order (youngest to oldest) or in descending order (oldest to youngest).
Each sort specification you create is given a name and saved in the system. The saved sorts
are listed in the Library of Saved Sorts. You can use the saved sorts when generating reports.
You can view Sorts for the report you are working with, or all Saved Sorts using the All
Sorts radio button.
Saved sorts do not change the order of the data, only the way it's displayed, printed, or
processed by the system.
EZ-CARE2 comes with a few basic sorts that you can use and modify. You can also build
your own sorts and save them.
Version 7.0
May 2010
Page 29
Getting Started with EZ-CARE2
EZ-CARE2
Accessing Sorts
There are several ways to access Sorts – the most direct is to click on the Reports button,
select any report and click on Print, click the Change button to display the Report
Options screen, and then click on the Sort button
. The Library of Saved Sorts appears.
X To apply a Sort from the library
1. Click on it with your mouse to select it, then click OK. You will return to the
Report Options screen, with the Sort displayed in the Sort By text box.
Note: If sorts aren’t available for a report, the Sort By line shows N/A.
Creating a New Sort and Editing an Existing Sort
The most common sort maintenance operations are:
•
Creating a New Sort
•
Editing or changing fields on a sort that exists.
Choosing either of these options brings you to the Sort Editor dialog box.
Use this screen to:
•
Choose fields to build or modify a sort
•
Replace fields used by a sort
•
Save or discard sort criteria
Choosing Fields to Sort
Depending on which report you have chosen, you have fields available from different tables,
including Child, Family, Ledger, or user-defined drawers such as Alumni or New Inquiries.
Page 30
Version 7.0
May 2010
Getting Started with EZ-CARE2
EZ-CARE2
These fields are shown in the Available Fields list—scroll through the list and decide which
field you want to use as your Primary Sort field—the field which you want every record sorted
by (regardless of where that field prints on a report) first.
X To choose fields to sort
1. In the Available Fields section, click the field you want to sort on, and then
click the Add button. The field appears in the Sort Fields list.
2. To add another sort field, click on it, and click Add. The field appears in the Sort
Fields section, which further sorts the records. You can sort on up to five (5)
fields.
Note: You can remove sort fields by clicking the Remove or Remove All buttons.
Note: Choose a Sort Order Name that reflects which fields you are sorting and from
which table. This allows you to quickly pick out the sort you want.
Consider this example: If your Sort Fields list indicates you've chosen only Child Last Name, then the
system sorts records like the example on the left. If your Sort Fields list shows Child Last Name with Child
First Name under it, then the system sorts records like the example on the right.
Version 7.0
May 2010
Roman, George
Roman, George
Smith, Sam
Smith, Caroline
Smith, Caroline
Smith, Sam
Tarrington, Sylvia
Tarrington, Sylvia
Williams, Lester
Williams, Anne
Williams, Anne
Williams, Lester
Page 31
Getting Started with EZ-CARE2
EZ-CARE2
Sorting with Date Fields
EZ-CARE2 gives you the option to sort with date fields in two different ways.
•
To sort by year (for example, to get a list of children from youngest to oldest),
use the field with a field name only, such as Child Birth Date.
•
To sort by month (for example, to get a list of all children with birthdays over
the summer months), pick the date field that includes the phrase
(MM/DD/YY), such as Child Birth Date (MM/DD/YY).
Every place where date fields exist, you will see two versions of the field—one with
(MM/DD/YY) in the name, and one without.
Removing Sort Fields
If there are fields on the Sort Fields list that you want to remove, click on them with the left
mouse button (one at a time), and then click on the Remove button. To get rid of all the
Sort Fields and start over, click on the Remove All button.
Editing Saved Sorts
When you re-open the sort window, the current sort is automatically highlighted and
available to be viewed or edited.
To edit the sort, click on the Edit button and make the changes desired.
Completing the Sort
When you have finished building or modifying your sort, click on Save to retain your
changes, or click Cancel to discard your changes and return the Sort back to its original
settings.
Page 32
Version 7.0
May 2010
Getting Started with EZ-CARE2
EZ-CARE2
Selections
EZ-CARE2 provides the ability to select records from the database that meet certain criteria.
This is useful when you are performing a process or producing a report for only certain
families, children, or staff. An example of this would be the creation of mailing labels for
parents who live in a certain town or ZIP code. You may already be familiar with this
concept—other programs sometimes refer to this as a Filter or Query.
The selection is given a name and saved in the system. The saved selections are listed in the
Library of Saved Selections. You can use the saved selection criteria when generating a
report or performing other operations such as Postings and EZ-Viewer functions. Anywhere
you see the selection button ( ), this feature is available to you.
The saved selection does not change the database or remove data; it only affects the way
data is displayed, printed, or processed by the system.
Accessing Selections
There are several ways to access Selections – one way is to click on the Reports button,
select any report, and click on Print. Then, click the Change button in the Options area.
Note: If selections aren’t available for a report, the Selection line shows N/A.
On the Report Options screen, click on the Selection button ( ). The Library of Saved
Selections screen appears. You can view Selections for the report you are working with, or
all Saved Selections using the “All Selections” radio button.
If you see the Selection button while working in another part of the system, just click on it to
access the Library of Saved Selections.
Version 7.0
May 2010
Page 33
Getting Started with EZ-CARE2
EZ-CARE2
X To apply a selection from the library
1. Click on it with your mouse to select it, and then click OK. You will return to the
Report Options screen (or other feature from which you have accessed
Selections), with your choice displayed in the Selection text box.
Creating a New Selection or Editing A Selection
While in the Library of Saved Selections, you can perform common maintenance operations,
such as:
•
Creating a New selection
•
Editing or changing criteria on a selection that exists
The Selection Editor dialog box allows you to create a new selection and edit an existing
selection.
Page 34
Version 7.0
May 2010
Getting Started with EZ-CARE2
EZ-CARE2
Use this screen to:
•
Build selections
•
Build Combined/Complex selections
•
Check how many records in the system meet the selection’s criteria
•
Edit selections
This section also addresses:
•
How to use grids and picklists in building selections
•
How to use several values at the same time
•
Know when to use (AND) and when to use (OR)
Building a Selection
X To build a selection
1. From the Library of Saved Selections screen, click the New button. The
Selection Editor appears.
2. In the Description field, enter a name for the selection. It should describe the
selection, so it’s easy to choose it from the library.
3. From the Table picklist, choose the table that contains the field you want to use
in the selection. The Field picklist is filled in based on what you choose for
Table.
4. From the Field picklist, choose the field you want to use in the selection to filter
your data.
Note: In some A/R reports, you can use Ledger transactions for selections. See
the Reports section on page 159 for details on which reports have this
capability.
5. From the Compare picklist, choose one of the following options, which is used
to filter the values in the field you selected:
Symbol
<
Function
Less than
Examples
To select children born before Jan. 1, 2007 (not including
Jan. 1)
Birthdate
>
Greater than
Equal to
>
01/01/07
To select children born on Jan. 1, 2007 only
Birthdate
Version 7.0
May 2010
01/01/07
To select children born after Jan.1, 2007 (not including
Jan. 1)
Birthdate
=
<
=
01/01/07
Page 35
Getting Started with EZ-CARE2
Symbol
<=
EZ-CARE2
Function
Less than or equal
to
Examples
To select children born on or before Jan. 1, 2007 (this
includes Jan 1)
Birthdate
>=
Greater than or
equal to
Not equal to
Contains
In Month
01/01/07
<>
Smithtown
To select children who live in any town that contains
“Smith” (Smithtown, Smithville, Ladysmith, etc.)
City
MO
>=
To select all children who do NOT live in Smithtown
City
==
01/01/07
To select children born on or after Jan. 1, 2007 (this
includes Jan 1)
Birthdate
<>
<=
==
Smith
To count all enrollments for the month of June (using a
numeric value for month)
Enrollment Date
MO 6
6. Next to the Value field, click the browse button
to see all available values.
The Choose Values dialog box appears. To select a value for your field(for
example, Male or PA), click in the M column next to the value you want to
select, and then click OK. If you choose more than one value, the selection will
filter records containing any value you selected as shown below.
7. If necessary, add other fields to your selection using the Table, Field, and
Compare picklists.
8. If necessary, use parentheses to isolate criteria (this is an advanced operation).
9. If necessary, use AND/OR Statements to refine your selection. You’ll do this to
combine selection criteria across different fields or in the same field. For
example, after you have defined your first condition (Birthdate > 1/1/07), you
may wish to define a second condition (City = Smithtown). Using AND, OR ,or
NOT determines how these conditions work together. The default is to use
AND. This means that your selection filters records meeting all the criteria you
choose.
Operator
Description
Example
AND
To select records that must have
the criteria before the AND and
after the AND.
To select all children living in Smithtown
who were born after Jan.1, 2007
To select records that have either
the criteria before the OR or after
the OR.
To select all children living in Smithtown
or Elmwood
OR
AND NOT
Page 36
To select records that have the
criteria before the AND NOT but
not the criteria after the AND
(Birthdate>1/1/07) AND
(City=Smithtown)
(City=Smithtown) OR
(City=Elmwood)
To select all children born after 1/1/07
who live anywhere except Smithtown.
(Birthdate>1/1/07) AND NOT
Version 7.0
May 2010
Getting Started with EZ-CARE2
EZ-CARE2
Operator
OR NOT
Description
Example
NOT.
(City=Smithtown)
To select records that have either
the criteria before the OR or after
the OR but not the criteria after
the OR NOT.
To select all children living in Smithtown
or Elmwood except children born before
1/1/07.
(City=Smithtown) OR
(City=Elmwood) OR NOT
(Birthdate<1/1/07)
10. Use Refresh Counts to determine how many records in the system meet the
selection’s criteria. This updates the Total number on the bottom of the editor.
For example, if we start with Gender = Male, use the expression AND, add the
second condition of From Center = Car, and then click Refresh Counts, we get a
count of all boys who are going home from center by car in the Total field at the
bottom of the screen.
The column titled Matches shows you how many people meet the criteria in
that specific line. The Total on the bottom shows how many records satisfy the
combination of conditions and is NOT necessarily a sum of all the numbers in
the Matches column.
Note: The Selection Editor does not filter on Status. This means that records in
all three Status categories (Active, Inactive, and Remove) are shown in
the Total box at the bottom of the editor. However, reports usually do
filter on Status. Therefore, it is likely the report you are creating the
selection for will show fewer records than those counted in the Total box.
This does not mean the Selection Editor isn’t working, but rather, the
report is even more selective. To double check, you can go to the userdefined options screen for the report, and choose to show all three Status
categories. The number of records in the report should now match the
total in the Selection Editor.
Version 7.0
May 2010
Page 37
Getting Started with EZ-CARE2
EZ-CARE2
11. When you are finished working with your selection, use the Close button
to
return to the Report Options screen (or other feature from which you have
accessed Selections). Your selection appears in the Selection Criteria text box.
Editing a Saved Selection
Whenever you re-open the selection window, the current selection is automatically
highlighted and available to be viewed or edited.
To edit the selection, click the Edit button and make the changes desired.
Page 38
Version 7.0
May 2010
Setting Up Your Center Information
EZ-CARE2
2. Setting Up Your Center
Information
The basic steps to set up a new center in EZ-CARE2 are as follows:
1. Create a new cabinet for the center.
2. Enter the basic information for the center (address, contact info, etc.).
3. Enter staff information, if you have purchased the Staff module.
4. Enter class information
5. Enter the immunizations required by your center
6. Enter hours of operation
Creating a Cabinet for Your Center
To create a new file cabinet for your center, you will use the Cabinet Wizard found in the
Office Administration cabinet. You can either create a brand new cabinet based off the
standard cabinet (for advanced users only), or copy an existing cabinet from another center
(recommended).
For details on creating a new cabinet, see “Creating/Modifying a File Cabinet” on page 268.
Entering Center Information
X To set up center information
1. Double-click the cabinet icon for which you want to set up center information.
2. Double-click the Center drawer, or click the Center drawer once and click
Open. The Center tab appears.
Version 7.0
May 2010
Page 39
Setting Up Your Center Information
EZ-CARE2
3. Enter the name of your center, the address, phone number, fax number, and
Federal ID number.
4. If you are using the optional EZ-EFT module, enter EZ-EFT information on
the lower part of the screen. See the Transaction Processing Manual for information
on EZ-EFT setup.
Entering Staff Information
If you want to manage staff information in EZ-CARE2, you will need to purchase the
optional Staff module. See “Staff Module” on page 356 for details on using the Staff module.
Entering Class And Schedule Information
Entering Class Data Using the Classes Tab
The Classes tab in the Center drawer allows you to set up an unlimited number of classes. It
also allows you to easily manage data that is specific to each class.
Required fields for this tab are Class, Capacity, Ratio, and FTE. You cannot move to another
row unless these fields contain information.
Any changes made to existing classes will automatically update records that are linked to that
class. For example, if you change the name of the Class Inf to Infants, all children that
previously had Inf as their class will have now have Infants.
This is also helpful when adding more classes due to expansion. For example, if you have
more toddler-age children, you can change the name of the Toddlers class to Toddlers 1,
and the name will change on all child records with Toddler in the class field (you DO NOT
have to create a new Toddlers 1 class and change the class fields in all the records). You can
now create a new class called Toddlers 2 for newer enrollments.
Tip: In the Description column, you may want to also store the room number or name of the
teacher. This provides more useful information when accessing this field (known as
Class Description) in the Report Writer while creating a report.
Page 40
Version 7.0
May 2010
Setting Up Your Center Information
EZ-CARE2
The Classes tab can be sorted by double-clicking on the title of the column you wish to sort
by. The changes remain permanent if you have chosen to resort each time the grid is
initialized; if you choose this, this order is used throughout the system wherever you can
choose classes. See page 23 for details on sorting grids.
Enter the following information for each class:
Field
Definition
Class/Description
The name of the class and a description of the class location.
Capacity/Enrolled
The Capacity represents the maximum number of children allowed in the class (for
example, because of size or licensing). This information must be entered in order to
move to another row. It is used in the Child FTE report, so if you don’t use the report
and don’t need this information, you can enter any number here. The Enrolled
column shows you how many children have been assigned to the class. The system
offers the option of restricting enrollment in a class based on capacity and
schedules—you can configure the system to not allow over scheduling or to just
warn of over enrollment. See page 46 for more information.
Ratio
Enter the number representing the ratio of children to staff members (as determined
by your state and licensing regulations). For example:
• If you have 20 children in a class and 1 teacher, the RATIO is entered as 20.
• If you have 20 children in a class and 2 teachers, the RATIO is entered as 10.
This ratio is used in the Staffing Level Analysis report, the Child Loading report, and
the Child Weekly Attendance Summary; because this is required information. If you
don’t use these attendance reports, you can just enter a 1 in order to enter a new
row.
FTE (Full Time
Equivalent)
This number represents how many hours would make up a full-time day for that
particular class.
This information is used on the Child FTE report and the Child Loading report.
Again, this information must be entered in order to move to another row. However, if
you don’t use these reports, you can enter any number here.
Youngest and
Oldest
Enter the minimum age of a child in this class using months. For example, if you
want 2 years as the youngest, enter 24. The same is true for the oldest child - if you
want 5 years as the oldest, enter 60.
This information is not required and is currently not used in any System reports.
However, if you purchased the Custom Report Writer, you can include this age
range information in reports.
Schedule Templates
Schedule templates allow you to set up standardized schedules that can be entered on each
child’s tab with a minimum of keystrokes. For example, a “Before and After School”
schedule template might include a MWF 7-9 A.M. entry, and MWF 3-5 P.M. entry.
Note: Schedule Templates are available on Child Schedule tabs; they are not available for
Staff Schedule tabs.
Version 7.0
May 2010
Page 41
Setting Up Your Center Information
EZ-CARE2
Setup
Setup is done in Office Administration, Chapter 5 (Attendance & Time Clock), Maintain Schedule
Templates (page 72). Here is an example of a Schedule template definition:
Using Schedule Templates
Schedule Templates are accessed from the Schedule tab in the Family drawer. Click on the
to activate this feature. The Library of Saved Schedule Templates
Templates button
appears. Click once on the template you wish to use to highlight it. Click the Select button.
You have the option to apply or post schedule templates to any of the following:
•
the record from which you accessed schedule templates (current record)
•
all records in your system
•
records that you select through the Selection Editor, which you can access from
the schedule templates screen
Page 42
Version 7.0
May 2010
Setting Up Your Center Information
EZ-CARE2
Results
Here is an example of times placed on the Schedule tab using the Toddler All Day Schedule
Template:
Applying a Schedule Template to the Current Record
You have the option to apply a schedule template to only the record from which you
accessed the Library of Saved Schedule Templates.
X To apply a schedule template to the current record
1. Click on the group template you want to use.
2. In the Posting Criteria section, click on Current Record.
3. Click the Apply button. The group template is applied to the current record.
Posting a Schedule Template to Selected Records
You can apply a schedule template to a group of records you select. This option requires you
to select records using an existing selection or a new one that you create.
X To post a schedule template to selected records
1. Click on the template you want to use.
2. In the Posting Criteria section, click on All or Selected Records.
3. Click on the Selection button
Version 7.0
May 2010
. The Library of Saved Selections appears.
Page 43
Setting Up Your Center Information
EZ-CARE2
4. You can use an existing selection or create a new one. For details on using
selections, see “Selections” on page 33. Click on the selection you want to use,
and click on OK. The Library of Saved Templates appears.
5. To see a report listing all the records that will be affected when you post the
schedule template, click on the Preview Pre-Post button. If you want to print a
listing of the affected records, click on the Print Pre-Post button.
6. Click on the Post button to post the template to the selected records.
Note: After you click on Post, you will be prompted to print the records affected by
the posting, even if you already printed it.
Posting a Schedule Template to All Records
You also have the option to post a group template to all records in your system.
X To post a schedule template to all records
1. Click on the template you want to use.
2. In the Posting Criteria section, click on All or Selected Records. Be sure that the
Selection field shows (None – all records).
Page 44
Version 7.0
May 2010
Setting Up Your Center Information
EZ-CARE2
3. Click on the Preview Pre-Post button to see a report listing all the records that
will be affected when you post the schedule template.
4. If you want to print a listing of the affected records, click on the Print Pre-Post
button.
5. Click on the Post button to post the template to all records.
Note: After you click on Post, you will be prompted to print the records affected by
the posting, even if you already printed it.
Removing the Last Schedule Template Posted to Multiple Records
If you’ve applied a schedule template to all or selected records, you can remove it from those
records. You can only remove the last template that you posted.
X To remove the last schedule template posted to multiple records
1. In the Posting Criteria section, click on All or Selected Records.
2. Click on the Remove button. The Remove Template Posting dialog box
appears, listing the name of the group template you last applied and the date and
time on which it was applied. It also lists how many transactions were affected by
the template.
3. Click on the Remove button. The transactions previously posted are removed,
and you can now apply or post a new template to the current record or multiple
records (see the previous sets of instructions for details).
Using Template Groups
Existing templates can be grouped together to combine several series of actions. With just a
few mouse clicks, you can enter information on the Tuition, Schedule, and Ledger tabs. For
example, a Preschool Group Template can add a Ledger Template (for Registration Fees),
Tuition template(s), and the applicable schedule(s). To choose a Template Group, click on
the radio button next to Template Groups in the Library of Saved Schedule Templates. See
page 131 for detailed information on using Template Groups.
Version 7.0
May 2010
Page 45
Setting Up Your Center Information
EZ-CARE2
Enforcing Enrollment Limits
The Enforce Enrollment Limits option allows you to manage enrollment or scheduling for
classes by checking against your defined classroom capacity.
Each class in your center can have a capacity, which is the maximum number of children
allowed at any one time (see page 41 for details). The Enforce Enrollment Limits feature
allows you to define whether you want to enforce the capacity limit when entering or editing
information in any of three areas—the Class field on the Child tab, the Schedule tab, and
the Contracted tab—and the method you want to use to enforce the capacity. Your options
for enforcement are:
•
No Enforcement: Capacity will not be considered when entering or editing
classes and schedules.
•
Don’t Allow: You will be prohibited from assigning a child to a class that is
already full.
•
OK to Override: You will be warned about assignments that exceed capacity but
given the option to override the capacity limit.
Note: Normally, only children with a status of Active are considered when
calculating enrollment limits, unless you choose to include Inactive
children by selecting the corresponding check box.
The method you choose depends on the level of scheduling flexibility you offer and how
you wish to handle possible scheduling conflicts. In general, we recommend using either OK
to Override or No Enforcement (remember you can also identify over-scheduling by
running the Class Loading Report—see page 226 for details). The table below outlines some
common scenarios and includes recommendations on how to enforce enrollment limits for
each scenario.
Page 46
Version 7.0
May 2010
Setting Up Your Center Information
EZ-CARE2
Scheduling
Scenario
Description
Example
Enrollment Enforcement Recommendation
Fixed
Number of
Children in
a Class
Your
enrollment
capacity is
based on the
total number
of children
assigned to
the class, not
the schedule
of the
children.
All
enrollment in
your classes
is full-time.
In this case, capacity can be limited by setting No
Enforcement for the Schedule Tab or Contracted Tab
data. The setting for Class Field can be either Don’t
Allow (where you will need to change the class
assignment or status of another assigned child before you
can assign the class to a different child) or OK to
Override (which will warn you of the over-scheduling, but
allow you to continue).
Flexible
Scheduling
Your
enrollment
capacity is
based on the
maximum
number of
children in a
class at any
one time.
You offer
flexible day
and/or time
scheduling
options. The
variable
schedules of
children’s
arrivals and
departures
means that
you can
enroll more
total children
than your
classroom
capacity as
long as you
do not
exceed the
capacity at
any one
time.
You don’t want to enforce enrollment limits on the Class
Field because you’ll want the flexibility to assign more
children to a class than the set capacity. In this case, you
will set the capacity checking based on the data on the
Schedule Tab and/or Contracted Tab. This will factor
days and times to identify situations where your children
expected will not be more than allowed at any one time.
We recommend using the OK to Override option. You
can choose to check/enforce capacity based on Schedule
or Contracted data (or both).
Settings
After you’ve determined the best way to enforce enrollment limits for your organization,
you’ll set them up in Office Administration.
Version 7.0
May 2010
Page 47
Setting Up Your Center Information
EZ-CARE2
X To enforce enrollment limits
1. Open Office Administration, Chapter 5 (Schedules & Attendance), and
select Enforce Enrollment Limits.
2. Select the cabinet for which you want to set enrollment limits, and click on
Select. The Enforce Enrollment Limits dialog box appears.
3. For the Class Field, Schedule Tab, and Contracted Tab, choose one of the
following options for enforcing enrollment limits:
Page 48
•
No Enforcement: allows you to assign a child to a class, regardless of
whether the capacity for the class has been met or exceeded.
•
Don’t Allow: prohibits you from assigning a child to a class that is already
full. If you choose this option, when a class is full and you select it from the
Class picklist, the following warning message appears, telling you the class is
full and prohibiting you from assigning the child to the class. The only way
you can assign the child to that class is to either increase the capacity of the
class or remove a child already assigned to the class.
•
OK to Override: warns you if you assign a child to a class that is already full
with the message below and gives you the option to override the enrollment
limit by clicking the Yes button, which assigns the child to the class. If you
click the No button, the child is not assigned to the class.
Version 7.0
May 2010
Setting Up Your Center Information
EZ-CARE2
4. If you want to include children who have an Inactive Status in the enforcement
of enrollment capacity, click the Include Inactive Children check box.
5. To recalculate enrollment numbers in your system, click the Re-calculate
Enrollments button. Typically, you won’t use this option because enrollment
limits are automatically refreshed; however, there may be situations where they
aren’t updated (for example, if records are corrupted or damaged).
6. After you define the settings for enforcement of enrollment limits, click OK.
Entering the Immunizations Required by Your Center
The Immunization tab allows you to specify the immunizations required by your state.
Once the required immunizations have been entered here, they will appear in the
Immunization Superfield on the Child tab of the Family drawer, allowing you to track the
immunization status of each child (see page 61 for information on the Immunization
Superfield).
The due dates for each immunization are specified as the age in months at which the child is
supposed to receive the immunization. Once a child’s birthdate is entered on the Child tab
in the Family drawer, the system calculates the actual due dates for each child based on the
birthdate and the number of months for each immunization, and displays them in the
Immunization Superfield for each child.
X To enter the immunizations required by your state on the Immunization tab
1. Enter the name of the immunization in the Description field (ex: Polio).
2. Enter the age in months for each immunization dose (as mandated by the state)
in the Imm columns.
3. Repeat as necessary for each immunization required by your state.
The Immunization tab can be sorted by double-clicking on the title of the column you wish
to sort by. Ordinarily, the only column it makes sense to sort by is the first column.
Version 7.0
May 2010
Page 49
Setting Up Your Center Information
EZ-CARE2
The changes remain permanent if you have chosen to resort each time the grid is initialized.
See page 23 for details on sorting grids.
Note: If you change the order of the immunizations on the Immunization tab, it will also
change the order of the immunizations in the Immunization Superfield for each child,
as well as in the Immunization Report.
Entering Hours of Operation
The Hours of Operation tab allows you to define the hours your center is open. Set up a
date range by entering a date in the Date From and Date To columns on the first line of
the grid. Then, enter the hours of operation for each day. For weeks that the hours change,
create a new line on the grid.
Dates and times entered here are used in three places:
•
When you enter Schedule times for children or staff (on the Schedule tab) the
system checks the validity of your data, to ensure that the center is open at those
times.
•
When you Generate Attendance from the Schedule tab to the Contracted or
Actual tab, the times are generated within the dates and times that the Center is
open.
•
When you bill families, any rates that are based on Actual Attendance Outside
Center Hours (for example, “after hours attendance”), use the center hours
specified here.
Page 50
Version 7.0
May 2010
Setting Up Your Center Information
EZ-CARE2
If there is a day that your center is closed, omit it from the range. This defines the dates your
center is closed. For example, if your center is closed December 23 to January 4 for holiday
break, then the To Date on one line in the grid should be 12/23 (plus the year), and the
From Date for the next line should be 1/4 (plus the year). See lines four and five of the
example below.
Note: Even though this grid allows you to enter the hours for all seven days of the week, it is
commonly used with the Saturday and Sunday columns closed. To see how to close
and open a column, refer to “Changing Column Width or Making Columns Disappear”
on page 22.
X To set up the hours of operation
1. Open the Center drawer, and click on the Hours of Operation tab.
2. Enter a date to start your specified hours in the Date From column, and a date
to end your specified hours in the Date To column. You can leave these
columns blank for perpetual (ongoing) dates.
3. Enter the times your center is open each day of the week in the appropriate
column for that line.
4. If you want to designate when your center is closed for holidays, then you need
to specify specific weeks for holiday hours.
5. When you are done entering your center's hours of operation, click on the Close
button.
Version 7.0
May 2010
Page 51
Setting Up Your Center Information
EZ-CARE2
This page intentionally left blank.
Page 52
Version 7.0
May 2010
Entering Child and Family Data
EZ-CARE2
3. Entering Child and Family Data
Entering Family Information
Adding a New Family Record
X To set up a new family record
1. Open the Family drawer.
2. Click the Family tab.
3. Click the Add New button.
4. Enter the family information.
5. Press the TAB key after filling in each field.
6. Enter the required fields—Name (First Name), Last Name, and Status.
7. Enter the desired fields (for reports)—Home Phone Number, Work Numbers (for
both parents), and Address, City, and ZIP codes for Primary and Other Parent or
Guardian.
8. Add child information to this record before creating the next family record.
Pictures on the Family and Child Tabs
You may insert a picture here to help with identification. Pictures can be
in .BMP, .GIF, or .JPG format.
X To add or change a picture
1. Double-click on the picture area.
2. Select the folder location and name of the picture and click OK.
3. If you click Cancel, you are prompted to delete the existing picture. Click on
Yes or No.
Note: When you make a backup of all cabinets in your EZ-CARE2 system,
pictures are backed up along with the rest of your data.
For the best picture clarity on screen, we recommend your pictures be 16 million colors,
and that you use your graphics programs to crop and resize your photos to 100 by 75 pixels
or 160 by 120 pixels.
The size of the pictures should match the size of the Picture/Image fields set up on the
screen. To change the picture’s size, go to Office Administration, Chapter 2 (Cabinets &
Drawers), Create/Modify a File Cabinet. Screen changes are made on Step 4 of the File
Cabinet Wizard (see page 337).
Version 7.0
May 2010
Page 53
Entering Child and Family Data
EZ-CARE2
If your system is limited to 256 colors, then we recommend making the pictures double the
size of the field size on the screen (for example, 200 by 150 for the graphics for a
Picture/Image field that is 100 by 75).
Note: For more details on using pictures, see the Managing and Using Digital Pictures in EZCARE2 document in the Data Management folder of our Clients Only web site.
Entering Child Information
Setting Up a Child Record
The process of entering a new child varies depending on whether it’s a new family record or
an existing family record.
Adding a Child to a New Family
Use these instructions to add a child to a new family.
X To add the first child to a new family record
1. Complete the Family tab information
2. Click on the Child tab.
3. Required fields are First Name, Last Name, and Status.
4. Additional fields needed for processing information are Birthdate and Registration
Date.
Note: You do NOT need to click on the Add New button to add the first child on a
family record. You can just click on the Child tab and begin entering the
child’s information.
Adding a Child to an Existing Family
Use these instructions to add a child to an existing family.
X To add a child to an existing family
1. Open the Family drawer.
2. Click on the Family tab.
3. From the Families picklist, choose the family to which you want to add a child.
4. Click on the Child tab.
5. Click on the Add New
button. The system prompts you to confirm that
you are setting up a new child for the current family, if you have confirmation set
up in Office Administration (see Confirm Adding New Child on page 319).
Page 54
Version 7.0
May 2010
Entering Child and Family Data
EZ-CARE2
6. Enter the child’s information. Required fields are First Name, Last Name, and
Status. Additional fields needed for processing information are Birth Date and
Registration Date.
Field
Version 7.0
May 2010
Description
Birthdate and
Age
When you enter the birth date, the age is automatically calculated and
shown in years and months. For example, 9.07 is 9 years and 7 months.
The system defaults to recalculating ages monthly. You can choose to
recalculate daily or as of a fixed date. See page 317 for details.
Registration
Date
The registration date is usually the date the child is registered or the first
payment is received.
Contacts
Superfield
Use the Contacts superfield to list relatives, authorized pickups, family
physicians, and others designated by the parents as important contacts.
See page 60 for more information on entering data into the Contacts
superfield.
Checklist
Superfield
Use the Checklist superfield to keep track of tasks and events that need to
be done for a specific child. See page 59 for more information on entering
data into the Checklist superfield.
Notes
Superfield
Use the Notes superfield to store notes or comments about this child when
needed (for example, accidents). See page 58 for more information on
entering data into the Notes superfield.
Immunizations
Superfield
Use the Immunizations superfield
Child Record
Status
This is a required field—all records must have one of the following
statuses:
• Active: Children who are currently enrolled in your center and are
attending. Active child records are included in tuition posting and
reports (including invoicing) by default.
Page 55
Entering Child and Family Data
EZ-CARE2
Note: You cannot have any Active child records
associated with any Inactive family records.
• Inactive: Children no longer enrolled in your center (or are set up for
future enrollment) and not presently attending. Inactive children are
included in A/R reports by default but can be excluded easily.
• Remove: Children no longer attending your center. Child records with
Remove status are not included in A/R reports by default and are
usually not included in any other System Reports—Database,
Attendance or Admin. Child records with Remove status can be
removed by running the Optimize a Cabinet option (see page 288) if
you check Remove records with Status: Remove as a choice before
running the optimization.
If children with Remove statuses are the only children in a family, they will
not be removed during the optimization process unless the Family record
has a Remove status and no balance; if this is the case, they both will be
removed.
A status indicator next to the child name shows if the child record is Active
(green), Inactive (yellow), or designated Remove (red).
Link Fields
You can add a link field to the Child tab, which allows you to link a file to a record. Keep
links to scanned permission slips, emergency contact forms, or any other documents you
want to easily access from a record. For more details on link fields, see “Defining the Data
Table Fields in a Drawer” on page 292.
Family Only
The Family Only button allows you to restrict your browsing to only child records in the
same family. This is especially beneficial for families that have children with different last
names. You can easily see which children are associated with that family.
The Family Only feature is used with the four record navigation buttons.
Using the Family Only Feature
Click on the Family Only button to restrict the Children picklist to only children in the
selected family. When the button appears inverted (as shown above), this feature is activated.
When you are on the Child tab, the navigation buttons move you to child records only
within that family, not the entire drawer. If you are at the last (or first) record and press the
Previous or Next button, the system displays a warning message and prevents you from
going to a child record of another family.
Page 56
Version 7.0
May 2010
EZ-CARE2
Entering Child and Family Data
Some Uses of This Feature
You can use this feature to quickly identify all the children in a family. This is helpful
anytime you need to verify which family a child belongs to or to identify siblings for a
specific family.
To Deactivate Family Only Feature
Press the Family Only Button a second time. When it has a raised appearance, the feature is
off, and the navigation buttons perform in a normal manner.
Note: The Family Only button has NO EFFECT on the navigation buttons when you are on the
Family or Ledger tabs.
Entering Ledger Information
The Ledger tab is where accounts receivable information is stored for each family. This tab
is only enabled if you have purchased the Accounts Receivable module.
For details on entering ledger information, see “Using the Accounts Receivable Module”
starting on page 95.
If you are a new user of EZ-CARE2, we recommend you become familiar with this chapter
before proceeding to Accounts Receivable.
Entering Tuition Information
There is a Tuition tab for each child, which is used to define how tuition is to be charged for
that child.
The Tuition tab is part of the Accounts Receivable module and is described in detail on page
110. If you are a new user of EZ-CARE2, we recommend that you become familiar with this
chapter before proceeding to Accounts Receivable.
Entering Schedule Information
See “Schedule Tab” page 66 for details on entering the basic schedule.
Entering Contracted and Actual Attendance
If you have purchased the Advanced Attendance & Billing Module, you can use the
Schedule, Contracted and Actual tabs together to track both the classes that a child was
signed up to attend, and the child’s actual attendance of those classes.
See “Using the Advanced Attendance & Billing Module” page 65 for details.
Version 7.0
May 2010
Page 57
Entering Child and Family Data
EZ-CARE2
Superfields
EZ-CARE2 contains special data entry areas known as Superfields. These fields are
accessed from the screen by clicking on a button. Unlike a regular field, a Superfield contains
multiple fields of related information. Superfields can be used on the Family, Child, and Staff
tabs, as well as in Other Ledgers or any user-defined drawers.
Superfields use grids, plus other Windows objects (text boxes, check boxes, and picklists) to
store information. As with grids, you have the ability to move columns and specify the order
of the records. Superfields have a “dual-view” dialog box where you can enter data directly
into the grid or in the fields below that show you the detail of the grid. For more
information on using grids in EZ-CARE2, see page 20.
As you select each line in the grid, the information changes in the corresponding fields on
the bottom of the dual-view to reflect the chosen line. You may resize the superfield to show
only the grid and hide the text fields on the bottom by grabbing the lower right corner of the
superfield with the mouse and moving the bottom border up.
Below is an example of a Checklist superfield for a child record, showing the dual-view: the
grid on top and the individual fields below.
The following superfields are available in EZ-CARE2:
Notes
Checklist
Contacts
Immunizations
Notes Superfield
The Notes superfield stores an unlimited number of notes or comments on a family, child,
or staff member (depending on which tab it is placed). This can be useful, for example, to
write up behavior incidents for children, report an incident that may need medical attention,
or record plant or food allergies.
Click on the Notes button to display the Notes dual-view. The following information is
stored in this superfield:
•
Page 58
Date—date applicable to the note.
Version 7.0
May 2010
Entering Child and Family Data
EZ-CARE2
•
Type—used to categorize your notes (for example, Accidents, Behavioral). You
can use one of the choices or add your own by typing it in (See “Maintain
Picklists” on page 316 for how to set up the choices).
•
Notes—these can be of any length.
Data can be entered directly into the grid or the fields below the grid. Notes can be deleted
by marking any line in the grid using the Mark Indicator
and the Cut button. The Notes
Report (one of the Database reports described in the System Reports section, pages 184 and
193) allows you to print notes for a particular date range and select particular note types, if
you wish. You can also use Insta-Print to print the contents of this field (see page 25).
Checklist Superfield
The Checklist superfield enables you to keep track of tasks and events that need to be
completed for a specific child, staff member, family, or other person. The date is colorcoded to quickly determine if the item is completed—blue means the item is completed,
yellow means the item is still due.
Click the Checklist button to display the Checklist dual-view. The following information is
stored in this superfield:
•
Item Type—used to categorize items (for example, Required Forms, To Do’s).
•
Description—a brief explanation or note.
•
Completion Checkbox—indicates whether the item is completed.
•
Date—use this to record the due date or completion date.
Version 7.0
May 2010
Page 59
Entering Child and Family Data
EZ-CARE2
You can type in the grid or the text boxes. See the Notes Superfield section on the previous
page for information about typing in the grid and fields.
The Checklist Report (one of the Database reports described in the System Reports section,
pages 175 and 193) allows you to report on this data. You can also use Insta-Print to print
the contents of this field (see page 25).
Contacts Superfield
Use the Contacts superfield to list relatives, authorized pickups, family physicians, and others
designated by the parents as important contacts. In the event a parent or guardian is not
reachable, you can use this list to obtain someone who can be contacted in an emergency
situation. Contacts Superfields can be located on both the Family and Child tabs (for two
different sets of contacts).
Click on the Contacts button to display the Contacts dual-view. The following information
can be stored for each contact:
Page 60
First Name
Last Name
Address
Address Line 2
City
State
ZIP Code
Phone #
Extension
Phone # 2
Extension 2
Relationship
Authorized Pickup checkbox
Notes
Version 7.0
May 2010
EZ-CARE2
Entering Child and Family Data
You can type in the grid or the text boxes (see the Notes Superfield section on page 58 for
information about typing in the grid and fields).
The Contacts Report (one of the Database reports described in the System Reports section,
page 176 and 193) allows you to report on this data. You can also use Insta-Print to print the
contents of this field (see page 25).
Immunizations Superfield
The Immunizations superfield stores the child’s detailed immunization records. The
list of immunizations and the calculations for due dates are set up in the Center
drawer (see page 49). Dates are calculated from the child’s birthday. The Immunization
superfield is located on the Child tab.
You can enter when the immunization was received by typing directly over the date in the
appropriate cell. The date is color coded to quickly determine if the item is completed. The
due date is initially yellow when it is first calculated to show the immunization has not been
received.
If you change the date or check the checkbox
blue, indicating this is considered completed.
, the color of the entry changes to light
The Immunizations list can be sorted by double-clicking on the title of the column you wish
to sort by. Ordinarily, the only column it makes sense to sort by is the first column:
Version 7.0
May 2010
Page 61
Entering Child and Family Data
EZ-CARE2
Immunization. The changes remain permanent if you have chosen to resort each time the
grid is initialized (see page 23 for information on sorting grids).
Note: Any sorting done here on the child’s Immunization superfield will determine the order
that immunizations will appear on the Immunization report (for all children).
The Immunization Report (page 182) allows you to report on this data. You can use InstaPrint to print the contents of this list for the current record (see page 25).
Changing a Child or Family Record Status
Keep the following information in mind about statuses:
•
Any family record can be Active regardless of the status of its child records.
•
A family record can ONLY be Inactive if all its child records are Inactive or
Remove.
•
A family record can ONLY be Remove if all its child records are Remove.
If you want to change a family record to a status of Inactive or Remove, you must first make
the corresponding status change to the child record. If you don’t, you’ll see a message telling
you that you can’t change the status for the family because the child’s status doesn’t match.
Setting a Record to be Inactive
How to Change a Record Status for Child Records
X To change the status for child records
1. Open the Family drawer.
2. Click the Child tab.
3. From the Children picklist, select the child.
4. In the Status section, click the desired status—Active, Inactive, or Remove.
How to Change a Record Status for Family Records
X To change the status for family records
1. Open the Family drawer.
2. Click the Family tab.
3. From the Families picklist, select the family.
4. In the Status section, click the desired status—Active, Inactive, or Remove.
Page 62
Version 7.0
May 2010
Entering Child and Family Data
EZ-CARE2
Changing the Family that a Child Record is Linked To
X To change the family that a child is linked to
1. Open the Family drawer.
2. On your keyboard, press CTRL+L. The Link to Family screen appears:
3. Select the Child that you want to link to a different family.
4. Select the new Family that you want the child to be linked to.
5. Click the Link button. A confirmation screen appears:
6. Click the Yes button to link the child to the new family, or click No to keep the
child linked to the current family.
Tip: A family must always contain a link to at least one child. You cannot remove the last child
record from a family. In order to change the family that an only child is linked to, you must
first create a fake child record for their current family, then change the link for the child.
Also, if you have two family records with identical names, and you are looking to switch a
child from one family record to the other, it can be helpful to temporarily alter one of the
names so that you can distinguish between them in the list.
Version 7.0
May 2010
Page 63
Entering Child and Family Data
EZ-CARE2
This page intentionally left blank.
Page 64
Version 7.0
May 2010
Using the Advanced Attendance & Billing Module
EZ-CARE2
4. Using the Advanced Attendance &
Billing Module
The Advanced Attendance & Billing Module allows you to track the attendance at your
center in greater detail, and, in combination with the Accounts Receivable module, allows
greater precision and flexibility in the billing process as well.
Note: In order to do billing, you must also purchase the Accounts Receivable module.
Attendance functions in EZ-CARE2 include:
•
Manually entering attendance (see below).
•
Generating (posting) attendance records - see page 77.
•
Modifying attendance that was previously entered - see page 78.
•
Removing attendance - see page 79.
•
Producing attendance reports - see page 82.
Attendance can also be brought into EZ-CARE2 via the Windows TimeClock Module (see
page 359 for an overview of the module).
Setting Up Attendance & Billing
Confirm Hours of Operation
The Confirm Hours of Operation screen enables you to temporarily suspend verification of
hours of operation, in order to make changes to your hours of operation.
To access this module
1. Open Office Administration, Chapter 5 (Scheduling & Attendance), and
then select Confirm Hours of Operation Validation. The Confirm Validating
Center Hours of Operation dialog box appears.
2. To make changes in your hours of operations, uncheck this feature to avoid
conflicts with schedules already entered. After modifications have been made,
turn this feature back on by entering a check in the check box.
Version 7.0
May 2010
Page 65
Using the Advanced Attendance & Billing Module
EZ-CARE2
Manual Schedule Entries
Manual entries are done on:
•
The Schedule tab - see below.
•
The Contracted tab - see page 68.
•
The Actual tab - see page 70
The general workflow is that the standard basic outline of classes is entered on the Schedule
tab. This data is then copied to the Contracted tab using the Generate Attendance screen
(page 77). In the Contracted tab, additional details and incidental changes are added for
each student, in order to form the final planned schedule. The data is then copied to the
Actual tab, where it is edited as the days go by to record the actual attendance on each day.
If the TimeClock module is being used, then data is not copied from the Contracted tab to
the Actual tab. Instead, the Actual tab is filled in with data recorded by the TimeClock.
Schedule Tab
There is a Schedule tab for each Child (in the Family Drawer) and Staff Member (in the Staff
Drawer). The Schedule tab describes the schedule for a typical week (or multiweek cycle) that is, the expected or "theoretical" schedule that the child normally attends your center.
For schedules that you want to continue with no specified end-date, leave the date fields
blank.
Class and Days
Choose the class and enter the schedule for the class on each day of the week. The system
offers the option of restricting enrollment in a class based on capacity and schedules—you
can configure the system to not allow over scheduling or to just warn of over enrollment.
X To set up a schedule
1. Select a file cabinet.
2. Open the Family drawer.
3. On the Family tab (or Child tab), select the child from the Children picklist.
Page 66
Version 7.0
May 2010
Using the Advanced Attendance & Billing Module
EZ-CARE2
4. For a recurring schedule, click on the Schedule tab. Select a Class for this child.
Place the recurring hours for each day on the first line of the grid.
Most centers set up a recurring schedule and generate attendance for contracted
and actual times. However, you can manually specify contracted or actual times.
•
If you want to specify a contracted schedule for an individual child, click
on the Contracted tab (see page 68).
•
You can also set up a Schedule template and apply it (see page 72).
Copy Options
As an alternative to retyping time ranges for each day of the week, you can copy the ranges
from the first time entered. After you have entered the class and date range, and your first
time, you can choose one of the copy options:
•
Mon-Fri - Replicates your Monday time range and places it in Tuesday,
•
M/W/F - Replicates your Monday time range and places it in Wednesday and
•
T/TH - Replicates your Tuesday time range and places it in Thursday of that
Wednesday, Thursday, and Friday of that line.
Friday of that line.
line.
Clear Options
If you wish to make changes to a line in the schedule, you can clear the entire line by
highlighting the line and pressing the Row button.
Schedule Templates
Schedule templates (see page 72) allow pre-specifying your schedules so they can be entered
on each child’s tab with a minimum of keystrokes. For example, a Before/After school
schedule template might include a MWF 7-9 AM entry, and MWF 3-5 PM entry. You can
also use Template Groups to combine Schedule and other types of templates (see page 76).
Entering Holiday Hours into the Schedule
X To put holiday hours into schedule
1. Select a file cabinet.
2. Open the Center drawer, and click on the Hours of Operation tab.
3. Enter a date to start your specified NORMAL hours in the Date From column,
and a date to end your specified hours in the Date To column.
4. Enter the times your center is open each day of the week in the appropriate
column for that line.
5. On the next line in the grid, enter the Date From and Date To for the week
containing the holiday. For days that your center is closed, omit a time for that
day.
Version 7.0
May 2010
Page 67
Using the Advanced Attendance & Billing Module
EZ-CARE2
6. Enter the times your center is open each day of the HOLIDAY week in the
appropriate column for that line.
7. On the next line in the grid, enter a date to start your specified NORMAL hours
in the Date From column, and a date to end your specified hours in the Date
To column. The Date To should be the last day of the week until the week of
your next holiday/closure.
8. Enter the times your center is open each day of the week in the appropriate
column for that line.
9. When you are done entering your center's hours of operation, click on the Close
button.
This is an example of a schedule that allows for holiday hours.
Contracted Tab
The Contracted tab is enabled if the Advanced Attendance & Billing module has been
purchased.
There is a Contracted tab for each Child and Staff Member. This is a schedule which is
applied against actual calendar dates and considers holidays and days when the center is
closed. It describes specific dates and times that a child has contracted to attend. This allows
you to adjust a child’s schedule to reflect planned absences and temporary schedule changes
(without having to adjust their “normal” schedule in the schedule tab).
Page 68
Version 7.0
May 2010
Using the Advanced Attendance & Billing Module
EZ-CARE2
Enter the following information for each class:
Column
Description
Date
Enter the date you want to capture contracted attendance for.
Day
Based on the date you enter, the system automatically enters the day of the week.
In Time/Out
Time
Enter the time the child entered and left the class.
# Hours
This number is automatically calculated based on the information you enter in the In Time
and Out Time columns.
Class
Choose the class from the picklist. The system offers the option of restricting enrollment in
a class based on capacity and schedules—you can configure the system to not allow over
scheduling or to just warn of over enrollment. See page 46 for more information.
Hour Type
Enter the Hour Type, which allows your center to define different rates for different billing
situations. For example, if a child is not attending yet, you may want to set up a different
charge for holding the child’s spot in the classroom.
Typical hour types are:
• Regular (which is primarily used)
• Holding
• Day Off
• School’s Out
• Vacation
Comments
Enter any information you want to capture for this row.
Filtering by Date
You can set a date filter for the Contracted tab, so you only see entries after or between
certain dates. This feature is useful to improve performance when you have extensive
attendance history.
X To set a date filter
1. Right-click anywhere on the grid. The Grid Options screen appears.
Version 7.0
May 2010
Page 69
Using the Advanced Attendance & Billing Module
EZ-CARE2
2. Enter the From date and To date for the filter. If you just want entries to appear
after a certain date (for example, 1/1/06), you don’t need to enter a To date.
Note:
For details on other grid options, see page 24.
3. Click the OK button. When you set a filter, a calendar icon appears in the Date
column on the grid to show you that you’re filtering the entries based on dates.
In addition, if you hover your mouse over anywhere in the date column, a field
tip shows you the dates you’re filtering for.
To clear a current date filter, click the Clear Date Filter and Show All button in the Grid
Options screen.
Total Hours
To obtain the total hours of each entry, click on the checkbox. The total hours display at the
bottom of the screen, under the grid. These total hours change when you set a date filter (see
the previous section).
View Loading Report
Click on this button to set up, preview, and print a Child Loading Report, which indicates
how many children will be in selected classes over a selected date and time range. You can
use this report to plan staffing over time periods when children are contracted to attend.
For details on the Child Loading Report, see “Child Loading Report” on page 226.
Page 70
Version 7.0
May 2010
EZ-CARE2
Using the Advanced Attendance & Billing Module
Actual Tab
The Actual tab is enabled if the Advanced Attendance & Billing module has been
purchased.
There is an Actual tab for each Child tab and Staff Member. This describes the actual dates
and times that a child has attended (previous dates).
If you use the Time Clock module to track time for each child, this is where the actual timein and time-out would be posted and stored.
The columns in this tab are the same as on the Contracted tab.
Filtering by Date
Setting up filtering by date works identically to the procedure for the Contracted tab (see
page 69 for details).
Total Hours
To obtain the total hours of each entry, click on the checkbox. The total hours display at the
bottom of the screen, under the grid. These total hours change when you set a date filter (see
the previous section).
Version 7.0
May 2010
Page 71
Using the Advanced Attendance & Billing Module
EZ-CARE2
Schedule Templates
Schedule templates allow pre-specifying your schedules so they can be entered on each
child’s tab with a minimum of keystrokes. For example, a Before and After school schedule
template might include a MWF 7-9 A.M. entry, and MWF 3-5 P.M. entry.
Maintain Schedule Templates
The Library of Saved Schedule Templates allows you to maintain schedule templates.
X To maintain schedule templates
1. Open Office Administration, Chapter 5 (Schedules & Attendance), and
select Maintain Schedule Templates.
2. Select a cabinet and click on Select. The Library of Saved Schedule Templates
appears:
3. Click the Child Templates button to display and maintain child templates. Click
the Staff Templates button to display and maintain staff templates.
4. To create a new template, click on New. Type in a name for this template. To
modify a template, click on Edit from the library. The Schedule Template
dialog box appears.
Page 72
Version 7.0
May 2010
Using the Advanced Attendance & Billing Module
EZ-CARE2
5. Use the Delete or Rename buttons on the library to make any other changes
needed to Schedule Templates.
6. To create (or edit) a schedule, enter (or change) the Class (select from a picklist),
then enter a time range for each day of the week. You may use the Copy Options
on the bottom of the dialog box to build recurring schedules.
7. Enter a From Date and To Date for each line created, or leave them blank if the
schedule is “forever.”
8. If you need to recreate a line, click the Row button in the Clear Options area.
9. Enter as many lines as needed.
10. When you have finished, click on the Close button
.
Using Schedule Templates
Schedule Templates are accessed from the Schedule tab in the Family drawer. Click on the
Templates button
to activate this feature. The Library of Saved Schedule Templates
appears.
You have the option to apply or post schedule templates to any of the following:
•
the record from which you accessed schedule templates (current record)
•
all records in your system
•
records that you select through the Selection Editor, which you can access from
the schedule templates screen
Here is an example of times placed on the Schedule tab using the Toddler All Day Schedule
Template:
Version 7.0
May 2010
Page 73
Using the Advanced Attendance & Billing Module
EZ-CARE2
Applying a Schedule Template to the Current Record
You have the option to apply a schedule template to only the record from which you
accessed the Library of Saved Schedule Templates.
X To apply a schedule template to the current record
1. Click on the group template you want to use.
2. In the Posting Criteria section, click on Current Record.
3. Click the Apply button. The group template is applied to the current record.
Posting a Schedule Template to Selected Records
You can apply a schedule template to a group of records you select. This option requires you
to select records using an existing selection or a new one that you create.
X To post a schedule template to selected records
1. Click on the template you want to use.
2. In the Posting Criteria section, click on All or Selected Records.
3. Click on the Selection button
. The Library of Saved Selections appears.
4. You can use an existing selection or create a new one. For details on using
selections, see “Selections” on page 33. Click on the selection you want to use,
and click on OK. The Library of Saved Templates appears.
Page 74
Version 7.0
May 2010
EZ-CARE2
Using the Advanced Attendance & Billing Module
5. To see a report listing all the records that will be affected when you post the
schedule template, click on the Preview Pre-Post button. If you want to print a
listing of the affected records, click on the Print Pre-Post button.
6. Click on the Post button to post the template to the selected records.
Note: After you click on Post, you will be prompted to print the records affected by
the posting, even if you already printed it.
Posting a Schedule Template to All Records
You also have the option to post a group template to all records in your system.
X To post a schedule template to all records
1. Click on the template you want to use.
2. In the Posting Criteria section, click on All or Selected Records. Be sure that the
Selection field shows (None – all records).
Version 7.0
May 2010
Page 75
Using the Advanced Attendance & Billing Module
EZ-CARE2
3. Click on the Preview Pre-Post button to see a report listing all the records that
will be affected when you post the schedule template.
4. If you want to print a listing of the affected records, click on the Print Pre-Post
button.
5. Click on the Post button to post the template to all records.
Note: After you click on Post, you will be prompted to print the records affected by
the posting, even if you already printed it.
Removing the Last Schedule Template Posted to Multiple Records
If you’ve applied a schedule template to all or selected records, you can remove it from those
records. You can only remove the last template that you posted.
X To remove the last schedule template posted to multiple records
1. In the Posting Criteria section, click on All or Selected Records.
2. Click on the Remove button. The Remove Template Posting dialog box
appears, listing the name of the group template you last applied and the date and
time on which it was applied. It also lists how many transactions were affected by
the template.
3. Click on the Remove button. The transactions previously posted are removed,
and you can now apply or post a new template to the current record or multiple
records (see the previous sets of instructions for details).
Using Template Groups
Existing templates can be grouped together to combine several series of actions. With just a
few mouse clicks, you can enter information on the Tuition, Schedule, and Ledger tabs. For
example, a Preschool Group Template can add a Ledger Template (for Registration Fees),
Tuition template(s), and the applicable schedule(s). To choose a Template Group, click on
the radio button next to Template Groups in the Library of Saved Schedule Templates. See
page 45 for detailed information on using Template Groups.
Page 76
Version 7.0
May 2010
Using the Advanced Attendance & Billing Module
EZ-CARE2
Generate Attendance
Generating attendance is the process of posting attendance records from the Schedule or
Contracted tabs to other attendance tabs. When attendance is ready to process, choose
Generate Attendance from the Attendance menu. Attendance for children and staff are
generated separately.
X To generate attendance
1. Make sure that all active children and/or staff have schedules entered. See the
Schedule tab section on page 66 or the Contracted tab section on page 68 for
details on data entry.
2. Close all open drawers.
3. Click on the Attendance menu, and select Generate Attendance.
4. Specify children or staff.
5. Enter dates for attendance to be posted.
6. Click on the attendance type you want to generate. There are four different ways
to do this:
•
Version 7.0
May 2010
Copy recurring Schedule to Contracted attendance – You might use this
option if you are using the Time Clock module for Actual attendance and
you want to compare Contracted to Actual.
•
Copy recurring Schedule to Actual attendance – You might use this
option if you want to place future attendance into the Actual tab and then
modify it based on actual attendance, for example with data from a manual
sign-in-sign-out sheet.
•
Copy recurring Schedule to both Contracted and Actual – You might
use this option if you usually bill people based on their Contracted
attendance, but want to enter any variations from this attendance on the
Actual tab and bill for the difference. Most people using this option bill in
advance using Contracted attendance and then pick up Actual over
contracted using Rate Masters.
Page 77
Using the Advanced Attendance & Billing Module
•
EZ-CARE2
Copy Contracted to Actual attendance – You might use this option if you
bill in advance based on Contracted hours, but parents can make
modifications to their contract, which are then entered into the Actual tab
and billed for the difference using Rate Masters.
Note: If you are using the Windows TimeClock Module, data recorded in TimeClock
is automatically transferred to the Actual tabs in EZ-CARE2. For an overview
of the TimeClock Module, see page 359. For more details on how to use
TimeClock, see the TimeClock Manual.
7. Choose Hour type you desire.
8. Choose a Selection, if needed. Generating attendance automatically selects on all
those children/staff currently enrolled, based on enrollment date.
9. Click on Generate.
Edit Attendance Entries
X To modify an individual attendance record
1. Select a file cabinet.
2. Open the Family drawer (Child tab) or the Staff drawer.
3. Make sure the active record reflects the proper child or staff member, using the
picklists.
4. Select the Contracted or Actual tab. Changes can be made to any cell on the
grid by clicking on the grid, positioning the cursor at the beginning of the cell,
and typing the corrected information. Total time will be recalculated
automatically.
5. You may enter a comment, if needed (for example, parent had to work overtime).
This helps you and the parent remember why there was an extra charge.
If you need to modify multiple existing attendance information, then choose Edit
Attendance Entries from the Attendance menu. This feature allows you to view alternative
information for all children or staff by Contracted or Actual attendance. This provides an
easy way to make changes to many records at the same time.
X To edit multiple existing attendance entries
1. From the Attendance menu, click Edit Attendance Entries. The Edit Attendance
screen appears.
2. Select the attendance entries you want to edit by clicking the gray box in the
column. To select a group of rows, scroll to the top of the list, check the gray
box in the
column for the first record, then go the bottom of the list, press
Shift, and then click the gray box in the M column for the last record you want
to select. All the entries are now marked for editing.
Page 78
Version 7.0
May 2010
Using the Advanced Attendance & Billing Module
EZ-CARE2
3. Click on the Edit Marked Rows button, located below the list of attendance
entries. The Edit Marked Rows dialog box appears.
Note: With this powerful feature, you can make a change to ALL the marked
records for the following columns: In Date, Class, In Time, Out Time, Hour
Type, Comments, and Out Date. Other columns, such as Day and # Hours,
will be automatically calculated and inserted when you make changes.
4. Make the desired changes, including a comment (Parent had to work overtime) if
necessary; this helps you and the parent remember why there was an extra
charge.
5. Click the Change button. The changes are applied to all the attendance entries
you selected.
Removing Scheduling and Attendance Data
Removing Contracted or Actual Times
The Remove Times screen gives you the ability to purge excess times from your EZ-CARE2
system. Running this option results in improved system performance.
Version 7.0
May 2010
Page 79
Using the Advanced Attendance & Billing Module
EZ-CARE2
First, make a backup of the cabinet(s) that you are going to run this option for. Running this
process is a NON-REVERSIBLE option - data is removed that cannot be retrieved. If this
option is done incorrectly, restoring the cabinet from a backup will bring it back to its state
before the times were removed.
X To access this module
1. Open Office Administration, in Chapter 5 (Schedules & Attendance), and
select Remove Times. Choose a cabinet and click Edit. The Remove Times
dialog box appears.
2. Select the range of dates you want to purge by entering the From and To dates.
Then, select the times you want to purge using the check boxes. You can select
to purge times for Child Contracted, Child Actual, Child Audit, Staff Contracted,
Staff Actual, and/or Staff Audit.
Removing Scheduled Times
The Remove Scheduled Times screen allows you to purge past schedules. Excess amounts of
outdated schedules can use up disk space and cause EZ-CARE2 to perform slower.
X To remove scheduled times
1. Open Office Administration, Chapter 5 (Attendance and Time Clock), and
select Remove Scheduled Times. The Remove Scheduled Times screen
appears.
2. Select one or more cabinets. Use the All button to select all cabinets, or the
Clear button to remove all check marks and restart selecting.
Page 80
Version 7.0
May 2010
Using the Advanced Attendance & Billing Module
EZ-CARE2
3. When your cabinets are selected, the classes set up for those cabinets display in
the Select Class window. Use the All button to select all classes, or the Clear
button to remove all check marks and restart selecting.
4. Indicate that you want to remove Child Schedules or Staff Schedules. Both
options can be selected.
5. Enter a Date Range if you want to remove entries made during a specific period of
time.
6. If you want to combine using a Date Range with Selected Classes, click on the
checkbox next to Use Date Range with Selected Classes. Remember to enter
a date range above.
7. Click OK to save your changes and close the present dialog box. Click Cancel to
close the dialog box and return to the previous screen WITHOUT saving any
changes.
Removing Attendance
X To remove attendance
1. From the Attendance menu, select Remove Attendance. The Remove
Attendance screen appears:
2. Click anywhere in the row representing the posting you want to remove. Click on
the OK button. The system will display all information about the batch or
batches selected. Click Yes to remove the post, or click No to retain the post
and return to the previous screen. If you do not wish to remove attendance, click
on Cancel.
3. When you are finished with this option, click on the Close button
in the
toolbar.
Version 7.0
May 2010
Page 81
Using the Advanced Attendance & Billing Module
EZ-CARE2
Attendance Reports
EZ-CARE2 offers several Attendance System reports. For more complete descriptions, refer
to the Attendance Reports section on page 219.
Child Attendance Analysis Report
Child Weekly Class Attendance Report
Child Attendance Detail Report
Export Attendance Spreadsheet
Child Class Attendance Summary by Period
Staff Attendance Analysis Report
Child Contracted vs. Actual Hours Report
Staff Contracted vs. Actual Hours Report
Child FTE Report
Staff Expected Hours Report
Child Hours Analysis Report
Staff Export Attendance Spreadsheet
Child Loading Report
Staff Hours Analysis Report
Child Schedule Report
Staff Payroll Hours Report
Child Schedule Worksheet
Staff Schedule Detail Report
Child Sign In Sheet
Staff Sign-In Sheet
Child Weekly Attendance Summary
Staff Level Analysis Report
Note: If you are using the TimeClock Module, you can access additional attendance reports
in the TimeClock system. See the TimeClock Manual for more details.
Page 82
Version 7.0
May 2010
Maintaining Data
EZ-CARE2
5. Maintaining Data
Searching for Records
Browsing Records Using the Toolbar Navigation Buttons
To browse through records, use the navigation buttons in the EZ-CARE2 toolbar to move
between records:
Move to the first record in the table.
Move to the previous record in the table. You can also do this by pressing F7 or the up arrow on
your keyboard.
Move to the next record in the table. You can also do this by pressing F8 or the down arrow on
your keyboard.
Move to the last record in the table.
Selecting Records Using the Family and Child Lists
•
To find a child’s record, open the Children list and search for names by last
names (names are automatically listed in order of Last Name, First Name). You
can also type the first few letters of the last name.
•
To access a parent’s record, open the Families list and search for names by last
names (names are automatically listed Last Name, First Name). You can also type
the first few letters of the last name.
Searching for Records using EZ-Finder
EZ-Finder is a tool that allows you to find any record, using up to three fields you enter to
narrow your search. You can use EZ-Finder in the Family Drawer (Child, Family, or Ledger
tabs) and also in the Staff Drawer (Staff Tab) or user-defined drawers. EZ-Finder lets you
define and then apply a filter so that you can locate a single record, or browse through all the
records that meet your conditions.
To find a specific record:
•
Specifying values that only one record will contain such as: a LAST NAME of
“Smith,” a FIRST NAME of “David,” with a CITY of “Rochester.” You may
have more than one David Smith in your records, but if only one is from
Rochester, setting these three EZ-Finder fields should lead you to the single
record you want to locate.
•
Entering the Child, Family, or Staff ID if you know it. Your system may already
have the ID fields in your system; otherwise, you can add it to your database
using the Define Data Table Fields section of the File Cabinet Wizard (see
page 292 for details).
Version 7.0
May 2010
Page 83
Maintaining Data
EZ-CARE2
To find a group of records:
•
If you want to browse through all families with the same last name, then only
enter one value. For example, enter “Smith” in the LAST NAME field of EZFinder.
•
If you want to find everyone with a specific value, such as all people on Van 1,
you might enter a value of “Van 1” in the TRANS field.
•
If you’re not sure how a person’s name or street is spelled, enter the beginning of
the word to find all records containing the beginning characters that you entered.
For example, if you enter a value of Joh in the LAST NAME field, EZ-Finder
will identify records where the LAST NAME begins with Joh—it will retrieve
records for Johnson, Johnsen, Johannsen, and Johannes.
•
If you want to find and fill in empty fields, you can search for all records where a
field is blank. For example, putting “” (2 quotation marks with no space between
them) in the EMAIL field of EZ-Finder will find all records with a blank email
field.
Running EZ-Finder
To run EZ-Finder, click the EZ-Finder icon
in the toolbar:
By default, EZ-Finder is set up to search by LAST NAME, FIRST NAME, and STATUS. If
you want to change the search fields, go to Office Administration, Chapter 3, Preferences
& Setup, Maintain EZ-Finders—see page 322 for details
In the example above, you can search on any combination of LAST NAME, FIRST NAME,
and STATUS to find a single record or group of records to navigate; you can also find
records where one or more of these fields are empty. If you enter only one field, you can
then navigate through all records containing that one field value, regardless of what is in the
other fields of those records. To browse through the records, use the Navigation buttons on
the toolbar.
How EZ-Finder Works in Different Drawers and Tabs
EZ-Finder works differently depending on which drawer and tab you are in when you
launch it:
When in:
Page 84
Use EZ-Finder to locate:
The Family Drawer: Family or Ledger Tab
Family records
The Family Drawer: Child Tab
Child records
The Staff Drawer: Staff Tab
Staff records
A User-Defined drawer
Whatever records are in the drawer –
inquiries, volunteers, you name it!
Version 7.0
May 2010
Maintaining Data
EZ-CARE2
After you have entered your search fields in EZ-Finder, click Find. The first record with the
specified value appears. You can then use the Navigation Buttons or related function keys to
browse through the list of records. The EZ-Finder “selection criteria” remain in effect until
you click on the Clear button or enter new search values and then click Find again.
To close EZ-Finder, click on the small “x” in the upper right hand corner of the EZ-Finder
dialog box. DO NOT click on the Windows Close button—the large X in the upper right
corner of EZ-CARE2. If you have not cleared your search values, they will be reapplied the
next time you open EZ-Finder.
Maintaining Data Using EZ-Viewer
This feature allows you to review and edit information from several records at the same
time. Records are viewed in a grid format.
The data fields available in EZ-Viewer depend on where you use this feature:
•
From the Family or Ledger tab, the fields available are Family and Ledger fields.
•
From the Child tab, the fields available are Family, Ledger, and Child.
•
From the Child Schedule, Contracted and Actual tabs, the fields available are
Family and Child.
•
From any of the tabs in the Staff drawer, Staff fields are available.
You can also use EZ-Viewer in any user-defined drawers.
To activate EZ-Viewer, click on the EZ-Viewer button from the toolbar
. This displays
the default view for the tab where you are located. For example, you might see a view like
the one shown below when accessing EZ-Viewer while you are in the Child Tab:
As shown, the View box at the top of the screen indicates which view is selected. To select
other views, click on the Views button
. This will display the Library for EZ-Viewer—see
the example below.
Version 7.0
May 2010
Page 85
Maintaining Data
EZ-CARE2
•
You will notice that some views are described as Updatable. This means that you
can modify data shown in the view; you can also make a selection of the data and
save that selection as part of the view. If the view is not Updatable, you can view
data or select some of it for viewing or export, but you cannot change the data or
save the selection.
•
To select another view, click on it with your mouse and then press the
button. The view will then change to the one you have chosen.
•
Once you have selected the view you want, you can use selection criteria to filter
the records displayed in EZ-Viewer (see page 33 for details on how to make
selections). As with any grid, you can double-click to change the sort order of the
columns, or change the placement of columns in the grid.
•
Under Status, check Active, Inactive, or Remove, to determine whether Active
records, Inactive records, or records marked for removal will appear in the view.
•
In EZ-Viewer, you can toggle back and forth to review a selected record. To do
this, click on the record in EZ-Viewer (the line turns light blue), and then click
on the Jump button to "jump" back to the Family, Child, Ledger, Staff tab, or
user-defined drawer, displaying this record's information. To get back to EZViewer, move the Window with the tab or drawer or minimize it (using the
in the upper right corner).
Windows minimize button
If you don’t see the views you need, you or your administrator will need to set up new views
in Office Administration, Chapter 3, Preferences and Setup. See page 324 for details.
Using Select-A-Merge with EZ-Viewer
If you have the optional Insta-Merge module (see page 350), you can use the Select-A-Merge
feature with EZ-Viewer. Using Select-A-Merge will enable you to:
•
Send a merge document to multiple recipients at once, either as a letter or by
email.
•
Select a group of records from within your database to send individual or
multiple merge documents. A popular use for this is selecting only records that
have email addresses.
Page 86
Version 7.0
May 2010
Maintaining Data
EZ-CARE2
For more information on using Select-A-Merge, see page 353.
Changing Data in EZ-Viewer
There are two ways to change data—individually or globally. For both methods, the view must
be set up as Updatable (see Maintain Library for EZ-Viewer on page 324).
•
To change individual data items, click on the row you want to edit; it turns light
blue. In some cases, picklists will be available. In other cases, you can modify the
text. Note that calculated fields, such as Child’s Age or Ledger Balance, cannot
be edited.
•
If you click on the Save Changes button, changes made while using EZ-Viewer
will then be saved to the database. If you do not want to save your changes, click
on the Undo Changes button.
•
Global Change is used to change several records at a time. Use this to save time
when making the same change on all records or a selected group of records (see
page 88 for more details).
•
Click on the Close button
when you have finished with EZ-Viewer.
Removing Duplicate Records
Use this method if you want to identify duplicates through EZ-Viewer.
X To find duplicate child records using EZ-Viewer
1. While you are on the Child tab, open EZ-Viewer.
2. Use the Grid sort features (described in detail on page 23) to sort the list of
children by Last Name, Address, and First Name.
Version 7.0
May 2010
Page 87
Maintaining Data
EZ-CARE2
Note: All these fields must be in the view you have selected. If they are not
there, you can add them using Maintain EZ-Views (see page 324).
3. You can then identify duplicate records on the list.
4. Use the Jump feature in EZ-Viewer to select individual records and determine
which should be deleted.
Updating Records Using Global Change
Use this feature to make the same change to some or all of the records that are displayed
while you are using EZ-Viewer. You can only use Global Change in a view that is Updatable.
Accessing the Library of Saved Global Changes
X To make a global change
1. Open a cabinet and select the tab you want to use.
2. Click on the EZ-Viewer button.
3. Choose the View and Selection you need to isolate the records you want to
modify with a Global Change. For example, you could choose the Child or Class
view and then make a selection to identify all the Toddlers who will now be
moving up to Pre-school. See page 33 for details on making selections.
4. To mark multiple data items for a global change, click in the M column for each
row that you want to change. A red check mark appears for the rows that you
marked. If you want to mark a block of rows, press and hold down the SHIFT
key, and then click the first row you want to mark and the last row you want to
mark. All the rows in between the first and last are selected, and a red check
mark appears in the M column for each selected row.
Page 88
Version 7.0
May 2010
Maintaining Data
EZ-CARE2
5. Click on the Global Change button (
). The Library of Saved Global
Changes appears.
Setting Up or Modifying Global Changes
To create a new Global Change, click on New while you are in the Library of Saved Global
Changes.
X To set up or modify a global change
1. Enter a Description (for our example, it would be Assign Bus).
2. Define what you want to change—choose a Table and Field. Remember, these
changes are limited to the tables and fields used in the view that is accessed by
EZ-Viewer. In this example, the Global Change shown below assigns all selected
children to Greyhound Bus #314 as the carrier taking them to center.
Version 7.0
May 2010
Page 89
Maintaining Data
EZ-CARE2
3. From the Use picklist, choose either Value or Field. Value allows you to define
the exact value that will be placed in the selected field. The value button ( )
allows you to pick the value/field from a list. You could also enter the value
manually by typing it into the Value text box. Field allows you to specify a field
containing the value to change to (for example, if you want to copy the values in
Parent1 address to Parent2 address). The arrow shows the direction of the
change.
4. If you want to change more than one field in the same Global Change, click on
the next line to highlight it and set up the next change you wish to make.
5. Click on the Close button (
) when you have finished creating or editing a
saved Global Change.
To edit a saved Global Change, click on the Global Change you want to modify, then click
on Edit. Make any desired changes to the Table, Field, Use, or Value choices.
Displaying and Selecting Global Changes
At the bottom of the library, you can use the radio buttons to show Global Changes specific
to the drawer and tab where you are working, or show all Global Changes. Once you have
found the Global Change you want to use, select it by clicking on it. In this case, you might
select the Global Change titled Assign Bus.
Running the Global Change
After you’ve selected the saved Global Change you want to use, click the Change button.
This performs the change and returns you to EZ-Viewer. The screen below shows the
change with all children assigned to Pre-School.
In EZ-Viewer, your can then do one of the following:
•
If you want to save the changes to the database, click the Save Changes button.
•
If you do not want to save the changes, click the Undo Changes button.
•
Click the Close button (
Page 90
) when you have finished with EZ-Viewer.
Version 7.0
May 2010
Maintaining Data
EZ-CARE2
Exporting Data Using EZ-Viewer
This feature allows you to export data displayed in EZ-Viewer to a comma-delimited (.CSV)
file. You can then open this file in Excel (or another spreadsheet application) or access it
from other programs for further analysis or reporting.
Note: The Export button in EZ-Viewer is activated only when a non-updatable view is used.
To change the view displayed while in EZ-Viewer, click the Change View
icon
and select a view that is not updatable . If you need to modify a view to make it nonupdatable or change the fields, go to Office Administration, Chapter 3, Maintain EZViews, choose the appropriate cabinet, select the view, choose Duplicate, give the
view a new name, and make the changes you desire. For more details on duplicating
or creating views, see page 324.
X To export from EZ-Viewer
1. Once you have a non-updatable view to use, open EZ-Viewer.
2. If desired, select the records you want to export in one of the following ways:
•
Choose a Selection that will contain the records that you want to export.
•
Manually mark records by clicking in the M column for each row you
want to export. You can also mark a block of rows by clicking in the M
column of the first row you want to select, pressing and holding down
the SHIFT key, and then clicking the last row you want to export.
3. Click on the Export button. If you haven’t marked any rows to be exported
because you’ve chosen your records via a selection or you want to export all
records, a dialog box appears, asking if you want to merge a current record or
merge all records.
4. The normal response will be All to export all displayed records. The system then
prompts you for a file name. If you started from the Family, Ledger, or Staff tab,
the prompt looks as follows:
When you export from a Child tab view, you must decide if you want one record
by family (Horizontal layout) or separate records from each child (Vertical layout):
Version 7.0
May 2010
Page 91
Maintaining Data
EZ-CARE2
In a Horizontal layout, each family record may contain up to 5 children’ records with a
maximum of 255 total fields exported.
Sending Email From a Record
EZ-CARE2 enables you to send emails to parents and children who have email addresses
stored in the system. You can send individual email messages, or use the Insta-Merge or
Select-a-Merge features to send personalized individual or group emails (see page 352 for
details). EZ-CARE2 supports Outlook Express (preferred program) or Outlook with the
email interface. For details on how to set up your system to use Outlook Express or Outlook
for EZ-CARE2 emails, see page 367.
Note: You can also email invoices to parents who have email addresses in the system. For
details on how to do this, see the Invoices report on page 154.
The Email Interface does not enable EZ-CARE2 to receive any email messages nor does it
replace your email system, but it allows you to generate messages using Outlook or Outlook
Express.
Note: Be sure you have a functioning copy of MS Outlook or Outlook Express installed and
working on your system in order for the EZ-CARE2 Email interface to function properly.
If you do not have email address fields on your Family, Staff, or User-Defined drawers, you
can add them through the Cabinet Wizard in Office Administration, Chapter 2 (Cabinets and
Drawers), Create/Modify a File Cabinet. At the Data Table Fields screen, set up a field name
Page 92
Version 7.0
May 2010
Maintaining Data
EZ-CARE2
containing either E-mail, e-mail, Email, or email. Field Type must be Character, and we
suggest a length of 30. See page 292 for more details on adding fields.
X To send a message
1. Go to the Family or Child tab. You can quickly see the email fields because
they are blue and underlined.
Note: If your email field is not a hyperlink (blue and underlined), the field name
does not contain E-mail, e-mail, Email, or email. You can modify the
field name—see page 298 for instructions.
2. Click the hyperlinked email label, or click in the email field and then, on the
keyboard, hold down the CTRL key and press ENTER.
Your computer’s default email program (usually MS Outlook Express) opens,
and the email address is automatically placed in the Address field. The cursor is
located in the Subject field.
Note: For details on how to set up Outlook Express or Outlook as your email program for EZCARE2, see page 367.
3. Type in a subject and email text.
4. Click on Send button to complete the process.
If you want to send email to several families or children at once, use the email features
described beginning on page 352.
Version 7.0
May 2010
Page 93
EZ-CARE2
This page intentionally left blank.
Page 94
Version 7.0
May 2010
Using the Accounts Receivable Module
EZ-CARE2
6. Using the Accounts Receivable
Module
Accounts Receivable Setup
EZ-CARE2 allows you to define your preferences for how Accounts Receivable information
is handled in your system
Accumulate YTD Payments
The Accumulate YTD Payments screen allows you to calculate the sum total of all Year-toDate payments and store that total in a field in the database. This total is displayed and
updated automatically on the Ledger tab.
X To accumulate YTD payments
1. Open Office Administration, Chapter 4 (Accounts Receivable Setup), and select
Accumulate YTD Payments. The Accumulate YTD Payments dialog box
appears.
2. Select the cabinet you want to set up YTD payments for, and click the Select
button. The Accumulate YTD Payments screen appears.
3. In the Include Ledger Entries section, enter a From Date and To Date to
define the range of transactions for the upcoming year (for example, 1/1/2010
and 12/31/2010).
4. In the Include Categories section, select the Show Payment Categories Only
check box to see only the payment categories in your system. If you don’t select
this check box, you’ll see all of your A/R categories.
5. Select the categories you want to include in the YTD Payments total.
Transactions within these categories will be included in the YTD Payments total.
Version 7.0
May 2010
Page 95
Using the Accounts Receivable Module
EZ-CARE2
6. Click on OK to save your changes and close the present dialog box. Click on
Cancel to close the dialog box and return to the previous screen WITHOUT
saving any changes.
When you click on OK , the YTD Payments total will be updated to reflect these
settings. This might take some time to complete for all ledgers in the cabinet.
Setting Beginning A/R Numbers
The Beginning A/R Numbers screen allows you to set beginning numbers for invoices,
deposits, and receipts.
X To set beginning A/R numbers
1. Double-click Office Administration, double-click Chapter 4 (Accounts Receivable
Setup), and double-click Beginning A/R Numbers. The Beginning A/R
Numbers dialog box appears.
2. Select the cabinet, and click the Edit button. The Beginning A/R Numbers
screen appears.
3. Enter or change the Invoice #, Deposit #, or Receipt #.
4. In the Transactions can be entered for section, you can restrict the date range
for which users can enter transactions. Select one of the following options:
Page 96
•
All Dates—no restriction.
•
Today Only—no pre-dated or post-dated transactions.
•
This Week—only transactions within the current week (Sunday to
Saturday)
•
This Month—only transactions within the current month.
Version 7.0
May 2010
Using the Accounts Receivable Module
EZ-CARE2
•
This Year—only transactions within the current year.
•
Date Range—if you select this option, enter a Start Date and End
Date between which transactions can be entered.
This is useful for eliminating possible discrepancies between your ledgers and
postings on your accounting system.
5. Click on OK to save your changes and close the present dialog box. Click on
Cancel to close the dialog box and return to the previous screen WITHOUT
saving any changes.
Entering Balance Forward Records
A Balance Forward record represents the existing balance for a ledger at the time that you
began keeping records in EZ-CAMP2. It can be a positive or negative balance, or even a
zero balance.
The Balance Forward record should typically be the first one in each family ledger.
X To enter the Balance Forward record in each family ledger
6. Open the file cabinet.
7. Open the Family drawer.
8. Select the family you want to enter the Balance Forward for.
9. Select the Ledger tab.
10. Place your cursor in the topmost empty row in the ledger grid.
11. Enter the current date in the Date field.
12. Set the Category to Balance Forward.
13. Enter the amount of the account balance in the Amount field.
14. Hit the ENTER key on your keyboard, or select the next row in the ledger.
For details on how to manually enter a ledger transaction, see “Billing for Activities and
Services” on page 119.
Maintaining Categories
The Categories screen allows you to define and modify categories representing revenues,
payments, and credits in Accounts Receivable.
X To access the Categories screen
1. Double-click Office Administration, double-click Chapter 4 (Accounts Receivable
Setup), and double-click Maintain Categories. The Maintain Categories dialog
box appears.
2. Select the cabinet you want to define accounts receivable categories for, and click
the Edit button. The Categories screen appears.
Version 7.0
May 2010
Page 97
Using the Accounts Receivable Module
EZ-CARE2
Managing Categories
X To edit categories
1. Select the Categories tab.
2. Click on the cell that you want to edit and enter your changes. Some cells will
display a picklist when you click on them. To add a new category, click on a blank
row (it will turn blue). For each category, complete the following information:
•
Category Name: name of the category.
•
Type: all Categories must be given a type. The Type determines how the
category will behave in the system (for example, whether it increases or
decreases the ledger balance). The four types of categories are:
Revenue Income category for your organization.
Payment Categories that are available for selection under the Payment Combo
Box in Enter Cash Receipts.
Canteen
Canteen Deposits and items that show in your Canteen Ledger. (If the
Canteen Module has been installed, these categories can be found in the
Canteen Categories tab.)
Credit
Items, such as discounts, that generate a credit - decreasing the ledger
balance.
Note: If you need to change the type of an existing category and have that
change affect both present and past transactions, click the Recalculate
Ledger Balances button.
•
Page 98
Rollup Category: which is an optional field. It is used to combine and
summarize categories into broader groupings for reporting purposes. If
Version 7.0
May 2010
Using the Accounts Receivable Module
EZ-CARE2
you want to use Rollup Categories, they must be set up in Maintain
Rollup Categories (described in the next section of this manual).
•
Enter the G/L Debit and Credit accounts for each category (Optional).
These are used with the Accounting module (see page 345) and the
Revenue Summary report.
•
Default Amount: a fixed amount to be applied every time you make a
ledger entry for that category; for example, the default amount for the
Registration Fee could be $15.00.
Note: If some of the columns do not appear on the grid, then they have been
collapsed and you need to expand them. To perform this action, place your
mouse cursor on the small black vertical line separating the headings
Rollup Categories and Default Amt. The cursor will change into a crosshair.
Left click and drag to the right approximately one inch. This will reveal one
of the hidden GL columns. Perform this procedure again to reveal the other
GL column.
X To arrange the order of categories
1. To define the order of the categories on both the Categories screen and in the
Category picklist, which appears on the Ledger tab and in the options for a few
A/R reports, click the Arrange Categories Picklist button. The Arrange
Categories Picklist screen appears. On this screen, you can do the following:
Version 7.0
May 2010
•
To move a category, click a gray box next to the category and drag it up
or down the list to the location where you want it to be.
•
If you want the categories to be in alphabetical order, click the Sort List
Alphabetically button.
Page 99
Using the Accounts Receivable Module
•
EZ-CARE2
When you’re done organizing the categories, click the OK button. The
Categories screen appears again.
2. To copy a category, click the Copy button
category, click the Paste button
on the toolbar. To paste a
on the toolbar.
3. To print the grid, click the Insta-Print button
on the toolbar.
4. When you are finished defining your categories, click the Close button
on
the toolbar.
Sample A/R Categories
Category Name
Type
Rollup
Category
G/L Debit
Account
G/L Credit
Account
Default
Amt.
Tuition Fee
Revenue
Tuition
102
301
$0
Payment
Payment
Payments
101
102
$0
Tuition Cancellation
Credit
Tuition
302
102
$0
Discount
Credit
Discounts
303
102
$0
Returned Check (NSF)
Payment
Payments
101
102
$-1
Returned Check Fee
Revenue
Other Fees
102
304
$0
Refund
Revenue
Refunds
102
203
$0
How do I define G/L accounts in my A/R categories?
Before you can populate the G/L Debits & Credits in your Accounts Receivable
categories, you must first have established your G/L Chart of Accounts. After doing so, it’s
a good idea to print your Chart of Accounts and have it in front of you while populating the
G/L Debits & Credits.
X To define G/L accounts in my A/R categories
1. Double-click Office Administration, double-click Chapter 4—Accounts
Receivable Setup, and then double-click Maintain Categories. The Maintain
Categories dialog box appears.
2. Double-click the cabinet you want to define G/L accounts for.
3. Select the Categories tab.
4. Locate GL Debit Account & GL Credit Account between the Rollup Categories &
the Default Amt. columns.
Note: If they do not appear on the grid, then their columns have been collapsed
and you need to expand them. To perform this action, place your mouse
cursor on the small black vertical line separating the headings Rollup
Categories and Default Amt. The cursor will change into a crosshair. Left
Page 100
Version 7.0
May 2010
Using the Accounts Receivable Module
EZ-CARE2
click and drag to the right approximately one inch. This will reveal one of
the hidden GL columns. Perform this procedure again to reveal the other
GL column.
5. Assign G/L account numbers to your categories. Because accounts and A/R
categories vary from company to company, the following will illustrate how you
can define them using a very generic model.
Sample Chart of Accounts
G/L Acct #
Description
Type
101
Cash
A
102
Accounts Receivable A
203
Refunds Payable
L
301
Tuition
I
302
Tuition Cancelled
I
303
Discounts
I
304
NSF Fees
I
Maintain Ledger Templates
Ledger templates provide a way to enter several ledger transactions at once on the Ledger
tab of a family record.
X To maintain ledger templates
1. Double-click Office Administration, double-click Chapter 4 (Accounts Receivable
Setup), then double-click Maintain Ledger Templates. The Maintain Ledger
Templates dialog box appears.
2. Select the cabinet that you want to create ledger templates for, and click the
Select button. The Library of Saved Ledger Templates appears with your
current ledger templates.
Version 7.0
May 2010
Page 101
Using the Accounts Receivable Module
EZ-CARE2
3. You can create, edit, duplicate, delete, or rename a ledger template. See the
following sections for instructions.
Creating a Ledger Template
X To create a ledger template
1. From the Library of Saved Ledger Templates, click the New button. A blank
Ledger Template screen appears.
2. In the Template Name field, enter a name.
3. Enter the following information for the ledger template:
•
Date: the date of the transaction.
Note: Primarily, transaction dates are left blank. The date a template is
applied to the family ledger becomes the transaction date. However,
there are some instances when you would enter a date – for
example, if you have charges spread out over 3 months (January,
March, May), you would enter three separate transaction lines, one
for each charge.
•
Category: the accounts receivable category that applies to the
transaction.
•
Comment: any comment you want to associate with the transaction.
•
Child: choose Default Child from the picklist.
•
Amount: the amount of the transaction.
4. When you’re done defining the template, click the Close button
.
Maintain Rollup Categories
To define and modify combined categories (as defined in Maintain Categories) used for
reporting purposes in Accounts Receivable.
Page 102
Version 7.0
May 2010
Using the Accounts Receivable Module
EZ-CARE2
X To maintain rollup categories
1. Double-click Office Administration, double-click Chapter 4 (Accounts Receivable
Setup), and then double-click Maintain Rollup Categories. The Maintain
Rollup Categories dialog box appears.
2. Select the cabinet that you want to define rollup categories for, and click the Edit
button. The Rollup Categories screen appears.
3. To edit any of the existing categories, click on the cell that you want to edit and
type your changes. To add a new Rollup category, click on an empty row (a blue
border appears) and type in the name of the new Rollup Category.
4. To define the order of Rollup Categories, click the Arrange Rollup Categories
Picklist button. The Arrange Rollup Categories Picklist screen appears. On
this screen, you can do the following:
•
To move a category, click a gray box next to the category and drag it up
or down the list to the location where you want it to be.
•
If you want the categories to be in alphabetical order, click the Sort List
Alphabetically button.
•
When you’re done organizing the categories, click the OK button. The
Rollup Categories screen appears again.
5. To copy a Rollup category, click on the Copy button
on the toolbar.
6. To paste a Rollup category, click on the Paste button
on the toolbar.
7. To print the grid, click on the Insta-Print button
on the toolbar.
8. When you are finished defining your categories, click the Close button
on
the toolbar.
Version 7.0
May 2010
Page 103
Using the Accounts Receivable Module
EZ-CARE2
Enabling the QuickBooks Interface
The QuickBooks Interface screen enables the use of the optional EZ2-Post module, which
links EZ-CARE2 with QuickBooks by exporting EZ-CARE2 information out to
QuickBooks.
X To enable QuickBooks interface
1. Double-click Office Administration, double-click Chapter 4 (Accounts
Receivable), and then double-click QuickBooks Interface. The QuickBooks
Interface dialog box appears.
2. Click the Enable QuickBooks Interface check box.
3. Click Done to save your changes and close the present dialog box. Click on
Cancel to close the dialog box and return to the previous screen WITHOUT
saving any changes.
If you have this module, see the additional EZ2-Post documentation.
Setting Discount Rounding Preferences
The Discount Rounding Preferences screen allows you to set your preferences for rounding
off discount amounts: to the next highest dollar or the nearest dollar amount.
X To access this module
1. Open Office Administration, Chapter 4 (Accounts Receivable Setup), and select
Rounding Discounts. The Discount Rounding Preferences dialog box appears.
2. Select one or more cabinets. Use the All button to select all cabinets, or the
Clear button to remove all check marks and restart selecting.
3. Choose a rounding option by clicking on the radio button:
Page 104
•
No Rounding retains the discounts without rounding.
•
Round to Next brings the amount up to the increment you specify (when
you select this option, a box displays for you to enter the dollar amount).
Version 7.0
May 2010
Using the Accounts Receivable Module
EZ-CARE2
•
Round to Nearest brings the amount up or down to the increment you
specify (when you select this option, a box displays for you to enter the dollar
amount).
•
Cumulative Discounts mean that if there is more than one discount, the
additional discounts are calculated on the already discounted amount. For
example, you can set up a family for a 10% sibling discount, and after that
discount is calculated and there is a new total, you can apply a 20% employee
discount on the discounted amount.
4. Click Set to activate the changes you have just made.
5. Click Done to save your changes and close the present dialog box. Click Cancel
to close the dialog box and return to the previous screen WITHOUT saving any
changes.
Changing the Currency Type
EZ-CARE2 supports currency other than the dollar ($). To specify a different currency, you
need to modify your ezcare.ini file. This file contains the following default information:
[Currency]
Symbol=$
Remove the $, replace it with the appropriate currency (for example, £), and then save the
file. The currency you enter will now appear anywhere the currency symbol is used in EZCARE2, including the Ledger tab and Accounts Receivable reports.
If you need assistance making this change, please contact EZ-CARE2 Support.
Maintaining Rate Masters
EZ-CARE2 provides the ability to set up charges several different ways. The Rate Masters
feature defines how rates are to be applied to specific children. Rates are set up and modified
in Rate Masters, through a Rate Definition Wizard that guides you through several screens of
options (the number of screens varies depending on the type of rate you are setting up).
Because each center’s rate schemes are different, and the flexibility of Rate Masters is so
great, systems are normally delivered with some representative rate masters pre-configured.
You should review the existing rate masters and discuss any changes or additions with the
support department.
Accessing the Library of Saved Rates
Rate Masters stores saved rate definitions in a library. This library allows you to create (new),
modify (edit), duplicate, delete, or rename saved rate definitions. Select the button on the
library for the operation you wish to perform on a rate definition.
X To access the Library of Saved Rates
1. Open Office Administration, Chapter 4 (Accounts Receivable Setup), and
select Maintain Rate Masters.
Version 7.0
May 2010
Page 105
Using the Accounts Receivable Module
EZ-CARE2
2. Select the cabinet that you want to create ledger templates for, and click the
Select button. The Library of Saved Rates appears with your current ledger
templates.
Creating Rates with the Rate Definition Wizard
If you choose the New or Edit options from the library, the Step 1 screen of the Rate
Definition Wizard prompts you for the following tasks:
•
Enter a Rate Name (for new rates).
Note: If you’re editing an existing rate master, you can copy any of the rates that
appear on the grid in Step 1. All the details of the rate are copied, including
those set up in Step 2 of the wizard and Step 3 of the wizard; you can then
edit the pasted rate as necessary. This feature is useful if you want to create
a similar rate with new effective dates or other minor changes but want to
keep the old rate for future reference. To copy a rate from the grid, highlight
the row you want to copy, click the Copy button
on the toolbar, click in
the row you want to paste the rate into, and then click the Paste
button.
The new row is added to the grid. You can copy and paste more than one
row at a time.
•
Enter the Effective Date the rate begins. You can change the rate over time by
adding later Effective Dates underneath the first one. The rate will change
automatically on the next Effective Date.
•
From the Using picklist, choose one of the three rate types:
}
Fixed Rates - these are recurring charges, which remain constant each
charge cycle. If a family is charged exactly the same amount each
week/month, you are charging them a fixed rate.
}
Simple Rates - these are constant rates that are dependent upon attendance
(either scheduled, contracted, or actual). You can still set up different rates
for different groups.
Page 106
Version 7.0
May 2010
Using the Accounts Receivable Module
EZ-CARE2
}
Variable Rates - these are more complex rates that may depend on a variety
of factors, such as the total number of hours attended each day and/or the
total number of days attended in a week.
Setting Up Rates
Setting up a Fixed Rate
After selecting Fixed Rate on the Step 1 screen, the Wizard brings you to the Step 2 screen.
X To set up a fixed rate
1. Select Charge or Credit per posting period.
2. Enter a dollar amount for that charge or credit.
3. Identify the A/R Category that amount is going to (for more details on setting
up A/R categories, see page 97).
4. Click on the Finish button. You’re done! The rate is now in your Library of
Saved Rates.
Setting up a Simple Rate
After selecting a Simple Rate on the Step 1 screen, you will need to select the type of
attendance the Rate is based on (for details on Attendance and Scheduling, see page 65).
Enter one of the following choices from the picklist in the Rate Based On box:
Recurring Schedule
Calculates the charge based on Scheduled Attendance.
Contracted Attendance
Calculates the charge based on Contracted Attendance.
Actual Attendance
Calculates charges based on Actual Attendance, which is often imported from
the Time Clock but could also be produced through Generate Attendance (see
page 77) and then manually edited.
Greater of Contracted or
Actual
This compares the Contracted Attendance to the Actual Attendance, and
calculates charges based on the greater of the two. For example, if a child is
contracted for two days, but attends three days, they will be charged based on
three days. If a child is contracted for two days, but attends one day, they will
be charged for two days.
Earliest to Latest from
Contracted to Actual
This compares the Contracted and Actual Attendance, and calculates charges
based on the earliest time in and latest time out.
Actual Times Outside of
Contracted
Calculates charges in EXCESS of the contract, and only charges for the
additional times.
Contracted Attendance
Outside of Actual
Calculates charges in EXCESS of the actual, and only charges for the
additional times.
Actual Times Outside of
Center Hours
Calculation begins at the center's Closing time.
Version 7.0
May 2010
Page 107
Using the Accounts Receivable Module
EZ-CARE2
After you have selected the attendance for the rate, the Wizard takes you to the screen for
Step 2, where you can choose from a number of rounding and billing options. For a Simple
Rate, these options include:
•
Round Times to the - Select next to go to the next time interval. Select nearest
to go to the closest time interval which could be the next or previous time
interval, whichever is closer.
Enter your time interval in the box - examples are 15 minutes, 30 minutes, 60
minutes. This is the amount of time you round to. For example, you may want to
round to the next 30 minutes or the nearest 15 minutes.
•
Minutes each – here you choose time ranges within which you will do
•
Time Pair – Use this option to round the hours and minutes for each time pair
•
Day - If you have one check-in and one check-out time per day, and you want to
•
Charge or Credit – Here you define a fixed amount to be charged(or credited)
•
Category - Designate the accounts receivable category to receive the charge.
•
Separate transactions for each day – If you select this option, tuition charged
rounding. The choices include
(the time between when a child checks IN and checks OUT).
round times for the day, select this option.
per hour or per day. Note: if you round times, you can only charge by the hour;
if you do not choose to round times, you can charge by the hour or by the day.
(or credited) will be posted separately for each day on the ledger. If you do NOT
select the option, the tuition will be posted as a lump sum for whatever posting
period you have selected. Select this option if you want to identify specific days
with charges beyond those from expected attendance, for example, late pickup
fees.
After making your choices, click Next to go to Step 3 of the Wizard, where you can select
from options for rounding charges:
•
Round Charges to the - Select next to go to the next dollar amount. Select
nearest to go to the closest dollar amount which could be the next or previous
dollar interval, whichever is closer. NOTE: Rounding Charges is actually the
LAST step. After your entire charge or credit has been computed, THEN
rounding takes effect.
•
Charge Minimum - Define a minimum charge, the frequency (per Day, or per
Posting), and the accounts receivable Category to receive the charge. If you select
a minimum charge, a child will never be charged less than that amount for any
period.
•
Charge Maximum - Define a maximum charge, the frequency (per Day, or per
Posting), and the accounts receivable Category to receive the charge. If you select
enter a maximum charge, a child will never be charged greater than that amount
for any period.
Page 108
Version 7.0
May 2010
Using the Accounts Receivable Module
EZ-CARE2
Select Finish, and you’re done: the new Rate Master is saved in the Library.
Setting Up Variable Rates
The attendance, billing and rounding options for Variable Rates give you a great deal of
flexibility to vary charges for different time ranges and also to apply charges to different A/R
categories. Some examples of Variable Rates include:
•
Different rates charged for different times of day: for example, you charge one
rate for a before-school session, a different rate for after school and, if
applicable, a third discounted rate for attending both sessions.
•
Charging combinations of fixed and hourly rates: for example, you charge a fixed
rate for 7 A.M. to 9 A.M., then an hourly rate between 9 A.M. and 3 P.M.
•
Discounts offered for increased attendance: for example, the more days a child
attends your center, the less they are charged per day.
Due to their complexity, Variable Rates can require advanced knowledge to configure. Our
support staff are available to assist you with setup of Variable Rates. When you feel you need
to modify or create a Variable Rate, feel free to contact SofterWare Technical Support.
Version 7.0
May 2010
Page 109
Using the Accounts Receivable Module
EZ-CARE2
Entering Tuition
Once you have set up your rates (or had them set up for you), you can use these rates to
enter tuition in the Tuition tab for each child.
There are two ways to assign rates to each child:
•
Manually, one at a time, on the Tuition tab.
•
More automatically, with Tuition Templates.
As you continue to maintain everyone’s tuition rate, you can charge their account
accordingly through Tuition Postings or Group Postings. Each of these processes is
described below.
Tuition Tab
There is a Tuition tab for each child, which is used to define how tuition is to be charged for
that child. To access the Tuition tab, open the Family drawer, select the child for whom you
want to enter tuition and open the Tuition tab. You can enter tuition data either on the grid
or in the text boxes below, but you cannot switch between the two areas until you have
provided a billing cycle, an account, percent multiplier, rate type, and hour type.
The following information can be entered:
Effective
Dates
For tuition items that you want to continue without an end date, leave the Effective Dates
(From and To) boxes blank. Otherwise, enter a beginning and ending date.
Billing Cycle
Enter the Billing Cycle, which determines how frequently charges will be billed. Examples
of billing cycles are Weekly, Bi-weekly, and Monthly. Billing Cycles are set up in Office
Administration Chapter 3 – Preferences & Setup, Maintain Picklists (see page 325).
Page 110
Version 7.0
May 2010
Using the Accounts Receivable Module
EZ-CARE2
Account
Enter the person(s) or other payers who will be charged. The default Account is Parent1.
Other payers can be entered as required.
Percentage
Multiplier
Enter the Percent Multiplier, which identifies the breakdown of charges to be applied to
multiple sources. This is used for situations where the single family is not responsible for
the total charge, for example:
• Third party accounts, such as grandparents or employer subsidies (see Other Ledgers
on page 16)
• Parents splitting a child’s charges
If one source is paying the entire amount, then the Percentage Multiplier is 100%.
Rate Types
Enter the Rate Type from your list of rates set up in Rate Masters.
Hour Type
If desired, enter the Hour Type, which allows your center to define different rates for
different billing situations. For example, if a child is not attending yet, you may want to set
up a different charge for holding the child’s spot in the classroom.
Typical hour types are:
• Regular (which is primarily used)
• Holding
• Day Off
• School’s Out
• Vacation
Hour types are set up and maintained in Office Administration Chapter 3 – Preferences &
Setup, Maintain Picklists (see page 325).
Credit
Categories
If appropriate, enter a Credit Category, that represents a reduction in the calculated tuition.
Examples of credit categories are:
• Sibling discounts
• Employee discounts
• Corporate discounts
Credit Categories are set up in Accounts Receivable, Maintain Categories, see page 97.
You can select up to 3 credit categories per rate type. Amounts can be in dollars or a
percentage of the amount. If you are using a percentage, make sure you place a percent
sign (%) after the number. For example:
If you enter 5, the system will deduct a flat fee of $5.00.
If your credits are cumulative or if you desire rounding of your discounts, see Office
Administration, Chapter 4 (Accounts Receivable), Rounding Discounts (page ).
On Posting Report
Version 7.0
May 2010
Calculated Tuition:
$200.00
Tuition Category
$200.00
Sibling Discount
$ 5.00
Sibling Discount
$ 5.00
Page 111
Using the Accounts Receivable Module
Credit
Categories,
continued
Comment
EZ-CARE2
If you enter 5%, then five percent of the calculated tuition will be deducted and credited
towards the chosen category.
On Posting Report
Calculated Tuition:
$200.00
Tuition Category
$200.00
Sibling Discount
5%
Sibling Discount
$ 10.00
You can also enter a Comment on the bottom of the screen as a reminder of
special circumstances with this account. This comment is for your purposes
only and is shown on the screen whenever you view this child’s Tuition tab.
It does not appear anywhere else and is not printed on any report.
Tuition Templates
You can use Tuition templates to enter several entries at once for a child. This saves time if
you are entering the same charges for many or all of your families. For example, a Preschool
tuition template might include entries for the Preschool part-time rate, extra hours rate, and
after-center-hours rate.
Setup
Setup is done in Office Administration, Chapter 4 (Accounts Receivable), Maintain Tuition
Templates. Here is an example of a Preschool Tuition template setup.
Using Tuition Templates
Tuition Templates are accessed from the Family drawer on the Tuition tab. Make sure you
have the correct Child record open on the Tuition tab. Click on the Templates button (see
above) to activate this feature. The Library of Saved Tuition Templates appears.
Page 112
Version 7.0
May 2010
Using the Accounts Receivable Module
EZ-CARE2
You have the option to apply or post tuition templates to any of the following:
•
the record from which you accessed the Library of Saved Tuition Templates
(current record)
•
all records in your system
•
records that you select through the Selection Editor, which you can access from
the Library of Saved Tuition Templates screen
Results
Here is an example of charges placed on the Tuition tab using the Tuition Template:
Version 7.0
May 2010
Page 113
Using the Accounts Receivable Module
EZ-CARE2
Applying a Tuition Template to the Current Record
You can apply a tuition template to only the record from which you accessed the Library of
Saved Tuition Templates.
X To apply a tuition template to the current record
1. Click on the tuition template you want to use.
2. In the Posting Criteria section, click on Current Record.
3. Click the Apply button. The tuition template is applied to the record.
Posting a Tuition Template to Selected Records
You can apply a tuition template to a group of records you select (for example, if you need
to assign a new tuition template to several existing families). This option requires you to
select records using an existing selection or a new one that you create.
X To post a tuition template to selected records
1. Click on the template you want to use.
2. In the Posting Criteria section, click on All or Selected Records.
3. Click on the Selection button
. The Library of Saved Selections appears.
4. You can use an existing selection or create a new one. For details on using
selections, see “Selections” on page 33. Click on the selection you want to use,
and click on OK. The Library of Saved Tuition Templates appears.
Page 114
Version 7.0
May 2010
Using the Accounts Receivable Module
EZ-CARE2
5. To see a report listing all the records that will be affected when you post the
tuition template, click on the Preview Pre-Post button. If you want to print a
listing of the affected records, click on the Print Pre-Post button.
6. Click on the Post button to post the template to the selected records.
Note: After you click on Post, you will be prompted to print the records affected by
the posting, even if you already printed it.
Posting a Tuition Template to All Records
You also have the option to post a tuition template to all records in your system.
X To post a tuition template to all records
1. Click on the template you want to use.
2. In the Posting Criteria section, click on All or Selected Records. Be sure that
the Selection field shows (None – all records).
3. Click on the Preview Pre-Post button to see a report listing all the records that
will be affected when you post the tuition template.
4. If you want to print a listing of the affected records, click on the Print Pre-Post
button.
5. Click on the Post button to post the template to all records.
Note: After you click on Post, you will be prompted to print the records affected by
the posting, even if you already printed it.
Removing the Last Tuition Template Posted to Multiple Records
If you’ve applied a tuition template to all or selected records in error, you can remove it from
those records. You can only remove the last ledger template that you posted.
Version 7.0
May 2010
Page 115
Using the Accounts Receivable Module
EZ-CARE2
X To remove the last tuition template posted to multiple records
1. In the Posting Criteria section, click on All or Selected Records.
2. Click on the Remove button. The Remove Template Posting dialog box
appears, listing the name of the tuition template you last applied and the date and
time on which it was applied. It also lists how many transactions were affected by
the template.
3. Click on the Remove button. The tuition template is removed, and you can now
apply or post a new template to the current record or multiple records (see the
previous sets of instructions for details).
Template Groups
Existing templates can be grouped together to combine several series of actions. With just a
few mouse clicks you can enter information on the Tuition, Schedule, and Ledger tabs. For
example, a Preschool Group Template can add a Ledger Template (for Registration Fees),
Tuition template(s), and the applicable schedule(s). See page 76 for details on using Template
Groups.
Posting Tuition
To automatically apply the charges (based on the rates set up on the Tuition tab) to all
families (or a selected group), run Post Tuition. This function is located on the A/R menu.
When selected, the Post Tuition screen appears.
Page 116
Version 7.0
May 2010
Using the Accounts Receivable Module
EZ-CARE2
Note: We recommend previewing (displaying) or printing a Pre-Post report which will show
you all the transactions that will result from the posting. This provides an opportunity
to identify any mistakes and correct them before transactions are posted to the
ledgers.
If there are any transactions that won’t post (for example, rates with missing categories or no
rate definition), then a preview showing exceptions will appear. You can choose to preview
this on your screen or print out the reports.
To set up the posting, choose the following items:
Billing Cycle
This selects which types of fees (rates) should be charged. Examples of billing
cycles are Weekly, Bi-weekly, and Monthly. These are set up in Maintain
Picklists in Office Administration (see page 316).
Attendance Dates
This defines the attendance period you wish to be considered for billing. Enter
the start and end dates for the attendance period being charged.
Ledger Date
The date that will appear on the ledger for these transactions. This could be the
date the charge is being applied or the “due” date. The system defaults to
today’s date.
Print Category
Summary in Tuition
Posting
Check this box to print a Summary page of posting amounts by category. The
Category Summary previews and prints after any Post or Pre-post reports.
Report Heading
Enter a heading to print on the top of the report, such as “Monthly Tuition Posting
- March.”
Selection
To post tuition only for specific records, use a Selection filter to define the criteria
of the records you want to post to (see page 33 for information on Selections).
Printer
Select or change your printer settings as necessary.
Viewing and Printing the Pre-Post Report
To run the Pre-Post report, select either Preview Pre-Post or Print Pre-Post at the bottom
of the Post Tuition screen, after you have made your selections for the posting.
As noted, this prints a pre-post report that may allow you to identify problems before
posting. We recommend you run the pre-post report before completing the Posting.
Posting Tuition Transactions
Click on Post when you are ready to post transactions to the ledgers.
Version 7.0
May 2010
Page 117
Using the Accounts Receivable Module
EZ-CARE2
Removing Tuition Entries
The Remove Tuition Entries screen allows you to purge tuition entries from the Tuition tab.
Excess amounts of outdated tuition entries can use up disk space and cause EZ-CARE2 to
perform slower.
Warning! MAKE A BACKUP OF YOUR CABINETS BEFORE REMOVING TUITION
ENTRIES! This operation is NOT reversible.
X To remove tuition entries
1. Open Office Administration, Chapter 4 (Accounts Receivable Setup), and select
Remove Tuition Entries. The Remove Tuition Entries screen appears.
2. Select one or more cabinets. Use the All button to select all cabinets, or the
Clear button to remove all check marks and restart selecting.
3. Enter a Date Range if you want to remove entries made during a specific period
of time.
4. Choose one or more Selection Criteria if you wish. Use the picklists to select
Hour Type, Rate Type, or Category. If you do not want to use any Selection
criteria, or want to remove one that is already selected, choose a null (blank)
from the top of the picklist.
5. If you want to combine using a Date Range with Selection Criteria, click on the
checkbox next to Use Date Range. Remember to enter a date range above.
6. Click OK to save your changes and close the present dialog box. Click Cancel to
close the dialog box and return to the previous screen WITHOUT saving any
changes.
Page 118
Version 7.0
May 2010
Using the Accounts Receivable Module
EZ-CARE2
Billing for Activities and Services
Entering Ledger Transactions Manually
You can also enter transactions manually onto the Ledger tab. Transactions entered
manually are usually for exceptional circumstances or one time fees. They are outside of the
normal agreement with parents and are not part of the normal posting process. Examples of
manual transactions are:
•
Returned Check Fees
•
Activity Fees
•
Transportation Fees
X To manually enter a ledger transaction
1. Open the Family drawer.
2. Using the Families picklist, find the family you want to enter charges for.
3. Click the Ledger tab.
4. Enter the date of the charge ("/" for today).
5. Choose the Category for the change from the picklist.
6. Enter a Comment, if needed.
7. Choose which Child the charge/credit is for.
8. Enter the Amount. (If the entry is a credit, the amount column will turn red,
signifying a negative amount). The balance automatically calculates.
9. When finished, click on the next row to add another charge, or go to another
tab.
Ledger Tab
The Ledger tab is where accounts receivable information is stored for each family. You can
enter transactions manually right here on this screen or make entries to the ledger by running
Group Postings, Cash Receipt Postings, and Ledger Templates.
The Ledger tab works in conjunction with the Family tab. There is one ledger for each
family, and transactions for all children from that family are combined into a single account
balance.
See the following sections for descriptions of each part of the Ledger tab.
Version 7.0
May 2010
Page 119
Using the Accounts Receivable Module
EZ-CARE2
Family
Ledger
The Family Ledger displays all transactions regardless of where they were entered,
including deposit transactions.
Balance
The Ledger Balance (located on the upper right of the tab for easy viewing) is the current
balance on this account as of the system date. This field can be used in reports and in EZViewer (see page 85). The balance always matches the balance of the last transaction in
the ledger.
YTD
Payments
The YTD Payments are the payments that have been received for this account during the
year. See “Accumulate YTD Payments” on page 95 for information on how EZ-CARE2
calculates YTD payments.
EZ-EFT
Billing
Information
Clicking on the EZ-EFT button allows you to set up Electronic Funds Transfer Billing
Information (see the EFT Manual for more information). The EZ-EFT module is optional. If
you did not purchase it, the button will not appear on the Ledger tab.
Print
Invoices
The Print Invoices button allows you to print an invoice for the current record. By default,
this button prints the Invoice Report or a modified version of that report named “Invoice
Button.” You can set up more than one “Invoice Button” report by simply including the
words “Invoice Button” in the title (for example, Day Center Invoice Button or Mary’s
Invoice Button) of a report when you name it. When you click the down-arrow next to the
Print Invoice button, you’ll see a list of any reports with “Invoice Button” in the name. To
select one of them, click its name.
Transaction Details
When you enter a transaction on the Ledger tab, complete the following information:
•
Date—enter the date of the transaction.
•
Category—choose the category you want to assign to this transaction (for
example, Payment, Session 1).
Page 120
Version 7.0
May 2010
EZ-CARE2
Using the Accounts Receivable Module
•
Comment—enter any additional information (for example, a check number) you
want to capture for the transaction.
•
Child—choose the child in the family the transaction applies to.
•
Amount—enter the amount of the transaction. If you want to make a memo
entry (an entry that isn’t a “real’ transaction), you can enter an amount of 0.00.
This allows you to capture information, such as a Comment, on the Ledger tab
without charging the family. For example, you may want to enter an amount of
0.00 for a field trip, activity, or other services that were provided at no charge to
the family.
Transaction Fields
Additional detail of individual transactions can be viewed in the fields on the far right of the
Ledger Tab, including:
Initials
Who posted (defaults to EZ2 without passwords)
Entry Program
For example, Ledger, Group, Template
Entry Date
Posting Date
Entry Time
Time of Posting
Batch #
Sequential System Batch #
Dep #
Deposit Number
Transaction #
Transaction Number
Since this information is not required in most cases, these columns are normally “closed” as
shown in the previous diagram. These fields are system-generated and cannot be edited.
Cash Receipts
You can also enter or print cash receipts quickly by clicking the Cash Receipts button. This
provides a shortcut to the C/R screen, where you can enter and post Cash Receipts, print
receipts, or print a Deposit Ticket.
On a multi-user system, this button displays the Library of Cash Receipts. This allows
several different users at your center to generate receipts at the same time by using their own
batch process.
The entering and processing of Cash Receipts is described in detail on page 142.
Notes
You can enter a message on the bottom of the screen as a reminder of special circumstances
with this account. This note can be viewed in EZ-Viewer or included in a Wizard report or
other customized reports. This note also appears on the bottom of the Cash Receipts screen
when you choose a family for which you want to enter a payment.
Version 7.0
May 2010
Page 121
Using the Accounts Receivable Module
EZ-CARE2
Setting a Date Filter for Ledger Entries
If you prefer to have your ledger display only transactions after or between certain dates, you
can set a date filter. This can be useful to improve performance if you maintain long
transaction histories with thousands of entries.
X To set a date filter
1. Right-click anywhere on the Ledger grid. The Grid Options dialog box appears.
2. Enter the From date and To date for the filter. If you just want entries to appear
after a certain date (for example, 1/1/09), you don’t need to enter a To date.
Note: For details on other grid options, see page 24.
3. Click the OK button. When you set a filter, a calendar icon appears in the Date
column on the grid to show you that you’re filtering the entries based on dates.
In addition, if you hover your mouse over anywhere in the date column, a field
tip shows you the dates you’re filtering for.
To clear a current date filter, click the Clear Date Filter and Show All button.
Charging Fees for Late Pickup
X To charge late pickup fees
1. Click on the A/R menu, and then click Rate Masters, or open Office
Administration, Chapter 4 - Accounts Receivable Setup.
2. Add a new rate called Late Pickup Fee.
3. Enter an Effective Date.
4. Select using Simple rate.
5. In the column Rate Based On, select the listing that indicates how you calculate
if someone is late (after the center is closed, after their contracted hours?).
Page 122
Version 7.0
May 2010
Using the Accounts Receivable Module
EZ-CARE2
6. Go through the rest of the wizard and enter the amount, rounding, or other
criteria. Click on Finish when you are done.
Handling Security Deposits
To handle security deposits most efficiently, review your Security Deposit category setups in
Accounts Receivable.
In Office Administration, open Chapter 4 (Accounts Receivable), and then select Maintain
Categories. Select the appropriate cabinet. We recommend that your security deposit
categories look something like this:
Category Name
Type
Rollup
Category
Security Deposit
Deposit
Sec Deposits
A/R*
Liability*
$0
Security Deposit Applied
Deposit
Sec Deposits
A/R*
Liability*
$0
Security Deposit Forfeit
Revenue Tuition
A/R*
Income*
$0
G/L Debit
Account
G/L Credit
Account
Default
Amt.
*Note: If you have not purchased the accounting modules, the G/L Debits & Credits will
not apply to you and you should leave them blank. If you have the accounting modules,
then apply your respective account #’s in these spaces (in place of A/R, Liability, and
Income shown in the example above).
Note:
For more details on setting up A/R categories, see page 97.
There are three circumstances that may present themselves when handling security deposits.
We will describe these circumstances and then illustrate how these transactions would appear
on the ledgers.
Scenario #1 – Applying a family’s Security Deposit to their account
balance:
Version 7.0
May 2010
Page 123
Using the Accounts Receivable Module
EZ-CARE2
The family in this case was aware that they only needed to pay $800 and the $200 security
deposit could be applied to the remaining balance.
Scenario #2 – Refunding a Security Deposit:
As you can see, the deposit ledger is the same as in scenario #1, but the primary ledger in
this case shows the payment in full and has an additional transaction for refunding the
security deposit.
Scenario #3 – Security Deposit is forfeited:
Setting Up Sibling Discounts
You can include a discount item in a ledger template or when the transaction is entered
directly onto the ledger.
On the Ledger tab, there are 2 columns that may be hidden, $ Unit and Quantity. If you do
not see these columns, they are probably between the Child column and the Amount
column. See page 22 for information on opening columns on a grid.
Page 124
Version 7.0
May 2010
Using the Accounts Receivable Module
EZ-CARE2
X To enter the discount directly on the ledger
1. Enter the Date, and then the A/R credit Category that you want to use.
2. Enter a Comment if desired and indicate which Child the discount is for.
3. Enter the tuition amount in the $ Unit column.
4. Enter the amount of the discount in the Quantity column. For example, enter
.15 for 15%. The amount of the discount is calculated for you and appears in red
in the amount column.
If you want to include a discount in a ledger template the steps are the same. Here is an
example showing a template containing a 10% sibling discount.
Discounts for other situations (such as early registration) are set up the same way.
Charging for the Difference between Contracted and Actual Times
X To charge the difference
1. Click on the A/R menu, and then click Rate Masters, or open Office
Administration, Chapter 4 - Accounts Receivable Setup.
2. Add a new rate called Extra Time or something applicable.
3. Enter an Effective Date.
4. Select using Simple rate.
5. In the column Rate Based On, select the listing that indicates how you calculate
if someone is late (after the center is closed, after their contracted hours?).
6. Go through the rest of the wizard and enter the amount, rounding or other
criteria. Click on Finish when you are done.
Handling Charges When a Child's Schedule Changes Mid-Billing
Cycle
There are several options: Whether the schedule changes are one time or permanent
determines what action you need to take.
•
Version 7.0
May 2010
If the schedule changes are one time only, enter a miscellaneous charge.
Page 125
Using the Accounts Receivable Module
EZ-CARE2
•
If the schedule changes are occasional, charge the difference between
contracted and actual.
•
If the schedule changes are permanent, enter a new line on Tuition tab, showing
effective date with new rate type.
Entering Other Ledger Transactions
The Other Ledgers drawer stores information and transactions for payers other than the
primary parent (for example, subsidizers, scholarships, or other family members making
payments). Each Other Ledger contains transactions for all children for whom the other
payer is responsible. This enables you to send one invoice to the other payer listing all
transactions for all children for whom the payer is responsible.
Records set up in Other Ledgers become available in the Ledger tabs as well as in the Enter
Cash Receipts function.
With the exception of a unique name and address for this ledger, the setup is basically the
same as the Ledger tab in the family drawer. Refer to the “Entering Ledger Transactions
Manually” section beginning on page Error! Bookmark not defined. for more detailed
information on the Ledger tab.
Third party accounts are added by opening the Other Ledgers drawer and clicking the Add
Enter the name, address, and contact information.
New button.
Enter the ZIP code to automatically enter the City and State (see page Error! Bookmark
not defined. for more information on City, State, and ZIP fields).
If you need to edit the name of an existing Ledger, click the edit button
the name field to type in any changes.
Page 126
and then click on
Version 7.0
May 2010
Using the Accounts Receivable Module
EZ-CARE2
Ledger Templates
Use ledger templates to enter several transactions for a family at once. This saves time if you
are entering the same transactions for many or all of your families. An example would be to
set up a template for Registration Fees.
Setting Up Ledger Templates
You can set up ledger templates through Office Administration, Chapter 4 (Accounts
Receivable), Maintain Ledger Templates (see page 100). Here is an example of a ledger
template setup:
For information on how to set up ledger templates, see page 100.
Using Ledger Templates
Ledger templates are accessed from the Family drawer on the Family or Ledger tabs. Make
sure you have selected the correct Family record. Click on the Templates button (
) to
activate this feature. The Library of Saved Ledger Templates appears.
You have the option to apply or post ledger templates to any of the following:
•
Version 7.0
May 2010
the record from which you accessed the Library of Saved Ledger Templates
(current record)
Page 127
Using the Accounts Receivable Module
EZ-CARE2
•
all records in your system
•
records that you select through the Selection Editor, which you can access from
the Library of Saved Ledger Templates screen
Results
Here is an example of transactions placed on the Ledger tab using a ledger template:
Applying a Ledger Template to the Current Record
You can apply a ledger template to only the record from which you accessed the Library of
Saved Ledger Templates.
X To apply a ledger template to the current record
1. Click the ledger template you want to use.
2. In the Posting Criteria section, select Current Record.
3. Click the Apply button. The ledger template is applied to the record.
Posting a Ledger Template to Selected Records
You can apply a ledger template to a group of records you select. This option requires you to
select records using an existing selection or a new one that you create.
X To post a ledger template to selected records
1. Click the template you want to use.
2. In the Posting Criteria section, click All or Selected Records.
3. In the Posting Criteria section, click the Selection button
. The Library of
Saved Selections appears.
Page 128
Version 7.0
May 2010
Using the Accounts Receivable Module
EZ-CARE2
4. You can use an existing selection or create a new one. If you don’t see the
selection you want to use but you have it in the system, click All Selections in
the Show Selection section. For details on using selections, see “Selections” on
page 33. Click the selection you want to use, and click OK. The Library of
Saved Ledger Templates appears.
5. To see a report listing all the records that will be affected when you post the
ledger template, click the Preview Pre-Post button.
6. If you want to print a listing of the affected records, click the Print Pre-Post
button.
7. Click the Post button to post the template to the selected records.
Note: After you click Post, you will be prompted to print the records affected by the
posting, even if you already printed it.
Posting a Ledger Template to All Records
You also have the option to post a ledger template to all records in your system.
Version 7.0
May 2010
Page 129
Using the Accounts Receivable Module
EZ-CARE2
X To post a ledger template to all records
1. Click the template you want to use.
2. In the Apply/Post Template to section, click All or Selected Records. Be sure
that the Selection field shows (None – all records).
3. In the Posting Criteria section, click the Preview Pre-Post button to see a
report listing all the records that will be affected when you post the ledger
template.
4. If you want to print a listing of the affected records, click the Print Pre-Post
button.
5. Click the Post button to post the template to all records.
Note: After you click on Post, you will be prompted to print the records affected by the
posting, even if you already printed it.
Removing the Last Ledger Template Posted to Multiple Records
If you’ve applied a ledger template to all or selected records, you can remove it from those
records. You can only remove the last ledger template that you posted.
X To remove the last ledger template posted to multiple records
1. In the Posting Criteria section, click All or Selected Records.
2. Click the Remove button. The Remove Template Posting dialog box appears,
listing the name of the ledger template you last applied and the date and time on
which it was applied. It also lists how many transactions were affected by the
template.
3. Click the Remove button. A message appears, asking if you’re sure you want to
remove the postings.
4. Click Yes. The ledger template is removed, and you can now apply or post a new
template to the current record or multiple records (see the previous sets of
instructions for details).
Page 130
Version 7.0
May 2010
EZ-CARE2
Using the Accounts Receivable Module
Template Groups
If you want to make postings or entries to several tabs at once, you can put several existing
templates together in a Template Group. Then, by easily choosing one Template Group
from the library, you can enter information on the Ledger and Sessions tabs.
For example, you can create a Template Group called Complete Setup for all Sessions that can
add a Ledger Template (for tuition charges and registration fees) and a Session Template (to
assign the child to all sessions).
You can also combine as many templates from just one category (Ledger or Sessions) as you
need.
Setting Up Template Groups
You can set up Template Groups, see Office Administration, Chapter 3 (Preferences and
Setup), Maintain Template Groups.
In this example, the template group contains the Charges for Sessions 1,2,3,4 and Sessions
1,2,3,4-Juniors templates. The selected Template Type to Add is Ledger, so all the Ledger
templates appear in the Available Templates window. Right now the Sessions 1 and 2 template
is selected. If you were to click on the down-arrow button to the right of the Available
Templates window, the Sessions 1 and 2 template would also be added to this group.
Using Template Groups
You can access Template Groups directly from the Child tab or other tabs that support this
feature – just click on the Templates icon, and then select the Template Groups radio
button at the bottom left of the Library of Saved Templates.
Version 7.0
May 2010
Page 131
Using the Accounts Receivable Module
EZ-CARE2
When you select the Template Group, several templates are applied at the same time and
entries are made on one or more tabs. The diagrams below illustrate how selecting a
Template Group can make entries on the Ledger and Sessions tabs. All entries on these grids
were placed on the tabs using the template highlighted in the previous graphic:
Page 132
Version 7.0
May 2010
Using the Accounts Receivable Module
EZ-CARE2
You have the option to apply or post group templates to any of the following:
•
the record from which you accessed the group templates (current record)
•
all records in your system
•
records that you select through the Selection Editor, which you can access from
the group templates screen
Note: In order to apply or post group templates, you must have the ability to add records to
both the Sessions and Ledger tabs.
Applying a Group Template to the Current Record
You have the option to apply a group template to only the record from which you accessed
the Library of Saved Templates.
X To apply a group template to the current record
1. Click on the group template you want to use.
2. In the Apply/Post Template to section, click on Current Record.
3. Click the Apply button. The group template is applied to the current record.
Posting a Group Template to Selected Records
You can apply a group template to a group of records you select. For example, you might
want to select all 7th grade girls and post a session of Girls/Flowers and ledger entries for
tuition and activity fees. This option requires you to select records using an existing selection
or a new one that you create.
X To post a group template to selected records
1. Click on the template you want to use.
2. In the Apply/Post template to section, click on All or Selected Records.
3. In the Posting Criteria section, click on the Selection button
. The Library
of Saved Selections appears.
4. You can use an existing selection or create a new one. For details on using
selections, see “Selections” on page 33. Click on the selection you want to use,
and click on OK. The Library of Saved Templates appears.
Version 7.0
May 2010
Page 133
Using the Accounts Receivable Module
EZ-CARE2
5. To see a report listing all the records that will be affected when you post the
group template, click on the Preview Pre-Post button.
6. If you want to print a listing of the affected records, click on the Print Pre-Post
button.
7. Click on the Post button to post the template to the selected records.
Note: After you click on Post, you will be prompted to print the records affected by the
posting, even if you already printed it.
Posting a Group Template to All Records
You also have the option to post a group template to all records in your system.
X To post a group template to all records
1. Click on the template you want to use.
2. In the Apply/Post template to section, click on All or Selected Records. Be
sure that the Selection field shows (None – all records).
Page 134
Version 7.0
May 2010
Using the Accounts Receivable Module
EZ-CARE2
3. In the Posting Criteria section, click on the Preview Pre-Post button to see a
report listing all the records that will be affected when you post the group
template.
4. If you want to print a listing of the affected records, click on the Print Pre-Post
button.
5. Click on the Post button to post the template to all records.
Note: After you click on Post, you will be prompted to print the records affected by the
posting, even if you already printed it.
Removing the Last Group Template Posted to Multiple Records
If you’ve applied a group template to all or selected records, you can remove it from those
records. You can only remove the last template that you posted.
X To remove the last group template posted to multiple records
1. In the Posting Criteria section, click on All or Selected Records.
2. Click on the Remove button. The Remove Template Posting dialog box
appears, listing the name of the group template you last applied and the date and
time on which it was applied. It also lists how many transactions were affected by
the template.
3. Click on the Remove button. The transactions previously posted are removed,
and you can now apply or post a new template to the current record or multiple
records (see the previous sets of instructions for details).
Group Posting
To apply a charge or credit to multiple accounts at one time, use Group Posting. You can post
a fixed amount or an amount from a field in the database (from the Family or Child tab).
Group Posting is commonly used for activity fees, registration charges, or late payment
charges.
Group Posting allows you to charge the same transaction to a group of children or families.
The amount can either be fixed (the same for everyone), an amount that is contained in a
field in your database, or even a percentage of a database field (such as current balance). As
Version 7.0
May 2010
Page 135
Using the Accounts Receivable Module
EZ-CARE2
with other functions throughout the system you can select the accounts based on virtually
any criteria.
X To access group posting
1. From the A/R menu, click
Group Posting. The Library
of Saved Group Postings
appears.
The Group Postings Library enables you to save your settings for a Group Posting (for
example, Selection, Printer, Status) and use them repeatedly without needing to re-enter
them.
Creating Group Postings
X To create a new group posting
1. From the A/R menu, click Group Posting. The Library of Saved Group
Postings appears.
2. From the Library of Saved Group Postings, click the New button. The Group
Posting screen appears.
3. In the Posting field, change the default name of New Group Posting to a name
that describes the purpose of the group posting (for example, Registration Fees).
4. In the Post Per section, choose to what charges should be applied. You can
choose Family, Child, or Other Ledger. If you choose Family or Other Ledger,
charges (for example, late fees) will be applied once. If you choose Child, charges
(for example, activity fees) are applied for each child; so if there are multiple
children in a family, there will be multiple charges for this posting. After you
make your choice, a message appears, telling you that you can’t change your
selection in the Post Per section and asking if you want to continue.
5. Click Yes.
Page 136
Version 7.0
May 2010
Using the Accounts Receivable Module
EZ-CARE2
6. To define the transactions to be posted, click the Edit button
next to the
Posting field. The Define Group Posting Entries dialog box appears.
7. For each transaction you want to post, define the following details:
•
Category: the A/R category to be used for the transaction.
•
Get Comment: you can include an additional comment to appear with
•
Comment: if you chose FIXED COMM in the Get Comment field,
•
Get Amount: you have two options for defining the amount for the
each transaction. If you want to enter a comment for the transaction (for
example, field trip), choose FIXED COMM. If you want to use a
comment that pulls from a database field in your system, choose DATA
FIELD.
enter the comment you want to include for the transaction. If you chose
DATA FIELD, choose the data field you want to use as a comment
from the picklist.
transaction. If you want to enter the amount for the transaction, choose
FIXED AMOUNT. If you want to use an amount that pulls from a
database field in your system (for example, Ledger Balance), choose
DATA FIELD.
•
Amount: if you chose FIXED AMOUNT in the Get Amount field,
•
% Multiplier: if you chose a Data Field for the Amount, you have the
enter the amount you want to charge for the transaction. If you chose
DATA FIELD, choose the decimal numeric data field you want to use
as the amount from the picklist.
option to apply a percentage to that value. For example, if you chose
Ledger Balance as the Data Field and you’re defining a late payment fee
charge, you can specify 1.00 in the % Multiplier column—this will create
a charge that is 1% of the Ledger Balance. For most group postings, you
don’t need a multiplier. If you don’t define a multiplier, the column
displays 100.00.
8. Each group posting can have more than one transaction, so repeat step 7 as
necessary until you’ve defined all the transactions. When you’re finished, click the
Done button. The Group Posting screen appears again.
Version 7.0
May 2010
Page 137
Using the Accounts Receivable Module
EZ-CARE2
9. To choose a selection, so you only post for specific records, click the Selection
button
, choose the selection you want to use, and then click OK. For more
details on selections, see page 33.
10. To choose or change your printer for the posting report, click the Printer button
, choose the printer you want to use, and click OK.
11. In the Status section, choose which statuses you want this posting to be for. You
can choose Active, Inactive, or Remove; typically, you’ll only choose Active.
12. When you’re done defining the group posting, click the Done button.
Editing Group Postings
If you want to change the transactions for a group posting, you can edit the group posting.
X To edit a group posting
1. Click the Edit button
.
2. Make the necessary changes to the transactions in the posting, and then click the
Done button.
3. Make the necessary changes to the Selection, Printer, or Status, and then click the
Done button.
Other Group Posting Changes
To Duplicate, Delete, or Rename a group post, select it from the library and click on the
appropriate button.
Running a Group Post
When you’re ready to post the transactions that you defined for a group posting, you can run
it.
X To run a group post
1. From the A/R menu, click Group Posting. The Library of Saved Group
Postings screen appears.
2. Select the posting you want to run, and click the Post button. The Group
Posting screen appears.
3. In the Billing Options section, enter the following information:
•
Ledger Date: enter the date you want to appear for this transaction on
the Ledger tab.
•
Rpt. Heading: enter the heading you want to appear on the posting
report.
4. Make any selections for Status, Selection, and Printer.
5. To preview the records that will get transactions posted, click the Preview Pre-
Post button.
Page 138
Version 7.0
May 2010
Using the Accounts Receivable Module
EZ-CARE2
6. To print the records that will get transactions posted, click the Print Pre-Post
button.
Note: We recommend running a Pre-Post report, which will show you all the
transactions that will result from the posting. This provides an opportunity
to identify any mistakes and correct them before transactions are posted
to the ledgers.
7. If you want to print a summary page of posting amounts by A/R category, click
the Print Category Summary check box. This will print after any post or prepost reports.
8. When you are satisfied with the results of the pre-post, click the Post button.
This posts the transactions to the ledger.
Processing Cancellations
“If a family’s account has been charged a fee they have elected to cancel, how do I process
this?”
Before you can begin to process a refund, you must have at least one Cancellation category
defined in your list of Accounts Receivable (A/R) categories. Moreover, it is recommended
you consider having one Cancellation category per revenue category to which this may apply
(for example, “Tuition Cancellation” or “Activity Cancellation”). This will provide better
detail on your A/R reports.
X To process the cancellation
1. Double-click Office Administration, double-click Chapter 4 (Accounts
Receivable), and then double-click Maintain Categories. The Maintain
Categories dialog box appears.
2. Double-click the cabinet that contains the fee you want to process.
3. Select the Categories tab.
4. Create the Cancellation category or categories. The Type must be designated as
a Credit. The Rollup Category can be according to your preference; however, it
should match whatever revenue is being reversed.
5. On the Family tab, enter a transaction using the Cancellation category that
matches the revenue transaction you wish to off-set. The cancellation category
should include the name of the same revenue category you used for the initial
transaction (for example “Tuition Cancellation” or “Activity Cancellation”).
Version 7.0
May 2010
Page 139
Using the Accounts Receivable Module
EZ-CARE2
6. In the Comment column, enter a suitable comment such as “withdrew” or
“removed.”
7. Enter the dollar Amount without using a negative sign because the category is
already defined as a Credit type.
That’s all that needs to be done unless they have paid you in part or in full for this fee. In
this case, refer to “Handling Refunds.”
Handling Refunds
“How do I process a refund to a parent and produce a refund check on an amount they have
already paid?”
This situation requires you to use the Family Ledger tab. If you have purchased the
SofterWare Accounting module (General Ledger and Accounts Payable), you will use this as
well. If you have not purchased the module, skip over any references to it in the procedure
that follows (inside the gray boxes).
1. General Ledger Setup
To prepare for refund transactions, make sure your General Ledger has a Refunds Payable
account set up, which is a Liability account. Jot down the account number to use later.
2. Office Administration Setup
A Refund category is used when a family prefers to have money paid back to them instead
of applying it to other fees they may have or accrue. If this category is not established, you
need to set it up. Go to Office Administration, open Chapter 4 (Accounts Receivable), and doubleclick Maintain Categories. Select the appropriate cabinet and create a Refund category in the
Categories tab. If you do NOT have the SofterWare Accounting module, you may leave
these blank.
•
The Type of account is Revenue.
•
The Rollup Category can be your preference, but we recommend you set up a
separate rollup category titled something like Refunds.
•
For the G/L Debit Account, enter the number for the Accounts Receivable
account.
•
For the G/L Credit Account, enter the number of the Refunds Payable account.
•
The Default Amount will remain $0.00.
Page 140
Version 7.0
May 2010
Using the Accounts Receivable Module
EZ-CARE2
3. Processing the Refund
On the Ledger tab for the family you’re giving the refund to, enter a transaction using a
Refund category:
•
In the Comment column, enter a comment that is best suited such as
“cancellation” or “overpayment.”
•
The dollar amount is entered as a positive because your goal here is to reverse
out their payment either in full or in part.
•
If they are to pay a penalty or wish to apply a portion of their payment to
another fee transaction, then you may need to add another “charge” transaction
to their ledger.
•
In the following graphic, you would do one of the following:
}
Do nothing if the appropriate fee transaction has already been applied to
their ledger or add the fee transaction immediately so that they do not
continue to show a credit balance.
}
Apply a transaction to show a penalty. An example of this would be if you
were holding a “spot” for their child and you will not likely fill this void
before center begins. In this case, you would need to use a revenue category
to handle this such as “Cancellation Fee” or “Administrative Fees.”
If this doesn’t seem intuitively correct, think of it as “charging” them for the refund check
you’re sending them.
If you do NOT have the Accounts Payable module, you will need to create a check from your checkbook, and
you are done! If you do have the Accounts Payable module, proceed to the next step.
Use the Accounts Payable system to produce a check to the parent.
1. First, set up the Parent as a vendor.
2. Process the transaction as normal except the Debit will go to the Refunds
Payable account as a negative income. This will zero out the Refunds Payable
account.
All you have to do now is give the check to the parent, and you are done!
Version 7.0
May 2010
Page 141
Using the Accounts Receivable Module
EZ-CARE2
Handling Cash Receipts
After you receive payments made by parents or other subsidizers, you’ll process these
payments using the Cash Receipts feature in EZ-CARE2.
X To access Cash Receipts
1. From the A/R menu, click Enter Cash Receipts. You can also click on the
Cash Receipts button from the Ledger Tab.
Next, if you are on a Network and have a multi-user license the Library of
Saved Cash Receipts screen opens. This is where you create and save separate
batches for entering cash receipts, so that you can do so from different
workstations simultaneously.
2. Click on New and then enter your name in the Description box. We suggest
that you just enter your name and the date as the description; you can also enter
anything else that helps you to identify the batch.
3. Click OK. The Cash Receipts screen appears.
This screen allows you to:
•
Enter New Payments—enter the transaction information into the Cash
•
Modify Existing Transactions—make changes to transactions already entered
•
Hide Ledger—see the Additional Hints section on page 151 for suggestions on
Page 142
Receipts grid.
that may need to be corrected or deleted.
when to use the Hide Ledger button.
Version 7.0
May 2010
Using the Accounts Receivable Module
EZ-CARE2
•
Email Receipt—select the receipts you want to email and click the Email
•
Produce a Receipt—select the gray box to the left of the row and click on
•
Post Cash Receipts to the Ledger—When you have finished working with
receipts, click on Post C/R. Verify your totals at the bottom of the ledger before
posting.
Receipt button. See page 145 for details.
Print Receipt. Receipts can be printed individually or in a batch (see page 148).
If you have a multi-user license, once you have Posted your Cash Receipts, your batch will
no longer appear in the Library of Saved Cash Receipts.
Enter New Payments
Enter the transaction information into the cash receipts grid.
Keep the following hints in mind when you’re entering new payments:
•
The Date, Name, Payment Type, Amount, and Category are all required
fields.
•
The Payment Type may be edited in Office Administration, Chapter 3 – Preferences
& Setup, Maintain Picklists (see page 316 for more information).
•
If you need to create an additional Category, go to Office Administration, Chapter 4
(Accounts Receivable), Maintain Categories (see page 97 for more information).
•
The following information is automatically entered for you on the Cash Receipts
screen:
•
The current date is automatically entered into the Date field in the empty
row that is provided for data entry. As new rows are added, their dates
are automatically filled in based on the date in the previous row.
•
When a ledger name is chosen for a new row, the Amount column is
filled in with the current balance from the Family Ledger.
•
By default, the Payment Type and Category for a new row are set to
match the settings in the previous row.
X To enter new payments
1. First enter the date of the payment, as you would like it to show on the ledger.
You may type a forward slash ( / ) and press the ENTER key for today’s date.
Use the Tab or ENTER key to move from field to field.
2. Enter the account the payment should be posted to. You can choose the account
in one of the following ways:
Version 7.0
May 2010
•
Type in part of the name until the system displays the name you want.
•
Double-click on the name field, and a list of accounts appears. Click on
the name you wish to select or use the UP-ARROW and DOWN-
Page 143
Using the Accounts Receivable Module
EZ-CARE2
ARROW keys to go from one record to another. You can also press
CTRL+ENTER to see a list of accounts.
3. Pick the Payment Type, and enter the Amount, which will default to the
balance that is owed. You can change this amount if it is different. Pick the
Category (all payment type categories will be displayed), and enter the Check#
and/or Comment.
4. After the line has been completed, a preview of what the ledger will look like
with the payment posted displays at the bottom of the screen (unless you have
hidden the ledger in order to view more Cash Receipt transactions). The ledger
view on the bottom of the screen is only a preview, and the batch of Cash
Receipts will not be posted until you click on Post C/R.
5. If you are finished entering transactions but NOT ready to post, click on the
Close button
to save your work. The transactions are saved and you can
continue entering transactions or posting at a later time.
Hints on Entering New Payments
•
The Date, Name, Payment Type, Amount, and Category are all required
fields.
•
Most organizations just apply the payment to a family’s account, but cash
receipts does allow you to identify a payment with a specific child through the
Child column. If you do not see the Child column displayed, use the scroll bar
and go to the far right of the screen. The last column will display a slightly
thicker line. This indicates that the Child column (and possibly others) is hidden.
To open the Child column, click on the thick line in the header, holding down
the mouse button and drag the line to the right. Repeat as necessary until the
Child column appears. For more details on working with columns in grids, see
page 22.
Page 144
Version 7.0
May 2010
Using the Accounts Receivable Module
EZ-CARE2
•
Once you open the Child column, it may be helpful to move it over next to the
Name column for the account. For details on how to do this, see page 23. You
can then use the Child column to either divide a payment received among
different children or identify the family (account) from just the child’s name. To
do this, select the child’s name using any of the methods described above for
selecting a family (account) name. Once you make your selection, the family
name associated with that child should display and payments made will be
entered onto that family’s ledger. Check to make sure the correct family is
displayed, especially if you have more than one child with the same name.
•
The Payment Type may be edited in Office Administration, Chapter 3 –
Preferences & Setup, Maintain Picklists.
•
Additional Categories for Category may be entered in Office Administration,
Chapter 4 – Accounts Receivable, Maintain Categories.
Additional Detail on Transactions
Additional detail of individual transactions posted through Cash Receipts can be viewed in
the fields on the far right of the Ledger tab, including:
Initials
Who posted (defaults to EZ2 if you don’t use passwords in your system)
Entry Program CASHREC
Entry Date
Posting Date
Entry Time
Time of Posting
Batch #
Sequential System Batch #
Dep #
Deposit Number
Because this information is not required in most cases, these columns are normally “closed”
as shown in the previous diagram.
Modify Existing Transactions
You can make changes to or delete transactions previously entered. The line currently being
modified is highlighted blue. Once Cash Receipts have been posted, these transactions
cannot be modified.
Handling Credit Card Payments with Insta-Charge
The optional Insta-Charge module allows you to process one-time credit card payments
from the Cash Receipts screen.
Version 7.0
May 2010
Page 145
Using the Accounts Receivable Module
EZ-CARE2
X To process credit card payments from the Cash Receipts screen
1. Enter the new payment in the Cash Receipts screen:
a. Select/enter the Date and Name.
b. Select Visa or MC as the Payment Type.
c. Enter the Amount for the payment.
d. Select Insta-Charge Payment as the Category.
2. Click the Insta-Charge button.
3. Complete the Insta-Charge transaction in the usual way. The Date, Name and
Amount will be entered for you on the Insta-Charge form. See the Transaction
Processing Guide for details.
Emailing Receipts
EZ-CARE2 allows you to email receipts to parents, making it quick and easy to notify them
that you received and processed their payments. To test the Email Receipts feature, enter
your email address on a family record with a balance. Then, choose to send a receipt for only
this account. This gives you the opportunity to view how the emailed receipt will look. When
you’re done testing, remember to change the email address back.
Important! You must have a report called “Email Receipt Button” in order to use this feature.
For more information, see page 212.
X To email receipts
1. In the Transactions section, click the M column for the receipts you want to
email.
2. Click the Email Receipt button. The Email Options screen appears.
Page 146
Version 7.0
May 2010
Using the Accounts Receivable Module
EZ-CARE2
3. If you have multiple email addresses in your system for families, you can choose
which email address you want to use for the message from the Family Ledgers
and the Other Ledgers picklists.
4. If you want to save copies of the receipts you email, click the Save a copy of
each emailed report to this folder check box, then click the
button,
navigate to the location you want to save the receipts, and then click the Select
button. If you’re sending many receipts and you don’t want to take up a lot of
space on your computer with copies of receipts, you may not want to do this. If
you want to keep a record of receipts, you may want to select this option.
5. In the Email Subject field, enter the subject.
6. In the Additional email message text field, enter the message you want to
include in the email message.
7. Click the OK button. The following graphic shows a sample emailed receipt.
Version 7.0
May 2010
Page 147
Using the Accounts Receivable Module
EZ-CARE2
Printing Receipts
You can easily print receipts for your families from EZ-CARE2. You have the option to
print individual receipts for families or print a batch of receipts. See the following sections
for details on each.
Producing Individual Receipts
You may print a single receipt, several receipts, or all receipts from the Cash Receipts screen.
X To produce an individual receipt
1. From the Cash Receipts screen, click the gray box to the left of the transaction
rows you want to print receipts for. Selected transactions are indicated with a red
checkmark.
2. Click the Print Receipt button. The Print dialog box appears.
3. From the Name picklist, choose the printer you want to use, and then click OK.
Receipts for the selected records are printed.
Producing a Batch of Receipts
Receipts can also be printed from the A/R menu.
This method is recommended for:
•
Page 148
Printing a large batch at one time
Version 7.0
May 2010
Using the Accounts Receivable Module
EZ-CARE2
•
Printing 3 receipts to a page
•
Printing selected receipts – for example, a selection of only those accounts who have
requested receipts (which can be set up using a check box on the Family Tab)
•
Printing receipts for Deposit # or Date Range.
X To print receipts
1. From the A/R menu, click A/R Reports. The Report Library appears.
2. From the Report List, double-click Payment Receipts.
3. Choose any of the following options to print receipts:
•
Include Ledgers: choose to include Family Ledgers and/or Other
Ledgers
•
Ledgers: choose to print receipts for All families or just One. If you
choose One, select the family you want to print for from the picklist.
•
Include for: choose whether to print receipts by Date Range, Deposit
Numbers, or Receipt Numbers. In the Starting and Ending fields,
enter the date range or number range.
4. To print more than one receipt per page, click the Print Multiple Receipts per
Page check box.
5. In the Message to Print section, enter a message you want to include on the
receipt.
Note: For more details on this report, see page 212.
Post Cash Receipts
Note: To work with A/R posting functions, you must close all drawers in the file cabinet.
X To post cash receipts
1. When you have finished entering all the payments, click the Post C/R button.
The Post C/R dialog box appears.
Version 7.0
May 2010
Page 149
Using the Accounts Receivable Module
EZ-CARE2
2. In the Posting Date field, enter the date of the bank deposit.
3. Click the Preview Pre-Post button to verify your totals. The following report
previews on the screen:
4. Close the preview with the Close Preview button (the door).
5. If you only want to print the preview and not post it at this time, or if you want a
record of what transactions you are posting, click the Print Pre-Post button.
Choose the printer, and click OK.
6. When you are ready to post, click the Post button. A message appears,
summarizing your posting. It shows the posting date, the number of cash
receipts to be posted, and the amount to be posted. Click Yes.
7. Another message appears, detailing what was posted and asking if you want to
print the Posting Report.
Page 150
Version 7.0
May 2010
Using the Accounts Receivable Module
EZ-CARE2
8. If you click Yes, both a Posting report and a Deposit slip will be printed.
Additional Hints on Posting
•
The Date Range refers to the Posting Date/Deposit Date that appeared on
the top of the Posting Report when the original posting was made.
•
If you prefer NOT to see each ledger as you are processing the payments, you
may click on the Hide Ledger button so you will only see the line items. This
gives you an ability to see more C/R transactions as you enter them, even though
you won’t be able to concurrently see their effect on corresponding ledgers. See
the following illustration for an example.
•
You may reprint any Posting report or Deposit slip. From the A/R menu, click
A/R Reports. From the A/R report list, choose Deposit Report.
Removing Posting (Group, C/R, EZ-EFT)
If you’ve incorrectly posted some transactions, you can remove them so they are not
processed
X To remove a posting
1. From the A/R menu, click one of the following:
•
Version 7.0
May 2010
Remove Group Posting
Page 151
Using the Accounts Receivable Module
EZ-CARE2
•
Remove C/R Posting
•
Remove EZ-EFT Posting
2. Then, click in the Batch column of the row representing the posting you want
removed.
3. Click the Remove button. A message appears, showing the information about
the batch or batches selected.
4. Click Yes to remove the posting, or click No to retain the posting and return to
the previous screen. If you’ve chosen to remove, a message appears, confirming
the removal.
5. Click OK. When a remove is complete, a date is placed in the Removed column.
6. When you are finished with this option, click the Done button.
Setting Up Customized Cash Receipts
You can print a standard cash receipt for the current record by clicking on the Print
Receipt button on the Cash Receipts dialog box.
X To set up a customized cash receipt and have it print for the current record
1. Click on the Reports button
. The Report Library appears.
2. From the Category picklist, select Accounts Receivable.
3. Select the Payment Receipts report.
4. Click the Print button.
5. Click the Save As button. When prompted for the name, enter Receipt Button.
6. You now have a Customized report. You can make whatever additional changes
you want using the Report Designer (see Custom Report Writer Guide for details).
For example, if you are applying payments to individual children, you can add the
child’s name to the receipt.
Page 152
Version 7.0
May 2010
Using the Accounts Receivable Module
EZ-CARE2
Note: If you have already created a custom receipt, you can just rename it
Receipt Button.
7. When you are done modifying the report and close the Report Library, open
Family drawer and go to the Ledger tab for one of your families. The next time
you use the Enter Cash Receipt feature and click on Print Receipt, your custom
receipt will print for the current record.
Sending Out Invoices
You have the option to send out invoices by printing and mailing them, or by email.
Printing Invoices
There are two ways to print Invoices from EZ-CARE2.
Printing as a Batch
X To print invoices as a batch
1. Click the Reports button
. The Report Library appears.
2. From the Category picklist, choose Accounts Receivable.
3. From the Report List, double-click Invoices (see page 205 for more
information). You can choose any invoice format you want and specify which
records to print.
Note: You also have the option to email invoices instead of printing them. With this option,
you can save a copy of the invoice to your hard drive. For more information, see page
154.
Individually From the Ledger Tab
You may print individual invoices for the current record from the Ledger tab by clicking the
Print Invoice button. By default, this button prints the Invoice Report or a modified
version of that report named “Invoice Button.” You can set up more than one “Invoice
Button” report by simply including the words “Invoice Button” in the title (for example, Day
Center Invoice Button or Mary’s Invoice Button) of a report when you name it. When you click the
down-arrow next to the Print Invoice button, you’ll see a list of any reports with “Invoice
Button” in the name. To select one of them, click its name.
For details on how to create a customized invoice, see page 155.
Version 7.0
May 2010
Page 153
Using the Accounts Receivable Module
EZ-CARE2
Emailing Invoices
In addition to printing invoices, you have the option to email them instead; EZ-CARE2
supports Outlook Express (preferred program) or Outlook for this option. For details on
how to set up your system to use Outlook Express or Outlook for EZ-CARE2 emails, see
page 367.
Note: To test the Email Invoices feature, enter your email address on a family record with a
balance. Then, choose to send an invoice for only this account. This gives you the
opportunity to view how the emailed invoice will look. When you’re done testing,
remember to change the email address back.
X To email invoices
1. Click the Reports button
. The Report Library appears.
2. From the Category picklist, choose Accounts Receivable.
3. From the Report List, double-click Invoices (see page 205 for more
information).
4. Make the selections for which information you want to include in the invoice.
5. In the Send To line, click the Email option.
6. In the Format line, click either HTML, which includes the invoice in the body
of an email as HTML, or PDF, which attaches a PDF of the invoice to the
email. When you choose to email invoices, the Print button changes to Email.
7. Click the Email button. The E-mail Options screen appears.
8. If you have multiple email addresses in your system for families, choose which
email address you want to use for the message from the Family/Ledger Email
Fields and the Other Ledger Email Fields.
Page 154
Version 7.0
May 2010
Using the Accounts Receivable Module
EZ-CARE2
9. Define the Email Subject and the Additional email message text for the
email.
10. If you want to save a copy of every invoice you send on your hard drive, click the
Save a copy of each emailed invoice check box, and then enter the path where
you want to save them. You may not want to do this if you’re sending many
invoices.
Note: The Include a Click-to-Pay link to allow online payments check box
provides a link in the email that allows parents to pay their bills online.
This option requires some setup. See the next section for more
information.
11. Click the OK button. Your email program emails invoices to the parents you
selected. See the next section for information on how parents will use this email
message to pay their bills online.
Printing Customized Invoices
You have the option to set up one or more customized invoices to print instantly from the
Ledger tab by clicking the Print Invoice button. By default, the Print Invoice button prints
the Invoice Report or a modified version of that report named “Invoice Button.” You can
set up more than one “Invoice Button” report by simply including the words “Invoice
Button” in the title (for example, Day Center Invoice Button or Mary’s Invoice Button) of a report
when you name it. When you click the down-arrow next to the Print Invoice button, you’ll
see a list of any reports with “Invoice Button” in the name. To select one of them, click its
name.
X To set up a customized Invoice
1. Click on the Reports button
. The Report Library appears.
2. From the Category picklist, select Accounts Receivable.
3. Select the Invoices report.
4. Click the Print button.
5. Click the Save As button. When prompted for the name, enter a name—it must
include Invoice Button as part of it. You now have a modified system report.
You can make whatever changes you want to customize the report, using the
Report Designer (see Custom Report Writer Guide for details).
Note: If you have already created a custom invoice, make sure the name of that
invoice report includes Invoice Button as part of the name.
6. When you are done modifying the report and have closed the Report Library,
open the Family drawer and go to the Ledger tab for one of your families. Click
the down-arrow on the Print Invoice button, and select the customized invoice
report you want to print.
Version 7.0
May 2010
Page 155
Using the Accounts Receivable Module
EZ-CARE2
Processing Transactions Electronically
EZ-CARE2 provides users with several different options for processing credit card and
electronic bank draft transactions. These are intended to address different needs that our
users have in different situations.
Click to Pay
The Click-to-Pay module allows you to set up a web page that customers can use to make
online payments. For details on using the module, please download the Payment Processing
Manual from the Document Library section of the EZ-CARE2 Client website.
Insta-Charge
Insta-Charge allows you to process one-time payments with a credit card easily and securely.
It works very much like a standard retail credit card terminal. For details on using the
module, please download the Payment Processing Manual from the Document Library section
of the EZ-CARE2 Client website.
EZ-EFT
The EZ-EFT module allows you to process preauthorized recurring credit card and bank
draft transactions. Typical uses involve charging for tuition or other expenses as part of a
regular collection cycle. EZ-EFT can charge parents’ credit cards, or transfer money directly
from parent’s bank accounts using electronic funds transfer. For details on using the module,
please download the Payment Processing Manual from the Document Library section of the
EZ-CARE2 Client website.
Year-End Procedures
Collapse Transactions
This section spells out an year-end maintenance process that eliminates excessive amounts of
transactions that are no longer referenced by the system. Carrying out year-end maintenance
results in improved system performance. This process is normally done AFTER year-end
statements are run.
Working with This Option
First, make a backup of the cabinet(s) that you are going to run this option for.
Running a collapse is a NON- REVERSIBLE process—data is removed that cannot be
retrieved. If this option is done incorrectly, restoring the cabinet from a backup will bring it
back to its original state before the collapse.
Page 156
Version 7.0
May 2010
Using the Accounts Receivable Module
EZ-CARE2
X To collapse transactions
1. Double-click Office Administration, double-click Chapter 4 (Accounts Receivable
Setup), and double-click Collapse Transactions. The Collapse Transactions
dialog box appears.
2. Click the cabinet you want to collapse transactions from, and click the Select
button.. The Collapse Transactions dialog box appears.
3. In the Up to and Including section, enter the date you want to collapse to.
4. Select the Category for Balance Forward from the picklist.
5. On the right, choose whether you want to Only Clear Ledger Audit Trail or
Collapse Transactions and Clear Ledger Audit Trail.
6. Click Collapse to complete the process. A message appears, asking you to
confirm you want to remove the transactions.
7. Click Yes. A message appears to let you know the transactions have been
removed.
Accounts Receivable Reports
EZ-CARE2 offers many Accounts Receivable reports. For more complete descriptions, see
“Accounts Receivable Reports” on page 197.
Version 7.0
May 2010
•
Aging Report
•
Payment Receipts
•
Deposit Report
•
Period Analysis Report
•
EZ-EFT Information Report
•
Period Variance Report
•
Invoices
•
Revenue Summary Report
•
Ledger Audit Report
•
Year-to-Date Payment Summary Report
•
Ledger Variance Report
•
Year-to-Date Summary Report
Page 157
Using the Accounts Receivable Module
Page 158
EZ-CARE2
Version 7.0
May 2010
Generating Reports
EZ-CARE2
7. Generating Reports
This chapter presents an overview of both simple and advanced reporting features in EZCARE2. You’ll learn how to preview and print reports, and how to save your changes to the
default settings for a report. All of the reports provided with the system are also explained.
Working with Reports
All reports are generated from the Report Library screen. To access this screen, do one of
the following:
•
click the Reports button on the toolbar (
•
from the File Cabinets menu, choose Print Reports
•
press CTRL+P on your keyboard
•
from the A/R menu, select A/R Reports
)
The Report Library screen will always attempt to select an appropriate report category based
on the screen and tab that you were in when you opened the Report Library. For instance, if
you open the screen from the A/R menu, the Accounts Receivable category will be
selected automatically.
Version 7.0
May 2010
Page 159
Generating Reports
EZ-CARE2
Creating Reports
In order to edit the layout, appearance and contents of a report, you must purchase the
Custom Report Writer module.
If you have purchased the Custom Report Writer module, you will have access to both the
Report Wizard for creating new reports, and the Report Designer, which is used to refine
customized or Wizard generated reports. Both of these tools are described in the “Custom
Report Writer Module” section, page 347.
If you have not purchased the Custom Report Writer module, you can make copies of a
report and change the print options that are saved as defaults, but you cannot edit the layout,
appearance and contents of a report.
Browsing Reports
You can use the Report Library screen to browse through all of the reports that are in the
system. You will see different reports in the Report List depending on the Cabinet,
Category and Drawer selected.
Report Categories
The report categories present in the system are:
Category
Database
Description
Reports related to the Center, Family and Staff drawers of your file cabinets.
Accounts Receivable Reports related to financial matters and the Accounts Receivable module.
Sessions
Reports related to the sessions that have been set up in your system.
Admin Reports
Reports for system administrators and other power users.
Report Types
To the right of each report you will see a letter indicating the Report Type. There are five
types of reports in EZ-CARE2:
(S) System Reports
This is the classification for all standard reports that come with the system. The
fields used in these reports, as well as the placement of the fields and columns on
the page, have all been pre-arranged to allow you to produce the reports
immediately.
Some system reports can run as defined, while others require you to make some
choices and set preferences. For example, to generate the Birthday List report, you
must choose at least one month.
(C) Customized
System Reports
These are System reports that have been modified and renamed using the Save
As command. An example would be a Birthday List report saved as "Birthday List
for Summer," which might include only those children whose birthdays are in the
summer months. This title will appear as the title on the report.
You can create a customized report from any System Report and designate the
options and preferences you prefer for just that report.
In addition, if you purchased the Custom Report Writer module, you can modify
Page 160
Version 7.0
May 2010
Generating Reports
EZ-CARE2
the format and appearance of most Customized System Reports using the Report
Designer (see Custom Report Writer Guide for more details).
(W) Wizard
Designed Reports
These are reports created using the EZ-CARE2 Report Wizard. The Wizard guides
you through the design and creation of the report and allows you to specify what
fields are included, totals, fonts, sort characteristics, selection characteristics, and
portrait or landscape printing. See Custom Report Writer Guide for details.
You must purchase the Custom Report Writer module in order to create
additional reports this way.
(D) Designer
Reports
These are reports that are totally designed and created using the advanced Report
Designer feature. This allows virtually unlimited control of the report design but
generally requires a higher level of technical expertise.
(Z) Wizard Designed
Reports Revised
with Designer
These are reports created and saved using the Report Wizard, and then edited
using the Report Designer.
Note:
Fields cannot be added to Z reports. If you want to add fields to a saved Wizard report
and then modify it with the Report Designer, first open the Wizard (W) report, then click
on Save As, then enter a new name. This preserves the original report. Next, select
the new report, click Print… then click on the Report Wizard button and add the new
fields. When you are done, click on the Report Designer button to make layout
changes.
Viewing Preview Graphics in the Report Library Screen
When you select a System or Customized System report in the Report List, a small graphic
of that report appears to the right to show you the general appearance and content of that
report.
If you click on that graphic, a “zoom” graphic pops up to show you a closer view of a small
portion of the report.
Version 7.0
May 2010
Page 161
Generating Reports
EZ-CARE2
If a report produced using the Report Wizard or Report Designer is selected, you will see a
notice that no preview graphic is available:
Selecting a Custom Sort Order
The sort order for the reports in the Report List is determined by the two buttons under the
list. By default, the Alpha Order option is selected, which lists the reports alphabetically.
You can also click on Custom Order, which displays the view shown below and allows you
to re-arrange the order of the report list within a category.
To move a report, click the gray box to the left of the report name, and hold the mouse
button down. Drag the gray button up or down the list to the desired location. You can
Page 162
Version 7.0
May 2010
Generating Reports
EZ-CARE2
always switch back to Alpha Order to find a report, and then return to the Custom Order
without it being changed.
Previewing a Report
EZ-CARE2 allows you to display the output from a report on screen within the application,
so that you can see the contents of the report without needing to print it out.
X To preview a report
1. Open the Report Library screen.
2. Select the Cabinet you want to draw data from.
3. Select the Category of the report, and if necessary, select the Drawer.
4. Select the report you want to preview from the Report List.
5. Click the Print button. A new screen appears in which you can set options for
the report:
Options Specific to
This Report
Standard Report
Options
The upper half of the screen contains the options that are specific to the report,
if any. The lower half of the screen contains the standard options which are
present for all reports.
6. Set any options that are specific to the report. For details on report-specific
options, see the entry for the report later in this chapter.
7. Set the standard report options. See “Setting Standard Report Options” on page
166 for details.
8. Click the Preview button. The Report Designer screen opens, displaying the
selected report:
Version 7.0
May 2010
Page 163
Generating Reports
EZ-CARE2
9. Use the following controls, located in the Print Preview toolbar, to view the
report:
Control
Function
Go to the first page of the report.
Go to the previous page of the report.
Clicking on this button opens up the following screen that allows you to jump to a
selected page within the report:
Select the Page Number you want to go to, and click the OK button.
Go to the next page in the report.
Go to the last page in the report.
Set the zoom level for the report.
Exits Print Preview.
Prints the report. See “Printing a Report” page 165 for details.
10. When you are done previewing the report, click
to exit Print Preview. You
will be returned to the Print Options screen.
11. Click the Done button to return to the Report Library screen.
Page 164
Version 7.0
May 2010
Generating Reports
EZ-CARE2
If you changed the settings for the report, you will be prompted to save the
report along with its settings under a new name. See “Copying a Report” page
169 for details.
Printing a Report
X To print a report
1. Open the Report Library screen.
2. Select the Cabinet you want to draw data from.
3. Select the Category of the report, and if necessary, select the Drawer.
4. Select the report you want to print from the Report List.
5. Click the Print button. A new screen appears in which you can set options for
the report:
Options Specific to
This Report
Standard Report
Options
The upper half of the screen contains the options that are specific to the report,
if any. The lower half of the screen contains the standard options which are
present for all reports.
6. Set any options that are specific to the report. For details on report-specific
options, see the entries for each report later in this chapter.
7. Set the standard report options. See “Setting Standard Report Options” on page
166 for details.
8. Click the Print button. The Printer screen opens:
Version 7.0
May 2010
Page 165
Generating Reports
EZ-CARE2
9. Select the printer you want to send the report to and click the OK button. You
will be returned to the Print Options screen.
10. Click the Done button to return to the Report Library screen.
11. If you changed the settings for the report, you will be prompted to save the
report along with its settings under a new name.
•
To return to the Report Library screen without saving a copy of the
report under a new name, click the No button.
•
To return to the Print Options page, click the Cancel button.
•
To save the report under a new name:
i.
Click the Yes button. The Save Report As screen appears:
ii. Enter the name you want to give to the new copy of the report, and click
the OK button. You will be returned to the Report Library screen, and
the new copy of the report will appear in the Report List.
Setting Standard Report Options
The following report options are present on the Print Options page for all reports:
X To set the standard report options when printing a report
1. Select whether to output the report to a printer or to a file:
•
To output the report to a printer, set Send to: to Printer.
•
To output the report to a file, set Send to: to File. See “Printing a
Report to a File” on page 170 for details.
2. To change the remaining report options:
Page 166
Version 7.0
May 2010
Generating Reports
EZ-CARE2
a. Click the Change button. The Report Options screen appears:
b. To select the sort order for the records in the report:
i.
Click the Sort By button.
The Library of Saved Sorts screen appears:
ii. Select the sort order you want to use and click the OK button. (For
details on creating sorts, see “Sorts and Selections” on page 29) You will
return to the Report Options screen, and the sort order you selected will
be displayed in the Sort By field.
Version 7.0
May 2010
Page 167
Generating Reports
EZ-CARE2
c. To set the selection criteria that will be used to determine which records
appear in the report:
i.
Click the Selection Criteria button.
screen appears:
The Library of Saved Selections
ii. Select the selection criteria you want to use and click the OK button.
(For details on creating selection criteria, see “Sorts and Selections” on
page 29.) You will return to the Report Options screen, and the selection
criteria you selected will be displayed in the Selection Criteria field.
d. If you want the report to always start a new page at a certain point, check the
selection under New Page. The exact contents of this section of the screen
will vary depending on the sort order that was selected.
e. Set Layout to Portrait (
f.
) or Landscape (
).
Under Copies, set Number of Copies to the number of copies of the
report that you want to print out. Check Collate to print out each copy in its
entirety before starting on the next. If Collate is not checked, the report will
print out all of the copies of the first page, followed by all of the copies of
the second page, and so on.
g. Under Status, check Active, Inactive, or Remove, to determine whether
Active records, Inactive records, or records marked for removal will appear
in the report.
h. If you have purchased the Custom Report Writer module, you can click the
Report Designer button to edit the actual report. Once you finish editing
the report, you will be returned to this screen. For details on editing a report
using Report Designer, see the Custom Report Writer Guide.
i.
Page 168
Click OK to return to the Print Options screen.
Version 7.0
May 2010
Generating Reports
EZ-CARE2
Copying a Report
You can make a copy of any report in the system.
X To make a copy of a report
1. Open the Report Library screen.
2. Select the Cabinet associated with the report.
3. Select the Category of the report, and if necessary, select the Drawer.
4. Select the report you want to copy from the Report List.
5. Click the Print button.
6. In the Print Options screen, click the Save As button. The Save Report As
screen appears:
7. Enter the name you want to give to the new copy of the report, and click the OK
button. You will be returned to the Report Library screen, and the new copy of
the report will appear in the Report List.
Renaming a Report
You can rename any report except for System reports (type S).
X To rename a report
1. Open the Report Library screen.
2. Select the Cabinet associated with the report.
3. Select the Category of the report, and if necessary, select the Drawer.
4. Select the report you want to rename from the Report List.
5. Click the Rename button. The Rename Report screen appears:
6. Enter the new name for the report and click the OK button to save the change,
or click Cancel to cancel the name change.
Version 7.0
May 2010
Page 169
Generating Reports
EZ-CARE2
Deleting a Report
You can delete any report except for System reports (type S).
X To delete a report
1. Open the Report Library screen.
2. Select the Cabinet associated with the report.
3. Select the Category of the report, and if necessary, select the Drawer.
4. Select the report you want to delete from the Report List.
5. Click the Delete Report button. A confirmation screen appears:
6. Click the Yes button to delete the report, or click the No button to cancel
deletion.
Printing a Report to a File
You can “print” a report to a file instead of sending it to a printer. You can generate a PDF
or HTML version of the report, or you can output the information to an Excel spreadsheet.
X To print a report to a file
1. Open the Report Library screen.
2. Select the Cabinet you want to draw data from.
3. Select the Category of the report, and if necessary, select the Drawer.
4. Select the report you want to print to a file from the Report List.
5. Click the Print button. The Print Options screen will appear.
Page 170
Version 7.0
May 2010
Generating Reports
EZ-CARE2
6. In the standard print options, set Send to to File and then select one of the
following Formats:
Format
Excel
Description
The report is created as an Excel (.XLS) file. This format is useful to perform
additional analysis on your EZ-CARE2 data using Excel.
Note: This functionality is available for all Wizard reports and
Wizard reports edited with Designer, but only for
certain System Reports.
PDF
The report is created as a PDF file. Reports in PDF format retain the look and
feel of the original report with formatting, graphics, fonts, and color intact. To
view the PDF report, you must have Adobe Acrobat Reader. This format is
very convenient to email reports as an attachment.
HTML
The report is created as an HTML file. HTML is the formatting language used
for web sites. Many email systems can display HTML information directly in an
email message.
7. Click the Export button (this button replaces the Print button once you set
Send to to File). You will see a message box that tells you that the file has been
created:
Moving Reports between Cabinets Using Import/Export
EZ-CARE2 provides an easy way to export a report to another cabinet, or import a report
from another cabinet. You can export a report to a file, and then import it into another
cabinet, or even a separate installation of EZ-CARE2, by importing from the file.
Warning! If your reports contain user-defined fields, make sure the cabinet you are importing to
has the same setup. Exporting a report also brings over the Sorts and Selections.
Exporting a Report to a File
Follow these procedures to export a report to another cabinet or to another site.
X To export a report
1. Click on the Reports button.
2. Click the New Report button.
3. Click the Import/Export report button.
The Export/Import
Report dialog box appears.
Version 7.0
May 2010
Page 171
Generating Reports
EZ-CARE2
4. At the top of the screen, select Export.
5. In the Select reports section, check the box next to the reports you want to
export. Click the All button to check all reports. Click the Clear button to
uncheck all reports.
6. In the Export reports to field, enter the path and file name for the report
export. You can also click the
button, go to the location where want to save
it, give it a name, and click Save. You can put the file on the desktop or where
you would like. It must be a file with a .ZIP extension (for example:
C:\REPORT.ZIP).
7. Click the Export button. A message appears, telling you the export is complete.
8. Click OK.
9. When the export is finished, click Done.
Importing a Report from a File
Follow these procedures to import a report that has been exported from another cabinet or
another site.
X To import a report
1. Click the Reports button in the main toolbar.
2. Select the correct Cabinet, Category, and Drawer. You need to import the
reports into the proper cabinet and category. Import Sessions reports into
the Sessions category, and Database reports into the Database category.
3. Click the New Report button.
4. Click the Import/Export report button.
The Export/Import
Report dialog box appears.
Page 172
Version 7.0
May 2010
Generating Reports
EZ-CARE2
5. At the top of the screen, select Import.
6. In the Import reports from field, enter the path and file name for the report
button, go to the location where the
you’re importing. You can also click the
report is, and double-click the file (for example, C:\REPORT.ZIP).
7. Click the Import button. A message appears, telling you the report was imported
successfully.
8. Click OK.
9. Click Done. The imported reports will display in your report list.
Version 7.0
May 2010
Page 173
Generating Reports
EZ-CARE2
Database Reports
Note: All these reports default to show only Active status children, families or staff. If you
want to include persons with Inactive or Remove status, you need to select the
Inactive or Remove options under the Status heading in the standard report options.
See “Setting Standard Report Options” page 166 for details.
Some of these reports are only available within the Family or the Staff drawer, while others
exist in similar versions in Family, Staff, and user-defined drawers. You select the relevant
Drawer from the top right of the Report Library screen.
Birthday List
The Birthday List report provides you with a list of all children whose birthdays fall within
the selected months. For example, you could produce a list of all children with birthdays
over the summer months.
In order to run this report, you must select the Database category, and the Family drawer.
X To set report-specific options
Page 174
Version 7.0
May 2010
Generating Reports
EZ-CARE2
1. Check the entries for the classes that you want to include in the report in the
Include Classes list. Click the All button to check all classes. Click the Clear
button to uncheck all classes.
2. Check the entries for the months that you want to include in the report in the
Include Months list. Click the All button to check all months. Click the Clear
button to uncheck all months.
Check List Report
The Check List Report prints a list of open and/or completed items entered into the Check
List superfield.
Note: In order to run the report, you must have set up a check list in either the Child or
Family tab of the Family drawer for the selected Cabinet.
In order to run this report, you must select the Database category, and the Family drawer.
X To set report-specific options
1. Under Print For, you can select either Child or Family. If you select Child, the
report will list records from the Check List field in the Child tab. If you select
Family, the report will list records from the Check List field in the Family tab.
If you only have a Check List field in one of the tabs, the other one will be
disabled, and you will not be able to select anything.
2. Under Child, you can select All to print records for all children, or One to print
records for just one child. Select the child from the list below. (If Family is
Version 7.0
May 2010
Page 175
Generating Reports
EZ-CARE2
selected under Print For, this section is renamed Family, and allows you to
select all families or just one.)
3. Under Item Type, you can select All to print records for all item types, or One
to print records for just one item type. Select the item type from the list below.
4. Under Include Items, check Completed or To Do to include items with those
statuses in the report.
5. Under Organize by, select Child to sort the records in the report by child, or
Check List Item Type to sort the records by item. Check New Page Per
Child/New Page Per Item to start each child or item type on a new page.
6. Under Include Dates, you can optionally enter a Start and End date. If a date
range is specified, only records entered within the date range will appear in the
report.
Child Directory
The Child Directory report allows you to produce a center directory organized by child
including parents and phone numbers. User-defined options allow you to sort by family or
child last name.
If you have purchased the Custom Report Writer module, you can easily add email addresses
or any other field to this report using the Report Designer. See Custom Report Writer Guide for
details.
In order to run this report, you must select the Database category, and the Family drawer.
There are no report-specific options for this report.
Page 176
Version 7.0
May 2010
Generating Reports
EZ-CARE2
Child Information Report
The Child Information Report displays the contents of all fields included in the screens
(Pages) in the Child tab. This is useful if you want a paper copy of the information to put in
a child’s physical file folder. The report prints data in the order it is displayed, with two
screens of data printed on each page of the report.
In order to run this report, you must select the Database category, and the Family drawer.
X To set report-specific options
1. Under Child, select which child records to print out:
a. Select All to print out records for all children.
b. Select One to print out only one child’s record. Select the name of the child
from the list below.
2. Check Include basic family information to include the family name at the
bottom of the page.
3. Check Include contacts information to include contacts information on a
separate page.
Version 7.0
May 2010
Page 177
Generating Reports
EZ-CARE2
4. Under Child information page numbers, select the pages whose information
you want to include in the report. Selected pages are indented, and the page icon
turns yellow.
5. Check the entries for the classes that you want to include in the report in the
Include Classes list. Click the All button to check all classes. Click the Clear
button to uncheck all classes.
Child List
The Child List generates a basic listing of children including name, gender, birthdate, age,
and home phone. For example, for a day center, you could take the printed list along on a
field trip or use it for calling to see if a child is home sick.
In order to run this report, you must select the Database category, and the Family drawer.
There are no report-specific options for this report.
Contacts Report
The Contacts Report provides a printed listing of all emergency contacts and/or Authorized
Pickups for Day Centers. Predefined options let you print only Authorized Pickups
(including parents).
In order to run this report, you must select the Database category, and the Family drawer.
Page 178
Version 7.0
May 2010
Generating Reports
EZ-CARE2
X To set report-specific options
1. Under Print For, you can select either Child or Family. If you select Child, the
report will list records from the Contacts field in the Child tab. If you select
Family, the report will list records from the Contacts field in the Family tab. If
you only have a Contacts field in one of the tabs, the other one will be disabled,
and you will not be able to select anything. Check Authorized Pickups Only to
list only those contact records designated as authorized pickups.
2. Under Child, you can select All to print records for all children, or One to print
records for just one child. Select the child from the list below. (If Family is
selected under Print For, this section is renamed Family, and allows you to
select all families or just one.)
3. If Family is selected under Print For, the Organize By options are enabled.
Select to organize records By Family, or By Class/Child.
4. Check the entries for the classes that you want to include in the report in the
Include Classes list. Click the All button to check all classes. Click the Clear
button to uncheck all classes.
5. Check Show Contact Comments to list any comments entered for a contact in
the report.
EZ-Entry Barcodes
The EZ-ENTRY Barcodes report allows you to generate pages full of barcodes for your
staffers to scan instead of entering data manually.
In order to run this report, you must select the Database category, and the Family drawer.
Version 7.0
May 2010
Page 179
Generating Reports
EZ-CARE2
X To set report-specific options
1. Under Print For, you can select either Child or Family.
2. Under Layout, select the number of columns you want to appear in the printed
pages.
3. Under Action to Perform, select the action you want EZ-Entry to perform
when a barcode is scanned:
•
Find record, page and field then enter a value: EZ-Entry will find the
child record whose Child ID is contained in the barcode, move to the
Page and Field specified under Action Details, and enter the Value
specified under Action Details into the field.
•
Find record, page and field then wait for a value: EZ-Entry will find
the child record whose Child ID is contained in the barcode, move to the
Page and Field specified under Action Details, and wait for the user to
enter a value into the field.
•
Find page and field of current record then enter a value: EZ-Entry
will stay in the current record, move to the Page and Field specified
under Action Details, and enter the Value specified under Action
Details into the field.
•
Find page and field of current record then wait for a value: EZEntry will stay in the current record, move to the Page and Field
specified under Action Details, and wait for the user to enter a value
into the field.
4. Set Reader to the barcode reader type.
5. Select the following settings under Action Details:
•
Set Page to the page in a multi-page tab that the desired field is located
on.
•
Set Field to the filed on the page that you want to enter data into.
•
Set Value to the value you want to enter into the field.
6. To include human-readable labels for the barcodes using the Human-Readable
Fields area of the screen:
Page 180
Version 7.0
May 2010
Generating Reports
EZ-CARE2
a. Select the field from the list.
b. Click the Add button to list the contents of the field above the barcode. For
instance, to label barcodes with children’ names, add the First Name and
Last Name fields.
Family Information Report
The Family Information Report displays the contents of all fields included in the screens
(Pages) in the Family tab. This is useful if you want a paper copy of the information to put in
a child’s physical file folder. The report prints data in the order it is displayed, with two
screens of data printed on each page of the report.
In order to run this report, you must select the Database category, and the Family drawer.
X To set report-specific options
1. Under Family, select which family records to print out:
a. Select All to print out records for all families.
b. Select One to print out only one family’s record. Select the name of the
family from the list below.
2. Check Include basic child information to include the children’s names at the
bottom of the page.
3. Check Include contacts information to include contacts information on a
separate page.
4. Under Family information page numbers, select the pages whose information
you want to include in the report. Selected pages are indented, and the page icon
turns yellow.
Version 7.0
May 2010
Page 181
Generating Reports
EZ-CARE2
5. Check the entries for the classes that you want to include in the report in the
Include Classes list. Click the All button to check all classes. Click the Clear
button to uncheck all classes.
Immunization Report
The Immunization Report allows you to track when immunizations were due, whether they
have been received, and which were received late. The report lists children alphabetically.
Immunizations are listed in the order in which they appear on the Immunizations Tab (see
page 49 for details).
In order to run this report, you must select the Database category, and the Family drawer.
X To set report-specific options
1. Check the entries for the classes that you want to include in the report in the
Include Classes list. Click the All button to check all classes. Click the Clear
button to uncheck all classes.
2. Under Immunizations, select one of the following options:
Page 182
•
All - prints a list of all immunizations. If the immunization was received,
the report shows a “Y” (for Yes) and the date received; if not received, it
shows “N” (for No) and the date due.
•
Due - prints a list of all immunizations outstanding, with the date they
were due, up through a date you specify
•
Received - prints all immunizations received with dates due and
received, within a time range you specify. If no immunizations have been
Version 7.0
May 2010
Generating Reports
EZ-CARE2
received for a specific item such as chicken pox vaccine, that item will
not appear.
•
Received late – only prints immunizations that were received after their
due date.
3. Under Include Dates, you can optionally enter a Start and/or End date,
depending on the option selected under Immunizations.
Note: With this report, you can create a selection from the Family, Ledger, Child, Class, and
Immunization tables; you can also include fields from these tables through the Report
Designer.
Mailing Labels
The Mailing Labels report provides a quick and easy way to print labels for children or
families. Labels can be used for more than mailing purposes (for example, index cards,
luggage tags, and nametags).
For families, the report defaults to print the primary parent’s name and address, in 1-, 2-, or
3-column format. If you have purchased the Custom Report Writer, you can use the Report
Designer to modify the label, for example sending it to “The Parents of John Smith.” See the
Custom Report Writer Guide for details.
If you need more customization, use the Labels option of the Custom Report Wizard, which
lets you choose from a wide variety of Avery labels and add information from tables you
select. See the Custom Report Writer Guide for details.
In order to run this report, you must select the Database category, and the Family drawer.
Version 7.0
May 2010
Page 183
Generating Reports
EZ-CARE2
X To set report-specific options
1. Check the entries for the classes that you want to include in the report in the
Include Classes list. Click the All button to check all classes. Click the Clear
button to uncheck all classes.
2. Under Label For, select Family to print labels for family records, or Child to
print labels for child records.
3. Under Format, select 1 Up, 2 Up, or 3 Up to determine the number of columns
you want to print on a page.
Notes Report
The Notes Report allows you to track events, by person and/or by type of event. For
example, you might want to list all accidents at the center over the past six months.
Alternatively, you might want a report showing all behavior incidents for a specific child.
Predefined options let you print for children or families, organize by person or note type,
select one child or all children, and select all notes or one type of note.
In order to run this report, you must select the Database category, and the Family drawer.
Page 184
Version 7.0
May 2010
Generating Reports
EZ-CARE2
X To set report-specific options
1. Under Print For, you can select either Child or Family. If you select Child, the
report will list records from the Notes field in the Child tab. If you select
Family, the report will list records from the Notes field in the Family tab. If
you only have a Notes field in one of the tabs, the other one will be disabled,
and you will not be able to select anything.
2. Under Child, you can select All to print records for all children, or One to print
records for just one child. Select the child from the list below. (If Family is
selected under Print For, this section is renamed Family, and allows you to
select all families or just one.)
3. Under Note Type, you can select All to print records for all note types, or One
to print records for just one note type. Select the note type from the list below.
4. Under Organize by, select Child to sort the records in the report by child, or
Note Type to sort the records by note type. Check New Page Per
Child/New Page Per Note Type to start each child or note type on a new
page.
5. Under Include Dates, you can optionally enter a Start and End date. If a date
range is specified, only records entered within the date range will appear in the
report.
Staff Check List Report
The Staff Check List Report provides a list of open and/or completed items entered into the
Check List superfield, for one or all Staff members. For example, you could produce a list of
Version 7.0
May 2010
Page 185
Generating Reports
EZ-CARE2
all staff members that still need to submit the required employment forms, or get a list of all
open items for a specific staff member.
In order to run this report, you must select the Database category, and the Staff drawer.
X To set report-specific options
1. Under Staff Member, you can select All to print records for all staff members,
or One to print records for just one staff member. Select the staff member from
the list below.
2. Under Item Type, you can select All to print records for all item types, or One
to print records for just one item type. Select the item type from the list below.
3. Under Include Items, check Completed or To Do to include items with those
statuses in the report.
4. Under Organize by, select Staff Member to sort the records in the report by
staff member, or Check List Item Type to sort the records by item. Check
New Page Per Staff Member/New Page Per Item to start each staff member
or item type on a new page.
5. Under Include Dates, you can optionally enter a Start and End date. If a date
range is specified, only records entered within the date range will appear in the
report.
Staff Contacts Report
Use when you need a printed listing of all contacts for one or all staff members. A
predefined option lets you choose whether to include comments for each contact. If you
Page 186
Version 7.0
May 2010
Generating Reports
EZ-CARE2
want your files to include a printed copy of material from the Contacts Superfield, then run
this report.
In order to run this report, you must select the Database category, and the Staff drawer.
X To set report-specific options
1. Under Staff Member, you can select All to print contact records for all staff
members, or One to print records for just one staff member. Select the staff
member from the list below.
2. Check Show Contact Comments to list any comments entered for a contact in
the report.
Staff Development Report
The Staff Development Report produces a list of staff development related activities for an
employee’s personal review, personnel records, or other purposes. You can also run this
report to see which staff members have attended specific training classes. This information
may be needed for your center to gain or maintain accreditation.
In order to run this report, you must select the Database category, and the Staff drawer.
Version 7.0
May 2010
Page 187
Generating Reports
EZ-CARE2
X To set report-specific options
1. Under Staff Member, you can select All to print records for all staff members,
or One to print records for just one staff member. Select the staff member from
the list below.
2. Under Development Type, you can select All to print records for all
development types, or One to print records for just one type. Select the
development type from the list below.
3. Under Include Items, check Completed or Uncompleted to include items
with those statuses in the report.
4. Under Organize by, select Staff Member to sort the records in the report by
staff member, or Development Type to sort the records by item. Check New
Page Per Staff Member/New Page Per Type to start each staff member or
development type on a new page.
5. Under Include Dates, you can optionally enter a Start and End date. If a date
range is specified, only records entered within the date range will appear in the
report.
Staff Directory
The Staff Directory Report prints a “phone list” showing name, address, phone number, and
hire date for all your staff. Predefined options let you choose all employees hired or
terminated within a date range you specify.
In order to run this report, you must select the Database category, and the Staff drawer.
Page 188
Version 7.0
May 2010
Generating Reports
EZ-CARE2
X To set report-specific options
1. Select Hired Between and enter a Start and End date to list only the staff
members hired within a certain date range.
2. Select Terminated Between and enter a Start and End date to list only the staff
members terminated within a certain date range.
3. If you leave the date range blank the report prints all employees listed
alphabetically regardless of hire or termination date.
Staff EZ-Entry Barcodes Report
The Staff EZ-Entry Barcodes Report is identical to the regular EZ-Entry Barcodes Report,
except that it pulls its data from the Staff drawer instead of the Family drawer.
In order to run this report, you must select the Database category, and the Staff drawer.
X To set report-specific options
1. Under Layout, select the number of columns you want to appear in the printed
pages.
2. Under Action to Perform, select the action you want EZ-Entry to perform
when a barcode is scanned:
Version 7.0
May 2010
Page 189
Generating Reports
EZ-CARE2
•
Find record, page and field then enter a value: EZ-Entry will find the
staff record whose Staff ID is contained in the barcode, move to the
Page and Field specified under Action Details, and enter the Value
specified under Action Details into the field.
•
Find record, page and field then wait for a value: EZ-Entry will find
the staff record whose Staff ID is contained in the barcode, move to the
Page and Field specified under Action Details, and wait for the user to
enter a value into the field.
•
Find page and field of current record then enter a value: EZ-Entry
will stay in the current record, move to the Page and Field specified
under Action Details, and enter the Value specified under Action
Details into the field.
•
Find page and field of current record then wait for a value: EZEntry will stay in the current record, move to the Page and Field
specified under Action Details, and wait for the user to enter a value
into the field.
3. Set Reader to the barcode reader type.
4. Select the following settings under Action Details:
•
Set Page to the page in a multi-page tab that the desired field is located
on.
•
Set Field to the filed on the page that you want to enter data into.
•
Set Value to the value you want to enter into the field.
5. To include human-readable labels for the barcodes using the Human-Readable
Fields area of the screen:
a. Select the field from the list.
b. Click the Add button to list the contents of the field above the barcode. For
instance, to label barcodes with children’ names, add the First Name and
Last Name fields.
Page 190
Version 7.0
May 2010
Generating Reports
EZ-CARE2
Staff Information Report
The Staff Information Report shows all fields included in the screens (Pages) in the Staff tab.
For example, you may need a printout of this for personnel files. The report prints data in
the order it is displayed on each screen, with two screens of data printed on each page of the
report. The report-specific options let you select which screens to print.
In order to run this report, you must select the Database category, and the Staff drawer.
X To set report-specific options
1. Under Staff Member, you can select All to print records for all staff members,
or One to print records for just one staff member. Select the staff member from
the list below.
2. Under Include Dates, you can do one of the following:
•
Select Hired Between and enter a Start and End date to list only the
staff members hired within a certain date range.
•
Select Terminated Between and enter a Start and End date to list only
the staff members terminated within a certain date range.
•
If you leave the date range blank the report prints all employees listed
alphabetically regardless of hire or termination date.
3. Under Staff information page numbers, select the pages whose information
you want to include in the report. Selected pages are indented, and the page icon
turns yellow.
Version 7.0
May 2010
Page 191
Generating Reports
EZ-CARE2
Staff Mailing Labels
The Staff Mailing Labels report provides a quick and easy way to print labels for staff and
don’t need to customize them. Labels can be used for more than mailing purposes: index
cards, mail bins, staff binders, and nametags can also be produced using labels.
The report defaults to print the staff member’s first name, last name, and address, in 1-, 2- or
3-column format. If you have purchased the Custom Report Writer, you can use the Report
Designer to modify the label. See Custom Report Writer Guide for details.
If you need more customization, use the Labels option of the Custom Report Wizard, which
lets you choose from a wide variety of Avery labels and add information from tables you
select. See Custom Report Writer Guide for details.
In order to run this report, you must select the Database category, and the Staff drawer.
X To set report-specific options
1. Under Format, select 1 Up, 2 Up, or 3 Up to determine the number of columns
you want to print on a page.
Page 192
Version 7.0
May 2010
Generating Reports
EZ-CARE2
Staff Notes Report
Use when: you want to track events, by staff member and/or by type of event. For example,
you might need to list all accidents sustained by staff members to submit to your insurance
carrier. Alternatively, you might want a report showing all notes on staff members’
performance over the past year in advance of their annual reviews. Predefined options let
you print for one or all staff members, select one or all note types, organize by person or
note type, and select a time range on which to report.
In order to run this report, you must select the Database category, and the Staff drawer.
X To set report-specific options
1. Under Staff Member, you can select All to print records for all staff members,
or One to print records for just one staff member. Select the staff member from
the list below.
2. Under Note Type, you can select All to print records for all note types, or One
to print records for just one note type. Select the note type from the list below.
3. Under Organize by, select Staff to sort the records in the report by child, or
Note Type to sort the records by note type. Check New Page Per Staff/New
Page Per Note Type to start each child or note type on a new page.
4. Under Include Dates, you can optionally enter a Start and End date. If a date
range is specified, only records entered within the date range will appear in the
report.
Version 7.0
May 2010
Page 193
Generating Reports
EZ-CARE2
User Drawer Check List Report
Use when you want a list of open and/or completed items entered into the Check List
superfield, for one or all persons in the drawer. For example, you have created a drawer for
alumni and want to list all open items for them so you can coordinate for reunions. The
predefined options allow you to select items that are completed or “to do,” and to organize
by name or item type, over a date range you specify.
In order to run this report, you must select the Database category, and a user-defined
drawer.
X To set report-specific options
1. Under Name, you can select All to print records for all persons, or One to print
records for just one person. Select the name from the list below.
2. Under Item Type, you can select All to print records for all item types, or One
to print records for just one item type. Select the item type from the list below.
3. Under Include Items, check Completed or To Do to include items with those
statuses in the report.
4. Under Organize by, select Name to sort the records in the report by name, or
Check List Item Type to sort the records by item. Check New Page Per
Name/New Page Per Item to start each child or item type on a new page.
5. Under Include Dates, you can optionally enter a Start and End date. If a date
range is specified, only records entered within the date range will appear in the
report.
Page 194
Version 7.0
May 2010
Generating Reports
EZ-CARE2
User Drawer Contacts Report
Use when you need a printed listing of all contacts for one or all persons named in your
user-defined drawer. A predefined option lets you choose whether to include comments for
each contact.
In order to run this report, you must select the Database category, and a user-defined
drawer.
X To set report-specific options
1. Under Name, you can select All to print records for all persons, or One to print
records for just one person. Select the name from the list below.
2. Check Show Contact Comments to list any comments entered for a contact in
the report.
User Drawer Notes Report
Version 7.0
May 2010
Page 195
Generating Reports
EZ-CARE2
Use when you want to track comments or events, for persons named in a user-defined
drawer. For example, if you have created a drawer for your waiting list, you could run this
report to get a listing of all comments made after recent conversations with them.
Predefined options let you print for one or all names in the user-defined drawer, select one
or all note types, organize by name or note type, and select a time range on which to report.
In order to run this report, you must select the Database category, and a user-defined
drawer.
X To set report-specific options
1. Under Name, you can select All to print records for all persons, or One to print
records for just one person. Select the name from the list below.
2. Under Note Type, you can select All to print records for all note types, or One
to print records for just one note type. Select the note type from the list below.
3. Under Organize by, select Name to sort the records in the report by child, or
Note Type to sort the records by note type. Check New Page Per Name
/New Page Per Note Type to start each child or note type on a new page.
4. Under Include Dates, you can optionally enter a Start and End date. If a date
range is specified, only records entered within the date range will appear in the
report.
Page 196
Version 7.0
May 2010
EZ-CARE2
Generating Reports
Waiting List Reports
The Waiting List reports are only available if you have purchased the optional Waiting List
module. See “Waiting List Module” page 360 for details.
Mailing Labels
The Mailing Labels report is designed to print out mailing labels for all of the families on the
waiting list. Records are sorted alphabetically by parent’s name.
In order to run this report, you must select the Database category, and the Waiting List
drawer.
There are no report-specific options for this report.
User Drawer Checklist Report
This report is identical to the standard User Drawer Checklist Report, except that it draws its
data from the entries in the waiting list. See “User Drawer Check List Report” page 194 for
details.
In order to run this report, you must select the Database category, and the Waiting List
drawer.
User Drawer Contacts Report
This report is identical to the standard User Drawer Contacts Report, except that it draws its
data from the entries in the waiting list. See “User Drawer Contacts Report” page 195 for
details.
In order to run this report, you must select the Database category, and the Waiting List
drawer.
User Drawer Notes Report
This report is identical to the standard User Drawer Notes Report, except that it draws its
data from the entries in the waiting list. See “User Drawer Notes Report” page 195 for
details.
In order to run this report, you must select the Database category, and the Waiting List
drawer.
Version 7.0
May 2010
Page 197
Generating Reports
EZ-CARE2
Wait List Statistics
The Wait List Statistics report lists the number of children waiting for enrollment in each
class. The numbers are broken out by priority, and totals are listed for each class and each
priority level, as well as for all children waiting.
In order to run this report, you must select the Database category, and the Waiting List
drawer.
There are no report-specific options for this report.
Wait List by Class/Priority/Date
The Wait List by Class/Priority/Date report lists the names in your waiting list. The names
are grouped by class, then sorted by priority then date.
In order to run this report, you must select the Database category, and the Waiting List
drawer.
There are no report-specific options for this report.
Page 198
Version 7.0
May 2010
EZ-CARE2
Generating Reports
Wait List by Priority/Date
The Wait List by Priority/Date report lists the names in your waiting list. The names are
sorted by priority then date.
In order to run this report, you must select the Database category, and the Waiting List
drawer.
There are no report-specific options for this report.
Accounts Receivable Reports
All these reports normally print both Active AND Inactive status because balances may
remain outstanding after a family becomes Inactive. Accounts Receivable reports can be run
for one or ALL ledgers, for families or other payers. Most of the Accounts Receivable
reports have predefined sorts based on the report’s internal grouping. If user-defined sorts
are available, that will be noted in the reports description. Selections are available for most
reports; if they are not available for a report, the Selection Line shows N/A.
Aging Report
Use when you want a summary or detail listing of all families with outstanding balances,
grouped by how long those balances have been outstanding. Predefined options let you
Version 7.0
May 2010
Page 199
Generating Reports
EZ-CARE2
choose the number of days in each cycle for grouping – for example, a 30 day cycle would
group balances by month. You can also set a grace period – all balances outstanding within
this period will be considered current, and any overdue balances will be reduced by the grace
period. For example, if your grace period is 7 days, a balance that is 37 days past due will
only show as 30 days overdue. You can also report on balances overdue as of any given
“Aging Date.” For example, balances as of the end of the previous month. At your choice,
you can include or exclude families with credit balances.
In order to run this report, you must select the Accounts Receivable category.
X To set report-specific options
1. Under Include Ledgers, select the ledgers you want to include in the report.
2. Under Ledgers, you can select All to print records from all accounts, or select
One to print records from only one account. Select the account from the list
below.
3. Under Aging Options, set the following options:
a. The Aging Date is the date that is used as the point of reference for whether
accounts are overdue: “as of this date, the following accounts had overdue
balances.” By default, the Aging Date is set to today’s date.
b. Days in Cycle indicates the length of the intervals used to separate out
accounts that have been overdue for a longer period of time. If you set it to
30, for instance, the intervals will be 1-30 days, 31-60 days, 61-90 days, and
90+ days.
c. Grace Period indicates a number of days that an account can be overdue
without being counted as overdue. If you specify a Grace Period, it will be
subtracted from the actual amount of time an account is overdue when
calculating the number of days overdue. If you do not want to extend a grace
period to overdue accounts, set Grace Period to 0.
4. Under Include, select from the following options:
a. Check Transaction Detail to display individual transactions in the report.
If cleared, only summary records for each account will be displayed.
Page 200
Version 7.0
May 2010
Generating Reports
EZ-CARE2
b. Check Credit Balances to include accounts with a positive credit balance in
the report. Accounts with a positive balance will display a CR after nonzero
values.
Note: You can print this report to an Excel (.XLS) file from the Report Options screen. To do
this, click File in the Send To line and Excel in the Format line.
Note: With this report, you can create selection criteria based on fields from the Family,
Ledger, Child or Session tables. See “Selections” page 33 for details.
Child Tuition Report
Use when: you want to verify the tuition being charged to children, or when you want to
verify which children are being charged specific rate(s), for example, which children are
being charged for a computer class. Predefined options allow you to include or exclude
discounts, select by billing cycle and by date range.
Note: With this report, you can create a selection from the Family, Ledger, Other Ledger,
Child, Class, or Tuition tables; you can also include fields from these tables through
the Report Designer.
X To set report-specific options
1. Under Account, select the ledgers you want to include in the report.
Version 7.0
May 2010
Page 201
Generating Reports
EZ-CARE2
2. Under Ledgers, you can select All to print records from all accounts, or select
One to print records from only one account. Select the account from the list
below.
3. Under Include Billing Cycle, check the billing cycle frequencies you want to
include in the report. Click the All button to check all billing cycles. Click the
Clear button to uncheck all billing cycles.
4. Check Show Category & Amount to list the Category and Amount entries
from the Tuition tab in the report.
5. Under Include Rates, select the rate masters you want to include in the report.
Click the All button to check all rate masters. Click the Clear button to uncheck
all rate masters.
6. Under Date Range, enter the Start and End dates for the range of dates you
want the report to cover. If a date range is entered, records from outside the date
range will not appear in the report.
7. Under Organize By, select Child to sort the records in the report by the names
of the children, or select Rate to sort the records by Rate Master.
8. Under Include Credits, select Credit 1 only to display only the Credit 1 fields in
the report, or select All Credits to display all credits.
Deposit Report
The Deposit Report allows you to reprint a Cash Receipts posting report after the posting
has been done. Alternatively, you could use the Summary option to get a listing of all
deposits in a time period you specify.
In order to run this report, you must select the Accounts Receivable category.
Note: You can print this report to an Excel (.XLS) file from the Report Options screen. To do
this, click File in the Send To line and Excel in the Format line.
Page 202
Version 7.0
May 2010
Generating Reports
EZ-CARE2
X To set report-specific options
1. Under Include for, indicate the deposits you want to appear in the report in one
of the following ways:
•
Select Date Range and enter Starting and Ending dates. The report
will display deposits that occurred within the specified date range.
•
Select Deposit Numbers and enter Starting and Ending numbers. The
report will display deposits whose numbers fall within the specified
number range.
2. Select the type of report you want to see:
•
Deposit Ticket – Lists the deposits by type, account, and value. Can be
used to deposit checks or cash at a bank.
•
Deposit Slip List – Similar to the Deposit Ticket, but includes the check
number/comment field. Intended to be used for financial recordkeeping.
•
Summary Report – Displays summary records for each payment type.
EZ-EFT Information Report
Use when: you want to verify data entry or monitor credit card expirations for people using
EZ-EFT.
User-defined selections are not available for this report.
In order to run this report, you must select the Accounts Receivable category.
Version 7.0
May 2010
Page 203
Generating Reports
EZ-CARE2
X To set report-specific options
1. Under Include Ledgers, select the ledgers you want to include in the report.
2. Under Ledgers, you can select All to print records from all accounts, or select
One to print records from only one account. Select the account from the list
below.
3. Under Gateway, choose which financial services gateway is being used:
SofterWare or CheckFree.
4. Under Organize By, select how you want to organize the records in the report:
•
Select Account Name to sort the records by the name attached to the
account.
•
Select Bank Name to sort the records by bank name.
•
Select Credit Card Expiration to sort the records by credit card
expiration date.
5. Under Draft Method, select the types of accounts that you want to include in
the report: Checking & Savings, Credit Card, and Non-EFT.
6. Under Include Only, you can select to include only certain types of accounts
(These options are only available when using the CheckFree gateway):
Page 204
•
Check Frozen Accounts to list only accounts that have been frozen.
•
Check Credit Cards Expiring within and specify the number of
months to list only credit card accounts that are due to expire soon.
Version 7.0
May 2010
Generating Reports
EZ-CARE2
EZ-Entry Category Barcodes
The EZ-Entry Category Barcodes report allows you to print out barcodes for your Accounts
Receivable categories. Your staffers can then scan the barcodes instead of instead of entering
categories manually.
In order to run this report, you must select the Accounts Receivable category.
X To set report-specific options
1. Under Include Categories:
a. Select the A/R Categories you want to print barcodes for. Click the All
button to select all categories. Click the Clear button to deselect all
categories.
b. Select the order that the categories will print out: either by Name, or using
the Custom sort order.
2. Under Layout, select the number of columns you want to appear in the printed
pages.
3. Set Reader to the barcode reader type.
4. Check Include EZ-Entry Action & Number Barcodes to put barcodes for
common actions and the numbers 0-9 at the bottom of the report page.
Version 7.0
May 2010
Page 205
Generating Reports
EZ-CARE2
EZ-Entry Family & Child Name Barcodes
The EZ-Entry Family & Child Name Barcodes report allows you to print out barcodes for
child and family names so that your staff can scan them in instead of entering them
manually.
In order to run this report, you must select the Accounts Receivable category.
X To set report-specific options
1. Under Print For, you can select either Child or Family. If you select Child, the
report will generate barcodes for child names. If you select Family, the report
will generate barcodes for family names.
2. Under Layout, select the number of columns you want to appear in the printed
pages.
3. Set Reader to the barcode reader type.
4. Under Child, you can select All to print barcodes for all children, or One to
print barcodes for just one child. Select the child from the list below. (If Family
is selected under Print For, this section is renamed Family, and allows you to
select all families or just one.)
5. Check Include EZ-Entry Action & Number Barcodes to put barcodes for
common actions and the numbers 0-9 at the bottom of the report page.
Page 206
Version 7.0
May 2010
Generating Reports
EZ-CARE2
Invoices
Use when: you want to print and send an invoice or statement to parents notifying them of
payments received and current charges, if any.
X To set report-specific options
1. Under Include Ledgers, select the ledgers you want to include in the report.
2. Under Ledgers, you can select All to print records from all accounts, or select
One to print records from only one account. Select the account from the list
below.
3. Under Transaction Dates, enter a Start and End date for the transactions you
want to include on the invoices.
4. Check Print invoices with no Balance to print invoices which do not have an
outstanding balance, along with all the rest.
5. Enter the date that you want to appear on the invoices in the Statement Date
field. By default, today’s date appears in the field.
Version 7.0
May 2010
Page 207
Generating Reports
EZ-CARE2
6. If you want a message to appear at the bottom of the invoices, enter it in the
Message on the bottom of the invoice field. The same message will appear for
all invoices. Check Center the message to center the message on the page.
Enabling the Print Invoice Button
If you click the Save As button and save this report with “Invoice Button” in the name, then
you can print your customized version directly from the Ledger tab with the Print Invoice
button. You can have multiple reports with “Invoice Button” in the name; if you do, you can
select which Invoice Button report you want to print when you click the Print Invoice button
on the Ledger tab. See page 153 for more details.
You have the option to email invoices—see page 154 for more details. You can also offer
parents online payment processing—see page 156 for more details.
If you click the Save As button and save this report with the description of Invoice Button,
then you can print your customized version directly from a single displayed ledger with the
“Print Invoice” button.
With this report, you can create a selection from the Family, Ledger Master, Ledger
Transaction, Child, or Center tables; you can also add fields from these tables.
For details on emailing invoices, see page 154.
Ledger Audit Report
Use when: you want to review transactions in the ledger by who entered the transaction and
how they were entered—manually or from a process within the system such as Group
Posting, Cash Receipts, or posting of Ledger Templates to one or more records.
Transactions that were entered with no user specified have a user named “EZ2” (this will
occur, for example, if you are not using passwords). Pre-defined options allow you to show
the transactions entered for just one user or all users, and further specify the type of
transaction. For instance, you may want to view all manual entries performed by one
employee for a given date range. The report prints the transactions within ledgers
alphabetically.
Page 208
Version 7.0
May 2010
Generating Reports
EZ-CARE2
X To set report-specific options
1. Under Include Ledgers, select the ledgers you want to include in the report.
2. Under User, you can select All to print records for all users, or One to print
records for just one user. Select the user from the list below.
3. Under Entry Date, enter a Start and End date for the transactions you want to
include in the report.
4. Check Manual Transactions to include transactions that were entered manually
in the report.
5. Check Cash Receipt Postings to include cash receipt transactions in the report.
6. Check Collapse Transactions to include collapsed transactions in the report
(see “Collapse Transactions” page 156 for details).
7. Check Tuition Postings to include transactions for tuition payments.
8. Check Click-to-Pay to include Click-to-Pay transactions in the report.
9. Check Template Postings to include transactions generated using ledger
templates in the report.
10. Check Group Postings to include group transactions in the report.
11. Check EZ-EFT Postings to include EZ-EFT transactions in the report.
12. Check Import Postings to include imported transactions in the report.
13. Check Insta-Charge to include Insta-Charge transactions in the report.
Ledger Report
Use when: you want to review your accounts receivable by family, in summary or detail. You
can use this report to answer parent questions on their balances, or to see which families
have had transactions within a given time period. You can filter to show only ledgers with
Version 7.0
May 2010
Page 209
Generating Reports
EZ-CARE2
transactions in specific A/R Categories. You can also print this report as an Excel file by
accessing the user-defined options and selecting Microsoft Excel (XLS) as the printer. After
you export the report, you can immediately view it in Excel by selecting the “Display”
option.
X To set report-specific options
1. Under Include Ledgers, select the ledgers you want to include in the report.
2. Under Ledgers, you can select All to print records from all accounts, or select
One to print records from only one account. Select the account from the list
below.
3. Under Include Transactions, enter a Start and End date for the transactions
you want to include on the invoices.
4. Check Print Transaction Detail to display individual transactions in the report.
If cleared, only summary records for each ledger will be displayed.
5. Check Print ledgers with no Balance to print ledgers which do not have an
outstanding balance, along with all the rest.
6. Under Include Categories, select the A/R Categories you want to include in the
report. Click the All button to select all categories. Click the Clear button to
deselect all categories.
7. If Only include ledgers with transactions for selected categories within the
date range is checked, ledgers which contain no transactions for the selected
categories within the date range specified will not appear in the report.
Note: You can print this report to an Excel (.XLS) file from the Report Options screen. To do
this, click File in the Send To line and Excel in the Format line.
Note: With this report, you can create a selection from the Family, Ledger Master, Ledger
Transaction, Child, or Center tables; you can also add fields from these tables.
Page 210
Version 7.0
May 2010
Generating Reports
EZ-CARE2
Ledger Variance Report
Use when: you want to view ledger activity for A/R categories for two different periods by
family and discover why there is a difference between the two periods. For example, you have
a large decrease in revenues between two months and want to find out the cause. The report
lists each family, in summary or detail form.
X To set report-specific options
1. Under Include Ledgers, select the ledgers you want to include in the report.
2. Under Period 1 and Period 2, enter the Start and End dates for the two date
ranges you want to compare in the report.
3. Under Summarize By, select whether you want to summarize records by
Category or by Rollup Category.
4. Under Category Type, select the category types you want to include in the
report.
5. Under Include Detail, select one of the following options:
Version 7.0
May 2010
•
Select Category Totals to display only summary records for each
category.
•
Select Transaction Detail to display all transaction records.
Page 211
Generating Reports
EZ-CARE2
Payment Receipts
Use when: you want to print a batch of receipts for parents. For example, centers can print
them for parents to use as documentation for reimbursement from their Flexible Spending
Accounts. Receipts to be printed can be selected by deposit number or by deposit date. They
can also be printed 3 to a page.
X To set report-specific options
1. Under Include Ledgers, select the ledgers you want to include in the report.
2. Under Ledgers, you can select All to print records from all accounts, or select
One to print records from only one account. Select the account from the list
below.
3. Under Include For, select one of the following options:
•
Select Date Range and enter a Starting and Ending date to generate
receipts for transactions within a specified date range.
•
Select Deposit Numbers and enter Starting and Ending numbers to
generate receipts for transactions whose deposit numbers fall within a
specified range.
•
Select Receipt Numbers and enter Starting and Ending numbers to
generate receipts for transactions whose receipt numbers fall within a
specified range.
4. Check Print Multiple Receipts per Page to print more than one receipt on a
page.
5. If desired, you can enter a Message to Print in the field provided. This message
will appear on all receipts.
Page 212
Version 7.0
May 2010
Generating Reports
EZ-CARE2
Note: If you click the Save As button and then save this report with the Description of
Receipt Button, then you can print your customized version directly from the Enter
Cash Receipts screen with the “Print Receipt” button (see page 148 for more details).
If you save this report with the Description of Email Receipt Button, then you can email
a receipt directly to a parent from the Enter Cash Receipts screen by clicking the
“Email Receipt” button (see page 146 for more details).
Note: With this report, you can create a selection from the Family, Ledger Master, Ledger
Transaction, Child, or Center tables; you can also add fields from these tables.
Period Analysis Report
Use when: you want to review your A/R activity (revenues, payments, credits, and discounts)
over several time periods you specify – weeks, months, or quarters – to identify trends. You
can group by A/R categories or by rollup categories if you choose. You can also print this
report as an Excel file by accessing the user-defined options and selecting Microsoft Excel
(XLS) as the printer. After you export the report, you can immediately view it in Excel by
selecting the “Display” option.
X To set report-specific options
1. Under Include Ledgers, select the ledgers you want to include in the report.
2. Under Period Options, select up the periods that will be compared in the
report:
Version 7.0
May 2010
Page 213
Generating Reports
EZ-CARE2
a. Select a Weekly, Monthly, Quarterly or Annual period.
b. Set the Start Date for the report.
c. Set the # of Periods that will be included in the report.
d. Check Auto format columns & fields to divide the columns evenly across
the page. If unchecked, the columns will use a fixed width starting from the
left margin.
3. Under Summarize By, select whether you want to summarize records by
Category, G/L account, or by Rollup Category.
4. Under Totals/Averages, select one of the following options:
•
Select None to display individual transactions for the selected period.
•
Select Period Totals to display the total of all transactions from each
period.
•
Select Period Averages to display the average of all transactions from
each period.
5. Under Category Type, select the category types you want to include in the
report.
Note: You can print this report to an Excel (.XLS) file from the Report Options screen. To do
this, click File in the Send To line and Excel in the Format line.
Period Variance Report
Use when: you want to view activity for A/R categories for two different periods and discover
why there is a difference between them. The report lists by A/R category – revenue,
payments, or credits.
Page 214
Version 7.0
May 2010
Generating Reports
EZ-CARE2
X To set report-specific options
1. Under Include Ledgers, select the ledgers you want to include in the report.
2. Under Period 1 and Period 2, enter the Start and End dates for the two time
periods you want to compare in the report.
3. Under Summarize By, select whether you want to summarize records by
Category, G/L Category or by Rollup Category.
4. Under Category Type, select the category types you want to include in the
report.
Revenue Summary Report
Use when: you want to review accounts receivable activity by category over a time range you
specify, with the option of seeing detail within the category. For each category, the report
shows a beginning balance, activity for the period, and an ending balance. You can choose to
run the report for only one category and can print by G/L account if they have been
entered. You can print this report as an Excel file by accessing the user-defined options and
selecting Microsoft Excel (XLS) as the printer. After you export the report, you can
immediately view it in Excel by clicking the Display button.
Version 7.0
May 2010
Page 215
Generating Reports
EZ-CARE2
X To set report-specific options
1. Under Include Ledgers, select the ledgers you want to include in the report.
2. Check the entries for the classes that you want to include in the report in the
Include Classes list. Click the All button to check all classes. Click the Clear
button to uncheck all classes.
3. Under Transaction Dates, enter a Start and End date for the transactions you
want to include in the report.
4. Check Print Transaction Detail to display individual transactions in the report.
If cleared, only summary records for each ledger will be displayed.
5. Under Summarize By, select whether you want to summarize records by
Category, G/L Category or by Rollup Category.
6. Under Include Categories, select the A/R Categories you want to include in the
report. Click the All button to select all categories. Click the Clear button to
deselect all categories. Click Revenues to select Revenue type categories. Click
Payments to select Payment type categories. Click Credits to select Credit type
categories.
Note: You can print this report to an Excel (.XLS) file from the Report Options screen. To do
this, click File in the Send To line and Excel in the Format line.
Note: With this report, you can create a selection from the Family, Ledger Master, Ledger
Transaction, Child, or Center tables; you can also add fields from these tables.
Page 216
Version 7.0
May 2010
Generating Reports
EZ-CARE2
Revenue vs. Labor Cost Report
Use when: you want to find out if the revenues for classes are covering your labor costs. The
report runs for all classes, using either contracted or actual times as you choose, over a
specified date range. Labor costs are entered in Office Administration, Chapter 3,
Maintain Staff Labor Costs (see page 329).
Note: You can print this report to an Excel (.XLS) file from the Report Options screen. To
do this, click File in the Send To line and Excel in the Format line.
X To set report-specific options
1. Under Attendance Basis, select to compute attendance based on Contracted
attendance, or Actual attendance.
2. Under Include Dates, you can optionally enter a Start and End date. If a date
range is specified, only records entered within the date range will appear in the
report.
Year to Date Payment Summary Report
Version 7.0
May 2010
Page 217
Generating Reports
EZ-CARE2
Use when: you want to give parents a printed summary showing the total of all payments for
the year. You can print one to three summaries per page. If you want, you can also specify
which A/R categories are included in the statement. You can also include a message on the
statements.
X To set report-specific options
1. Under Include Ledgers, select the ledgers you want to include in the report.
2. Under Ledgers, you can select All to print records from all accounts, or select
One to print records from only one account. Select the account from the list
below.
3. Under Include Categories, select the A/R Categories you want to include in the
report. Click the All button to select all categories. Click the Clear button to
deselect all categories.
4. Under Transaction Dates, enter a Start and End date for the transactions you
want to include in the report.
5. Under Report Layout, select Detail to include all transaction records, or select
Summary to include only summary records, and specify the number of
summaries that appear on a page.
6. If desired, you can enter a Message to Print in the field provided. This message
will appear for every family in the report.
Year to Date Summary Report
Page 218
Version 7.0
May 2010
Generating Reports
EZ-CARE2
Use when: you want to provide parents or other payers a listing of all their charges, credits and
payments for the year or another time range you specify. Predefined options allow you to
break down the totals by child if you want. You can also print a message to include on each
family’s summary.
X To set report-specific options
1. Under Include Ledgers, select the ledgers you want to include in the report.
2. Under Ledgers, you can select All to print records from all accounts, or select
One to print records from only one account. Select the account from the list
below.
3. Under Transaction Dates, enter a Start and End date for the transactions you
want to include in the report.
4. Check Show Child Total Detail to display subtotals for each child in a family
under every category.
5. If desired, you can enter a Message to Print in the field provided. This message
will appear for every family in the report.
Attendance Reports
The Attendance Reports allow you to analyse child attendance at each center.
Note: All these reports default to show only Active status children, families or staff. If you
want to include persons with Inactive or Remove status, you need to select the
Inactive or Remove options under the Status heading in the standard report options.
See “Setting Standard Report Options” page 166 for details. Most of the attendance
reports have predefined sorts based on the report’s internal grouping. If user-defined
sorts are available, we’ll note this below. Selections are available for most reports; we’ll
note if they are NOT available.
Version 7.0
May 2010
Page 219
Generating Reports
EZ-CARE2
Child Attendance Analysis Report
Use when: you want to create a report showing child attendance by different hour types – this is
the only report that gives you this option in reporting child times. For example, you might
want to know which children were at the center during a snow day or early school release
day. If you check Summary in the predefined options, you can print a count of hours per
child for each hour type within a time period you specify.
Note: With this report, you can create a selection from the Family, Ledger, Child, Class, or
Attendance (Contracted and Actual) tables; you can also include fields from these tables
through the Report Designer.
X To set report-specific options
1. Under Child, select which child records to print out:
a. Select All to print out records for all children.
b. Select One to print out only one child’s record. Select the name of the child
from the list below.
2. Under Class, select which classes’ records to print out:
a. Select All to print out records for all classes.
b. Select One to print out the records for only one class. Select the class from
the list below.
3. Under Hour Type, select which hour types to print out records for:
a. Select All to print out records for all hour types.
Page 220
Version 7.0
May 2010
Generating Reports
EZ-CARE2
b. Select One to print out records for only one hour type. Select the hour type
from the list below.
4. Under Organize by, select Child to sort the records in the report by child, or
Class to sort the records by class. Check New Page Per Child/New Page Per
Class to start each child or class on a new page.
5. Under Attendance Basis, select to compute attendance based on Contracted
attendance, or Actual attendance.
6. Under Include Dates, you can optionally enter a Start and End date. If a date
range is specified, only records entered within the date range will appear in the
report.
7. Check the Print Summary option to list summary records for each class instead
of individual records for each child.
Child Attendance Detail Report
Use when: you want a detailed listing of actual or contracted attendance over any given time
period. You can also use this report to get a count of how many children are attending half
days or full days. A half day is four hours or less. You can also find how many children are
there for an AM session, PM session, or both. Predefined options let you run the report for
some or all classes at your center. This report can be “printed” to Excel by changing the
printer to Microsoft Excel (XLS).
Note: With this report, you can create a selection from the Family, Ledger, Child, Class, or
Attendance (Contracted and Actual) tables; you can also include fields from these tables
through the Report Designer.
Version 7.0
May 2010
Page 221
Generating Reports
EZ-CARE2
X To set report-specific options
1. Under Attendance Basis, select to compute attendance based on Contracted
attendance, or Actual attendance.
2. Under Include Dates, you can optionally enter a Start and End date. If a date
range is specified, only records entered within the date range will appear in the
report.
3. Under Analyze As, select one of the following options:
•
AM/PM/ALL: The report will display columns marked AM, PM and
All. For each record, the relevant columns will be marked with an X.
•
HD/FD: The report will display columns marked HD (Half Day) and
FD (Full Day). For each record, the relevant columns will be marked
with an X.
•
Hours: The report will display only the total hours for each record.
4. Check the entries for the classes that you want to include in the report in the
Include Classes list. Click the All button to check all classes. Click the Clear
button to uncheck all classes.
5. Under Organize by, select Child to sort the records in the report by child, or
Class to sort the records by class. Check New Page Per Child/New Page Per
Class to start each child or class on a new page.
6. If desired, you can enter a Report Summary Message in the field provided.
This message will appear at the bottom of each page.
Page 222
Version 7.0
May 2010
Generating Reports
EZ-CARE2
Child Class Attendance Summary by Period
Use when: you want to list total hours of attendance by all children for classes, weekly, or
monthly. Other predefined options allow you to count totals for half day and full day
sessions, or for AM and PM sessions. The report shows either six weeks or six months of
totals depending on the period you choose for reporting. User defined selections are not
available for this report.
Note: You can print this report to an Excel (.XLS) file from the Report Options screen. To
do this, click File in the Send To line and Excel in the Format line.
X To set report-specific options
1. Under Attendance Basis, select to compute attendance based on Contracted
attendance, or Actual attendance.
2. Under Analyze As, select one of the following options:
•
AM/PM/ALL: The report will display columns marked AM, PM and
All. For each record, the relevant columns will be marked with an X.
•
HD/FD: The report will display columns marked HD (Half Day) and
FD (Full Day). For each record, the relevant columns will be marked
with an X.
•
Hours: The report will display only the total hours for each record.
3. Under the second Analyse As, select whether you want to summarize records on
a Weekly or Monthly basis. Enter a Start date to determine the starting point
for the report.
Version 7.0
May 2010
Page 223
Generating Reports
EZ-CARE2
Child Contracted vs. Actual Hours Report
Use when: you bill by some comparison of contracted and actual attendance - for example,
you charge for the greater of actual or contracted attendance - and you want a report
showing the variance, perhaps to send to a parent along with an invoice. Predefined options
let you run the report for all or one child, for some or all classes, within a time range you
specify. This report prints in landscape format.
Note: With this report, you can create a selection from the Family, Ledger, Child, Class, and
Attendance (Contracted and Actual) tables. In addition, this report has a table for the
calculated fields from which you can create selections. You can also include fields from these
tables through the Report Designer.
X To set report-specific options
1. Under Include Dates, you can optionally enter a Start and End date. If a date
range is specified, only records entered within the date range will appear in the
report.
2. Under Organize by, select Child to sort the records in the report by child, or
Class to sort the records by class. Check New Page Per Child/New Page Per
Class to start each child or class on a new page.
3. Under Child, select which child records to print out:
a. Select All to print out records for all children.
b. Select One to print out only one child’s record. Select the name of the child
from the list below.
4. Check the entries for the classes that you want to include in the report in the
Include Classes list. Click the All button to check all classes. Click the Clear
button to uncheck all classes.
Page 224
Version 7.0
May 2010
Generating Reports
EZ-CARE2
Child FTE Report
Use when: you want to determine how full your classrooms are over a specified time period.
The report prints classroom capacity over the period, numbers of children, and average
FTEs. You can use this report to focus marketing efforts on getting new children for classes
with low attendance, or to determine classes where you are over capacity and might need to
increase staff or create an additional class. Note: the class capacity and FTE definition come
from the Class tab in the Center drawer. These values must be entered for this report to run
properly. User-defined selections are not available for this report.
Note: You can print this report to an Excel (.XLS) file from the Report Options screen. To
do this, click File in the Send To line and Excel in the Format line.
X To set report-specific options
1. Under Attendance Basis, select to compute attendance based on Contracted
attendance, or Actual attendance.
2. Under Include Dates, you can optionally enter a Start and End date. If a date
range is specified, only records entered within the date range will appear in the
report.
Child Hours Analysis Report
Version 7.0
May 2010
Page 225
Generating Reports
EZ-CARE2
Use when: you want to see the total hours and average number of hours of attendance in each
class. Predefined options let you run the report over a period of 12 days, weeks, or months,
for contracted or actual attendance. User defined selections are not available for this report.
X To set report-specific options
1. Under Attendance Basis, select to compute attendance based on Contracted
attendance, or Actual attendance.
2. Under Analysis Period, select the length of the analysis period.
3. Under Start Date, enter the date for the beginning of the first period.
Child Loading Report
Use when: you want a graphic representation of how many children are in a class throughout
the day. This report is most useful if you have children coming and going throughout the
day and want to arrange your staffing accordingly.
Note: This report prints a page for each day of each class. The report can use scheduled
times as well as contracted and actual. If you have schedules into the future on your
Schedule tab, you can run this report as a forecasting tool. A predefined option lets you
combine classes and look at total children to take classes with two staff members and
combine them under one, reducing your staff costs. User-defined selections are not available
for this report.
Note: You can print this report to an Excel (.XLS) file from the Report Options screen. To
do this, click File in the Send To line and Excel in the Format line.
Page 226
Version 7.0
May 2010
Generating Reports
EZ-CARE2
X To set report-specific options
1. Under Attendance Basis, select to compute attendance based on the original
Schedule, Contracted attendance, or Actual attendance.
2. Under Include Dates, you can optionally enter a Start and End date. If a date
range is specified, only records entered within the date range will appear in the
report.
3. Under Include Times, you can optionally set the starting and ending times of
the period that will be covered by the report. Set Interval to the desired
frequency of attendance listings.
4. Check the entries for the classes that you want to include in the report in the
Include Classes list. Click the All button to check all classes. Click the Clear
button to uncheck all classes.
5. Check Show Period’s Peak Loading to display the number of children at the
end of each record as a series of asterisks, making it easy to spot where periods
with the highest loads are taking place.
6. Check Combine Classes to combine attendance for all selected classes into one
set of numbers.
Child Schedule Report
Use when: you want to verify that children’s schedules have been properly entered on the
Schedule tab. Predefined options let you run the report by Class, for all children or one
child, for a date range you specify. You can also print this report for future dates, for
example, to give to a parent so they can confirm the child’s schedule before they start a new
session in the fall. The report prints in landscape format and shows each child’s schedule in
chronological date order.
Version 7.0
May 2010
Page 227
Generating Reports
EZ-CARE2
Note: With this report, you can create a selection from the Family, Ledger, Child, Class, or
Attendance (Schedule, Contracted, and Actual) tables; you can also include fields from these
tables through the Report Designer.
X To set report-specific options
1. Under Date Range, you can optionally enter a From and To date. If a date
range is specified, only records entered within the date range will appear in the
report.
2. Under Print For, select which child records to print out:
a. Select All Children to print out records for all children.
b. Select One Child to print out only one child’s record. Select the name of the
child from the list below.
3. Under Organize by, select Child to sort the records in the report by child, or
Class to sort the records by class. Check New Page Per Child/New Page Per
Class to start each child or class on a new page.
4. Check the entries for the classes that you want to include in the report in the
Include Classes list. Click the All button to check all classes. Click the Clear
button to uncheck all classes.
Child Schedule Worksheet
Use when: your center allows schedules to change (for example, at a hospital where staff work
different shifts), and you want a report allowing parents to indicate upcoming schedule
changes. The report prints for all seven days of the week over a time range you specify; one
Page 228
Version 7.0
May 2010
Generating Reports
EZ-CARE2
sheet per child; it also indicates when the center is closed. The parent fills in the expected
times when the child will be at the center over the time range printed on the report. You can
also add a personalized message at the bottom of the report.
X To set report-specific options
1. Under Include Dates, you must enter a Start and End date. Only records from
within the specified date range will appear in the report.
2. If desired, you can enter a Message on the bottom of page in the field
provided. This message will appear at the bottom of every page in the report.
Child Sign In Sheet
Use when: you need a printed sign-in sheet to be at the front desk for parents to sign or in the
classroom for teachers. The sheet prints for daily, weekly, or monthly time periods. If you
choose daily or weekly, you can print for Scheduled or Contracted times; the monthly option
gives a check box for each day. This report can also be printed by child or by class with an
option for a new page per class.
Note: With this report, you can create a selection from the Family, Ledger, Child, Class, or
Attendance (Schedule, Contracted, and Actual) tables; you can also include fields from these
tables through the Report Designer.
Version 7.0
May 2010
Page 229
Generating Reports
EZ-CARE2
X To set report-specific options
1. Under Attendance Basis, select to generate the report using the original
Schedule, or the Contracted tab.
2. Check the entries for the classes that you want to include in the report in the
Include Classes list. Click the All button to check all classes. Click the Clear
button to uncheck all classes.
3. Under Include Dates, select one of the following options:
•
Daily: The report will allow you to enter daily sign-in and sign-out times
for each child for the date range specified in the Start and End fields.
•
Weekly: The report will allow you to enter daily sign-in and sign-out
times for a week, starting with the Start date. Each day will get its own
column.
•
Monthly: The report will allow you to mark off daily attendance for each
student for a month, starting at the Start date.
4. Under Organize by, select Child to sort the records in the report by child, or
Class to sort the records by class. Check New Page Per Child/New Page Per
Class to start each child or class on a new page.
5. Check Print Birthdates to print out the birthdates for each child.
6. Check Show Class to display the class name after each child’s name. This option
is only enabled if Daily is selected under Include Dates.
7. Check Include Unscheduled Children to print out records for children who
are part of one of the selected classes, but who are not scheduled for the
specified date range. This option is only enabled if Daily is selected under
Include Dates.
Page 230
Version 7.0
May 2010
Generating Reports
EZ-CARE2
Child Weekly Attendance Summary
Use when: you want a summary list by time period within the day by class, showing how many
children are attending and the ratio of staff to children. Predefined options let you choose
count of children, ratio or both; you can also vary the time interval over which
measurements are taken and combine classes. The report prints for a two week period
beginning at a date you specify, for contracted or actual times. User-defined selections are
not available for this report.
X To set report-specific options
1. Under Attendance Basis, select to generate the report using attendance data
from the Contracted tab, or the Actual tab.
2. Check the entries for the classes that you want to include in the report in the
Include Classes list. Click the All button to check all classes. Click the Clear
button to uncheck all classes.
3. Under Include Times, you can optionally set the starting and ending times of
the period that will be covered by the report. Set Interval to the desired
frequency of attendance listings.
4. Under Layout, select Page per Class to print each class on a separate page, or
select Combine Classes to generate a report where all classes are summarized
together.
5. Enter the starting date for the report in the Start field.
6. Under Contents, check one of the following options, or both:
•
Version 7.0
May 2010
# of Children: The report will list the number of children who attended
the class during each time period.
Page 231
Generating Reports
•
EZ-CARE2
Ratio: The report will list the ratio of children to staff (ex: 5 indicates 5
children per staffer).
Child Weekly Class Attendance Report
Use when: you need a list (by name) and count of children present in a class over a weekly
time period. To produce the report with this information, click on the report to open the
predefined options, select the radio button to run the report by Day and check the box for
“Show X.” Also, if you have multiple sites and have created a field (usually on the Child tab)
identifying the site each child attends, you can use the Selection feature in user-defined
options to filter and report only on attendance for sites you specify.
By default, the data for this report is drawn from the Contracted tab.
Note: You can print this report to an Excel (.XLS) file from the Report Options screen. To
do this, click File in the Send To line and Excel in the Format line.
X To set report-specific options
1. Check the entries for the classes that you want to include in the report in the
Include Classes list. Click the All button to check all classes. Click the Clear
button to uncheck all classes.
2. Enter the starting date for the report in the Start Date field.
3. Under Analyze, select one of the following options:
•
Page 232
By Day – Show # Hours: the report will show the number of hours
attended each day.
Version 7.0
May 2010
Generating Reports
EZ-CARE2
•
By Week – Show # Days: the report will show the number of days
attended each week.
4. Check Show X to display an X instead of numbers in the report. This option is
only enabled if By Day is selected under Analyze.
5. Check Show Actual Attendance to pull data out of the Actual tab instead of
the Contracted tab. The optin is disabled if Show X is checked.
Export Attendance Spreadsheet
Use when: you want to send child attendance data into Excel – to manipulate it for your own
reports that you create in Excel. For example, if you have purchased our Child Care Food
Program (CCFP) module, you would use this report to transfer data and then use it in the
module. Predefined options include organization by child or by class, and if you want to
include contracted times, actual times, and/or hour types in the export.
X To set report-specific options
1. Under Include, select the attendance data you want to export: Contracted,
Actual or Hour Type.
2. Under Include Dates, you must enter a Start and End date. Only records from
within the specified date range will be exported.
3. The Time Pairs section allows you to choose how you will handle multiple sets
of logins and logouts (1 login + 1 logout = a time pair):
•
Set Time Pairs per day to the maximum number of time pairs to record
for a given child in a given day. Select from 1 to 5.
•
Select either One row per child to list all the time pairs for each child on
a single row, or One row per time-pair to list each time pair on a
separate row.
4. Under Organize by, select the method to be used to sort the records in the
export file:
Version 7.0
May 2010
•
Child: the records will be sorted alphabetically by name.
•
Class/Child: the records will be sorted by class, and by name within
each class.
Page 233
Generating Reports
EZ-CARE2
5. Enter the file name and path of the export file in the Output to File field, or
click the
button to select a file.
6. If you selected Class/Child under Organize by, you can check the Separate
file for each Class option to output data from each class in its own separate file.
Staff Attendance Analysis Report
Use when: you want to create a report showing staff attendance by different hour types – this
is the only report that gives you this option in reporting staff times. For example, you could
identify regular and overtime hours within a pay period, or count vacation and sick days for
the year to date. Note: You must have created and entered these hour types in order to use
these features. If you choose Summary in the predefined options, you can print a count of
hours per staff member for each hour type within a time period you specify.
Note: With this report, you can create a selection from the Staff, Class, or Attendance
(Schedule, Contracted, and Actual) tables; you can also include fields from these tables
through the Report Designer.
X To set report-specific options
1. Under Staff Member, select which staff records to print out:
a. Select All to print out records for all staffers.
b. Select One to print out only one staffer’s record. Select the name of the
staffer from the list below.
2. Under Class, select which classes’ records to print out:
a. Select All to print out records for all classes.
Page 234
Version 7.0
May 2010
Generating Reports
EZ-CARE2
b. Select One to print out the records for only one class. Select the class from
the list below.
3. Under Hour Type, select which hour types to print out records for:
a. Select All to print out records for all hour types.
b. Select One to print out records for only one hour type. Select the hour type
from the list below.
4. Under Organize by, select Staff member to sort the records in the report by
staff memer, or Class to sort the records by class. Check New Page Per
Staff/New Page Per Class to start each staff member or class on a new page.
5. Under Attendance Basis, select to compute attendance based on Contracted
attendance, or Actual attendance.
6. Under Include Dates, you can optionally enter a Start and End date. If a date
range is specified, only records entered within the date range will appear in the
report.
7. Check the Print Summary option to list summary records for each class instead
of individual records for each staffer.
Staff Contracted versus Actual Hours Report
Use when: you want to determine whether a staff member has worked more or fewer hours
than contracted within a time range you specify. Predefined options let you run the report
for all or one staff member, for one or all classes, and to organize by class or staff member.
This report prints in landscape format.
Note: With this report, you can create a selection from the Staff, Class, or Attendance
(Schedule, Contracted, and Actual) tables; you can also include fields from these tables
through the Report Designer.
Version 7.0
May 2010
Page 235
Generating Reports
EZ-CARE2
X To set report-specific options
1. Under Staff, select which staff records to print out:
a. Select All to print out records for all staffers.
b. Select One to print out only one staffer’s record. Select the name of the
staffer from the list below.
2. Under Class, select which classes’ records to print out:
a. Select All to print out records for all classes.
b. Select One to print out the records for only one class. Select the class from
the list below.
3. Under Organize by, select Staff member to sort the records in the report by
staffer, or Class to sort the records by class. Check New Page Per Staff/New
Page Per Class to start each child or class on a new page.
4. Under Include Dates, you can optionally enter a Start and End date. If a date
range is specified, only records entered within the date range will appear in the
report.
Staff Expected Hours Report
Use when: it is partway through the week and you want to determine if the remaining
scheduled hours for your staff mean that one or more staff members will be working
overtime. You can then adjust staff schedules if needed. The report shows expected hours
by the end of the week and anticipated overtime hours.
Page 236
Version 7.0
May 2010
Generating Reports
EZ-CARE2
X To set report-specific options
1. Enter the starting date for the report in the Start Date field.
Staff Export Attendance Spreadsheet
Use when: you want to send staff attendance data into Excel – to manipulate it for your own
reports that you create in Excel. Predefined options include organization by staff or by class,
and if you want to include contracted times, actual times, and/or hour types in the export.
X To set report-specific options
1. Under Include, select the attendance data you want to export: Contracted,
Actual or Hour Type.
2. Under Include Dates, you must enter a Start and End date. Only records from
within the specified date range will be exported.
3. The Time Pairs section allows you to choose how you will handle multiple sets
of logins and logouts (1 login + 1 logout = a time pair):
•
Set Time Pairs per day to the maximum number of time pairs to record
for a given staffer in a given day. Select from 1 to 5.
•
Select either One row per staff to list all the time pairs for each staffer
on a single row, or One row per time-pair to list each time pair on a
separate row.
4. Under Organize by, select the method to be used to sort the records in the
export file:
•
Version 7.0
May 2010
Staff: the records will be sorted alphabetically by name.
Page 237
Generating Reports
•
EZ-CARE2
Class/Staff: the records will be sorted by class, and by name within each
class.
5. Enter the file name and path of the export file in the Output to File field, or
click the
button to select a file.
6. If you selected Class/Staff under Organize by, you can check the Separate file
for each Class option to output data from each class in its own separate file.
Staff Hours Analysis Report
Use when: you want to see the total hours and average number of hours of attendance for all
staff members in each class. Predefined options let you run the report over a period of 12
days, weeks, or months, for contracted or actual attendance. User defined selections are not
available for this report.
X To set report-specific options
1. Under Attendance Basis, select to compute attendance based on Contracted
attendance, or Actual attendance.
2. Under Analysis Period, select the length of the analysis period.
3. Under Start Date, enter the date for the beginning of the first period.
Page 238
Version 7.0
May 2010
Generating Reports
EZ-CARE2
Staff Payroll Hours Report
Use when: you need to send a report to your payroll department in order to generate payroll;
also if you want to apply rounding in calculating staff times. The predefined options for this
report give you a number of choices for rounding times in relation to contracted hours, in
and out times, time pairs, days or total time range you specify. The report also shows both
actual and adjusted hours after rounding.
Note: If you have the Time Clock module and are rounding times as they are transferred
from the Time Clock into EZ-CARE2, be careful that you are not rounding times again
here unnecessarily!
Tip: You can print this report to an Excel (.XLS) file from the Report Options screen. To do
this, click File in the Send To line and Excel in the Format line.
X To set report-specific options
1. Under Use Contracted Hours, specify the grace period before and after the
contracted check-in and check-out times.
2. Under Include Dates, you can optionally enter a Start and End date. If a date
range is specified, only records entered within the date range will appear in the
report.
3. Under Rounding Options, specify how times will be rounded off.
Version 7.0
May 2010
Page 239
Generating Reports
EZ-CARE2
Staff Schedule Detail Report
Use when: you want to print out a staff member’s schedule (from the Schedule Tab) over a
time range you specify. Predefined options let you run the report for one or all staff
members, and to include the staff member’s position on the report.
Note: With this report, you can create a selection from the Staff, Class, or Attendance
(Schedule, Contracted, and Actual) tables; you can also include fields from these tables
through the Report Designer.
X To set report-specific options
1. Under Staff Member, select which staff records to print out:
a. Select All to print out records for all staffers.
b. Select One to print out only one staffer’s record. Select the name of the
staffer from the list below.
2. Under Include Dates, you can optionally enter a Start and End date. If a date
range is specified, only records entered within the date range will appear in the
report.
3. Check Print Staff Member Position to include a Position column in the report
that lists staff member’s job position title.
Page 240
Version 7.0
May 2010
Generating Reports
EZ-CARE2
Staff Sign-in Sheet
Use when: you need a printed sign-in sheet for all staff members to use. The sheet prints for
daily, weekly or monthly time periods. If you choose daily or weekly, you can show
scheduled or contracted times next to the actual sign-in and sign-out times; the monthly
option gives a check box for each day. This report can also be printed by staff or by class
with an option for a new page per class.
X To set report-specific options
1. Under Attendance Basis, select to generate the report using the original
Schedule, or the Contracted tab.
2. Check the entries for the classes that you want to include in the report in the
Include Classes list. Click the All button to check all classes. Click the Clear
button to uncheck all classes.
3. Under Include Dates, select one of the following options:
Version 7.0
May 2010
•
Daily: The report will allow you to enter daily sign-in and sign-out times
for each child for the date range specified in the Start and End fields.
•
Weekly: The report will allow you to enter daily sign-in and sign-out
times for a week, starting with the Start date. Each day will get its own
column.
•
Monthly: The report will allow you to mark off daily attendance for each
student for a month, starting at the Start date.
Page 241
Generating Reports
EZ-CARE2
4. Under Organize by, select By Staff to sort the records in the report by staffer,
or By Class/Staff to sort the records by class. Check New Page Per
Staff/New Page Per Class to start each staffer or class on a new page.
5. Check Show Class to display the class name after each staffer’s name. This
option is only enabled if Daily is selected under Include Dates.
Staffing Level Analysis Report
Use when: you want to determine if you have adequate coverage for specific classes during
specific time periods during the day. As with the Child Loading Report, you can also
combine classes to determine if you can shift staff to a different task when there are more
than enough staff required. The report prints from Contracted or Actual attendance. Note:
This report prints a page for each day of each class. Normally, you would only want to run it
for a day for one or more classes; otherwise printing could take a long time and use
substantial system resources. User defined selections are not available for this report.
X To set report-specific options
1. Under Attendance Basis, select to compute attendance based on the original
Schedule, Contracted attendance, or Actual attendance.
2. Check the entries for the classes that you want to include in the report in the
Include Classes list. Click the All button to check all classes. Click the Clear
button to uncheck all classes.
3. Under Include Times, you can optionally set the starting and ending times of
the period that will be covered by the report. Set Interval to the desired
frequency of attendance listings.
Page 242
Version 7.0
May 2010
Generating Reports
EZ-CARE2
4. Under Include Dates, you can optionally enter a Start and End date. If a date
range is specified, only records entered within the date range will appear in the
report.
5. Check Combine Classes to combine attendance for all selected classes into one
set of numbers.
6. Check Show Period’s Peak Loading to display the number of staff members at
the end of each record as a series of asterisks, making it easy to spot where
periods with the highest loads are taking place.
Administrative Reports
Admin reports allow you to view or print out, in summary or detail form, the contents of
libraries where you have defined templates, picklists, and EZ-Views. You can use these
reports to verify that these items have been properly set up and to plan for upcoming
changes to your system or organization.
Note: You can store customized versions of these reports using the “Save As” option, but
you cannot modify them with the Report Designer.
EZ-Views Report
Use when: you need to see a listing of all EZ-Views contained in your system, identifying
whether they are updatable and which fields and tables are included in each view.
Version 7.0
May 2010
Page 243
Generating Reports
EZ-CARE2
X To set report-specific options
1. Select the type of report you want to see:
•
Select Summary Report to simply list all of the EZ-Views in the file
cabinet.
•
Select Detail Report to see detailed information about selected EZViews, including whether they are updateable, and which fields appear in
them.
2. Under Included EZ-Views, select the EZ-Views you want to include in a detail
report. If Summary Report is selected, this feature is disabled.
Page 244
Version 7.0
May 2010
Generating Reports
EZ-CARE2
Ledger Templates Report
Use when: you need to see a listing of all saved Ledger Templates. The report can display the
detail of all transactions in the template, including A/R categories, amount, and (if
applicable) effective dates.
X To set report-specific options
1. Select the type of report you want to see:
•
Select Summary Report to simply list all of the Ledger Templates in the
file cabinet.
•
Select Detail Report to see detailed information about selected Ledger
Templates, including A/R categories, amount, and effective dates.
2. Under Included Templates, select the Ledger Templates you want to include in
a detail report. If Summary Report is selected, this feature is disabled.
Version 7.0
May 2010
Page 245
Generating Reports
EZ-CARE2
Linked Drawers Report
Use when: you need a listing of all links that have been defined throughout Maintain Linked
Drawers. You can use this information to determine that your mappings are accurate and
also to verify the destination, source cabinets, drawers, and which fields are searchable.
X To set report-specific options
1. Select the type of report you want to see:
•
Select Summary Report to simply list all of the linked drawers in the file
cabinet.
•
Select Detail Report to see detailed information about selected linked
drawers.
2. Under Included Linked Drawers, select the linked drawers you want to include
in a detail report. If Summary Report is selected, this feature is disabled.
Page 246
Version 7.0
May 2010
Generating Reports
EZ-CARE2
Picklists Report
Use when: you want a listing of all picklists in the system or of all items on a specific picklist.
You can use this information to determine that the picklists are accurate. You can also
review the report to determine if picklist settings should be changed; for example, you may
want to “lock down” the values on the picklist so users cannot change values on the list
during data entry and can only add values with confirmation.
X To set report-specific options
1. Select the type of report you want to see:
•
Select Summary Report to simply list all of the picklists in the file
cabinet.
•
Select Detail Report to see detailed information about selected picklists.
2. Under Included Picklists, select the picklists you want to include in a detail
report. If Summary Report is selected, this feature is disabled.
Version 7.0
May 2010
Page 247
Generating Reports
EZ-CARE2
Rate Masters Report
Use when: you want a listing of all saved Rate Masters. Use this report to verify that rates have
been properly set up. Predefined options let you filter on the type of rate; for example, you
could choose to view only variable rates.
X To set report-specific options
1. Select the type of report you want to see:
•
Select Summary Report to simply list all of the Rate Masters in the file
cabinet.
•
Select Detail Report to see detailed information about selected Rate
Masters.
2. Under Included Rates, select the Rate Masters you want to include in a detail
report. If Summary Report is selected, this feature is disabled.
Page 248
Version 7.0
May 2010
Generating Reports
EZ-CARE2
Template Groups Report
Use when: you need to see a listing of all saved Template Groups. You can use this if needed
as a written reference reminding users of which templates and template types are included
when a specific Template Group is applied.
X To set report-specific options
1. Select the type of report you want to see:
•
Select Summary Report to simply list all of the template groups in the
file cabinet.
•
Select Detail Report to see detailed information about selected template
groups.
2. Under Included Templates, select the template groups you want to include in a
detail report. If Summary Report is selected, this feature is disabled.
Version 7.0
May 2010
Page 249
Generating Reports
EZ-CARE2
Tuition Templates Report
Use when: you need to see a listing of all saved Tuition Templates. The report can display the
detail of all entries made on the tuition tab by each template, including billing cycle, amount,
percent multiplier, rate type, hour type, or other specified entries.
X To set report-specific options
1. Select the type of report you want to see:
•
Select Summary Report to simply list all of the template groups in the
file cabinet.
•
Select Detail Report to see detailed information about selected template
groups.
2. Under Included Templates, select the tuition templates you want to include in
a detail report. If Summary Report is selected, this feature is disabled.
Page 250
Version 7.0
May 2010
Generating Reports
EZ-CARE2
Answers to Common Report Questions
This section details common procedures you may need for reports.
How do I modify System Reports?
You can’t modify System Reports directly, but you can create a copy of a System Report and
modify that copy in any way you want.
X To modify a copy of a system report
1. From the Report Library, select the report you want to modify.
2. Click the Print button.
3. Click the Save As button. The Save As dialog box appears.
4. In the Description field, enter a new name, and click OK.
5. You can now do one of the following:
•
Make changes to the pre-defined options and save them as part of the
report by clicking the Save button.
•
Click the Change button, and then click the Report Designer button to
make changes to the report. For details on the Report Designer, see the
Custom Report Writer Guide.
Note: You cannot modify Admin Reports using the Report Designer.
How do I create a print (.PRN) file?
Reports can be sent to a print file to be printed at a later time. Print files can be sent to
another computer or location for someone else to print. To create a print file, you first need
to set up a generic printer and then create the print file.
Creating a Generic Text/Only Printer
To create a generic/text only printer, you’ll add a printer to your system.
X To add a generic/text only printer
1. On the left of your Windows taskbar, click the Start button.
2. Go to Settings, and click Printers.
3. Double-click the Add Printer icon. The Add Printer Wizard appears.
Version 7.0
May 2010
Page 251
Generating Reports
EZ-CARE2
4. Follow the instructions on the Wizard screens. Choose the Local Printer setting,
and a Port setting of FILE: (Print to File).
5. From the Manufacturers list, select Generic. From the Printers list to the right,
select Generic / Text Only. When asked if you want it to be the default, click
No. Also click No for prompts asking you to share the printer or print a test page.
Printing a Report to a .PRN File
Now, you can print PRN files with the printer you added.
X To print to a .PRN file
1. From the Report List, select the report you want to print, and then click the
Print button.
2. Click the Change button.
3. Click the Printer button
. The Printer Selection dialog box appears.
4. From the list, click Generic / Text Only, and then click OK. The Report
Options screen appears again.
5. Click OK. The Print screen appears again.
6. Click the Print button to create the file. The Print to File dialog box appears.
7. In the Output File Name field, enter the path and file name for the file you’re
creating. The path must specify already existing folders (for example, C:\MY
DOCUMENTS\REPORT.PRN). The file name must have a PRN extension.
8. Click OK.
9. Click Done. A message appears, asking you want to save the changes to the
report. If you do, click Yes.
Viewing the .PRN File
To view the .PRN file, use a word processor, such as MS Word or WordPad (don’t use
Notepad because that does not format the columns). The file opens with a generic Courierlike typeface, and you may experience some wrapping of the header information.
Note: .PRN files can be opened by double-clicking them from Windows Explorer if they are
associated with your word processor program. Refer to your MS Windows
help/documentation on how to associate files.
Page 252
Version 7.0
May 2010
EZ-CARE2
Generating Reports
How do I export accounts receivable (A/R) information into Excel?
There are five different A/R reports that include an option to export the information to
Excel.
•
Aging Report (see page 199)—shows a summary or detail listing of all families
with outstanding balances, grouped by how long those balances have been
outstanding.
•
Deposit Report (see page 202)—allows you to reprint a Cash Receipts posting
report after the posting has been done.
•
Ledger Report (see page 209)—allows you to review accounts receivable
information by family.
•
Period Analysis (see page 213)—shows A/R activity over several time periods.
•
Revenue Summary Report (see page 215)—shows information by A/R
category.
Version 7.0
May 2010
Page 253
Generating Reports
EZ-CARE2
This page intentionally left blank.
Page 254
Version 7.0
May 2010
Generating Mailings and Email
EZ-CARE2
8. Generating Mailings and Email
Performing a Mail Merge with Word
You can create a mail merge document using EZ-CARE2 and Word. To do this, you’ll
create a File Export in the Report Wizard (for more details, see the Custom Report Writer
Guide), and then you’ll go to Word and create a mail merge document.
Creating the File Export in EZ-CARE2
X To perform a mail merge
1. On the Report Library, choose the appropriate values at the top for Cabinet,
Category, and Drawer. These selections determine what information you can
include in your file export, so be sure you’ve chosen the right options.
2. Click the New Report button. The New Report dialog box appears.
3. Click the Wizard button. The Save New Report As dialog box appears.
4. In the Description field, enter a report name, and click OK.
5. Click the File Export button, and then click OK.
6. From the Available Fields section, choose the fields you want to export, using
the buttons in the middle. When you select a field, it appears in Fields to Export
section.
7. Check the Add Field Header Line to Output File check box.
8. In the Output to File field, enter a path and a name for the exported file. To
browse to a new location, click the
button, go to the new location, give the
file a new name, and then click Save. Make sure the name contains a .CSV
extension. The file name should include the drive and folder, name of the file,
and extension (.CSV). For example, C:\REPORT082203.CSV.
Note: Be sure you note where you save the file because you’ll have to retrieve
the file when you’re in Word.
9. Click Finish. The Report Library appears again.
10. From the Report Library, double-click the report name, and click the Export
button. This creates the .CSV file containing the data from EZ-CARE2. See the
next section for how to bring this file into Word to create the mail merge
document.
Version 7.0
May 2010
Page 255
Generating Mailings and Email
EZ-CARE2
Creating a Merge Document in Word 2007
X To create a merge document in Word 2007
1. Open Word and create a new merge document.
2. On the Mailings tab, in the Start Mail Merge group, click Start Mail Merge.
3. Click A set of form letters or e-mail messages.
4. On the Mailings tab, in the Start Mail Merge group, click Select Recipients.
5. Click Use Existing List, and then locate the .CSV export file created in EZ2 in
the Select Data Source dialog box.
6. Create the text of your document. When you want to add a field, click on Write
& Insert Fields, then choose the field you want to add. Finish typing your
document, adding fields as needed.
7. On the Mailings tab, click Preview Results.
8. On the Mailings tab, in the Finish group, click Finish & Merge.
9. Save this document as a Word file. This document is the finished document –
meaning, when you open it, it will include the information stored in your export
(.CSV) file. You can print your letters from this document, or you can save it for
future mailings.
Updating a Mail Merge in Word 2007
From EZ-CARE2
X To update a mail merge from EZ-CARE2
1. Choose the previously defined report from the Report Library, double-click on
the report name, and click on the Export button. This creates the .RTF file
containing the latest data from EZ-CARE2.
From MS Word 2007
X To update a mail merge from Word 2007
1. Open the previously saved document. It now contains the updated data from the
recently run export.
Creating a Merge Document in Word 2002 and 2003
Once you’ve created the file in EZ-CARE2, open Word to create a new merge document.
X To create a merge document
1. From the Tools menu, select Letters and Mailings, and then click Mail Merge
Wizard. The Mail Merge Wizard appears as a pane on the right side of the
screen.
2. In the Select Document Type section, click Letters.
Page 256
Version 7.0
May 2010
Generating Mailings and Email
EZ-CARE2
3. At the bottom of the pane, click Next: Starting document.
4. In the Select starting document option, click Use the current document.
5. At the bottom of the pane, click Next: Select Recipients.
6. In the Select recipients section, click Use an existing list.
7. In the Use an existing list section, click Browse.
8. Locate the .CSV export file created in EZ-CARE2, click the file, and then click
Open. The Mail Merge Recipients screen appears.
9. At the bottom of the screen, click the Select All button, and then click OK.
10. At the bottom of the pane, click Next: Write your letter.
11. Create the text of your document. When you want to add a field from the file
you exported from EZ-CARE2, click More Items, choose the field you want to
add, and then click Insert. Finish typing your document, adding fields as needed.
Note: For assistance creating your document, see Word help.
12. At the bottom of the pane, click Next: Preview your letters. A preview of one
of your letters appears.
13. Make sure everything looks okay. If not, you can click the Previous link at the
bottom of the page and make changes.
14. At the bottom of the pane, click Next: Complete the merge.
15. In the Merge section, click Edit individual letters. The Merge to New
Document dialog box appears.
16. In the Merge records section, click All, and then click OK.
17. Save this document as a Word file. This document is the finished document –
meaning, when you open it, it will include the information stored in your export
file. You can print your letters from this document, or you can save it for future
mailings.
Updating a Mail Merge in Word 2002 and 2003
If information in EZ-CARE2 has changed, you should export the file again to make sure
your mail merge letter contains the most up-to-date information.
From EZ-CARE2
Choose the previously-defined report from the Report Library, double-click the report
name, and click the Export button. This creates the .RTF file containing the latest data from
EZ-CARE2.
Version 7.0
May 2010
Page 257
Generating Mailings and Email
EZ-CARE2
From MS Word 2002
Open the mail merge document with the EZ-CARE2 information that you saved. It now
contains the updated data from the recently run export.
Creating a Merge Document in Word 2000
Open Word and create a new merge document.
X To create a merge document
1. From the Tools menu, click Mail Merge. The Mail Merge Helper dialog box
appears.
2. In Section 1, click the Create button.
3. From the picklist that appears, click Form Letters. A dialog box appears.
4. Click Active Window.
5. In Section 2 of the Mail Merge Helper dialog box, click the Get Data button.
6. From the picklist that appears, click Open Data Source. The Open Data
Source dialog box appears.
7. From the Look in picklist, change the directory to find the folder where your
mail merge directory is located.
8. From the Files of Type picklist, choose Rich Text Format (.RTF).
9. Double-click the .RTF export file.
10. Click Edit Main Document.
11. On the toolbar, click the Insert Merge Field button.
12. Using the list the appears based on the information in your export file, create the
text of your document.
Note: For assistance creating your document, see Word help.
13. Save this document as a Word file (with a .doc extension). This creates the
template for the finished product.
14. To print the merge, first open the template document (the document you named
with .doc extension), and then take the following steps:
a. From the Tools menu, click Mail Merge.
b. In section 3, click Merge.
c. From the Merge picklist, choose Printer to send the document directly to
the printer or New document to save it as a new document. The document
you print or save will be the data merged with the template file, for as many
records as you have included in the data export.
Page 258
Version 7.0
May 2010
Generating Mailings and Email
EZ-CARE2
Updating a Mail Merge in Word 2000
From EZ-CARE2
Choose the previously-defined report from the Report Library, double-click the report
name, and click the Export button. This creates the .RTF file containing the latest data from
EZ-CARE2.
From MS Word 2000
X To update a mail merge
1. Open the template document (the document you named with .doc extension).
2. On the Tools menu, click Mail Merge.
3. Click on Merge, choose Merge Again from the mini menu.
4. Choose whether to Print directly to the printer or Save as a new document. The
job you print or save will be the data merged with the template file, for as many
records as you have included in the data export.
Generating Email Messages
Note: These features will only run with Microsoft Outlook or Outlook Express—for details on
how to set these up to work EZ-CARE2, see page 367. You must also have an email
field containing an email address. For more details, see page 92.
You have the option to send an email message to an individual in your system or to a group
of people.
X To send an email to an individual
1. Open the Family drawer and go to the Family tab.
2. Using the Families or Children picklists, locate the parent or child you want to
send an email.
3. To send a message, click the email field once (until the cursor flashes in the
field), and then on your keyboard, press CTRL+ENTER. Outlook or Outlook
Express opens with the email address inserted. Type your message and send it as
you would send any email message.
4. If you have the optional Insta-Merge module, you may also send an Insta-merge
letter by email. To do so, click on the Insta-Merge icon, select the letter you want
to send (for example, Confirmation Letter), then click the Email button. MS
Outlook or Outlook Express opens, the email address is inserted in the To: line,
and the merged letter will be filled in the text portion of your message. You can
then modify the message and send it. (See page 352 for more details).
Version 7.0
May 2010
Page 259
Generating Mailings and Email
EZ-CARE2
X To send an email to a group
(You must have the optional Insta-Merge module.)
1. Choose the tab containing the group and records you want to include in your
email. For details on which records are available on which tab, see EZ-Viewer or
Insta-Merge.
2. Click the EZ-Viewer button (
), and mark the records to which you want to
send an email or choose a Selection (for example, just parents of children in a
single class).
3. Click on Select-a-Merge. If you have marked records, the Library of Insta-
Merge Templates appears. If not, you will be asked whether to choose one or
all records. Make your choice, and then the library appears.
4. Select the Insta-Merge letter you want to send. We recommend that you Preview
the message to make sure it is the one you want because this is the only
opportunity you have to preview the message.
5. After you are satisfied with your choice, click the Email button.
6. If email addresses are missing, the system displays a warning message. You will
need to go back to the selected records and insert an address in the email field.
7. If all addresses are present, the system displays a notification for each email and
you will be given an opportunity to send or not send it. Note: You will NOT see
the email itself, which is why we recommend that you Preview the message
before sending.
Page 260
Version 7.0
May 2010
Office Administration
EZ-CARE2
9. Office Administration
The Office Administration module contains procedures and wizards that help you with the
setup and maintenance aspects of EZ-CARE2.
The features in Office Administration can be
grouped into the following categories:
•
Setting up and administering users,
groups, and security settings.
•
Setting up and maintaining your file
cabinets
•
Backing up and restoring your data
•
Setting system preferences
•
Setting session preferences and
maintaining session data
Administering Users, Groups and Security
There are several steps to setting up security in EZ-CARE2. They must be performed in the
order detailed below.
X To set up security features
1. Create Security Groups that define the rights available to staff based on their
security clearance. For example, someone in the security group of Administrator
would have wide access to system features, whereas a person in the group
Limited Access would only be able browse some areas of the system and would
be locked out of others.
EZ-CARE2 has two kinds of security groups. Cabinet Security Groups define
whether a group member has Full Access, No Access, or Read-Only Access for each
drawer, tab, and page in the system. This section also defines access to functions
in the cabinet, such as Group Posting, Enter Cash Receipts, or Printing Reports.
System Security Groups define access to Office Administration features that
can affect all cabinets such as Backup, Create/modify cabinets, and Optimize.
For details on setting up Cabinet and System Security Groups, see page 264.
2. After the cabinet and system security groups are established, you need to create
individual users in the system. You will give each user a password and assign
them to a System Security Group. For each cabinet, you should then assign the
user to a Cabinet Security Group. Note that the same user could have different
access rights to different cabinets. Also, if you do not assign a Cabinet Security
Group for a specific cabinet, the user will have NO ACCESS to that cabinet. To
Version 7.0
May 2010
Page 261
Office Administration
EZ-CARE2
perform these steps, use Maintain Users & Privileges in Office administration –
see page 262 for details.
3. Lastly, in Office Administration, open Use Passwords (see page 267) and activate
this feature by checking the box. Note that the feature does not take effect until the next
time someone logs into the system.
When you create a copy of an existing cabinet, you have the option to copy that cabinet’s
Security Groups to the new cabinet. This allows you to keep users in the same security
groups for the new cabinet without having to manually assign them. For details, see page
264.
Maintaining User Accounts with the Library of Users
The Library of Users allows you to specify security levels and authorizations for each user of
your EZ-CARE2 system.
Note: Before using this feature, we recommend you set up System and Cabinet Security
Groups first (see page 264).
Accessing the Library of Users
X To access users and privileges
1. Double-click Office Administration, double-click Chapter 1 (Users, Groups &
Security), and double-click Maintain Users & Privileges. The Library of Users
appears, listing the current users in your system.
2. Select an existing user and click Edit to modify, or click New to set up a new
user. The following screen appears:
Adding a New User
If you’re requiring each user in your system to use passwords (see page 266), you need to
create user profile for each person.
Page 262
Version 7.0
May 2010
Office Administration
EZ-CARE2
X To add a new user
1. From the Library of Users, click the New button. A blank User Profile
appears.
2. Enter the Full Name of the user.
3. Enter the Initials of the user.
4. Click on the Active check box if this user is active.
5. To set this user’s password, click the Change Password button. The Password
Setup dialog box appears.
6. Because this is a new user, leave the Enter Old Password field blank. Then,
enter the new password, and re-enter the new password to verify. Click OK to
save your changes and close the Password Setup dialog box. Click Cancel to
close the dialog box and return to the previous screen WITHOUT saving any
changes.
7. If you’re using Microsoft Exchange Server 2003 or 2000 to send emails from
EZ-CARE2, we recommend that you complete the User Name and Password
fields in the Email Account section in order to authenticate your email account.
8. From the System Security Group picklist, choose the access group you want to
give the user.
9. From the Cabinet picklist, select the cabinet for which you want to authorize
this user. You can select as many cabinets as exist on the system for each user.
After you have selected a group, you can re-select another cabinet.
10. Select a Group from the picklist that is associated with the cabinet selected. This
user can only have one group per cabinet. You can set the privileges for each
group in Maintain Cabinets/System Security Groups (next section).
11. Click OK to save your changes and close the present dialog box. Click Cancel to
close the dialog box and return to the previous screen WITHOUT saving any
changes.
Editing an Existing User
X To edit an existing user
1. From the Library of Users, select the user you want to edit, and click the Edit
button. The User Profile screen appears.
2. Make the necessary changes to the user.
Version 7.0
May 2010
Page 263
Office Administration
EZ-CARE2
3. When you’re finished, click Done.
Maintain Cabinet/System Security Groups
The Maintain Cabinet Security Groups and Maintain System Security Groups screens allow
you to set up and maintain Cabinet security groups that provide access to menus, drawers,
and tabs in cabinets, and System security groups that provide access to Office
Administration functions.
Modifying a Security Group
The process to set up a Cabinet Security Group and a System Security Group is similar.
X To modify a security group
1. Double-click Office Administration, double-click Chapter 1 (Users, Groups
and Security), and double-click Maintain Cabinet Security Groups or
Maintain System Security Groups.
Note: If you choose Maintain Cabinet Security Group, you need to choose a
cabinet, and then click the Edit button.
2. Select a Security Group from the library, and click the Edit button. The
following screen appears.
3. Click the row that corresponds to the security area you want to define.
4. For each security area, you can set Access (Read Only), Modify, Add, or Delete
options by clicking in the corresponding column. A red check indicates the
option is selected for this Security Area. A gray box means the option is not
available for this Security Area.
Page 264
Version 7.0
May 2010
Office Administration
EZ-CARE2
Note: If you’re defining Cabinet Security Groups, the Ledger Tab and Other
Ledgers security areas have a row called Administrative Override. If
given Access rights, this option allows a person in the group to make
changes to posted ledger entries. This area should be activated with care
because it reduces the ability to have an effective audit trail of changes
made.
5. In the Copy Options section, you can choose one of the following options,
which allow you to apply several options to a row at once:
•
Full Access: marks all columns.
•
No Access: no options are selected—all columns remain with gray
boxes.
•
Read Only: the Access column is marked, and the other 3 columns are
left blank.
•
Other: the Access column is marked, and you can then specify which
actions are permissible—Add, Delete, or Modify.
6. If you want to copy the setup of the currently highlighted row to all security
areas in that drawer, click the Copy To Everything in … Drawer button.
7. If you want to copy the setup of the currently highlighted row to all security
areas in the entire cabinet or system, click the Copy To All Security Areas
button.
8. Click Done to save your changes and close the present dialog box.
Registering New Modules
Before you use an optional module, you much purchase the module through your
SofterWare sales or support person, then use the registration code they provide you to
register the module, which unlocks it for use.
X To register a new module
1. Close all drawers and file cabinets.
2. Double-click Office Administration, double-click Chapter 1 - Users, Groups
& Security, and double-click Register New Modules. The EZ-CARE2 Module
Registration dialog box appears.
Version 7.0
May 2010
Page 265
Office Administration
EZ-CARE2
3. Click the Modules button to see if you have already been registered for the
module. If you are, the module will have an expiration date or a check in the
Forever column (status cannot be modified on this screen). Click Done to close
this screen.
4. You have the option to register in two ways:
•
Click the Click here to obtain # from web site button. You can then
go to the SofterWare Web site, where you can follow the instructions on
screen to obtain your registration number.
•
Call SofterWare Support and give them your 6-digit code number. They
will give you the registration key to register your new module.
5. Enter the number they give you, and click the Register button. You may check
this module again by clicking on Modules.
Enabling or Disabling Password Protection
The Use Passwords screen determines whether or not passwords are needed to access EZCARE2.
X To use passwords
1. Double-click Office Administration, double-click Chapter 1 (Users, Groups and
Security), and double-click Use Passwords. The Use Passwords dialog box
appears.
2. If you require a person's name and password to be entered to use the system,
Require name and password to use EZ-CARE2 check box. This requires all
Page 266
Version 7.0
May 2010
Office Administration
EZ-CARE2
users to enter a password as set up in Maintain Users & Privileges (see page
262) and restricts each person's usage as determined by their security group,
which is set up in Maintain Security Groups (see page 264). If you do not wish
to use any security to use the EZ-CARE2 system, make sure the check box is not
selected.
3. If you want to force users to change their passwords on a regular basis, check the
Users must change their password periodically check box. Then, define how
often you want to force them to change it.
4. Click OK. Changes to this function do not take effect until the next time you
enter the EZ-CARE2 system.
Note:
If you are using passwords, you can determine who is signed into the system
by clicking on the Help menu and selecting About EZ-CARE2. Click the
Current Users button to see a list of users currently logged into the system.
Maintaining Passwords
X To maintain passwords
1. Close all drawers and file cabinets.
2. Double-click Office Administration, double-click Chapter 1 - Users, Groups
& Security, and double-click Maintain Users & Privileges. The Library of
Users appears.
3. Highlight the user you want to work with, and click the Edit button. The User
Profile screen appears.
4. Click the Change Password button. The Password Setup dialog box appears.
5. Enter the old password, a new password, and retype the new password.
6. Click OK after changing your password, and then click OK at the User Profile
screen.
Passwords can also be changed at the initial sign-in by right-clicking on Password.
Maintaining File Cabinets
A cabinet represents a separate “database” you manage. A cabinet consists of drawers and
folders. You can have multiple cabinets, each of which contains information for different
programs, centers, or years.
EZ-CARE2 offers you several tools to manage the cabinets and drawers in your system. You
can carry out the following tasks:
•
Creating a new file cabinet
•
Renaming Drawers
•
Copying a file cabinet
•
Deleting Drawers from a File Cabinet
Version 7.0
May 2010
Page 267
Office Administration
EZ-CARE2
•
Modifying a file cabinet
•
Linking Drawers
•
Renaming a file cabinet
•
Maintaining Linked Drawers
•
Deleting a file cabinet
•
Restoring file cabinets
•
Optimizing Cabinets
Creating a New File Cabinet Based Off the Standard Template
The File Cabinet Wizard allows you to create new file cabinets either by basing it off of the
standard template, or by copying an existing file cabinet. For details on copying a file cabinet,
see “Copying a File Cabinet” page 271.
X To create a new file cabinet based off the Standard Template
1. Double-click Office Administration, double-click Chapter 2 (Cabinets &
Drawers), and double-click Create/Modify a File Cabinet (Wizard). The
Cabinet Wizard appears:
2. In the Operation section, select Create.
3. In the Cabinets section on the right, select Standard Cabinet.
4. In the Copying section, select Only Copy Structure. This will create a new
cabinet with the structure of the Standard Cabinet, but containing no
information.
5. In the Cabinet Name field, enter a name for the new cabinet.
6. Click Next. A message appears, prompting you to make a backup of your system
before proceeding.
Page 268
Version 7.0
May 2010
Office Administration
EZ-CARE2
7. Choose one of the following options:
•
To make a backup, which we strongly recommend, click the Yes button.
When the backup is complete, a message appears to let you know. Click
the OK button. Step 2 of the Cabinet Wizard appears.
•
To continue creating the cabinet without backing up, click the No
button. Step 2 of the Cabinet Wizard appears.
8. In Step 2, you have the option to create a new drawer, copy a user-created
drawer, or modify the existing drawers.
•
For details on creating a new drawer, see “Creating a New Drawer” on
page 280.
•
For details on making a copy of a user-created drawer, see “Copying a
User-Created Drawer” on page 282.
•
For details on modifying a drawer, see “Modifying a Drawer” on page
283.
9. When finished creating and editing drawers, click the Next button to proceed to
Step 3 and define the fields in the drawer.
Version 7.0
May 2010
Page 269
Office Administration
EZ-CARE2
See “Defining the Data Table Fields in a Drawer” page 292 for details on adding
fields and other objects to a drawer.
10. When finished adding fields to the drawer, click the Next button to proceed to
Step 4 and adjust the layout of the drawer tabs.
See “Modifying Screen Layouts in a Drawer” page 302 for details on fine-tuning
the layout of the tabs in your file cabinet drawers.
11. When finished modifying the tab layouts, click the Finish button to complete
the process and save the new file cabinet.
Page 270
Version 7.0
May 2010
Office Administration
EZ-CARE2
Copying a File Cabinet
EZ-CARE2 allows you to make a copy of an existing file cabinet. The copy has the same
data structure as the original, and may contain duplicates of the data in the original cabinet if
you so desire. You can also copy over the security groups from the original cabinet, if
desired.
X To copy an existing file cabinet
1. Double-click Office Administration, double-click Chapter 2 (Cabinets &
Drawers), and double-click Create/Modify a File Cabinet (Wizard). The
Cabinet Wizard appears:
2. In the Operation section, select Create.
3. In the Cabinets section on the right, select the file cabinet you want to copy.
4. In the Copying section, select one of the following:
•
Select Only Copy Structure to create a new cabinet with the structure of
the selected cabinet, but containing no information.
•
Select Copy Structure and Data to create a new cabinet with the same
structure as the selected cabinet, and containing the same information.
5. Underneath the Copying section, select one of the following options:
•
Select Copy Security Groups to include copies of the security groups
that were created for the original file cabinet when you create the copy.
•
Select No Security Groups to copy the file cabinet without copying the
security groups.
6. In the Cabinet Name field, enter a name for the new cabinet.
7. Click Next. A message appears, prompting you to make a backup of your system
before proceeding.
Version 7.0
May 2010
Page 271
Office Administration
EZ-CARE2
8. Choose one of the following options:
•
To make a backup, which we strongly recommend, click the Yes button.
When the backup is complete, a message appears to let you know. Click
the OK button. Step 2 of the Cabinet Wizard appears.
•
To continue creating the cabinet without backing up, click the No
button. Step 2 of the Cabinet Wizard appears.
9. In Step 2, you have the option to create a new drawer, copy a user-created
drawer, or modify the existing drawers.
•
For details on creating a new drawer, see “Creating a New Drawer” on
page 280.
•
For details on making a copy of a user-created drawer, see “Copying a
User-Created Drawer” on page 282.
•
For details on modifying a drawer, see “Modifying a Drawer” on page
283.
10. When finished creating and editing drawers, click the Next button to proceed to
Step 3 and define the fields in the drawer.
Page 272
Version 7.0
May 2010
Office Administration
EZ-CARE2
See “Defining the Data Table Fields in a Drawer” on page 292 for details on
adding fields and other objects to a drawer.
11. When finished adding fields to the drawer, click the Next button to proceed to
Step 4 and adjust the layout of the drawer tabs.
See “Modifying Screen Layouts in a Drawer” on page 302 for details on finetuning the layout of the tabs in your file cabinet drawers.
12. When finished modifying the tab layouts, click the Finish button to complete
the process and save the new file cabinet.
Version 7.0
May 2010
Page 273
Office Administration
EZ-CARE2
Modifying a File Cabinet
EZ-CARE2 allows you to modify file cabinets after they have been created. You can add,
edit or remove drawers, edit the fields that appear in the drawers, and edit the layouts of the
tabs in each drawer. To rename a file cabinet, see “Renaming File Cabinets” on page 277.
X To modify a file cabinet
1. Double-click Office Administration, double-click Chapter 2 (Cabinets &
Drawers), and double-click Create/Modify a File Cabinet (Wizard). The
Cabinet Wizard appears:
2. In the Operation section, select Modify.
3. In the Cabinets section on the right, select the file cabinet you want to modify.
4. Click Next. A message appears, prompting you to make a backup of your system
before proceeding.
5. Choose one of the following options:
•
Page 274
To make a backup, which we strongly recommend, click the Yes button.
When the backup is complete, a message appears to let you know. Click
the OK button. Step 2 of the Cabinet Wizard appears.
Version 7.0
May 2010
Office Administration
EZ-CARE2
•
To continue modifying the cabinet without backing up, click the No
button. Step 2 of the Cabinet Wizard appears.
6. In Step 2, you have the option to create a new drawer, copy a user-created
drawer, or modify the existing drawers.
•
For details on creating a new drawer, see “Creating a New Drawer” on
page 280.
•
For details on making a copy of a user-created drawer, see “Copying a
User-Created Drawer” on page 282.
•
For details on modifying a drawer, see “Modifying a Drawer” on page
283.
7. When finished creating and editing drawers, click the Next button to proceed to
Step 3 and define the fields in the drawer.
Version 7.0
May 2010
Page 275
Office Administration
EZ-CARE2
See “Defining the Data Table Fields in a Drawer” on page 292 for details on
adding fields and other objects to a drawer.
8. When finished adding fields to the drawer, click the Next button to proceed to
Step 4 and adjust the layout of the drawer tabs.
See “Modifying Screen Layouts in a Drawer” on page 302 for details on finetuning the layout of the tabs in your file cabinet drawers.
9. When finished modifying the tab layouts, click the Finish button to complete
the process and save the changes to the file cabinet.
Page 276
Version 7.0
May 2010
Office Administration
EZ-CARE2
Renaming File Cabinets
To change the name of a cabinet (without changing any settings or data), do the following:
X To rename a cabinet
1. Double-click Office Administration, double-click Chapter 2 (Cabinets
&
Drawers), and double-click Rename a Cabinet. The Rename a Cabinet dialog
box appears with a list of cabinets appears in alphabetical order.
2. Click the cabinet you want to rename, and click the Rename button. The
Rename Cabinet dialog box appears.
3. In the Description box, enter the new name of the cabinet. Click OK to save
your changes and close the present dialog box. Click Cancel to close the dialog
box and return to the previous screen WITHOUT saving any changes.
4. Click Done to close the dialog box and return to the previous screen.
Deleting File Cabinets
To eliminate an EZ-CARE2 cabinet that is no longer used by your organization.
Note: We recommend that you make a backup at this time before deleting a cabinet.
X To delete cabinets
1. Double-click Office Administration, double-click Chapter 2 (Cabinets &
Drawers), and double-click Delete Cabinets. The Delete Cabinets screen
appears.
2. Click the cabinet you want to delete, and then click the Delete button. A
message appears to warn you that you will PERMANENTLY DELETE the
selected cabinet.
3. Click Yes to continue with the delete. A message appears, asking you once again
if you want to delete the selected cabinet.
4. Click Yes to continue with the delete or No to cancel the delete.
5. Click Done to close the dialog box and return to the previous screen.
Restoring Cabinets
To restore cabinet files to your EZ-CARE2 system from a previous backup. The
information that is restored includes family, child, staff, ledger, and session data as well as
pictures of parents, children, and staff.
Version 7.0
May 2010
Page 277
Office Administration
EZ-CARE2
Warning! Restoring a single cabinet will overwrite any existing cabinet with the same
name. If no cabinets with the same name exist, the system will create a new cabinet.
Restoring all cabinets will overwrite all cabinets regardless of their names.
X To restore cabinets
1. Double-click Office Administration, double-click Chapter 2 (Cabinets &
Drawers), and double-click Restore Cabinets. The Restore Cabinets dialog box
appears, listing the last successful backup that was restored in the Restore data
from field.
In the Restore data from field, enter the path and file name of the backup you
want to restore. You may select a floppy disk, a folder on the network, or a
folder on your hard drive as the source. You can use the browse button
to
find the file.
If you are restoring cabinets from a floppy disk, you will be required to insert the
first disk that contains the backup, then insert the last disk that contains the
backup, and then re-insert the first disk. The system does this in order to analyze
the backup. You’ll be prompted on-screen to do this.
2. If you use the Scheduled Backup feature (see the next section), you can browse
the location where you save your scheduled backups to find the one you want to
restore. To do this, click the Browse Scheduled Backup Location button, find
the backup you want to restore, and choose it.
3. Click the Restore button to start the process. The restore process first analyzes
the backup file and your system.
4. You will be asked if you want to restore One Cabinet or All Cabinets. Make
your choice accordingly. If you are restoring from a set of multiple disks, the
system prompts you to enter the next disk. If a cabinet needs to be overwritten,
or a new cabinet needs to be created, the system prompts you before proceeding.
Note: Be careful at this point in the process. Restoring cabinets deletes
previous data. Be sure that you wish to replace current information with
the information you are restoring.
5. Click Done to close the dialog box and return to the previous screen.
Page 278
Version 7.0
May 2010
Office Administration
EZ-CARE2
Optimizing Cabinets
The Optimize a Cabinet screen allows you to remove records that are no longer needed in
your EZ-CARE2 file cabinets or re-index current records. This process can also improve the
performance of your system in some situations.
Note: Families that have balances will not be deleted. Also, a family record cannot exist
without a child record—at least one child record will remain associated with each
family record that is Active.
First, make a backup of the cabinet(s) that you are optimizing. Running the optimization is a
NON-REVERSIBLE option—data may be removed that cannot be retrieved. If the results
of this process are not what you intended, the only way to return the cabinet to its prior state
is to restore it from a backup.
X To optimize a cabinet
1. Double-click Office Administration, double-click Chapter 2—Cabinets &
Drawers, and double-click Optimize a Cabinet. The Optimize a Cabinet screen
appears.
2. In the Choose a cabinet to optimize section, click the cabinet you want to
optimize.
3. Select the Remove Records with Status: Remove or Remove Records with
Status: Inactive check boxes if you want to remove records with either status.
To just re-index your system without removing records, leave both check boxes
unchecked.
4. If you want to re-index the files that are in common to all cabinets (for example,
counters for invoice number, Cash Receipts, etc.), click the Optimize System
Registry check box. We suggest you run this procedure about once a month.
Version 7.0
May 2010
Page 279
Office Administration
EZ-CARE2
5. Click one of the following buttons depending on which cabinets you want to
optimize:
•
Optimize: only optimizes the cabinet you selected in the Choose a
cabinet to optimize section.
•
Optimize All: optimizes all the cabinets in your system, regardless of
which cabinet you selected.
If you chose to remove records with a status of Remove or Inactive, the
following message appears, warning you that families with a $0.00 ledger balance
will be permanently removed and unavailable for reporting, and families that
have a ledger balance will not be removed and one child will remain for that
record.
6. Click Yes. When optimization is complete, a confirmation message appears.
7. Click OK.
8. Click Done to close the dialog box and return to the previous screen.
Maintaining File Cabinet Drawers
Creating a User-Defined Drawer
Step 2 of the Cabinet Wizard allows you to create new user-defined drawers for your file
cabinets. These customized drawers can be used for setting up alumni information, waiting
list information, mailing information, or other information that your organization deems
necessary.
User-Defined drawers contain only one tab, with the same name as the drawer. However,
this tab can contain up to 9 pages, just as the Family, Child, and Staff tabs can.
X To create a user-defined drawer
1. Double-click Office Administration, double-click Chapter 2 (Cabinets &
Drawers), and double-click Create/Modify a File Cabinet (Wizard). The
Cabinet Wizard appears.
2. In the Operation section, select Modify.
3. In the Cabinets section on the right, select the file cabinet you want to add a
drawer to.
4. Click Next.
Page 280
Version 7.0
May 2010
Office Administration
EZ-CARE2
A message appears, prompting you to make a backup of your system before
proceeding.
5. Click Yes to create the backup and proceed to Step 2.
6. In the Operation section, select Create.
7. Under Name Option, select one of the following options:
•
Single Name Field – Use this option if your drawer will contain
information about organizations or tangible items rather than individuals
(for example, a list of books in the library).
The following default fields are set up if you chose the Single Name option:
• Status
• Name
These fields will appear in Cabinet Wizard Step 3.
Note: There is a limit of 254 fields in each drawer. Also, Ledger fields are
not available for user-defined drawers.
•
First and Last Names – Use this option for recording information
about actual people.
The following default fields are set up if you choose the First and Last
Names option:
• First Name
• Last Name
8. Enter a Drawer Name.
9. Click on Next to proceed to Step 3 and edit the data fields that appear in the
drawer. See “Defining the Data Table Fields in a Drawer” page 292 for details.
Version 7.0
May 2010
Page 281
Office Administration
EZ-CARE2
10. Click on Next to proceed to Step 4 and edit the layout of the fields on the
drawer tab. See “Modifying Screen Layouts in a Drawer” page 302 for details.
11. Click Finish to save changes and exit the Cabinet Wizard.
Copying a User-Defined Drawer
The Cabinet Wizard allows you to create a copy of a user-defined drawer. You can copy over
the data field structure and layout of a user-defined drawer, but you cannot copy over the
information that was entered into the drawer.
X To copy a user-defined drawer
1. Double-click Office Administration, double-click Chapter 2 (Cabinets &
Drawers), and double-click Create/Modify a File Cabinet (Wizard). The
Cabinet Wizard appears.
2. In the Operation section, select Modify.
3. In the Cabinets section on the right, select the file cabinet you want to copy a
drawer in.
4. Click Next.
A message appears, prompting you to make a backup of your system before
proceeding.
5. Click Yes to create the backup and proceed to Step 2.
6. Under Operation, select Create.
7. In the list superimposed over a graphic of a file cabinet that appears underneath
the Operation section, select the user-created drawer you want to copy.
8. Underneath the Copying section, select one of the following options:
Page 282
Version 7.0
May 2010
Office Administration
EZ-CARE2
•
Select Only Copy Structure to include the data field structure and layout
of the original drawer when you create the copy.
•
Select No Structure or Data to copy the drawer without copying the
data structure or layout of the original drawer.
9. Underneath the Copying section, select one of the following options:
•
Select Copy Security Groups to include copies of the security groups
that were created for the original drawer when you create the copy.
•
Select No Security Groups to copy the drawer without copying the
security groups.
10. Under Name Option, select one of the following options:
•
Single Name Field – Use this option if your drawer will contain
information about organizations or tangible items rather than individuals
(for example, a list of books in the library).
The following default fields are set up if you chose the Single Name option:
• Status
• Name
These fields will appear in Cabinet Wizard Step 3.
Note: There is a limit of 254 fields in each drawer. Also, Ledger fields are
not available for user-defined drawers.
•
First and Last Names – Use this option for recording information
about actual people.
The following default fields are set up if you choose the First and Last
Names option:
• First Name
• Last Name
11. In the Drawer Name field, enter a name for the duplicate drawer.
12. Click on Next to proceed to Step 3 and edit the data fields that appear in the
drawer. See “Defining the Data Table Fields in a Drawer” page 292 for details.
13. Click on Next to proceed to Step 4 and edit the layout of the fields on the
drawer tab. See “Modifying Screen Layouts in a Drawer” page 302 for details.
14. Click Finish to save changes and exit the Cabinet Wizard.
Modifying a Drawer
X To modify a drawer
1. Double-click Office Administration, double-click Chapter 2 (Cabinets &
Drawers), and double-click Create/Modify a File Cabinet (Wizard). The
Cabinet Wizard appears.
Version 7.0
May 2010
Page 283
Office Administration
EZ-CARE2
2. In the Operation section, select Modify.
3. In the Cabinets section on the right, select the file cabinet that contains the
drawer you want to modify.
4. Click Next.
A message appears, prompting you to make a backup of your system before
proceeding.
5. Click Yes to create the backup and proceed to Step 2.
6. Double-click Office Administration, double-click Chapter 2 (Cabinets &
Drawers), and double-click Create/Modify a File Cabinet (Wizard). The
Cabinet Wizard appears.
7. In the Operation section, select Modify.
8. In the Cabinets section on the right, select the file cabinet you want to copy a
drawer in.
9. Click Next.
A message appears, prompting you to make a backup of your system before
proceeding.
10. Click Yes to create the backup and proceed to Step 2.
11. In the Operation section, select Modify.
12. Select the drawer that you wish to modify from the list on the left of the window.
13. Click on Next to proceed to Step 3 and edit the data fields that appear in the
drawer. See “Defining the Data Table Fields in a Drawer” page 292 for details.
14. Click on Next to proceed to Step 4 and edit the layout of the fields on the
drawer tab. See “Modifying Screen Layouts in a Drawer” page 302 for details.
Page 284
Version 7.0
May 2010
Office Administration
EZ-CARE2
15. Click Finish to save changes and exit the Cabinet Wizard.
Deleting Drawers
The Delete Drawers screen allows you to eliminate user-defined drawers that are no longer
used by your organization. You may want to consider making a backup at this time before
deleting a drawer.
X To delete drawers
1. Double-click Office Administration, double-click Chapter 2 (Cabinets &
Drawers), and then double-click Delete Drawers. The Delete Drawers screen
appears.
2. Click the cabinet that contains the drawer you want to delete, and then click
Open. The Delete Drawers screen appears.
3. Click the drawer you want to delete.
4. Click the Delete button. A message appears to warn you that you will
PERMANENTLY DELETE the selected drawer. Make sure you have selected
the correct drawer to delete.
5. Click Yes to continue with the delete. A message appears, asking again if you
want to delete the selected cabinet.
6. Click Yes to continue with the delete or No to cancel the delete.
7. Click Done to close the dialog box and return to the previous screen.
Linking Drawers
Linking allows you to “pull” data from one drawer (for example, last year’s children) into
another drawer (for example, current enrollment). This feature saves you time because don’t
have to re-enter all the information.
Version 7.0
May 2010
Page 285
Office Administration
EZ-CARE2
Use this feature to add new records to your database using information from existing
records in another drawer. You can link drawers from within the same file cabinet or from
different file cabinets that display on the main EZ-CARE2 screen.
The Copy from Linked Drawer
button is active in the drawer that will be receiving
information, also known as the destination drawer. Links can be set up on the Family, Child,
and Staff tabs, and in the Other Ledgers and user-defined drawers.
If you do not see the links you need, you or your administrator will need to set them up in
Office Administration (Cabinets and Drawers), Link Drawers (see page 286).
You can use the linking feature in any of the following locations in the system:
•
The Family tab—when adding a new family.
•
The Child tab—when adding a new child (make sure the correct family record is
open).
•
The Staff tab—when adding a new staff member.
•
A user-defined drawer—when adding new user-defined records.
Creating and Maintaining Linked Drawers
Linking allows you to “pull” data from one drawer (for example, last year’s children) into
another drawer (for example, current enrollment). This feature saves you time because don’t
have to re-enter all the information.
Maintain Linked Drawers allows you to create, modify, and store Link Drawer settings for
use with the Copy from Linked Drawer feature.
X To maintain linked drawers
1. Double-click Office Administration, double-click Chapter 2 (Cabinets
and
Drawers), and double-click Link Drawers. The Library of Saved Linked
Drawer Mappings appears, with your current linked drawer mappings.
2. From the library, you have the option to create a new mapping, edit an existing
mapping, duplicate an existing mapping, delete a mapping, or rename a mapping.
For more details, see the following sections.
What You Need To Know About Linking
Links are set up with the following provisions:
•
You can link to a drawer from the same cabinet or from a different cabinet.
•
Only one source drawer can be used per destination link.
•
The destination can receive from many sources—you can set up many links, each
from a different source drawer, to the same destination drawer.
•
Fields can only be mapped to the same type of field (for example, text, date,
decimal numeric, memo).
•
Superfields are NOT currently available in the mapping process.
Page 286
Version 7.0
May 2010
Office Administration
EZ-CARE2
Adding a New Linked Drawer Mapping
X To add a new linked drawer mapping
1. From the Library of Saved Linked Drawer Mappings screen, click the New
button. The New Linked Mapping dialog box appears.
2. In the Name field, enter a name for your link, and then click OK. The Drawer
Link screen appears.
3. At the top of the screen, select the Dest. Cabinet and Dest. Drawer. These are
the cabinet and drawer that the data will be copied into.
4. In the Source Definition section, select the Cabinet and Drawer. These are the
cabinet and drawer that the data will be copied from.
5. You may enter up to three search fields from the Source Drawer. These are the
fields that are used to find the records to add to your current (destination)
Version 7.0
May 2010
Page 287
Office Administration
EZ-CARE2
drawer. You may change the headings of these fields to your liking (the headings
appear in the dialog box when linking).
6. In the Mapping Definition section, choose the fields you want to map. From
the Destination Field column, choose the field in the destination drawer that
data will be copied into. From the Source Field column, choose the field in the
source drawer that data will be copied from—the data from this field will go into
the Destination Field you’ve defined. They must be of the SAME FIELD TYPE
(for example, character, numeric, picklist). The fields available for mapping are
the database fields, including ledger balance, with the exception of Superfields
and pictures. As you select a field to map, an “x” appears next to the field in the
picklists.
7. When you have finished, click on the Close button
.
8. Click Done when you are finished. You can now use this link for copying data—
see below for details on how to do this.
Copying Data from Linked Drawers
X To copy data from linked drawers
1. Click the Copy From Linked Drawer button
. The Copy From Linked
Drawer dialog box appears.
Note: DO NOT click the Add New button.
Page 288
Version 7.0
May 2010
Office Administration
EZ-CARE2
2. To find a record in the source drawer, go to the text boxes in the Search for area
of the dialog box. Enter a name or portion of a name. You may also enter other
information, depending on the headings (for example, telephone numbers or
birthdates). Click the Search button. All records matching your entry display on
the screen.
3. To add a family record to the current drawer, highlight the record (if more than
one are found in your search), then click the Add Family button. Do the same
to add a child using the Add Child button. When you click on each of the
buttons to transfer data, a confirmation message appears, asking if you’re sure
you want to add a family or child record.
Note: If the family or child records you’re adding have a Formula field, only the
result of the Formula field is copied; the actual formula defined for the
field is not copied. You must copy all the fields that make up the Formula;
if you don’t, you will see an error message in the Formula field.
If the source contains only Family or only Child information, then only that
corresponding button is enabled.
4. If you are adding to a Staff or User-Defined drawer (such as Alumni or Volunteers),
the Add New button appears, and a single new record will be added. The Link
Name appears at the top of the dialog box.
5. You can choose another saved link, by clicking on the Saved Links button. This
displays the links available for this destination drawer.
6. When you are finished, click on Done.
Version 7.0
May 2010
Page 289
Office Administration
EZ-CARE2
Print Drawer/Record Format
The Print Drawer/Record Format screen allows you to print a list of fields and their
characteristics from all drawers of a file cabinet.
X To print drawer/record format
1. Double-click Office Administration, double-click Chapter 2 (Cabinets &
Drawers), and double-click Print Drawer/Record Format. The Print
Drawer/Record Format screen appears.
2. Select a cabinet, and click OK. The Print Drawer/Record Format screen
appears.
3. In the Include Tables section, select the tables for which you want to print the
drawer and field formats.
4. In the Sort Fields By section, click the sort method—Field Name or Field
Order.
5. Click Print to produce the list or Preview to see the list on the screen.
6. Click Done when you are finished.
Page 290
Version 7.0
May 2010
Office Administration
EZ-CARE2
Renaming Drawers
The Rename Drawers screen allows you to change the name of user-defined drawers within
a cabinet (without changing any settings or data).
X To rename drawers
1. Double-click Office Administration, double-click Chapter 2 (Cabinets &
Drawers), and double-click Rename Drawers. The Rename Drawers screen
appears.
2. Click the cabinet that contains the drawer you want to rename, and then click the
Open button. The Rename Drawers dialog box appears.
3. Click the drawer you want to rename, and then click the Rename button.
4. In the Description box, enter the new name of the drawer. Click OK to save
your changes and close the present dialog box. Click Cancel to close the dialog
box and return to the previous screen WITHOUT saving any changes.
5. Click Done to close the dialog box and return to the previous screen.
Version 7.0
May 2010
Page 291
Office Administration
EZ-CARE2
Defining the Data Table Fields in a Drawer
Use this screen to add, remove, or edit the fields that are stored in your system
Adding Fields
Use the following steps to add fields to your EZ-CARE2 system on Step 3 of the Cabinet
Wizard. If you are adding Formula, Pick List, or Radio Button fields, see the following
sections for specific details.
Note: There is a limit of 254 fields in each drawer.
X To add fields
1. In the Data Format box, choose Family, Ledger, Child, or Child Sessions.
This determines which table you’re choosing fields from.
Note: If you’re adding fields to a user-defined drawer, there will no Data Format
section in step 3.
2. Define a Field Name.
3. Select a Field Type. If you choose a field type of Formula, Pick List, or Radio
Button, some additional setup is required. See “Setting Up Picklists, Radio
Buttons, and Formulas” below for details.
4. Define the Length of the field by entering the number of characters or digits
(items like Superfields and Picklists have a system-defined length). For decimal
Page 292
Version 7.0
May 2010
Office Administration
EZ-CARE2
numeric fields, the length includes the decimal point (for example, a length of 6
allows for 000.00).
5. Specify Default values you want to place in the field. These values are
automatically placed in the field when a new record is created, but you can
overwrite them if necessary.
6. If you want to require the user to enter a value in this field, click the button in
the Required column.
7. Click the Next button. You’ll then work on setting up your screen layout—see
“Modifying Screen Layouts in a Drawer” on page 302.
Setting Up Picklists
You can set up picklists through step 3 of the Cabinet Wizard or through Maintain Picklists
(for more information, see page 325).
X To set up picklists
1. In the Data Format box, choose Family, Ledger, Child, or Child Sessions.
This determines which table you’re choosing fields from.
Note: If you’re adding fields to a user-defined drawer, there will no Data Format
section in step 3.
2. Define a Field Name.
3. From the Field Type picklist, choose Pick List and then press TAB or
ENTER. The Edit Pick List dialog box appears.
4. Populate the picklist with values in one of the following ways:
•
Version 7.0
May 2010
To create new items for the picklist, in the New Pick List Item box,
enter the name of the first item you want to include in the picklist, and
Page 293
Office Administration
EZ-CARE2
press ENTER. Continue entering picklist items until you have added all
the items you want.
•
To use items that are already part of an existing picklist, click Library.
From the Library of Saved Pick Lists, click the picklist you want to
use, and then click OK. The picklist items appear on the Edit Pick List
dialog box. You can further edit the items if you want.
5. Click the Sort Alphabetically button to sort the list.
6. If you want to allow users to add values to the picklist, click the Allow Other
Values check box. If checked, the options below the check box are enabled. You
can then make the following choices:
•
Add: gives users the ability to add items to a picklist from a data entry
screen.
•
Add with Confirmation: gives users the ability to add items to a picklist
from a data entry screen, but only after they confirm they want to add it
through a dialog box.
•
Allow Editing List During Data Entry: gives users the ability to edit
the items in the picklist while they are entering data on a screen. If you
choose this option, the edit button appears on the screen with the
picklist, as the following graphic illustrates.
7. When you’ve finished defining your picklist, click Done. The Cabinet Wizard
appears, with the Length field completed based on how many items are
contained in the picklist.
8. Specify any Default values you want to place in the field.
9. If you want to require the user to enter a value in this field, click on the button in
the Required column.
10. Click the Next button. You’ll then work on setting up your screen layout–see
“Modifying Screen Layouts in a Drawer” on page 302.
Setting Up Radio Buttons
EZ-CARE2 makes it easy to add radio buttons to your screens.
X To add Radio Buttons
1. In the Data Format box, choose Family, Ledger, or Child. This determines
which table you’re choosing fields from.
Note: If you’re adding fields to a user-defined drawer, there will no Data Format
section in step 3 of the File Cabinet Wizard.
Page 294
Version 7.0
May 2010
Office Administration
EZ-CARE2
2. Define a Field Name.
3. From the Field Type picklist, choose Radio Button and then press TAB or
ENTER. The Edit Radio Buttons dialog box appears.
4. From the Number of Buttons box, choose how many radio buttons you want
to appear for this field. You can choose any number between two and 12.
5. In the Button Names section, enter the name for each button. As you add the
button names, the right side of the screen shows you how the buttons will appear
on the screen.
6. When you’ve defined the names for all the radio buttons, click OK. The Cabinet
Wizard appears, with the Length field completed based on how many radio
buttons you defined.
7. Specify any Default value you want to place in the field.
8. If you want to require the user to enter a value in this field, click on the button in
the Required column.
9. Click the Next button. You’ll then work on setting up your screen layout—see
“Modifying Screen Layouts in a Drawer” on page 302.
Setting Up Formulas
Formulas can be used for a wide variety of purposes. Simple formulas can multiply, divide,
add, or subtract fields. More complex formulas (for example, formulas that are conditional
based on data in another field) require a higher level of skill and knowledge. For example,
you may want to calculate additional fees for a child by adding up all the fees for extra
activities, such as horseback riding, archery, and arts and crafts; you can do this with a
Formula field. Formulas are automatically recalculated when information used to calculate
them is changed; however, you can force a formula to be recalculated if necessary—see page
330 for more details.
For help with the functions you can include in formulas, see Appendix A. For help with
creating or troubleshooting formulas, contact SofterWare support.
Version 7.0
May 2010
Page 295
Office Administration
EZ-CARE2
Basic Formula Elements
There are some basic elements to any formula. Keep these elements in mind when creating
formulas for your screens.
•
Field Value: if you are typing in the name of a field, it must match the literal
name of the field. For example, if you are including Parent First Name as part of
the formula, you must enter Parent First Name and not just First Name.
•
Parentheses: if you are creating a complex formula in which certain parts of it
need to be calculated first, you can insert parentheses into the formula. Each
opening parenthesis (must have a closing parenthesis), and you must enter them
into the formula yourself.
•
Operators: you can add (+), subtract (-), multiply (*), or divide (/) the parts of
your formula. Be sure to pay attention to where you place the operators within
the formula, especially if you are using parentheses.
When you’ve added the formula field to your screen, it appears with a blue background (see
the Additional Fees field below).
X To add a Formula field
1. In the Data Format box, choose Family, Ledger, Child, or Child Sessions.
This determines which table you’re choosing fields from.
Note: If you’re adding fields to a user-defined drawer, there will no Data Format
section in step 3 of the File Cabinet Wizard.
2. Define a Field Name.
3. From the Field Type picklist, choose Formula and then press TAB or
ENTER. The Formula Editor dialog box appears with the name you gave the
formula field on the upper left side.
Page 296
Version 7.0
May 2010
EZ-CARE2
Office Administration
4. From the Field Type picklist in the Formula Editor, choose the field type for
your Formula field. Most fields with formulas will be Numeric or Decimal
Numeric, but you can also choose Character, Check Box, or Date. The
Length of the Formula field is determined by the formula that you create.
5. From the Field Name picklist, choose the first field you will include in your
formula, and then click Insert Field. The field name appears in brackets in the
Formula box. You can also type the field name directly into the Formula box,
with brackets around the name.
6. Using the + (add), - (subtract), * (multiply), and / (divide) buttons, define the
operation you want the system to perform on the field value you added to the
Formula box.
7. Continue to assemble your formula using the Field Name picklist, Insert Field
button, and the operation buttons. You can also add parentheses in a formula by
entering them directly into the Formula field.
8. When you are done constructing your formula, click the Validate button. EZ-
CARE2 validates the formula you created to be sure that it is formatted correctly.
9. Click Done. The Cabinet Wizard screen appears, with the Length of the
formula field completed based on how you defined the formula.
Version 7.0
May 2010
Page 297
Office Administration
EZ-CARE2
10. Specify Default values you want to place in the field.
11. Click the Next button. You’ll then work on setting up your screen layout—see
“Modifying Screen Layouts in a Drawer” on page 302.
Editing Fields
You can make changes to the Field Name, Length, Default, and Required values for the
fields in your system. For details on making changes to the Field Type, see the following
section. To make changes to a field, simply click in the row for the field and make the
appropriate changes.
Making Changes to the Field Type
You can make changes to the Field Type, but there are restrictions, which are detailed below.
When you cannot make a change to the Field Type, you’ll see the following message:
When you create a new field, you can change the Field Type with no restrictions, until you
exit the File Cabinet Wizard. Once you exit the wizard, the field is considered an “existing
field,” and the rules and restrictions below apply.
To change the Field Type for existing fields in your system, the following rules and
restrictions apply:
•
Existing fields can be changed, but only as reflected by the chart below. The
chart only includes Field Types that can be changed (Existing Field Type) and
the Field Types they can be changed to (New Field Type); if a Field Type cannot
be changed at all, it’s not included in the chart. These rules apply regardless of
whether the field has data in it or not.
New Field Type
Uppercase
Character
9
Time Range
Date
Time
9
Character
Numeric
9
Memo/Edit
Box
Date
9
Decimal
Numeric
Character
Birthdate
Existing Field Type
Page 298
Birthdate
9
9
9
9
9
9
9
9
Decimal Numeric
9
9
9
Numeric
9
Phone #
9
9
9
Time
9
9
9
Time Range
9
9
9
Uppercase Character
9
9
9
9
9
9
9
9
9
Version 7.0
May 2010
Office Administration
EZ-CARE2
Note: When you make a change to the Field Type, you may see a warning
message stating that data may be truncated or lost. This can occur if your
current data is not consistent with the new type. For example, if you change
the Field Type to decimal numeric from numeric. If you do not want to
continue with the change, click the No button; if you do, click the Yes button.
•
After you make a change to the Field Type and exit the File Cabinet Wizard, the
system tries to convert the existing data based on the new Field Type you
selected. If it can’t convert the data, or has a problem converting the data, you
may see some changes/anomalies in your data, which you may need to manually
correct.
Field Types
In EZ-CARE2, you have the option to add many types of fields through the Cabinet
Wizard. The following table details the field types you can choose from when creating fields
for your system.
Field Type
Description
Age
Use this field to calculate children’ ages. This decimal numeric field can be linked to
a birthdate field; if you do this, the age field automatically displays age in a decimal
Years.Months format when a birthday is entered. To link the fields, double-click the
Birthdate field when you’re designing your screens; then, when prompted, click the
Age field once.
Birthdate
Use this field to keep track of birthdays. Double-clicking it brings up a calendar for
graphical date selection. You can link a Birthdate field to an Age field; if you do this,
age is automatically calculated when a birthday is entered. To link the fields, doubleclick the Birthdate field when you’re designing your screens; then, when prompted,
click the Age field once.
Character
Use this field to manage names, addresses, email addresses, cities, states, or any
other data that can be represented in alphanumeric characters. The length you
define for this field determines the character length of the input field.
Check Box
Use this field to keep track of Yes or No answers, such as enrollment in special
programs or involvement in organizations. Set the Default value to “No.”
Checklist with
Reminder
Use this Superfield as a To-Do list. Keep track of date-related tasks and their
completion status. Built-in field type, description field, and reminder features make
tracking family responsibilities easy. Only one of these field types can be used in
each tab.
Contacts
Use this Superfield for storing emergency contact information and authorized pickups. Special fields can keep track of the contact’s relationship to the child and any
other relevant information. Only one of these field types can be used in each tab.
Date
Use this field to keep track of dates. It takes dates entered in either mm-dd-yy(yy) or
mm/dd/yy(yy) format. Double-clicking it brings up a calendar for graphical date
selection. To set two or four digits to display for the year, go to Office Administration,
Version 7.0
May 2010
Page 299
Office Administration
Field Type
EZ-CARE2
Description
Chapter 3 (Preferences & Setup), choose Century Settings, and then click on the
Show Century in Date Fields box.
Decimal Numeric
Use this field to keep track of any number that requires decimals (for example,
currency being held for special snacks). The length includes the decimal point (for
example, a length of 6 allows for 000.00).
Formula
Use this field to define a formula that will calculate a value. The formula can contain
the field itself, other formula fields, constants, conditionals, or any fields or values
allowed in a FoxPro expression. For example, you might want to know how much to
charge children for additional services. Using this field type, you can set up a formula
to calculate the following: Additional Fees ($) = Insurance ($) + Laundry ($) +
Transportation ($).Formulas are automatically recalculated when information used to
calculate them is changed. For details on how to set up formulas, see page 295.
Group Pick List
Use this field to enroll children in groups. The Group picklist uses the groups defined
in the Center tab. There can only be one per drawer.
Link
Use this field to link a file to a record. Keep links to scanned permission slips,
emergency contact forms, or any other documents you want to easily access from a
record. When you add a link field to a screen, the label is in blue and underlined and
the value in the field is also blue. A browse button next to the field allows you to
navigate to the location where the file you want to link to is saved. You can also
enter a path and file name (e.g., C:\softer\ezcenter2\forms\ZAlexander_Emergency.doc) directly into the link field, without using
the browse button. After you’ve linked to the file, you can view it by clicking the
underlined label of the link field or by clicking in the field and then pressing
CTRL+ENTER.
Memo/Edit Box
Use this field for longer entries that can be displayed in an easy-to-read format. This
field can be resized in the cabinet wizard to be easily readable, but if all text does not
appear in the box, a scrollbar is available to look at the text that didn’t fit in the view.
Text is limited to 240 characters in a memo field.
Notes with Date
and Comments
Use this Superfield to keep track of child, staff, or family related notes as they
happen. For example, enter information about a child accident or staff performance.
This field type can be used only once on each tab.
Numeric
Use this field to keep track of numeric information that does not require decimal
places.
Phone Number
Use this field to enter phone numbers. Enter the digits along with any formatting
(parentheses and hyphen). Because this field does not require you to enter US
specific formatting (area code plus 7 numbers), you can use it for local or
international phone numbers.
Pick List
Use this field to choose one item from a list of selections. The list can either be
created in the cabinet/drawer wizard or edited during entry. There is a limit of only six
user-defined picklists in the Sessions tab. See page 325 for details on maintaining
picklists.
Page 300
Version 7.0
May 2010
Office Administration
EZ-CARE2
Field Type
Description
Picture/Image
Use this field to keep track of the physical appearance of staff, family, or children.
Pictures in .JPG, .BMP or .GIF format can be used. During data entry, double-click
on the picture field to choose an image file. Note: For more information on placing
and sizing picture fields through the Cabinet Wizard, see page 305. For more
information on adding pictures to the system, see page 53 or contact SofterWare
Support.
Radio Buttons
Use this field to choose only one of several options. Examples include gender,
marital status, or T-shirt size. Up to twelve choices can be entered during field
selection.
Record Number
(ID Fields)
Use this field to display a system-defined ID field on the screen that uniquely
identifies a record. The Family ID can be displayed on the Family and Ledger tabs,
and both Family and Child ID can be displayed on the Child tab. ID fields can also be
displayed in EZ-Viewer, Report Wizard, Report Designer, and Selection.
Technical note: An ID field is especially useful as a key, for updating records with the
optional Import module. ID fields are not available as Link Drawer destination fields
but are available as Link Drawer source and/or search fields.
Status
Use this required system-defined field to maintain enrollment status. The radio
button choices are Active, Inactive, and Remove. Only one status field is allowed per
tab.
Check ListTime
Use this field to keep track of time information in a HH:MMa format. The
automatically adapting HH:MMa format allows for quick entry of time. For example,
1a will become 1:00am, 12:34p will become 12:34pm.
Time Range
Use this field to store time, such as arrival and departure times, in the Sessions tabs.
The automatically adapting HH:MMa-HH:MMp format allows for quick entry of time
ranges. 1a will become 1:00am, 12:34p will become 12:34pm.
Uppercase
Character
Use this field to manage names, addresses, email addresses, cities, states, or any
other data that can be represented in alphanumeric characters. As all entries appear
in capital letters, this field is primarily used to store state name abbreviations.
Zip Code List w/
City and State
Use this field to store zip code information. Zip codes are stored as a picklist where
each postal code is associated with a city and state. This field can be linked to the
city and state fields so that they will be entered automatically upon entry of a valid
zip code.
Note: In order to use this field and link it to City and State, you must have City and
State fields defined in your drawer. The City and State fields must be placed on the
screen in Cabinet Wizard Step 4 (Screen Modification) prior to placing the Zip Code
field on the screen. To link to the City field, double-click on the Zip Code field, and
then, when prompted, click on the City field once.
Note: Although there can be multiple zip codes for each city, there can only be one
city assigned to each zip code. To add a second or third city name to a zip code, use
a nine-digit format for the code.
Version 7.0
May 2010
Page 301
Office Administration
EZ-CARE2
Modifying Screen Layouts in a Drawer
Step 4 of the Cabinet Wizard allows you to do the following:
•
Make modifications to the screen layout for each tab in a drawer and for each
page within a tab. Click on any object of the screen you wish to move or change.
•
To add a field name, left click and hold the mouse while dragging the name from
the field list onto the screen.
•
In the Family drawer, modifications can be made to the Family, Ledger, and
Child tabs. In the Staff drawer, you can modify the Staff tab. The User-Defined
drawers are a single tab, which can be modified here. Use the Next and Back
buttons to move between the screens.
The toolbar defaults to the right side of the screen but can be moved by clicking on an area
outside a tool button and dragging it to another position. Once you've selected an object to
modify, you may use any of the following tools (depending on the object):
Button
Name
Description
Field List
Displays the field list from which you can select fields to add to the screen.
Cut
Enables you to cut an object to be pasted someplace on the screen.
Copy
Enables you to copy an object to be pasted someplace else on the screen.
Paste
Performs a paste of an object previously cut or copied into the clipboard.
Undo
Performs an undo (reversal) of your last action on this screen.
Edit
Label
Provides the ability to edit the label of a field or other object on the screen.
Align
Label
Aligns the selected label and field either next to each other or above and below each
other.
Page 302
Version 7.0
May 2010
Office Administration
EZ-CARE2
Button
Name
Description
Reorder
Displays a list of fields in tab order and allows you to change the order by clicking
and dragging the gray box to the left of the field.
Add a
Label
Creates a new label.
Add a
Box
Creates a new box, which you can move and resize. Note: This is not a field or
picklist.
Add a
Line
Creates a new line, which you can move and resize.
Field Tip
Adds a tool tip to a field. A tool tip is a small yellow box that appears above an
object when you point to that object with the mouse.
Page
Tips
Adds a tool tip to the page number indicators (also known as a page tip). A tool tip is
a small yellow box that appears above an object when you point to that object with
the mouse.
Delete
Page
Allows you to delete a page on a tab. You cannot delete the first page on any tab.
Help
Displays help for this portion of Office Administration.
Changing Screen Layout
EZ-CARE2 allows its users to arrange their screens in whatever way suits their individual
needs best. Step 4 of the Cabinet Wizard is where this layout takes place.
Using the mouse and the toolbar on the side of the screen, you may move around fields,
such as pictures, picklists, radio buttons, and Superfields.
You need to select the page you want to edit, and then you can make changes to the screen.
X To select the specific page of the tab that you want to edit
1. Click the number for the page you want to edit the layout for on the page menu
. You may create and edit up to nine pages for each tab
in the family drawer (just click on the number of the page you want to create).
You may not create a page if there are no fields on the page before it (for
example, page 5 cannot be created if page 4 is empty).
Alignment within the Layout Field
Every graphic element placed in the tab layout screen is assigned a location. This location is
measured and displayed in the top right corner of the screen.
Version 7.0
May 2010
Page 303
Office Administration
EZ-CARE2
Use these coordinates, Left, Top, Width and Height to better align fields, Superfields, boxes,
lines, and text within the screen.
Adding a Field to the Tab or Page
If you added a field in step 3 , you can now add it to your screen layout. You cannot add a
field to the screen layout if you haven’t added it in step 3.
X To add a field
1. Click the Add Fields button
. The Field List dialog box appears.
Note: Clicking the Add Fields button for a second time will anchor the Fields
window in the bottom right corner of the screen. Clicking it a third time will
remove it from view.
2. Select the field that you want to add from the window of available fields.
3. Left-click and hold the mouse down and drag the field on to the page. At the
desired location, let go of the mouse button.
Moving a Field
You can easily change the location of a field on your screens
X To move a field
1. Click once on the field you want to move.
2. Once the red box around the field indicates that it has been selected, drag the
field to the location where you want it on the screen.
Resizing a Field
When fields are added to the screen, they may be smaller or larger than you prefer. You can
change the size of the field on screen—this doesn’t change the length of the field in your
database
X To resize a field
1. Click the field you want to resize.
2. At the corner of the selected field, click the black resizing box.
3. Drag and resize the field as to suit your personal preferences.
Page 304
Version 7.0
May 2010
Office Administration
EZ-CARE2
Note: The resizing boxes can only change the graphical appearance of a field. The
number of characters that it can hold can only be changed on the Define Data
Table Fields screen in the Modify a Drawer section of the Wizard (see page
292).
Aligning the Text of a Label
The default alignment of label text is to the left of the data entry field.
X To change the alignment of a label
1. Click the Align a Label button
. One click will move the text directly
above the data field and a second click will revert it to its location on the left of
the entry field.
Changing the Text of a Label
Some fields have text attached to them. You can customize the label for the field.
X To change the label text
1. Select the label you want to change and click on the Edit Label button
.
2. Change the label, and then click anywhere in the tab to close the editing
procedure.
Adding Extra Text
You have the option to add text to your screens. You may want to do this to organize blocks
of information or add instructions to certain sections
X To add extra text
1. Click the Add a Label button
.
2. Type the text, and then press ENTER or click anywhere else on the page. Text
added using the Text button can be moved in the same way that ordinary fields
are.
Adding Graphic Enhancements
You have the option to add a horizontal blue to help improve the aesthetics of the tab layout
or a black box to help users separate fields on the screen.
X To add a horizontal blue line
1. Click the Add a Line button
. The line appears on the screen.
2. If necessary, move the line by dragging it with the mouse and resize it with the
resizing boxes.
Version 7.0
May 2010
Page 305
Office Administration
EZ-CARE2
X To add a black box
1. Click the Add a Box button
. The box appears on the screen.
2. If necessary, use the mouse to move the box and the resizing boxes to change its
size.
Changing Picture Size
If you’ve added a picture to your screen, you may need to resize it to fit your screen.
X To change the picture size
1. Hover over the Picture/Image field – the dimensions appear in the upper right
of the screen.
2. Click once on the Picture/Image field, then grab the handles (little black boxes)
by holding down the left mouse button. The mouse pointer turns into a doublearrow. Field information displays on the top of the Cabinet Wizard screen – the
Left position, Top position, Width, and Length. See page 53 for suggested
dimensions (width and length) of this field.
3. To move the image, click in the middle of the image and hold down the left
mouse button. Drag the field to the desired location.
4. When you are finished, click the Next button to proceed to another screen, or
click on the Finish button.
Adding a Field Tip
To create text that will appear when the mouse rests on a tab field, use the Field Tip button
.
X To add a field tip
1. Select the field you want to add the tip to.
2. Click the Field Tip button. A dialog box appears.
Page 306
Version 7.0
May 2010
Office Administration
EZ-CARE2
3. In the Field Tip box, enter the text you want to appear.
4. Click the OK button when you are finished.
Note: Field Tips cannot be attached to picture or status fields.
Adding Page Tips
You can create descriptions of the pages on your screens. These page tips will appear when
you hold your mouse on the page selector menu on the bottom right of the tab.
To add these descriptions, use the Page Tips button
.
X To add page tips
1. Click the Page Tips button. A dialog box appears.
2. Enter the text that you want to appear for each page, and click OK when you are
finished.
Version 7.0
May 2010
Page 307
Office Administration
EZ-CARE2
Removing Records from Superfields
The Remove Records from Superfields screen allows you to remove records from the Check
List and Notes Superfields, based on the date of entry. This can help to clear out outdated
entries from these fields.
X To remove records from superfields based on date of entry
1. Double-click Office Administration, double-click Chapter 2 (Cabinets &
Drawers), and double-click Remove Records from Superfields. The Remove
Records from Superfields Cabinet Select screen appears.
2. Click the cabinet that contains the drawer you want to rename, and then click the
Open button. The Remove Records from Superfields screen appears.
3. Under Select Date Range, enter the date range of the records you want to
remove by specifying the From Date and To Date.
4. Under Select Record Types to Remove, select Check List, Notes, or both.
5. Click the Remove button to remove the records that fall within the specified
date range. A confirmation screen will appear if records were found within the
specified date range:
6. Click the Yes button to remove the fields. A message box will appear:
7. Click OK to close the message box. You will automatically exit the Remove
Records from Superfields screen.
Page 308
Version 7.0
May 2010
Office Administration
EZ-CARE2
Backing Up Your System
It is extremely important to back up your data (cabinets) on a consistent basis. Hardware can
break down or be stolen, but if your data is backed up, you can recover quickly and keep the
database and financial aspect of your center running. Having no backup puts you at risk of
losing all your data in the event of a system malfunction.
Overview
Backup Types
There are several ways of backing up data on your system:
•
Through a Network - If your center is part of a larger organization, and your
•
Individual Backup to a Removable Drive - Using a backup device like an
•
CD Recordable (CD-R) or CD Rewriteable (CD-RW) - Using a recordable
•
Back up EZ-CARE2 File Cabinets - By using the backup program built into
center's computer is connected to a network, a network administrator can back
up all the data on your system on a nightly or regular basis. This will include your
EZ-CARE2 data.
external USB drive connected to your system and third party software, you can
back up all the data on your system on a nightly or regular basis. This will include
your EZ-CARE2 data.
CD “burner” and third party software, you can back up your EZ-CARE2 data.
In most cases, this should be more than enough storage space for your EZCARE2 data. If your CD Burner has the capability to write “directly” to the CD,
you can use the EZ-CARE2 backup function. Refer to your third party software
for specific CD functions.
EZ-CARE2, you can back up only your EZ-CARE2 data onto a flash drive, a
folder on your network, or a folder on your hard drive on a one-time basis or on
a schedule you define. This does NOT back up any other data on your system.
Of the backup types listed, the first three are supported by your network administrator,
hardware consultant, or third party software manufacturer. The fourth method is supported
by SofterWare.
Planning Your Backups
The recommended backup frequency is daily. However, if this is not possible, a weekly or
monthly backup is done. Remember - whatever data is on your last backup is the point at
which we can restore the EZ-CARE2 system. Any data entered after your last backup will be
lost and you will have to re-enter it.
Make sure you have enough disks or other storage space for a periodical backup set. For
example, your backup may take multiple disks. Label a set (Disk 1, Disk 2) for even
numbered days and odd numbered days. Remember to replace these disks and discard the
old ones at least every three months.
Version 7.0
May 2010
Page 309
Office Administration
EZ-CARE2
If you are placing backups in a folder on your hard drive, make sure to change the file name
each time you make a backup. Otherwise, you run the risk of overwriting older backups with
the same file name.
Periodically take a set of backups off-site. Make sure either a staff member takes the disks
home or they are brought to another location. If you must keep your backup media on site,
be sure to store them in a fireproof and waterproof safe.
Backing Up Cabinets Manually
EZ-CARE2 allows you to back up cabinet information from your EZ-CARE2 system to a
file for safekeeping. The information includes family, child, staff, ledger, and session data as
well as pictures of parents, children, and staff (only available if you back up all cabinets).
Note: You can also use EZ-CARE2’s scheduled backup feature, which allows you to run a
backup at a predefined time on the days that you specify. For more information, see
page 311.
X To backup cabinets
1. Double-click Office Administration, double-click Chapter 2 (Cabinets &
Drawers), and double-click Backup Cabinets. The Backup Cabinets dialog box
appears.
2. Under Backup, select the following options:
a. Check Use Maximum Compression (Slower) to use the maximum file
compression option when creating the backup. This will require more time to
process, but will result in smaller backup files.
b. You can select to back up All Cabinets or One Cabinet. If you choose All
Cabinets, EZ-CARE2 backs up pictures in your system in addition to other
cabinet data (but see below). If you select One Cabinet, you will need to
specify which cabinet by selecting it from the list.
c. Check Include the Pictures folder to include the pictures folder in your
backup, or clear the check box to exclude this folder. Excluding the folder
will make your backups much smaller.
3. Under Backup file name, type in the folder/directory and file name for backing
up or find it using the browse button
Page 310
. Make sure you name the file with a
Version 7.0
May 2010
Office Administration
EZ-CARE2
.zip extension (for example, g:\data.zip if you are saving it to a flash drive, or
c:\ezcenter2\backup\data_081304.zip if you are saving it on the hard drive).
You should give each backup a unique name (for example, add the date to the
end of each file name) so that you do not overwrite backups.
Note: If you are burning the backup to a CD-ROM or DVD, this will require the
use of third party software. Consult with the documentation for these
devices for more information before starting the backup process.
4. If you are backing up to floppy discs, check Format floppy disk to format the
floppy discs before writing to them.
5. Click the Backup button to start the process.
Note: If you are backing up to floppy discs, replace the floppy diskette with the
next disk when prompted by the system and then click OK. Make sure
you write the necessary information on the disk label. You may want to
label the first disk that you used for the backup as Disk 1, and the second
disk as Disk 2.
6. Click Done to close the dialog box and return to the previous screen.
Scheduled Backup
This feature allows you to automatically back up your cabinets every week at a predefined
time on the days that you specify. You can back up all cabinets, or create separate backup
schedules for each one. Running scheduled backups on a regular basis helps ensure that you
can retrieve a current copy of your data if something causes your data to be lost or damaged.
Note: To run a one-time backup of your system, use the Backup Cabinets option. For details,
see page 310.
X To access this module
1. Open Office Administration, Chapter 2 (Cabinets & Drawers), and select
Scheduled Backup. The Library of Saved Scheduled Backups screen appears.
Version 7.0
May 2010
Page 311
Office Administration
EZ-CARE2
X To create a new scheduled backup
1. Click the New button on the Library of Saved Scheduled Backups screen. The
New Scheduled Backup screen appears:
2. Type in a descriptive name for the new backup in the Name field (“Weekly
Saturday Night Backup” or something similar).
3. Click the OK button. The Scheduled Backup screen appears:
4. To set up a scheduled backup, click the Enable Scheduled Backup check box.
This will enable the other fields on the dialog.
Page 312
Version 7.0
May 2010
Office Administration
EZ-CARE2
5. If you have a multi-user license for EZ-CARE2, you will see a field to the right
of the Enable Scheduled Backup on PC checkbox. This field allows you to select
which computer on your network will be backed up. By default it is set to the
button to select a different computer on your
current workstation. Click the
network. You might select the EZ-CARE2 server, for instance, if you wanted to
create a scheduled backup for it.
Note: If you do not have a multi-user license, you will not see this field, and you
will only be able to set up a scheduled backup from your current
computer.
6. In the Cabinets to Backup section, choose the cabinets that you want to back
up when the scheduled backup process runs—All Cabinets or One Cabinet. If
you choose One Cabinet, select the cabinet you want to back up from the list.
7. In the Backup Schedule section, set up the day of the week and the time that
the backup will occur:
a. Under Days, click the button for each day of the week on which you want
the scheduled backup to run. (If needed, click the button a second time to
clear the selection.) You can schedule backups as frequently as every day or
as infrequently as once a week; choose the option that works best for your
organization.
b. In the Backup Time field, enter the time of the day you want the scheduled
backup to run, in the format HH:MM. Indicate AM or PM with an A or P
at the end of the time. For instance, to schedule a backup at 11 PM, enter
11:00P. To schedule a backup at 3 AM, enter 03:00A.
8. In the Backup Location section, select details on where and how you want to
create the backup files:
a. To store the files at a location on your computer, or in one of your network
folders or on a connected flash drive:
i.
Check the Local checkbox.
ii. Enter the name and path of the folder you want to store the files in (ex:
G:\EZBACKUP) in the Local Folder field, or click the
select a folder.
button to
b. To store the files at a remote location on an FTP server:
i.
Check the Remote checkbox.
ii. Enter the address of the FTP site in the FTP Site Address field, or click
the
button to select a folder.
iii. Enter the FTP Site User Name and FTP Site Password used to log
into the FTP site.
Version 7.0
May 2010
Page 313
Office Administration
EZ-CARE2
Note: You can schedule a backup to create files in both a local folder and a
remote FTP folder at the same time.
c. In the File Name Prefix field, enter the start of the file name for each
backup file the system creates. For each backup file name, a date and time
stamp will be added to the end of the prefix you specify. In the Example
box, you can see a sample of what a backup file name would look like.
d. If you want to delete previous backup files when a new backup file is created,
click the Delete previous backup files after a successful backup check
box. In general, it is best that you don’t delete previous backups, so you have
more than one backup available. (You may eventually need to delete your
oldest backups in order to save space, however.)
9. If you want someone to be notified when the backup is complete, enter an email
address in the Email backup completion status to field. You should also enter
the User Name and Password for the person’s email program, so EZ-CARE2
can properly send the email.
10. When finished, click the OK button to save your new scheduled backup, or click
the Cancel button to quit without creating a new backup.
The new scheduled backup entry will appear in the Library of Saved Scheduled
Backups:
X To edit, enable or disable a scheduled backup
1. In the Library of Saved Scheduled Backups, select the scheduled backup you
want to edit.
2. Click the Edit button. The Scheduled Backup screen opens, displaying the
settings for the selected backup.
3. To enable the backup, check the Enable Scheduled Backup checkbox.
4. To disable the backup, clear the Enable Scheduled Backup checkbox.
Note: Once the Enable Scheduled Backup checkbox is cleared, you will not be
Page 314
Version 7.0
May 2010
Office Administration
EZ-CARE2
able to edit the other settings for the scheduled backup.
5. Edit the remaining settings as needed (see the section on creating scheduled
backups for details).
6. Click the OK button to save your changes and return to the Library of Saved
Scheduled Backups.
X To duplicate a scheduled backup
1. In the Library of Saved Scheduled Backups, select the scheduled backup you
want to copy.
2. Click the Duplicate button. The New Scheduled Backup screen appears, with
the default filename being Copy of [original backup name].
3. Type in the name you want to give the duplicate backup, and click OK. The
Scheduled Backup screen opens, displaying the settings for the duplicate backup.
4. Edit the settings as needed (see the section on creating scheduled backups for
details).
5. Click the OK button to save the duplicate backup and return to the Library of
Saved Scheduled Backups.
X To delete a scheduled backup
1. In the Library of Saved Scheduled Backups, select the scheduled backup you
want to delete.
2. Click the Delete button. A confirmation screen appears:
3. Click the Yes button to delete the scheduled backup, or click the No button to
cancel.
X To rename a scheduled backup
1. In the Library of Saved Scheduled Backups, select the scheduled backup you
want to rename.
2. Click the Rename button. The Rename Scheduled Backup screen appears:
3. Enter the new name in the Description field.
Version 7.0
May 2010
Page 315
Office Administration
EZ-CARE2
4. Click the OK button to rename the scheduled backup, or click the Cancel
button to cancel.
Notes on Scheduled Backups
When you enable the Scheduled Backup feature, an icon appears in the status area of the
Windows taskbar.
When a backup has been successfully created, a tool tip appears with the icon, showing the
day, date, and time of the last backup. When a backup is unsuccessful, the icon has a red X
over it and the tool tip notifies you that the backup was unsuccessful.
Successful
Unsuccessful
If you right-click the Scheduled Backup icon, you can choose from the following options:
•
Backup EZ-CARE2 Now: starts a backup of EZ-CARE2.
•
View Backup Schedule and Status: shows you the status of the most recent
backup attempt and the schedule for backups.
•
Cancel Automatic Backup: disables the Scheduled Backup feature. After you
click this option, the icon is removed from the status area.
Restoring from Backups
By using the restore program built into EZ-CARE2, you can restore only your EZ-CARE2
data. This is done using the data that was backed up using EZ-CARE2’s Backup Cabinets
or Scheduled Backup options. This does NOT restore any other data on your system.
X To restore EZ-CARE2 data from a previously-created backup file
1. Close all drawers and file cabinets.
2. Double-click Office Administration, double-click Chapter 2 - Cabinets and
Drawers, and then double-click Restore Cabinets. The Restore Cabinets
dialog box appears.
Page 316
Version 7.0
May 2010
Office Administration
EZ-CARE2
3. In the Restore data from field, identify the folder/directory and file name you
want to restore data from. You may select a floppy disk, a CD, a folder on the
network, or a folder on your hard drive as the source. You can either type in the
information or you can use the browse button
.
4. If you use the Scheduled Backup feature, you can browse the location where you
save your scheduled backups to find the one you want to restore. To do this,
click the Browse Scheduled Backup Location button, find the backup you
want to restore, and choose it.
5. In the Restore section, choose which cabinets to restore—All Cabinets or One
Cabinet. If you choose One Cabinet, choose the cabinet from the picklist.
6. Click the Restore button. A message appears, asking you if you want to continue
with the restore.
7. Click Yes. Another message appears, asking if you want to continue.
8. Click Yes. A message appears, telling you the cabinet has been restored.
9. Click OK.
Preferences & Setup
EZ-CARE2 allows you to define your preferences and the setup for your system. This
section details those procedures.
Calculate Child Ages
To determine when to calculate children ages in the EZ-CARE2 system.
X To calculate child ages
1. Double-click Office Administration, double-click Chapter 3 (Preferences &
Setup), and double-click Calculate Child Ages.
2. Click the cabinet that you want to set up how ages are calculated for, and click
the Edit button. The Calculate Ages dialog box appears.
3. In the Child’s Age section, choose Daily, Monthly, or As of Fixed Date. If
you choose As of Fixed Date, enter the date in the text box below.
Version 7.0
May 2010
Page 317
Office Administration
EZ-CARE2
4. Click OK to save your changes and close the present dialog box. Click Cancel to
close the dialog box and return to the previous screen WITHOUT saving any
changes.
Date Format & Century Settings
To determine the format of dates in your system—American or International. It also
determines at what point a date is considered part of the 20th century or the 21st century,
and if grids and fields that contain dates will display them as two or four-digit fields.
X To set up century settings
1. Open Office Administration, Chapter 3 - Preferences & Setup, and select
Century Settings. The Date Format & Century Settings screen appears.
2. In the Date Format section, choose American Dates (for example,
12/25/2008) or International Dates (for example, 25/12/2008).
3. In the Century Settings section, define the century rollover date by manually
typing it in the field or using the up- and down-arrows.
4. If you wish to Show Century in Date Fields, click on the check box next to
that option. If this option is selected, all years will be four digits (for example,
4/1/2006).
5. Click on OK to save your changes and close the present dialog box. Click on
Cancel to close the dialog box and return to the previous screen WITHOUT
saving any changes.
Page 318
Version 7.0
May 2010
Office Administration
EZ-CARE2
Confirm Adding New Child
The Confirm Adding New Child setting determines whether or not to prompt the user when
a new child is added to the current family record in the Family drawer.
X To confirm adding new child
1. Double-click Office Administration, double-click Chapter 3 (Preferences &
Setup), and double-click Confirm Adding New Child. The Confirm Adding
New Child screen appears.
2. If you wish to Require confirmation of child being added to family, click the
check box. A blank check box indicates no confirmation.
3. Click OK to save your changes and close the present dialog box. Click Cancel to
close the dialog box and return to the previous screen WITHOUT saving any
changes.
Confirm Cut/Delete
The Confirm Cut/Delete setting determines whether or not to prompt you before
performing a Cut or Paste operation on any grid of the EZ-CARE2 system.
X To use confirm cut/delete
1. Double-click Office Administration, double-click Chapter 3 (Preferences &
Setup), and double-click Confirm Cut/ Delete. The Confirm Cut/Delete
dialog box appears.
2. If you wish to Always prompt for Cut/Delete in all grids, click the check box.
A blank check box indicates no confirmation.
3. Click OK to save your changes and close the present dialog box. Click Cancel to
close the dialog box and return to the previous screen WITHOUT saving any
changes.
Incremental Search Settings
Incremental searches in the Families, Children, and Staff picklists work with a time interval
that you define. The time interval defines how long the system waits for you to type before
selecting the record that currently appears in the picklist.
Version 7.0
May 2010
Page 319
Office Administration
EZ-CARE2
Note: The settings you define here only apply when an incremental search picklist is OPEN.
If the picklist is closed, no time interval applies.
The time interval you define and how quickly you type affect the way incremental search
works. For example, if you type “str” quickly, you’ll get to the last name that starts with
“str.” If you type “s” “t” “r” slowly, the system will consider each letter to be separate
instead of part of one name. So instead of going to a name that starts with “str,” you’ll go to
the last name that starts with “s,” then the last name that starts with “t,” and then finally the
last one that starts with “r.”
You have the option to test the incremental search settings first and then set them for your
system.
You also have the option to change the time interval in which the computer recognizes a
double-click of your mouse.
X To define incremental search settings
1. Open Office Administration, Chapter 3 - Preferences & Setup, and select
Incremental Search Settings. The Incremental Search and Mouse Double Click
Time Intervals dialog box appears with the default choices for incremental search
at the top.
2. We suggest you start by setting the Time Interval to 2. Each interval represents
.5 seconds, so a setting of 2 is one second. If you type
letters within one second, they will be considered part
of one name. If it takes you more than one second to
type the name, each letter will be considered separate.
Click on the Test picklist to display the list of test
words. Pick a word in the middle of the list to type, in
order to test the settings.
3. Then, at a normal, comfortable rate of speed, type the word. Now look at the
Test picklist. If a different word is showing—for example, you picked
“Concentrate” but the highlighted word is “Neglect”—then you might want to
increase the Time Interval before a new search starts. Try to strike a balance, so
you have enough time to locate the word, but don’t have to wait too long before
starting a new search if you made an error while typing.
Page 320
Version 7.0
May 2010
Office Administration
EZ-CARE2
4. To modify your mouse double-click settings: double-click on the file cabinet at
your normal speed. If the drawer opens, your Double Click Speed is recognized.
If the drawer doesn’t open, try increasing the time intervals for Double Click
Speed using the counter, then double-clicking again, until you arrive at a speed
where your double-click is recognized.
5. When you’re done setting the time interval for your incremental search, click the
Done button.
Locale Settings
The Locale Settings define the ZIP code formats for the center’s locale (country).
X To define locale settings
1. Double-click Office Administration, double-click Chapter 3 (Preferences &
Setup), and double-click Locale Settings. The Locale Settings screen appears.
The system default is to validate US and Canadian postal codes (or both) so they
are entered in the correct format. If these settings are acceptable, you do not
need to change them.
2. To allow foreign (non US and Canada) postal codes, clear the Use Primary
Locale Format box. The rest of the Locale Settings screen is disabled.
3. To limit postal codes to only US or Canada, select a Primary Locale format, and
then enter the format in the Zip Format String field. Then, clear the Allow
Secondary Locale Format box.
4. To define a secondary format, check the Allow Secondary Locale Format
check box, and then enter the format in the Zip Format String field.
5. Click OK to save your changes and close the present dialog box. Click Cancel to
close the dialog box and return to the previous screen WITHOUT saving any
changes.
Version 7.0
May 2010
Page 321
Office Administration
EZ-CARE2
Maintaining Audit Trails
Audit trails provide a record of all postings done on the EZ-CARE2 system. The
information contained here may be purged as part of the yearly maintenance process for
your system.
X To maintain audit trails
1. Double-click Office Administration, double-click Chapter 3 (Preferences &
Setup), and double-click Maintain Audit Trails. The Maintain Audit Trails
screen appears.
2. Select the cabinet you want to maintain audit trails for, and then click Edit. The
Maintain Audit Trail screen appears.
3. To specify the transaction type to display, use the Type picklist at the top of the
screen. This grid can display Group Posting, G/L Posting (if applicable), or All types
of transactions.
4. To purge a series of transactions from this list, click the Delete button. The
system will prompt you for a date range.
5. Click Done to close the dialog box and return to the previous screen.
Maintaining EZ-Finders
EZ-Finder is a tool that allows you to find any record, using up to three fields you enter to
narrow your search. You can use EZ-Finder in the Family Drawer (Child, Family, or Ledger
tabs) and also in the Staff Drawer (Staff Tab) or user-defined drawers. EZ-Finder lets you
define and then apply a filter so that you can locate a single record, or browse through all the
records that meet your conditions. For more details on EZ-Finder, see “Searching for
Records Using EZ-Finder” page 83.
Maintain EZ-Finders allows you to set up the fields used to retrieve records using EZFinder, for specified cabinets, drawers, and tabs. You can set up different search fields for
each available drawer and tab within each cabinet , so that one drawer may have different
fields with which to FIND records than another drawer
Page 322
Version 7.0
May 2010
Office Administration
EZ-CARE2
X To maintain EZ-Finders
1. Double-click Office Administration, double-click Chapter 3 (Preferences &
Setup), and double-click Maintain EZ-Finder. The Maintain EZ-Finder dialog
box appears.
2. Select the cabinet that contains the drawer you want to define EZ-Finder for,
and click the Select button. The Maintain EZ-Finder dialog box appears.
3. Select the drawer you want to define EZ-Finder for, and click the Select button.
The EZ-Finder Search Fields screen appears.
4. If you chose the Family drawer, pick which tab you’ll by defining EZ-Finder for
by clicking Family Tab or Child Tab.
5. At the top of the screen, you’ll identify up to three search fields you want to use
in EZ-Finder for the specific drawer you selected. Choose these fields from the
Search Field 1, Search Field 2, and Search Field 3 picklists. By default, EZFinder is set up to search by LAST NAME, FIRST NAME, and STATUS. For
each search field you choose, you can define a heading that describes the field in
plain language (such as those shown in the following graphics—Last Name, First
Name, and Birthdate)—choose these from the Search Heading 1, Search
Heading 2, and Search Heading 3 picklists.
6. In the Search for Records Having section, you define how you want the
system to search for records with EZ-Finder. You have the following options:
Version 7.0
May 2010
•
AND – (All matching values): this is the default and allows you to
search for records that meet ALL the specified criteria entered into EZFinder. If you use this method, you might locate all records where the
primary parent’s LAST NAME is Smith and FIRST NAME is George.
•
OR – (One or more matching values): allows you to search for
records where one or another criteria matches your search. For example,
if either the primary or secondary parent’s last name is Smith, you might
want a search where PRIMARY PARENT LAST or SPOUSE LAST
is “Smith.”
Page 323
Office Administration
EZ-CARE2
7. When you’re done defining the EZ-Finder search fields, click the Done button.
Note: You can also access the EZ-Finder Search Fields screen by right-clicking on the EZFinder screen.
Maintaining EZ-Views
EZ-Viewer allows you to review and edit information from several records at the same time.
Records are viewed in a grid format. To use EZ-Viewer, you need to set up the fields that
should be shown in EZ-Viewer—you do this through Maintain EZ-Views in Office
Administration. For details on using EZ-Viewer, see page 85.
X To maintain EZ-Views
1. Double-click Office Administration, double-click Chapter 3 (Preferences &
Setup), and double-click Maintain EZ-Views. The Maintain Library for EZViewer screen appears.
2. Select the cabinet you want to set up EZ-Views for, and click the Select button.
The Library for EZ-Viewer appears showing your current EZ-Views.
3. You can add a new EZ-View, edit an existing EZ-View, or duplicate, delete, or
rename EZ-Views. See the following sections for more details.
Creating an EZ-View
X To create an EZ-View
1. From the Library for EZ-Viewer, enter an EZ-Viewer Preference Name to
define the view setting.
2. Select a Topic/Drawer from the picklist. The Topic/Drawer you choose
determine which fields appear in the Available Fields section.
3. Choose the fields you want to include for the view. These fields will appear when
you activate EZ-Viewer and choose a view. To choose a field, click on it in the
Available Fields column, and then use the
Page 324
button to move it to the
Version 7.0
May 2010
Office Administration
EZ-CARE2
Fields to Display column. You can use any of the following buttons to move
fields between the two columns.
Button Description
Copies just the selected field to the Fields to Display column.
Copies ALL fields from the Available Fields column to the Fields to Display
column.
Removes just the field selected from the Fields to Display column.
Removes ALL fields from the Fields to Display column.
Tip: You can also copy a field to the Fields to Display column by double-clicking on
it.
4. To finish adding the new view, do one of the following:
•
Click Cancel to close the dialog box and return to the previous screen
WITHOUT saving any changes.
•
Click Done to save your changes and close the present dialog box.
Clicking this button saves your changes to a non-updatable state and data
is ONLY VIEWED in EZ-Viewer, not updated; however, it can be
exported.
•
Click Save As Updatable to allow for changes on the screen during EZViewer and Global Change. Changes made during EZ-Viewer and
Global Change will then be saved to the database if you choose to do so.
Maintaining Picklists
To create new picklists and update current ones, to be used on various screens throughout
EZ-CARE2.
X To maintain picklists
1. Close all drawers and file cabinets.
2. Double-click Office Administration, double-click Chapter 3 (Preferences &
Setup), and double-click Maintain Picklists. The Maintain Picklists dialog
box appears.
3. Click the cabinet that you want to manage picklists for, and then click the Edit
button. The Library of Saved Picklists appears with your current picklists.
4. Select a cabinet and click on the Edit button. A library appears with your current
picklists.
Version 7.0
May 2010
Page 325
Office Administration
EZ-CARE2
5. If you want to create separate picklists for each drawer and superfield, click the
Maintain a separate picklist for each drawer and superfield check box.
6. You can add a New picklist, Edit, Duplicate, Delete, or Rename an existing
picklist. See the following sections for details.
System Picklists
You can have an unlimited number of optional picklists on your system. However, there are
several standard picklists that are required and cannot be removed. These are:
Staff Position
Check List Item Type Hours Type
Notes Type
Payment Type
Staff Development Type Zip Code Picklist
Relations
Transportation Mode
Bank Name (for EFT)
Creating a New Picklist
X To create a new picklist
1. From the Library of Saved Picklists, click the New button. The Save Picklist
As dialog box appears.
2. In the Description field, enter the name for the picklist, and then click OK. The
Edit Pick List screen appears. See the next section for instructions on adding
items to the picklist.
Adding New Picklist Items or Editing Existing Picklist Items
X To add new items or edit existing items
1. From the Library of Saved Picklists, double-click the name of the picklist you
want to add or edit items for. The Edit Pick List screen appears.
Note: If you just created a new picklist, you can skip to step 2.
Page 326
Version 7.0
May 2010
Office Administration
EZ-CARE2
2. Do any of the following actions to the list:
•
To add an item, type in the new item name in the New Picklist Item
box and press the Enter key on your keyboard.
•
To change the order of the list, click the gray box to the left of the list item
you want to move, hold down the left mouse button, and drag the item
to the new position.
•
To alphabetize the list, click the Sort Alphabetically button.
•
To delete an item, select the item and click on the delete button
the toolbar above.
on
3. If you want to allow users to add values to the picklist, click the Allow Other
Values check box. If checked, the options below the check box are enabled. You
can then make the following choices:
•
Add: gives users the ability to add items to a picklist from a data entry
screen.
•
Add with Confirmation: gives users the ability to add items to a picklist
from a data entry screen, but only after they confirm they want to add it
through a dialog box.
•
Allow Editing List During Data Entry: gives users the ability to edit
the items in the picklist while they are entering data on a screen. If you
choose this option, the edit button appears on the screen with the
picklist.
4. When you are finished editing, click the Done button. Click Cancel to close the
dialog box and return to the previous screen WITHOUT saving any changes.
5. Click Done to close the dialog box and return to the previous screen.
Note: Payment Type and Transportation Mode do not allow you to add to a picklist
from a screen.
Version 7.0
May 2010
Page 327
Office Administration
EZ-CARE2
Adding Values to a Picklist During Data Entry
If you have a picklist that allows editing, you can add a picklist item during data entry by
typing in a new value. You can also edit all the picklist items by clicking on the edit button
. If you want to change a non-editable picklist to an editable one, you need to make
changes to the picklist.
Note: The Payment Type and Transportation Mode picklists do not allow you to add to a
picklist from a screen.
X To make a picklist editable
1. Close all drawers and file cabinets.
2. Double-click Office Administration, double-click Chapter 3 - Preferences &
Setup, and then double-click Maintain Picklists. The Maintain Picklists
dialog box appears,
3. Select the cabinet you want to change picklists for, and then click the Edit
button. The Library of Saved Picklists appears.
4. Select the picklist you want to change, and then click the Edit button.
5. In the List Type section, click the Allow Other Values check box. This allows
other entries to be added to the picklist and enables the fields below the check
box.
6. Choose one of the following options:
•
Add: if you do NOT want confirmation when adding
•
Add with Confirmation: if you want confirmation when adding
7. Click on the option button for Add, or click on the option button for Add with
Confirmation if you want confirmation when adding.
8. Click the Allow Editing List During Data Entry check box. This allows you to
edit the existing entries in the picklist during data entry.
9. When you are finished, click the Done button.
10. When you are finished editing picklists, click the Done button again.
How do I limit picklists to only certain items?
X To limit picklists
1. Close all drawers and file cabinets.
2. Double-click Office Administration, double-click Chapter 3 - Preferences &
Setup, and then double-click Maintain Picklists. The Maintain Picklists
dialog box appears.
3. Select the cabinet you want to change picklists for, and then click the Edit
button. The Library of Saved Picklists appear.
Page 328
Version 7.0
May 2010
Office Administration
EZ-CARE2
4. Select the picklist you want to change, and then click the Edit button.
5. If necessary, clear the Allow Other Values check box. Make sure this box is
EMPTY. This prohibits other entries to be added to the picklist.
6. If necessary, clear the Allow Editing List During Data Entry check box. Make
sure this box is EMPTY. This prohibits editing the existing entries in the picklist
during data entry.
7. When you are finished, click the Done button.
8. When you are finished editing picklists, click the Done button again.
Maintaining Staff Labor Costs
The Staff Labor Costs screen allows you to maintain the hourly wage for each employee of
your center. This is used by the Revenue vs. Labor Costs report.
X To maintain labor costs
1. Open Office Administration, Chapter 3 (Preferences & Setup), and select
Maintain Staff Labor Costs.
2. Select a cabinet and click on Edit. The Staff Labor Costs screen appears.
3. To add or edit an hourly wage for an employee, click on the Hourly Cost column
next to their name. Enter the employee wage and benefits (overhead).
4. If you wish to run the Revenue vs. Labor Costs report, click on the Report button
on the toolbar.
5. To print the grid, click on the Instant Print button
on the toolbar.
6. When you are finished with this option, click on the Close button
on the
toolbar.
Version 7.0
May 2010
Page 329
Office Administration
EZ-CARE2
Maintaining Template Groups
For details on maintaining template groups, see “Template Groups” on page 131.
Importing Data
To import data from an external file, such as a comma-delimited file, use the Import
Module. For example, if you have purchased our optional Online Registration Module, you
will use the Import Module to import data from a file downloaded from the registration web
site.
X To import data
1. Double-click Office Administration, double-click Chapter 2 (Cabinets and
Drawers), and then double-click Import Data.
If you have purchased this module, please call SofterWare for the import documentation.
Recalculating Formulas
The Calculate Formulas screen allows you to refresh formula fields that are in your system.
Typically, you won’t use this option because formulas are automatically refreshed; however,
there may be situations where formulas aren’t updated (for example, importing records into
the system).
X To recalculate formulas
1. Open Office Administration, Chapter 2 – Cabinets & Drawers, and select
Calculate Formulas. The Calculate Formulas dialog box appears.
2. Choose the cabinet you want to refresh formulas for. The Calculate Formulas
screen appears, showing all the formulas within the selected cabinet.
3. Select each formula you want to refresh by clicking the check box next to it.
Note: To choose all formulas, click the All button. To clear formulas you have
already selected, click the Clear button.
4. Click the Calculate button. A message appears, confirming that the formulas
have been calculated.
Page 330
Version 7.0
May 2010
Office Administration
EZ-CARE2
5. Click OK, and then click the Done button.
Primary Key Cleanup
The Primary Key Cleanup screen is used to correct duplicate primary keys.
This option is used for support purposes, and only with the direction and guidance of a
SofterWare support representative.
System Updates
Installing an Update
Important! You must back up your EZ-CARE2 system before installing updates, in case
something goes wrong during the installation process. See “Backing Up Your
System” on page 309 for details.
In this section, the server refers to the location where you have installed the EZ-CARE2
System. On a Local Area network (LAN), this is the server. On a peer-to-peer network, it is
a computer that holds the system and data but also acts as a workstation for someone in
your center.
Getting Ready To Install
X To get ready to install
1. Disable any virus scanning software that might interfere with the installation.
2. Log on from a workstation as Administrator, having full rights to the server.
3. Make sure everyone is logged out of the EZ-CARE2 system, if there are multiple
users.
4. Make sure EZ-CARE2 is not running on the server, or at any workstations.
Run the Installation
From CD
X To install from a CD
1. Insert the CD, click Update Programs, and then click Update EZ-CARE2
System, which updates EZ-CARE2 on the server.
2. Follow the instructions on the screen. This includes a prompt to indicate the
folder where your EZ-CARE2 program is located on the server.
Version 7.0
May 2010
Page 331
Office Administration
EZ-CARE2
From Internet Download
X To install from the Internet
1. Download the update by going to http://www.softerware.com/, and then select
EZ-CARE2 ->Clients Only->Download Updates from the drop down menus at
the top of the screen.
2. Enter your email address and user ID when prompted.
3. Select the update you need, and download it to the EZCARE2\Updates folder
on the server. Note the name or version of the update file.
4. Run the update and follow the instructions to install it in the folder where your
EZ-CARE2 program is located on the server.
After the update has finished installing, launch the EZ-CARE2 System on the server to
update the data and to make sure that the new version is running properly.
Workstation Install
When users open EZ-CARE2 at their workstations, they will get the prompt:
The version of EZ-CARE2 on your workstation does not match the data you are
accessing. Would you like to update?
If the workstation is running:
•
Windows NT, Windows 2000, Windows XP and Windows Vista – you must have
logged on as Administrator of your network. Once you have logged on, click
Yes in response to this screen. When you click the "Yes" button, the application
will launch the install script for the workstation update from the server.
That’s all there is to it! If there is something wrong with the data or programs when you
open EZ-CARE2, call our support department. Make sure you have the backup you created
earlier available if needed.
Manual System Updates
The System Updates screen allows you to manually run selected updates on the EZ-CARE2
system.
X To run system updates
1. Double-click Office Administration, double-click Chapter 5 (Maintenance), and
double-click System Updates.
This option is used for support purposes, and only with the direction and guidance of a
SofterWare support representative.
Setting Up Printers for EZ-CARE2
Printer functions are controlled by Windows. EZ-CARE2 does not need any special printer
drivers to print reports or screens. If you can print from any program in Windows, you can
print from EZ-CARE2.
Page 332
Version 7.0
May 2010
EZ-CARE2
Office Administration
Recovering from a System Crash or Hardware Failure
In the event of a hardware failure (for example, disk crash, bad spot or block on the disk,
power surge), the destruction of your computer system, or theft of your hardware, a backup
and restoration plan can ensure a speedy recovery of your data processing. Consult with your
network administrator or hardware support person when dealing with repair or replacement
of your computer hardware and operating system software.
Ensuring Hardware is Running Properly
Minor Repair Situation - In the case of a problem with your hard drive, such as a bad data
block, you'll need to use software utility programs (such as Microsoft Scan Disk or Norton
Utilities Disk Doctor) to determine the problem. If the problem can be fixed on your hard
drive, then you can resume using your system normally.
However, if this situation has caused data loss or data corruption (EZ-CARE2 files located
on a bad spot that is no longer used on the disk), then the file cabinet or cabinets need to be
restored as described below.
Major Repair Situation - In the case of a hard drive "crash," the computer's hard drive is
so physically damaged that it can no longer be replaced. A new hard drive will have to be
installed on your computer. After the new hard drive and operating system is installed, all the
software you use on a regular basis will have to be re-installed. Refer to the section below
regarding re-installing of your EZ-CARE2 software. After the software is installed, your
center's file cabinet or cabinets can then be restored.
Computer Replacement - If your computer was stolen, damaged due to vandalism, or
destroyed in a fire, your center will need a brand new computer system. As with a hard drive
replacement, all the software you use on a regular basis will have to be re-installed. Refer to
the section regarding re-installing of your EZ-CARE2 software. After the software is
installed, your center's file cabinet or cabinets can then be restored.
Re-installing Software
If you need to re-install EZ-CARE2 to your computer system, contact the SofterWare
Support Department. Apprise the support representative of your situation, and they can
guide you through re-installing the software.
Restoration of Data
There are two ways of restoring data to your system.
Restoring EZ-CARE2 File Cabinets from Backups
By using the restore program built into EZ-CARE2, you can restore only your EZ-CARE2
data. This is done using the data that was backed up using EZ-CARE2’s Backup Cabinets
or Scheduled Backup options. This does NOT restore any other data on your system.
This is obviously the easiest and least disruptive way of maintaining and restoring your data.
It should generally NOT require the involvement of technical staff. The only drawbacks to
this method are that you have to back up your cabinets yourself on a regular basis.
See “Restoring from Backups” on page 316 for details.
Version 7.0
May 2010
Page 333
Office Administration
EZ-CARE2
Restoring System Data
If your organization has a technical staff person (for example, a network administrator or IT
consultant), your entire system may be getting backed up automatically and/or with third
party software. If so, and it becomes necessary to restore your data, you may need to call on
your technical resources to identify your files and restore them.
End of Year/End of Season Procedures
The beginning of a new year or new season is usually the time when you set up new cabinets
or clean up current ones. Although there are certain things that need to be done at year-end,
the exact procedures may differ, depending on your center’s needs. However, ALL clients
should include the procedures described here as part of their normal Year-End Processing.
Note: For more details, see the Year End Procedures document in the Document Library
area of our Clients Only web site.
Backup/Archive Your Active Cabinet(s)
Backup your enrollment cabinet(s). Go to Office Administration, Chapter 2 (Cabinets and
Drawers), and select Backup Cabinet or Scheduled Backup. This backup should be on
diskettes or a zip disk and kept for future reference.
Set up a New Database For Your New Year
Make a copy of your enrollment cabinet.
X To set up a new database for your new year
1. Double-click Office Administration, double-click Chapter 2 (Cabinets and
Drawers), and double-click Create/Modify a File Cabinet. The Cabinet
Wizard appears.
2. In the Operation section, click Create.
3. In the Cabinets section, click on the cabinet you want to copy (current
enrollment cabinet).
4. In the Copying section, click Only Copy Structure Only.
5. Click Copy Security Groups.
6. In the Cabinet Name box, give the cabinet a new name that includes the new
year (for example, 2006).
7. Click Next throughout the Wizard until you reach the final screen, and then click
Finish to complete the process. For details on all the steps of the Cabinet
Wizard, see page 268.
If your old cabinet does not include the prior year in its name, you may want to rename it to
include the year.
Page 334
Version 7.0
May 2010
Office Administration
EZ-CARE2
You now have a cabinet for the prior year with data in it, and a new cabinet without any
records. The purpose of the prior year’s cabinet is to provide information for families and
can be used as a reference when building records for the new year.
Since you have created a new cabinet, you will be able to re-specify many of the options that
were previously set-up. Re-enter or verify the following sections of information:
•
In the Center Drawer, enter current information on all tabs.
In Office Administration, Chapter 3 (Preferences & Setup)
•
Calculate Children Ages
Maintain EZ-Views
•
In Office Administration, Chapter 4 (Accounts Receivable Setup)
•
Re-enter Categories
•
Maintain Rollup Categories
Family and Child information can now be entered into the new cabinet using the linking
process—see the next section.
Linking Cabinets
X To link cabinets
1. Double-click Office Administration, double-click Chapter 2 (Cabinets and
Drawers), and then double-click Link Drawers. The Library of Saved Linked
Drawers screen appears.
2. Click the New button. The New Linked Mapping dialog box appears.
3. Enter a name for your link, and click OK. The Drawer Link dialog box appears.
4. At the top of the screen, select the new cabinet as the Dest. Cabinet and the
Family Drawer as the Dest. Drawer. These are the cabinet and drawer that the
data will be copied into.
5. In the Source Definition section, select Prior Year Cabinet as the Cabinet and
the Family Drawer as the Drawer. These are the cabinet and drawer that the
data will be copied from.
6. You may enter up to three search fields from the Source Drawer. These are the
fields that are used to find the records to add to your current (destination)
Version 7.0
May 2010
Page 335
Office Administration
EZ-CARE2
drawer. You may change the headings of these fields to your liking (the headings
appear in the dialog box when linking).
7. In the Mapping Definition section, choose the fields you want to map. From
the Destination Field column, choose the field in the destination drawer that
data will be copied into. From the Source Field column, choose the field in the
source drawer that data will be copied from—the data from this field will go into
the Destination Field you’ve defined. They must be of the SAME FIELD TYPE
(for example, character, numeric, picklist). The fields available for mapping are
the database fields, including ledger balance, with the exception of Superfields
and pictures. As you select a field to map, an “x” appears next to the field in the
picklists.
8. When you have finished, click the close button.
Note: The destination can receive data from many sources - you can set up many
links, each from a different source drawer, to the same destination drawer.
For example, you can link to a Family Drawer from the previous year’s cabinet
as one link, the Staff drawer from the previous year’s database as another
link, and the Family Drawer of a Waiting List cabinet (or a drawer within your
current cabinet) as another link – all source links to the destination of your
current year (new) cabinet.
When you receive an application from a returning child, you will be able to link the old
information into this new cabinet without needing to re-enter it.
Your cabinet is now set up for the new year! Use the new cabinet to start building
your database for the next year.
Page 336
Version 7.0
May 2010
Customizing EZ-CARE2
EZ-CARE2
10. Customizing EZ-CARE2
Customizing EZ-CARE2 Using the Create/Modify a File Cabinet
Wizard
EZ-CARE2 gives you extensive abilities to customize the data in your system, as well as the
way it is organized and displayed. With our Create/Modify a File Cabinet Wizard, you can
•
Create a new cabinet
•
Add a new drawer to a cabinet
•
Add pages inside a tab
•
Add data that can be displayed within drawers
•
Change the appearance of the drawers
For details on these features, see Create/Modify a File Cabinet Wizard on page 268, in the
Office Administration chapter of this manual.
The two following screens illustrate how differently the data for your particular center can be
displayed. The first screen is for a daycare center, the second is for a preschool probram.
These are just examples of how you can organize and display your data to meet your needs.
Displaying information the way you want makes it that much easier to enter and maintain
your data.
Version 7.0
May 2010
Page 337
Customizing EZ-CARE2
EZ-CARE2
In addition to including the information you need in just the way that is easiest to use, EZCARE2 also provides considerable flexibility in reporting. The degree of flexibility depends,
in part, on whether you have purchased the Custom Report Writer.
Custom report creation is described in more detail beginning on page 347.
Macros
A macro is a simple combination of keys that can be used as an “abbreviation” or shortcut for
a sequence of keystrokes.
The most common advantage of using a macro is to save time by pressing one or two keys
instead of a much longer sequence of keystrokes. This is especially helpful when the same
commands or information are entered repetitively in the system.
For example, you could define the key combination of ALT+E to stand for entering the
words “Early Registration” when typing a comment for a discount on the Ledger tab.
Similarly, you could establish ALT+L for “Late Registration Fee.”
Macros cannot store mouse clicks in the saved sequence.
There are two separate and distinct aspects to macros:
•
Setting up a macro in which you specify the macro keys (sometimes called the
Hot Key combination), and the key sequence they represent.
•
Using the macro once it has been defined.
Setting up Macros
X To set up macros
1. Go to the EZ-CARE2 screen where you would normally type in the long
sequence of keystrokes. In our first example, go to that part of the Ledger Tab
where you would normally enter the comment.
2. Press the application key on your keyboard (the key that has a menu
with an arrow). Don’t hold down the key; just press it once. The
Record Macro dialog box appears.
Page 338
Version 7.0
May 2010
Customizing EZ-CARE2
EZ-CARE2
3. In the Defined Key field, press the key(s) you want to use as the “shortcut” or
Hot Key combination. For our example, you would hold down the Alt key and
press E.
4. In the Macro Name field, enter a description to define the macro (for example,
Early_Reg) (the macro name cannot contain spaces, and it defaults the
characters to lower case once the macro has been saved.)
5. Click OK.
6. Start typing in the keystrokes for the macro; in our example of the Early
Registration comments, you would type Early Registration, and then press the
TAB key.
7. Press Shift+F10 to indicate that you are finished recording the keystrokes. The
Stop Recording Macro dialog box appears. (The system will present you with
other options for more advanced applications of macros.)
8. Click OK.
Using Macros
When you are at the point where you want to enter the keystrokes you saved in the macro
(on the Ledger tab in our example), press the “Hot Key(s)” you defined. To use the macro
you created in the previous example, when you’re on the Ledger tab, in the Comment
column, press ALT+E, and the comment will be entered in that column. Depending on
how you defined the macro, the cursor should automatically advance to the next column.
There are many other ways you could define macros to suit your particular needs. For
example, you could create a macro to do any of the following:
•
copy a Primary Parent’s address to the Secondary Parent
•
move to a particular field and enter fixed information
•
automatically “fill in” a standard set of items on the Checklist Superfield
Version 7.0
May 2010
Page 339
Customizing EZ-CARE2
EZ-CARE2
For shortcuts in the A/R Ledger, templates are a more powerful and versatile way of entering
transactions that are lengthy or repetitious (see page 101). The uses of macros are limited
only by your own creativity.
Printing the Macro Report
To see what macros are set up in your system, you can print a detailed report by clicking on
the Help menu, then clicking View Keyboard Macros. This report shows you the Macro
Name, the Hot Key combination, and the text or keystrokes associated with the macro.
Changing the Appearance of EZ-CARE2 Screens
Note: We strongly suggest making a backup before modifying your cabinet.
X To change the way my screen looks
1. Close all drawers and file cabinets.
2. Double-click Office Administration, double-click Chapter 2 - Cabinets and
Drawers, and double-click Create/Modify a File Cabinet (Wizard). The
Cabinet Wizard appears.
3. In Step 1, select Modify in the Operations section, and select the cabinet name
from the Cabinets section. Click the Next button. A message appears,
prompting you to make a backup of your system before proceeding.
4. Choose one of the following options:
•
To make a backup, which we strongly recommend, click the Yes button.
When the backup is complete, a message appears to let you know. Click
the OK button. Step 2 of the Cabinet Wizard appears.
•
To continue creating the cabinet without backing up, click the No
button. Step 2 of the Cabinet Wizard appears.
•
To exit the Cabinet Wizard without making any changes, click Cancel.
5. In Step 2, select the drawer to modify (Family, Staff, or Other Ledgers). Click
the Next button.
6. In Step 3, click on the Next button (unless you want to make modifications to a
field; if you do, follow the directions on the top of the Wizard screen).
7. In Step 4, make any modifications needed to the screen you selected. Click the
page number you want to modify (page 1 is the default).
8. To move any element on the screen, click on it with your left mouse button and
hold the button down. Drag the element to the new location.
Page 340
Version 7.0
May 2010
Customizing EZ-CARE2
EZ-CARE2
9. To cancel any work on the screen, click on the Undo button
. Remember,
this button will reverse ALL of the changes you have made to this screen during
this session.
10. Use any of the tool buttons that display with this page. Each button has a tool tip
to display its name (just hold the mouse pointer over the button).
11. When you are finished with Step 4, click the Next button.
12. If you are modifying the Family drawer, you will have the opportunity to make
changes to the Ledger and Child tabs. Make your changes, and then click Next.
13. When you are done making your changes, click on the Finish button to save all
your changes.
Adding a Field to Calculate Anniversaries
You can set up a field that calculates anniversaries or number of years with the organization.
You do this by identifying two fields that work with each other on the tab where you want to
calculate anniversaries: an Age type field and Birthdate type field. These fields are set up on
the Define Data Fields dialog box (Cabinet Wizard Step 3). The setup described below is
also used to calculate automatically the age of children on the Child tab.
X To set up a field to calculate anniversaries
Important! Make a backup of your EZ-CARE2 file cabinets before running the
Cabinet Wizard!
1. Double-click Office Administration, double-click Chapter 2 (Cabinets &
Drawers), and double-click Create/Modify a File Cabinet.
2. On the right side of the Step 1 dialog box, select the Cabinet that contains the
record for which you want to calculate the anniversaries. In the Operation
section, click the Modify button. Then, click the Next button.
3. On the Step 2 dialog box, click the drawer you want to modify. In the
Operation section, click the Modify button. Then, click the Next button.
4. On the Step 3 dialog box, go to the first empty cell in the Field Name column,
and enter the name of a new field you want to use for storing a date. For
example, this field could be named Date Started or Wedding Date.
5. Use the TAB key to tab over to the Field Type column. From the picklist, select
Birthdate. Press the TAB key and the length will be automatically set to 10.
6. Go to the next line and type in the name of a new field you want to use to
calculate the number of years and months. For example, this field could be called
Number of Years of Service or Anniversary.
7. Use the TAB key to tab over to the Field Type column. From the picklist, select
Age. Press the TAB key and the length will be automatically set to 5.
Version 7.0
May 2010
Page 341
Customizing EZ-CARE2
EZ-CARE2
Note: We recommend not setting up any default values or making either of
these two fields required.
8. When you are done entering the fields, click the Next button.
9. On the Step 4 dialog box, click the Field List button to show fields available for
this tab. Drag and drop the new fields where you want to place them, starting
with the field that has the Age type.
10. After you move the Birthdate type field on to the screen, the following dialog
box appears:
11. Click Yes. Another dialog box comes up with a message to click on the Age
field.
12. Click OK, and then click the Age type field.
Note: If at any time during any step you do not want to save the changes, click
on Undo. If at any time you wish to stop this process and return
everything to its state before your edits, click on Cancel any time
BEFORE you click on the Finish button.
13. When you are done with the layout and ready to save the changes you made,
click the Finish button. The system saves your changes, and now have a field
that will calculate your staff’s anniversary.
Page 342
Version 7.0
May 2010
Customizing EZ-CARE2
EZ-CARE2
Managing Inquiries and Prospects
Create a used-defined drawer using the Create/Modify a File Cabinet Wizard (see page 268).
Here is an example of an Inquiries User-Defined drawer:
You can use the Notes Superfield to track conversations and actions with the prospect. The
Checklist Superfield can be used as a tickler file for the next steps that are needed, or forms
to be received.
When a prospect becomes a child, you can transfer information from the Inquiries drawer
into the cabinet and drawer you choose.
X To manage inquiries/prospects
1. Set up a link between drawers (see page 286 for details on how to do this in
Office Administration).
2. Go to the cabinet, drawer, and tab where you want to add the new child.
3. Click on the Copy from Linked Drawers button
. See page 285 for details
on the linking process.
Using Mapping Software with EZ-CARE2 to Determine
Transportation Routes
Most mapping programs (such as Microsoft Streets and Trips ® or Google™ Maps) have a
feature allowing you to use names and addresses from another source. Look at your
program’s documentation to determine what fields are needed and in what format. You can
then create an export file with the appropriate information. To create the export file, use the
Report Wizard, File Export report (see the Custom Report Writer Guide for details).
After you use the mapping software to generate child specific data, such as pickup location,
you may want to bring this data back into EZ-CARE2. For example, you may want to
generate a report of pickup locations for the bus driver. To bring data back into EZ-CARE2
from third party software, you will need our optional Import Data module. For information
on this module, contact your sales representative.
Version 7.0
May 2010
Page 343
Customizing EZ-CARE2
EZ-CARE2
Offering Online Registration
Through our optional Online Registration module, you can allow parents to register online
and then import registration data into EZ-CARE2. You can create a customized online
registration form and offer secure credit card processing. This can be a great way to allow
parents to register at their convenience while saving you time and effort on paperwork.
For details on Online Registration, please contact your sales representative.
Page 344
Version 7.0
May 2010
Optional Modules
EZ-CARE2
11. Optional Modules
Accounting Module
This section addresses the steps to post accounting data to the General Ledger module.
Note: Other functions of the Accounting Modules are described in the separate Accounting
Manual.
Also, if you are planning to post transactions to QuickBooks, using our EZ2-Post interface,
please contact your sales representative for separate documentation.
Posting to General Ledger
This option creates the file containing the accounts receivable information to be posted to
the EZ-CARE2 Accounting module. It will contain all unposted entries through the Post
Through Date that you entered. You can then import this file into the SofterWare Accounting
Module.
Note: Before using this option for the first time, enter the GL Account number for each
category in Maintain Categories (see page 97 for details). Enter both the Debit and
Credit account numbers (For example, for a tuition charge, the Debit would go to
Accounts Receivable and the Credit to the Tuition Revenue account). Keep in mind
that EZ-CARE2 does not verify the accuracy of GL Account numbers that are entered.
X To run Post to G/L
1. From the Accounting menu,
click Post A/R to G/L. The
Post A/R to G/L screen
appears.
2. In the Post through box on the
right, enter the Post Date (the
date on the left shows the
previous Post Through date).
3. In the File Name field, enter the file name for the file EZ-CARE2 will create.
Click the
button if necessary to navigate to the right location and name the
file. For example, C:\EZCARE2\EZ2GL.TXT. The file name will be saved as
the default file name.
4. If a printer is not already selected, click the Printer button
, and then double-
click the printer you want to use.
Version 7.0
May 2010
Page 345
Optional Modules
EZ-CARE2
5. Click the Post button to complete the process, or click Done if you decide you
do not want to post at this time. You can Preview or Print a Pre-Posting report to
see the posting before any changes are made. After you’ve created the file, you
need to go to the SofterWare Accounting program and import the file.
6. From the Data Entry menu, click Import Options. The Import Options
screen appears.
7. Select the EZ-Care2/EZ-Center2 option, and enter the name of the file you
created in EZ-CARE2 (for example, C:\EZCARE2\EZ2GL.TXT).
8. Click Verify. The data is now ready for use by the G/L module.
Launching the Accounting Module
You can launch the Accounting Module right from within EZ-CARE2 by clicking the
Accounting menu, and then clicking Launch Accounting. For complete help information
on the accounting module, access the Help system from within the Accounting module.
Removing G/L Posting
X To remove a G/L posting
1. From the Accounting menu, click Remove G/L Posting. The Remove GL
Posting screen appears.
2. Click in the Batch column of the row representing the posting you want to
remove.
3. Click the Remove button. A message appears, showing you the details about the
batch.
4. Click Yes to remove the post or click No to retain the post and return to the
previous screen.
5. When you are finished with this option, click on the Close button
Page 346
.
Version 7.0
May 2010
Optional Modules
EZ-CARE2
Accounts Receivable Module
For details on using the Accounts Receivable module to manage your financial accounts, see
“Using the Accounts Receivable Module” on page 83.
Click-to-Pay Module
The Click-to-Pay module allows you to set up online forms that parents can use to pay their
bills. You can email the web address of the form to parents to tell them where to find it.
Click-to-Pay is an optional module. Please contact your SofterWare representative for
information on ordering the module.
For details on using the module, please download the Payment Processing Manual from the
Document Library section of the EZ-CARE2 Client website.
Custom Report Writer Module
If you have purchased the Custom Report Writer, you will have access to the following
tools for creating and editing customized reports:
•
The Report Wizard is a tool that guides you through the report designing
process step by step. Each step in the Wizard offers explanations and sample
diagrams. This is the easiest method for designing a new report.
•
The Report Designer is a more powerful tool that allows you to edit the
elements that appear in the various sections of the reports. It offers more
flexibility and control than the Report Wizard, but it is more advanced and
requires more expertise to use.
The Custom Report Writer module is an optional module. Please contact your SofterWare
representative for information on ordering the module.
For details on using the module, please download the Custom Report Writer Manual from
the Document Library section of the EZ-CARE2 Client website.
EZ-EFT Module
The EZ-EFT module allows you to process preauthorized recurring credit card and bank
draft transactions. Typical uses involve charging for tuition or other expenses as part of a
regular collection cycle. EZ-EFT can charge parents’ credit cards, or transfer money directly
from parents’ bank accounts using electronic funds transfer.
EZ-EFT is an optional module. Please contact your SofterWare representative for
information on ordering the module.
For details on using the module, please download the Payment Processing Manual from the
Document Library section of the EZ-CARE2 Client website.
Version 7.0
May 2010
Page 347
Optional Modules
EZ-CARE2
EZ-Entry Module
The EZ-Entry Module allows you to navigate between records and enter data into the
system using a barcode scanner. Several reports are included to allow you to print out sheets
of barcodes.
EZ-Entry is an optional module: contact your sales representative to enable this module on
your system.
The basic steps in using EZ-Entry are:
1. Printing out the pages of barcodes you will scan with the barcode scanner. EZ-
Entry includes reports to generate the barcode printouts you will need.
2. Using the barcode scanner to scan in the barcodes.
Printing Barcodes using EZ-Entry Reports
Several reports are included to allow you to print out sheets of barcodes:
Report
Category
Description
EZ-Entry
Barcodes
Database
This is the report you will use to create barcodes for all areas. You can
set up barcodes to navigate between records, or to move between pages
in the current record. You can also choose whether you want EZ-Entry to
enter a value into the field, or just select the field for manual data entry.
See page 179 for details.
EZ-Entry Family
& Child Name
Barcodes
Ledger
This report is designed to print out sheets of labels that contain the
childrens’ names and a barcode for their ID number. See page 206 for
details.
EZ-Entry
Category
Barcodes
Ledger
This report prints out barcodes for all of the Categories in your system,
so that your staffers can scan them instead of entering the data
manually. See page 205 for details.
Tip: If you want to generate a report containing the EZ-Entry action & number barcodes, we
recommend including them with the EZ-Entry Category Barcodes report.
Scanning in Barcodes using EZ-Entry
Once you have installed your scanner, and printed out barcodes using the EZ-Entry
Barcodes report, using the barcode scanner to enter information is fairly straightforward.
X To use the barcode scanner on a non-ledger screen
1. Open the screen that which you want to enter information into.
2. Scan the barcode.
EZ-Entry barcodes contain not only information, but instructions on actions to
be carried out. Depending on which action was specified when the barcodes
were created, one of the following will occur when the barcode is scanned:
Page 348
Version 7.0
May 2010
Optional Modules
EZ-CARE2
•
If Find record, page and field then enter a value was selected, EZEntry will find the child record whose Child ID is contained in the
barcode, move to the Page and Field that were specified under Action
Details, and enter the Value that was specified under Action Details
into the field.
•
If Find record, page and field then wait for a value was selected, EZEntry will find the child record whose Child ID is contained in the
barcode, move to the Page and Field that were specified under Action
Details, and wait for you to enter a value into the field.
•
If Find page and field of current record then enter a value was
selected, EZ-Entry will stay in the current record, move to the Page and
Field that were specified under Action Details, and enter the Value that
was specified under Action Details into the field.
•
If Find page and field of current record then wait for a value was
selected, EZ-Entry will stay in the current record, move to the Page and
Field that were specified under Action Details, and wait for you to
enter a value into the field.
3. Enter a value in the field if it was not already entered for you.
4. Continue to scan barcodes as needed.
5. When finished, close the screen as you would normally.
EZ2-Post2 Module (QuickBooks Integration)
The EZ2-Post2 Accounting Interface is a module that exports financial data from EZCARE2 to QuickBooks Pro Version 2002 or later, Premier Version 2002 or later, or
Accountant Editions Version 2002 or later (all abbreviated hereafter as “QuickBooks”).
EZ2-Post2 will export data to QuickBooks 2008, and to Canadian versions of QuickBooks,
which the previous version of EZ2-Post could not do.
The EZ2-Post2 module is an optional module. Please contact your SofterWare
representative for information on ordering the module.
EZ2-Import Module
The EZ2-Import module allows you to import sessions, children, families, ledger
transactions, and child session enrollment data from external data files.
The EZ2-Import module is an optional module. Please contact your SofterWare
representative for information on ordering the module.
Version 7.0
May 2010
Page 349
Optional Modules
EZ-CARE2
Insta-Charge Module
Insta-Charge allows you to process one-time payments with a credit card. It allows you to
process credit card transactions with less data entry, helps ensure that you’re using valid
credit cards, and protects your clients’ confidential data by using a secure process.
Insta-Charge is an optional module. Please contact your SofterWare representative for
information on ordering the module.
For details on using the module, please download the Payment Processing Manual from the
Document Library section of the EZ-CARE2 Client website.
Insta-Merge Module
This feature enables you to print a merged document from any record using Microsoft
Word®. Insta-Merge also provides functionality to generate letters addressed to a family that
contains information about multiple children and multiple sessions per child. This is
especially useful for creating Confirmation Letters. See the section below for specific hints
and details for this type of merge letter.
When the Insta-Merge library appears, you can choose to work with an existing merge
template or create a new one.
Create a New Merge Template
To create a new template, first decide what information you will want in your document.
•
From the Family tab, the fields available are from the Family and Ledger tabs.
•
From the Child tab, the fields available are from the Family, Ledger, and Child
tabs.
•
From the Staff tab, Staff fields are available.
•
From a User-Defined Drawer, fields from that drawer are available.
X To create a merge template
1. Open the tab that you want to create the template for (see list above).
2. Click the Insta-Merge button on the EZ-CARE2 toolbar
. The Library of
Insta-Merge Templates appears.
3. Click the New button. The Insta-Merge Template Name dialog box appears.
4. Enter a name for this Insta-Merge (this will be the name you will see in the Insta-
Merge Library), and click OK. The Insta-Merge Fields screen appears.
5. Choose which fields you would like to include in your merge document. In the
Available Fields column, click once on the field that you would like to use in
the merge document. Then use the appropriate arrow button to move the field
from the Available Fields to the Selected Fields column. You can also doubleclick on the field to move it to the opposite column.
Page 350
Version 7.0
May 2010
Optional Modules
EZ-CARE2
6. Once you have selected all the fields to merge, click Done. EZ-CARE2 then
opens Microsoft Word with a document containing all your selected fields.
7. Go to the end of the list of fields and begin creating your letter. Using Word, cut
and paste the fields into your letter. Once your letter is complete, you can delete
any unused fields.
8. From the File menu, click Save. Save the letter in Word, but let Word assign the
name and folder (the name is an unusual series of letters and numbers). This is
important because EZ-CARE2 has already assigned a name to this document
that will link it to the EZ-CARE2 system when you retrieve it from the InstaMerge Library.
9. Once the file has been saved, exit Word. The Library of Insta-Merge
Templates now contains the new merge template.
Printing a Merged Document
Click on Print when you are ready to merge the data from the family or child’s record. The
document will print to the printer that is set up as your computer’s default printer.
Version 7.0
May 2010
Page 351
Optional Modules
EZ-CARE2
Previewing a Merged Document
This option allows you to view the Insta-Merge letter with the personalized data of the
family or child’s record. Word will open to show you the created letter.
Editing a Merged Document
If modifications need to be made, click the Edit button. Word opens, and you can make the
needed changes to your letter. Once you are finished, save the file again to the same unique
file name (a set of numbers) and exit from Word.
Duplicating an Insta-Merge Template
To make an additional copy of an existing merge template, click the Duplicate button. This
feature allows you to give this second merge a new name. Then you can use the edit feature
to make changes to the template.
Renaming an Insta-Merge Template
To change the name of an existing merge template, use the Rename button. In the box,
enter the new name, and click on OK.
Deleting an Insta-Merge Template
To remove an existing merge template that you no longer need, click the Delete button.
This permanently removes the Insta-Merge template from your system.
Sending Email from Insta-Merge
If you want to send a personalized message to an individual family or child (such as an
acceptance letter, a survey, or an invoice), you can use a previously prepared merge
document.
Note: Make sure the recipient of the merge letter has a valid email address in the email field.
X To send email from Insta-Merge
1. Go to the Family tab to send a merge document to a parent, or to the Child tab
to send a merge document to a child.
2. Click on the Insta-Merge button (
). The Library of Insta-Merge
Templates appears.
Page 352
Version 7.0
May 2010
Optional Modules
EZ-CARE2
3. Select a merge document, and click the Email button.
If you have more than one email address per record (one for the parent and one
for the child), the following screen appears and you can choose which address to
use:
Note: The Email Interface displays all fields that contain E-mail, e-mail, Email
or email in their field name. Make any adjustments to the field name in
the file Cabinet Wizard on the Define Data Table Fields main screen (see
page 292 for information on how to adjust which fields appear).
4. Choose the email you want to use, and click OK. Your email program will
open—the email address field will contain the email address of the opened EZCARE2 record; the Subject line will contain the name of the merge document;
and the body of the email message will contain the merge letter with information
from the opened record. If you are using Outlook, the email message will retain
the formatting from the original Word document (Outlook Express produces the
message using a single mono-space font).
5. Click the Send button to complete the process. If your email program is set to
save messages in a Sent folder, then this email will be automatically copied and
stored in that folder.
Using Select-A-Merge with EZ-Viewer
Select-A-Merge allows you to use the features of Insta-Merge while you are using the EZViewer feature. It combines several powerful features that enable you to:
•
Version 7.0
May 2010
Send a merge document to multiple recipients at once.
Page 353
Optional Modules
EZ-CARE2
•
Select records from within your database to send individual or multiple merge
documents.
•
Preview and print your documents, or send them via email.
Go to the Family tab to send letters using fields from the Family tab, or to the Child tab to
send letters using fields from the Child tab.
Note: You cannot send the same letter to both children and parents at the same time. With
EZ-Viewer, you can also export information. For details, see “Exporting from EZViewer” on page 91.
X To use Select-a-Merge
1. Go to the Family or Child tab, and click the EZ-Viewer button.
2. Make any changes to the data or views as needed (see EZ-Viewer on page 85 for
details)
3. Choose the records to include for the Select-a-Merge in either of the following
ways:
•
to create or choose a Selection. The
Click on the Selection button
following example is a Selection for families in Fort Washington.
•
To manually mark the records for Select-a-Merge, click in the M column
for each row that you want to include. You can also mark a block of
rows by clicking in the M column of the first row you want to select,
pressing and holding down the SHIFT key, and then clicking the last
row you want to export.
4. Once you have selected the records to include, click the Select-A-Merge button.
If you haven’t marked any rows to be exported because you’ve chosen your
records via a selection, the following dialog box appears:
Page 354
Version 7.0
May 2010
Optional Modules
EZ-CARE2
5. Click Current for the current record (highlighted in blue on the EZ-Viewer
screen), or All to merge all documents. The Library of Insta-Merge Templates
appears (unless you chose Cancel).
6. Select a merge document.
7. Click the button that corresponds with the option you wish to choose. If you
choose to Print or Preview, EZ-CARE2 opens MS Word, and you are able to
print and preview from there. When you are finished, go to the File menu of
Word and choose Exit.
8. If you want to send email from Select-A Merge, we recommend that you select
and then Preview the message to make sure it is the one you want. After you are
satisfied with your choice, click the Email button. If email addresses are missing,
the system displays a warning message. You will need to go back to the selected
records and insert an address in the email field. If all addresses are present, the
system displays a notification for each email and you will be given an opportunity
to send or not send it. Note: You will NOT see the email itself, which is why we
recommend that you Preview the message before sending. If you are using
Outlook, the email message will retain the formatting from the original Word
document (Outlook Express produces the message using a single mono-space
font). For more information on setting up the email functionality, see page 92.
Click on the Send button to complete the process.
Version 7.0
May 2010
Page 355
Optional Modules
EZ-CARE2
Staff Module
The Staff Module is an optional module that provides users with a Staff drawer that can be
used to enter and access information on staff members.
Contact your sales representative to enable this module on your system.
Overview
The Staff drawer contains three tabs:
•
Staff
•
Development
•
Staff Sessions (if activated)
Each of these tabs is described in more detail below.
Staff Tab
The Staff tab is where information is stored about the staff members, such as their name and
address, start date, and record status (Active, Inactive, Remove).
Staff Picklist
This picklist, shown at the top left of the screen, allows you to search for specific staff
members at your center:
Page 356
Version 7.0
May 2010
Optional Modules
EZ-CARE2
As with the Family or Child Picklists, you access this picklist either by clicking on the staff
person’s name shown in the box, or clicking on the arrow next to that name. This will
display the list of names.
If you type a few letters, but find yourself near a name with a different starting letter than
you intended, you may need to fine-tune Incremental Search to match your typing style. See
page 319 for details on how to do this in Office Administration.
You can also use the EZ-Finder tool to search for staff, using up to three field values you
specify (see page 83).
Pictures on the Staff Tab
Î
You can add a picture of the staffer in the “To insert your image” space to help with
identification. Pictures can be in .BMP, .GIF, or .JPG format.
X To add or change a picture
1. Double-click the picture area.
2. Select the folder location and name of the picture and click OK.
If you click Cancel, you are prompted to delete the existing picture. Click Yes or
No.
Note: When you make a backup of all cabinets in your EZ-CARE2 system, pictures
are backed up along with the rest of your data.
For more information on picture resolution and size, see the “Pictures on the Family and
Child Tabs” section, page 53. For further details on using pictures, see the Managing and Using
Digital Pictures in EZ-CARE2 document in the Data Management folder of our Clients Only
web site.
Staff Record Status
This is a required field—all records must have one of these status designations chosen.
•
Active: Staff members who are currently employed at your center and are
working on a regular basis. Active staff records are included in all reports by
default.
•
Inactive: Staff members who are not currently working at your center (did in the
past or will in the future).
•
Remove: Staff members who are no longer working at your center. Staff
member records with Remove status are not included in reports by default. You
Version 7.0
May 2010
Page 357
Optional Modules
EZ-CARE2
can remove staff member records with a Remove status by running the Optimize
a Cabinet option (see page 277). To remove them, check Remove Records with
Status: Remove as a choice before running the optimization.
A status indicator next to the staff member’s name shows if the staff person’s record is
Active (green), Inactive (yellow), or designated Remove (red).
Employment Information
Employment information, such as Social Security Number, Date Hired, Job Status, and
Position, is stored together and is easy to locate. This is usually set up on an additional page
along with other information you may wish to store on a staff member.
Note: If you have entered a termination date, you still need to change the record status to
Inactive if the person is no longer an employee and you wish not to include them on
reports.
Checklist Superfield
Use the Checklist Superfield to keep track of such things as human resources-related items
that need to be completed for a specific employee (for example, submitting health insurance
forms or background check forms). See page 59 for more information.
Contacts Superfield
Use the Contacts superfield to list emergency contacts, relatives, family physicians, and
others designated by the employee as important contacts. See page 60 for more information.
Notes Superfield
Use the Notes superfield to store notes or comments about this employee when needed (for
example, summaries of employee evaluations). See page 58 for more information.
Page 358
Version 7.0
May 2010
EZ-CARE2
Optional Modules
Link Fields
You can add a link field to the Staff tab, which allows you to link a file to a record. Keep
links to employee forms, emergency contact forms, or any other documents you want to
easily access from a record. For more details on link fields, see “Field Types” on page 299.
Development Tab
This tab enables you to keep track of your staff member's professional development. You
may list courses taken by your staff member, the type of course, the dates, how many hours
the courses took, and place a check in the check box column if the course was completed.
The Staff Development tab is illustrated below.
Schedule, Contracted, and Actual Tabs
(These tabs are part of your EZ-CARE2 system if the Schedule and Attendance Module has
been purchased.)
There is a Schedule, Contracted, or Actual tab for each staff member. These tabs describe a
staff member’s recurring, contracted, or actual attendance. They function identically to the
Schedule, Contracted and Actual tabs for child schedules, see “Manual Schedule Entries”
page 66 for details.
TimeClock Module
The Windows TimeClock Module keeps track of actual arrival and departure times for
children and staff. The data for this module (for example, In and Out times, PINs for signin/out, and messages and responses) is stored in the TimeClock system.
This module is usually installed on a dedicated system located by the main entrance to your
center, so that parents and staff can read and interface with the various screens displayed by
the system. EZ-CARE2 interfaces with TimeClock to automatically send child and staff
information to the TimeClock system and receive the actual times from it.
Version 7.0
May 2010
Page 359
Optional Modules
EZ-CARE2
For details on the TimeClock Module, see the separate TimeClock Manual.
Waiting List Module
The Waiting List module allows you to maintain a waiting list of families and children who
are waiting to attend your center.
Contact your sales representative to enable this module on your system.
Overview
The Waiting List module adds a Waiting List drawer to your file cabinets. This drawer
contains a single tab that can be used to enter child and family records for children waiting
to attend one of your centers.
Setup
The Waiting List module is included with your EZ-CARE2 system. Once purchased, it only
needs to be registered in order to be used. See “Registering New Modules” on page 265 for
details on registering optional modules.
Once the Waiting List module has been registered, you will want to link the Waiting List
drawer to the Family drawer so that you can copy child records from the Waiting List
drawer to the Family drawer once openings occur. See “Linking Drawers” on page 285 for
details.
Entering Names into the Waiting List
To enter names and information into the waiting list, select the Waiting List drawer from
your center’s file cabinet. There is only one tab in the drawer:
To enter a new name, click the
Page 360
button in the toolbar. The following fields are available:
Version 7.0
May 2010
Optional Modules
EZ-CARE2
Field
Description
First Name, Last
Name
The name of the child.
Gender
Select Male or Female.
Birthdate & Age
Enter the birth date of the child. The Age of the child will automatically be filled in
based on the birthdate entered.
Inquiry Source
Where the child’s family learned about your center.
Parent
Enter first name followed by last name.
Address
The street address of the family.
City
Enter the ZIP code of the family address. The City and State will automatically be filled
in.
Home
Enter the home phone number.
Status
Select the current status of the child: Active (waiting), Inactive (no longer waiting), or
Remove (ready to be removed from the database).
Priority
Select the priority level for admitting the child into your center.
Date on List
Enter the date at which the child was entered into the waiting list
Desired Start
Date
Enter the date by which the child wishes to start attending classes.
Class Name
Select the name of the class the child will attend pending admittance.
Desired
Schedule
Select the type of schedule the child will attend pending admittance.
Date Enrolled
Enter the date on which the child is actually enrolled at your center.
Notes
If desired, notes can be entered into the Notes superfield.
Handling Admittance
Once the child is admitted to your center, you will want to do the following:
1. Update the information in the child’s record, if necessary. Enter the date on
which the child was enrolled at your center in the Date Enrolled field.
2. Use the Copy from Linked Drawer function to move the child’s record into the
Family drawer. See “Copying Data from Linked Drawers” on page 288 for
details.
Version 7.0
May 2010
Page 361
Optional Modules
EZ-CARE2
This page intentionally left blank.
Page 362
Version 7.0
May 2010
Appendix A: FoxPro Functions
EZ-CARE2
Appendix A: FoxPro Functions
You can use FoxPro functions in Formula fields and in reports. The following tables list
some of the FoxPro functions you can use.
Note: If you use functions in reports, you need to put the field names in parentheses. For
example, ALLTRIM(field). If you use functions in Formula fields, you need to put the
field name in parentheses, but you also need to enclose the brackets in parentheses.
For example, ALLTRIM([field]).
Basic Functions
The following table lists basic FoxPro functions that any EZ-CARE2 user can use.
FoxPro
Function
Function
Type
Description
ALLTRIM(field)
Character
Eliminates spaces
from the front and
back of a field
Example
ALLTRIM(name)
ALLTRIM(cpar1fname) + ' ' +
ALLTRIM(cpar1lname)
CDOW(date
field)
Character
Returns the day of the
week
CDOW(dbirthdate)
CMONTH(date
field)
Character
Returns the name of
the month
CMONTH (dbirthdate)
DAY(date field)
Numeric
Returns the day of the
month as a number
DAY(dbirthdate)
LEFT(field
name, x)
Character
Returns a specified
number of characters
from a character
expression, starting
with the leftmost
character.
LEFT(DBCHILD.CCHILDAGE,2)
MONTH(date
field)
Numeric
Returns the month as
a number
MONTH(dbirthdate)
Version 7.0
May 2010
Page 363
Appendix A: FoxPro Functions
EZ-CARE2
FoxPro
Function
Function
Type
Description
UPPER(field)
Character
Converts letters to
upper case
Example
UPPER(DBCHILD.CLASTNAME)
Advanced Functions
The following table lists advanced FoxPro functions. You’ll need some familiarity with
FoxPro in order to use some of these functions.
FoxPro Function Function
Type
Description
Example
DTOC(date field)
Character
Converts a date
to a character
string
(mm/dd/yyyy)
DTOC(Date)
DTOS(date field)
Character
Converts a date
to a character
string
(YYYYMMDD)
DTOS(dbirthdate)
GOMONTH(date,x)
Date
Increases the
date x months
GOMONTH(date, 2)
Date Before
Date After
GOMONTH(date, -2)
Date Before
IIF(criteria,x,y)
Character
Numeric
Currency
Date
Date After
Returns x if
criteria is true,
otherwise
returns y
IIF(igender=1,"M",IIF(igender=2,"F","NA"))
Returns the
number of
characters in a
field
LEN(DBFAMILY.CFAMCITY)
If the gender value is 1, show M for Male; if the
gender value is 2, show F for Female; if there is no
value, show NA.
DateTime
LEN(field name)
Page 364
Numeric
Version 7.0
May 2010
Appendix A: FoxPro Functions
EZ-CARE2
FoxPro Function Function
Type
PROPER(field)
Character
Description
Example
Converts the
first letter of a
word to a capital
PROPER(DBCHILD.CLASTNAME)
Eliminates
extraneous
spaces and
returns the
specified
number of
rightmost
characters from
a character
string.
RIGHT(Van,2)
Name Before
Name After
RIGHT(field name,
x)
Character
ROUND(field
name, x)
Numeric
Returns a
numeric
expression
rounded to a
specified
number of
decimal places.
ROUND(VAL(DBCHILD.CCHILDAGE),0)
SUBSTR(field
name, x, x)
Character
Returns a
character string
from the given
character OR
memo field.
SUBSTR(notes,1,40)
Returns a
numeric value
from a character
expression
composed of
numbers.
VAL(DBCHILD.CCHILDAGE)
Returns the year
as a number
YEAR(dbirthdate)
OR
SUBSTR(field
name, x)
VAL(field name)
Numeric
Decimal
Numeric
YEAR(date field)
Version 7.0
May 2010
Numeric
Van Before
Van After
SUBSTR(notes,41)
Page 365
Appendix A: FoxPro Functions
EZ-CARE2
This page intentionally left blank.
Page 366
Version 7.0
May 2010
EZ-CARE2 Appendix B: Setting Up Outlook Express and Outlook to Send EZ-CARE2 Emails
Appendix B: Setting Up Outlook
Express and Outlook to Send EZCARE2 Emails
To send emails directly from EZ-CARE2, you need to use Outlook Express or Outlook as
your default email program and set up it up to work with EZ-CARE2.
Choosing the Default Email Program for Your System
To send emails from EZ-CARE2, you need to define the default email program for your
system. Choosing a default does not affect your use of any other email program, such as
Outlook, to send or receive your regular emails.
X To choose the default email program
1. Click the Start menu, select Settings, and then click Internet Options. The
Internet Properties screen appears.
2. Click the Programs tab.
3. From the E-mail picklist, choose the program you want to use as your default—
either Outlook Express or Microsoft Outlook.
4. At the bottom of the screen, click the Apply button.
5. Then, click the OK button.
Version 7.0
May 2010
Page 367
Appendix B: Setting Up Outlook Express and Outlook to Send EZ-CARE2 Emails EZ-CARE2
Setting Up Your Email Program for Use with EZ-CARE2
Once you’ve selected your default email program, you need to set up Outlook Express or
Outlook to send emails. In order to do this, you’ll need to get information from your
Internet Service Provider (ISP) or Information Technology (IT) department about the
settings you need to define for an email account.
This section contains instructions for setting up both Outlook Express (see next section)
and Outlook (see page 369)—go to the appropriate section based on the program you’re
using.
Setting Up Outlook Express
In Outlook Express, you need to define an email security setting and set up your email
account in order to send emails from EZ-CARE2.
Defining the Email Security Setting
You need to disable the Outlook Express setting that warns you when programs on your
system, such as EZ-CARE2, try to send email.
X To define the email security setting
1. From the Tools menu, click Options. The Options screen appears.
2. Click the Security tab.
3. Clear the Warn me when other applications try to send mail as me check
box. This allows you to send emails from EZ-CARE2 without having to
authorize each email you send, which is helpful when you’re sending multiple
emails through EZ-CARE2.
4. At the bottom of the screen, click the Apply button.
5. Then, click the OK button.
Page 368
Version 7.0
May 2010
EZ-CARE2 Appendix B: Setting Up Outlook Express and Outlook to Send EZ-CARE2 Emails
Setting Up Your Outlook Express Email Account
Using information provided to you by your ISP or IT department, you need to set up your
Outlook Express email account.
X To set up your email account
1. From the Tools menu, click Accounts. The Internet Accounts screen appears.
2. Click the Mail tab.
3. Click the Add button, and then click Mail. The Internet Connection Wizard
appears.
4. Move through the Internet Connection Wizard, setting up your email account
with the information provided to you by your ISP or your IT department. For
help setting up your email account, contact your ISP or IT department.
After you set up your email account, you are ready to send emails from EZCARE2.
Setting Up Outlook
Using information provided to you by your ISP or IT department, you need to set up your
Outlook email account.
Version 7.0
May 2010
Page 369
Appendix B: Setting Up Outlook Express and Outlook to Send EZ-CARE2 Emails EZ-CARE2
X To set up your email account
1. From the Tools menu, click E-mail Accounts. The E-mail Accounts screen
appears.
2. In the E-mail section, click Add a new e-mail account.
3. Click the Next button, and then move through the wizard, setting up your email
account with the information provided to you by your ISP or your IT
department. For help setting up your email account, contact your ISP or IT
department.
After you set up your email account, you are ready to send emails from EZCARE2.
Page 370
Version 7.0
May 2010
EZ-CARE2
Index
Index
accessing
selections..............................................................33
sorts ......................................................................30
Accounting Module
launching ............................................................346
Accounts Payable ...................................................124
Accounts Receivable
categories, setup ..................................................97
G/L accounts in...................................................100
rates....................................................................105
reports ................................................................157
rollup categories .................................................102
tuition ..................................................................110
Accounts Receivable reports ..................................199
Actual tab ..........................................................71, 359
adding
child, confirming..................................................319
field tips to screens.............................................306
fields ...........................................................292, 304
graphics ..............................................................305
immunizations.......................................................49
new users ...........................................................262
page tips to screen .............................................307
pictures of family and children ..............................53
pictures to drawer ...............................................301
rates....................................................................105
text to screens ....................................................305
tuition ..................................................................110
additional pages on tabs ...........................................19
administrative reports..............................................243
ages, calculating .....................................................317
Aging Report ...........................................................199
aligning
fields on screen ..................................................303
text in labels........................................................305
American dates .......................................................318
anniversaries, calculating........................................341
applying
templates to all records ..............................129, 134
templates to current record.........................128, 133
templates to selected records.....................128, 133
attendance
Actual tab......................................................71, 359
Contracted tab ..............................................68, 359
editing ...................................................................78
entering records....................................................66
generating.............................................................77
removing.........................................................79, 81
reports ..................................................................82
Schedule tab.................................................66, 359
viewing..................................................................71
Version 7.0
May 2010
audit trails, maintaining........................................... 322
authorized pickups ................................................... 60
authorizing users .................................................... 267
automatic backups ................................................. 311
backing up cabinets................................................ 309
Balance Forward records ......................................... 97
barcodes................................................. 179, 205, 206
billing
creating invoices ................................................ 155
printing invoices ................................................. 153
rates for.............................................................. 105
Birthday List report ................................................. 174
building selections .................................................... 35
cabinets
backing up.......................................................... 309
deleting .............................................................. 277
description............................................................ 13
Print Drawer/Record format ............................... 290
renaming ............................................................ 277
restoring ............................................................. 277
security groups................................................... 264
calculating
anniversaries...................................................... 341
child ages........................................................... 317
formulas ............................................................. 330
Capacity
of classes ............................................................. 41
cash receipts .......................................................... 142
batch .................................................................. 148
customizing ........................................................ 152
description.......................................................... 121
emailing.............................................................. 146
entering .............................................................. 121
formatting ........................................................... 152
Insta-Charge ...................................................... 145
modifying............................................................ 145
multi-user functions............................................ 142
printing ............................................................... 148
printing batches of receipts ................................ 148
Center drawer........................................................... 15
Hours of Operation tab......................................... 50
Immunization tab.................................................. 49
schedule, recognizing holidays in ........................ 67
Center tab................................................................. 15
centers
new season........................................................ 334
setting up ............................................................. 39
century settings ...................................................... 318
certification, staff .................................................... 359
changing.....................................................See Editing
Cash Receipts.................................................... 145
Page 371
Index
data with EZ-Viewer .............................................87
data, tools for........................................................85
password ............................................................266
screen layout ......................................................302
charges
posting ................................................................138
charging
rates for ..............................................................105
Check List Report ...................................................175
Checklist superfield
description ............................................................59
Child Directory report ..............................................176
Child Information Report .........................................177
Child List report.......................................................178
children
Actual tab..............................................................71
calculating ages..................................................317
confirm adding new ............................................319
Contracted tab ......................................................68
events ...................................................................59
pictures .................................................................53
Schedule tab.........................................................66
schedules .......................................................68, 71
tab.........................................................................16
tasks .....................................................................59
tuition ..................................................................110
classes
capacity ................................................................41
collapsing transactions............................................156
color of tabs ..............................................................17
columns
changing width......................................................22
hiding ....................................................................22
moving ..................................................................23
options ..................................................................24
saving sorts ..........................................................24
sorting...................................................................23
combined A/R categories..................................98, 102
confirming
addition of new children......................................319
cutting and deleting rows....................................319
consolidated A/R categories .............................98, 102
contacts
superfield ..............................................................60
superfield, for staff ..............................................358
Contacts Report ......................................................178
Contracted tab ..................................................68, 359
Coordinates of fields on screen ..............................303
copying reports .......................................................169
creating
Insta-Merge template..........................................350
new group posting ..............................................136
PRN file ..............................................................251
selections..............................................................35
sort........................................................................30
currency, setting up.................................................105
Page 372
EZ-CARE2
customizing
color of tabs ......................................................... 17
invoices .............................................................. 155
receipts .............................................................. 152
cutting rows ...................................................... 21, 319
D reports................................................................. 161
data, entering
Contacts superfield .............................................. 60
Notes superfield ................................................... 58
superfields............................................................ 58
database reports .................................................... 174
dates
American............................................................ 318
defining settings for............................................ 318
filtering by, on Ledger tab .................................. 122
formats of ........................................................... 318
international ....................................................... 318
options for sorting by............................................ 32
defining
G/L accounts...................................................... 100
deleting....................................................see removing
cabinet ............................................................... 277
child with Remove status ..................................... 55
drawers .............................................................. 285
Insta-Merge template ......................................... 352
row ....................................................................... 21
deleting reports....................................................... 170
Deposit Report ....................................................... 202
deposits
security............................................................... 123
slip for ................................................................ 151
designer reports ..................................................... 161
Development tab .............................................. 16, 359
discounts, sibling .................................................... 124
drawers
Center .................................................................. 15
copying records between ................................... 286
deleting .............................................................. 285
linking................................................................. 286
Other Ledgers ...................................................... 16
Print Record format of........................................ 290
renaming ............................................................ 291
screen .................................................................. 14
Staff...................................................................... 16
user-defined ......................................................... 17
duplicating
Insta-Merge template ......................................... 352
editing
attendance ........................................................... 78
existing users ..................................................... 262
field type, for fields ............................................. 298
Insta-Merge document ....................................... 352
label text............................................................. 305
passwords.......................................................... 267
picture size......................................................... 306
screen layout...................................................... 303
Version 7.0
May 2010
EZ-CARE2
selections..............................................................38
sorts......................................................................32
email
field .......................................................................92
from a record ........................................................92
from Insta-Merge ................................................352
from Select-A-Merge ..........................................355
emailing
invoices...............................................................154
receipts ...............................................................146
emergency contacts, setup .......................................60
employment information, on Staff tab .....................358
end of year procedures ........ See year-end procedures
entering
attendance records...............................................66
new line item.........................................................20
new payments ....................................................143
new row ................................................................20
receipts ...............................................................121
events .......................................................................59
Excel, printing reports to .........................................253
exporting
Accounts Receivable information .......................253
to Word ...............................................................255
exporting reports to another cabinet .......................171
EZ2-Post .........................................................104, 345
EZ-EFT Information Report.....................................203
EZ-Entry
EZ-Entry Barcodes report...................................179
EZ-Entry Category Barcodes..............................205
EZ-Entry Family & Child Name Barcodes ..........206
EZ-Entry Barcodes report .......................................179
EZ-Entry Category Barcodes ..................................205
EZ-Entry Family & Child Name Barcodes...............206
EZ-Finder
in different drawers and tabs ................................84
running..................................................................84
setting up ............................................................322
EZ-Viewer .................................................................85
changing data .......................................................87
maintain library for ..............................................324
using Select-A-Merge ...................................86, 353
EZ-Views.................................................................324
EZ-Views Report.....................................................243
families
events ...................................................................59
pictures of .............................................................53
tasks .....................................................................59
Family drawer
Actual tab..............................................................71
Family Only button................................................56
Schedule tab .........................................................66
Family Information Report .......................................181
Family Only button ....................................................56
Family tab .................................................................16
fees
Version 7.0
May 2010
Index
charging ...................................................See billing
fields
adding ........................................................ 292, 304
aligning on-screen.............................................. 303
editing ................................................................ 298
field type, changing ............................................ 298
formula ............................................................... 300
link fields ...................................................... 56, 359
moving on layout................................................ 304
picklists .............................................................. 300
resizing on layout ............................................... 304
tips ..................................................................... 306
types .................................................................. 299
used in sorting...................................................... 30
file cabinets ............................................. See cabinets
file output................................................................ 170
files
backing up.......................................................... 309
filtering
Ledger tab by date ............................................. 122
records ..............................................See selections
fixed rates............................................................... 107
formatting
of dates .............................................................. 318
receipts .............................................................. 152
formulas
calculating .......................................................... 330
definition............................................................. 300
refreshing ........................................................... 330
setting up ........................................................... 295
updating ............................................................. 330
FoxPro functions ............................ 367, 368, 369, 370
functions, in FoxPro................................................ 367
Functions, in FoxPro .............................. 368, 369, 370
General Ledger
accounts, in A/R categories ............................... 100
posting to ........................................................... 345
posting, removing............................................... 346
generating attendance.............................................. 77
global change ........................................................... 88
displaying ............................................................. 90
modifying.............................................................. 89
running ................................................................. 90
selecting ............................................................... 90
setting up ............................................................. 89
graphics
adding to screens............................................... 305
sizing.................................................................. 305
grids
changing column widths....................................... 22
cutting a row......................................................... 21
deleting a row....................................................... 21
how to use............................................................ 20
moving columns ................................................... 23
moving rows within............................................... 22
options ................................................................. 24
Page 373
Index
removing a row .....................................................21
set up a new line...................................................20
settings .................................................................24
sorting columns ....................................................23
group posting
creating new .......................................................136
running................................................................138
group templates
applying to all records.........................................134
applying to current record...................................133
applying to selected records...............................133
hardware, problems with.........................................333
health data ................................................................58
help
how to use ............................................................26
hiding columns ..........................................................22
holiday hours.............................................................67
hours of operation ...............................................50, 65
immunizations
superfield ..............................................................61
tab for ...................................................................49
importing reports from other cabinets .....................172
Inactive status .........................................................357
incidents, tracking with notes ....................................58
inoculations .................................... See immunizations
inquiries, managing.................................................343
Insta-Charge
Cash Receipts payments....................................145
installing
new modules ......................................................265
updates...............................................................331
Insta-Merge
creating a merge template..................................350
deleting a template .............................................352
duplicating a template.........................................352
editing .................................................................352
emailing from ......................................................352
previewing ..........................................................352
printing ................................................................351
renaming a template...........................................352
Select-A-Merge with .....................................86, 353
Insta-Print button.......................................................25
international dates...................................................318
invoices
customizing.........................................................155
emailing ..............................................................154
Invoices report ....................................................207
numbers for ..........................................................96
printing................................................................153
Keying macros ........................................................338
labels.......................................................................183
aligning text ........................................................305
changing on-screen ............................................305
layout, of screens....................................................303
Ledger Audit Report................................................208
Ledger Report .........................................................209
Page 374
EZ-CARE2
Ledger tab .............................................................. 119
ledger templates
applying to current record .................................. 128
posting to all records.......................................... 129
posting to selected records ................................ 128
removing ............................................................ 130
using .................................................................. 127
Ledger Templates Report....................................... 245
Ledger Variance Report ......................................... 211
ledgers
Balance Forward records ..................................... 97
filtering by date................................................... 122
hide when entering cash receipts ...................... 151
Other Ledgers ...................................................... 16
posting to ........................................................... 345
tab ........................................................................ 16
templates ........................................................... 101
line item, entering new ............................................. 20
link fields........................................................... 56, 359
linked drawers ........................................................ 286
Linked Drawers Report........................................... 246
Locale settings .....................................See ZIP Codes
macros.................................................................... 338
practical uses ..................................................... 339
printing list of...................................................... 340
setting up and using........................................... 338
mail merges
Using Export Data.............................................. 255
using Select-A-Merge .................................. 86, 353
Mailing Labels report .............................................. 183
main screen.............................................................. 13
maintaining
A/R categories ..................................................... 97
audit trails........................................................... 322
EZ-Finders ......................................................... 322
EZ-Views............................................................ 324
Ledger Templates .............................................. 101
passwords.......................................................... 267
picklists .............................................................. 325
rollup categories................................................. 102
schedule templates .............................................. 72
Template Groups ............................................... 330
managing
inquiries/prospects ............................................. 343
mapping software ................................................... 343
medical data ............................................................. 58
merging records with Word ................. See Mail Merge
modifying
Cash Receipts.................................................... 145
fields................................................................... 298
screens .............................................................. 302
system reports ................................................... 251
modules
Accounts Receivable ........................................... 97
Insta-Merge.......................................................... 86
registering .......................................................... 265
Version 7.0
May 2010
EZ-CARE2
moving
columns in a grid ..................................................23
fields on a screen ...............................................304
rows in a grid ........................................................22
new season preparation..........................................334
new year, procedures .............................................334
notes
superfield ..............................................................58
superfield, for staff ..............................................358
Notes Report ...........................................................184
NSF checks.............................................................119
Office Administration.................................................13
online help .................................................................26
online registration....................................................344
options, for grids .......................................................24
ordering
rows ......................................................................23
organization
drawers .................................................................14
grids ......................................................................20
main screen ..........................................................13
Office Administration ............................................13
tabs.......................................................................15
Other Ledgers drawer .......................................16, 126
adding third party accounts ................................126
Outlook (emailing from)...........................................355
pages
adding tips ..........................................................307
on tabs..................................................................19
passwords
maintaining .........................................................267
setting up ............................................................266
Payment Receipts report ........................................212
payments
entering...............................................................143
YTD payments......................................................95
Period Analysis Report ...........................................213
Period Variance Report...........................................214
picklists
adding values .....................................................328
definition .............................................................300
finding staff on ....................................................356
limiting items.......................................................328
modifying ............................................................325
setting up ....................................................293, 325
Picklists Report .......................................................247
pickups, authorized ...................................................60
pictures
adding to drawer.................................................301
on Child tab ..........................................................53
on Family tab ........................................................53
sizing ..................................................................306
postal codes............................................................321
posting
charges...............................................................138
removing.....................................................151, 346
Version 7.0
May 2010
Index
templates to all records.............................. 129, 134
templates to current record ........................ 128, 133
templates to selected records .................... 128, 133
to General Ledger .............................................. 345
to QuickBooks.................................................... 345
tuition ................................................................. 116
previewing
Insta-Merge document ....................................... 352
schedule template posting ................. 44, 45, 75, 76
tuition posting..................................................... 117
tuition template posting ...................................... 115
previewing reports .................................................. 163
printer setup ........................................................... 332
printing
Drawer/Record format........................................ 290
from active screen................................................ 25
Insta-Merge document ....................................... 351
invoices .............................................................. 153
Macro Report ..................................................... 340
receipts .............................................................. 212
reports................................................................ 165
to a PRN file....................................................... 251
printing to a file ....................................................... 170
PRN file .................................................................. 251
prospects, managing .............................................. 343
query .....................................................See selections
QuickBooks interface ............................................. 104
radio buttons........................................................... 294
rates
charging ............................................................. 105
creating .............................................................. 105
fixed rates .......................................................... 107
for billing............................................................. 105
for tuition ............................................................ 105
setting up ........................................................... 107
simple rates........................................................ 107
variable rates ..................................................... 109
records
sending emails from............................................. 92
recovering from system crash ................................ 333
refreshing formulas................................................. 330
refunds ................................................................... 140
registering
new modules...................................................... 265
online ................................................................. 344
remove status......................................................... 357
removing
attendance ..................................................... 79, 81
ledger templates ................................................ 130
posting ....................................................... 151, 346
row ....................................................................... 21
rows ................................................................... 319
rows, confirmation of.......................................... 319
schedule templates ........................................ 45, 76
scheduled times ................................................... 80
staff records ....................................................... 357
Page 375
Index
times .....................................................................79
transactions ........................................................156
tuition ..................................................................118
tuition templates .................................................115
renaming
cabinet ................................................................277
drawer.................................................................291
Insta-Merge template..........................................352
reports ................................................................169
reordering rows .........................................................24
reports
Accounts Receivable ..................................157, 199
administrative reports .........................................243
Aging Report.......................................................199
attendance............................................................82
Birthday List........................................................174
Check List Report ...............................................175
Child Directory ....................................................176
Child Information Report.....................................177
Child List.............................................................178
Contacts Report..................................................178
copying ...............................................................169
D reports.............................................................161
database reports.................................................174
deleting ...............................................................170
Deposit Report....................................................202
designer reports..................................................161
exporting .............................................................171
EZ-EFT Information Report ................................203
EZ-Entry Barcodes .............................................179
EZ-Entry Category Barcodes..............................205
EZ-Entry Family & Child Name Barcodes ..........206
EZ-Views Report ................................................243
Family Information Report ..................................181
importing.............................................................171
Invoices ..............................................................207
Ledger Audit Report ...........................................208
Ledger Report.....................................................209
Ledger Templates Report ...................................245
Ledger Variance Report .....................................211
Linked Drawers Report.......................................246
Mailing Labels.....................................................183
modifying system reports....................................251
moving between cabinets ...................................171
Notes Report ......................................................184
options ................................................................166
Payment Receipts Report...................................212
Period Analysis Report .......................................213
Period Variance Report ......................................214
Picklists Report...................................................247
previewing ..........................................................163
printing................................................................165
printing to a file ...................................................170
renaming.............................................................169
Revenue Summary Report .................................215
S reports .............................................................160
Page 376
EZ-CARE2
selecting records in .............................................. 33
setting standard report options .......................... 166
sorting records in ................................................. 29
Staff Check List Report ...................................... 185
Staff Contacts Report......................................... 186
Staff Development Report.................................. 187
Staff Directory .................................................... 188
Staff Export Attendance Spreadsheet................ 237
Staff EZ-Entry Barcodes Report ........................ 189
Staff Information Report..................................... 191
Staff Mailing Labels............................................ 192
Staff Notes Report ............................................. 193
system................................................................ 160
Template Groups Report ................................... 249
User Drawer Check List Report ......................... 194
User Drawer Contacts Report............................ 195
User Drawer Notes Report......................... 195, 197
Wait List by Class/Priority/Date.......................... 198
Wait List by Priority/Date.................................... 199
Wait List Statistics.............................................. 198
Waiting List Mailing Labels ................................ 197
Waiting List reports ............................................ 197
Waiting List User Drawer Checklist Report........ 197
Waiting List User Drawer Contacts Report ........ 197
Year to Date Payment Summary Report ........... 217
Year to Date Summary Report........................... 218
resizing
columns................................................................ 22
pictures .............................................................. 306
restoring cabinets ................................................... 277
restricting views to specific families.......................... 56
returned checks...................................................... 119
Revenue Summary Report..................................... 215
reversing a posting ......................................... 151, 346
rollup categories, in A/R ................................... 98, 102
rows
confirming cut or delete...................................... 319
cutting .................................................................. 21
deleting ................................................................ 21
entering new one ................................................. 20
moving in a grid.................................................... 22
removing .............................................................. 21
reordering............................................................. 24
running a group posting.......................................... 138
S reports................................................................. 160
saving column sorts.................................................. 24
Schedule templates
applying to current record .............................. 43, 74
posting to all records...................................... 44, 75
posting to selected records ............................ 43, 74
removing ........................................................ 45, 76
setting up ............................................................. 42
using .............................................................. 42, 73
schedules
entering .................................................... 66, 68, 71
holiday hours........................................................ 67
Version 7.0
May 2010
EZ-CARE2
removing...............................................................80
tab for ...........................................................66, 359
templates ..............................................................72
scheduling backups ................................................311
scholarships ............................................................124
screens
adding field tips...................................................306
adding fields .......................................................304
adding graphics ..................................................305
adding page tips .................................................307
adding text ..........................................................305
aligning fields......................................................303
aligning text ........................................................305
changing labels...................................................305
changing picture size..........................................306
editing layout ......................................................303
modifying ............................................................302
moving fields.......................................................304
printing from..........................................................25
resizing fields......................................................304
security
Cabinet Groups ..................................................264
deposits ..............................................................123
deposits, refunding .............................................124
passwords ..................................................261, 266
System Groups...................................................264
Select-A-Merge .................................................86, 353
selecting
records or data ................................. See selections
selections
accessing..............................................................33
creating.................................................................35
criteria, records meeting .......................................37
editing ...................................................................38
sending email................................................See email
sessions
Sessions tab .........................................................40
setting up
A/R categories ......................................................97
center information.................................................39
EZ-Finder............................................................322
formulas..............................................................295
linked drawers ....................................................286
passwords ..........................................................266
picklists .......................................................293, 325
printers................................................................332
radio buttons.......................................................294
template groups..........................................131, 330
user privileges ....................................................262
ZIP codes ...........................................................321
sibling discounts ......................................................124
Simple rates ............................................................107
sizing columns ..........................................................22
sizing graphics ........................................................305
SofterWare
fax number............................................................28
Version 7.0
May 2010
Index
mailing address.................................................... 28
phone numbers .................................................... 28
Web site ............................................................... 28
sorting
columns................................................................ 23
records for report ................................................. 29
saving columns .................................................... 24
sorting dates
by month of birth .................................................. 32
by year (age)........................................................ 32
sorts
accessing ............................................................. 30
choosing fields for ................................................ 30
creating ................................................................ 30
editing .................................................................. 30
editing an existing one ......................................... 32
in grids ................................................................. 24
primary field ......................................................... 31
secondary field..................................................... 31
spreadsheet
exporting attendance to ..................................... 237
staff
Actual tab ............................................................. 71
attendance ........................................................... 71
events .................................................................. 59
export attendance spreadsheet ......................... 237
picklist ................................................................ 356
records, removing .............................................. 357
tasks..................................................................... 59
Staff Check List Report .......................................... 185
Staff Contacts Report ............................................. 186
Staff Development Report ...................................... 187
Staff Directory report .............................................. 188
Staff drawer
Actual tab ........................................................... 359
certification......................................................... 359
Contracted tab ................................................... 359
description............................................................ 16
Development Tab............................................... 359
Schedule tab ................................................ 66, 359
Staff tab.............................................................. 356
status ................................................................. 357
Staff EZ-Entry Barcodes Report............................. 189
Staff Information Report ......................................... 191
Staff Mailing Labels ................................................ 192
Staff Notes Report.................................................. 193
staff tab
Contacts superfield ............................................ 358
description............................................................ 16
employment information..................................... 358
Notes superfield ................................................. 358
record status ...................................................... 357
using .................................................................. 356
status
inactive............................................................... 357
remove ............................................................... 357
Page 377
Index
staff.....................................................................357
superfields
Checklist superfield ..............................................59
Contacts ...............................................................60
Contacts, staff.....................................................358
description ............................................................58
Immunizations superfield......................................61
Notes ....................................................................58
Notes, staff .........................................................358
system
backing up ..........................................................309
configuration .........................................................27
details of your .......................................................27
reports ................................................................160
Security Groups ..................................................264
setup, summary ....................................................27
updates ...............................................................331
system crash, recovering from................................333
system organization
drawers.................................................................14
grids......................................................................20
main screen ..........................................................13
Office Administration ............................................13
tabs.......................................................................15
tabs
Actual tab......................................................71, 359
adding fields to ...................................................304
additional pages on ..............................................19
Center...................................................................15
Child .....................................................................16
color of..................................................................17
Contracted tab ..............................................68, 359
customizing color..................................................17
Development ................................................16, 359
editing layout ......................................................303
Family ...................................................................16
Hours of Operation tab .........................................50
Immunization tab ..................................................49
Ledger ..........................................................16, 119
organization ..........................................................15
Schedule tab.................................................66, 359
Sessions tab .........................................................40
Staff ..............................................................16, 356
Tuition tab...........................................................110
tasks, tracking ...........................................................59
template groups
setting up ............................................................131
using ...................................................................131
Template Groups Report ........................................249
templates
groups.................................................................330
setting up and modifying.............................101, 330
Templates
schedule templates...............................................72
tuition templates .................................................112
text
Page 378
EZ-CARE2
adding to screens............................................... 305
aligning............................................................... 305
on labels............................................................. 305
third party accounts ................................................ 126
times
removing scheduled............................................. 80
Times
removing .............................................................. 79
tips
adding for fields.................................................. 306
adding for pages ................................................ 307
on contacting support........................................... 26
on entering payments ........................................ 144
toolbar
Insta-Print button.................................................. 25
Total payments YTD................................................. 95
tracking
events .................................................................. 59
tasks..................................................................... 59
transactions, collapsing .......................................... 156
Transportation, using mapping software ................ 343
troubleshooting......................................................... 27
tuition
adding ................................................................ 110
entering .............................................................. 110
posting ............................................................... 116
rates for.............................................................. 105
removing ............................................................ 118
tab for................................................................. 110
templates ........................................................... 112
tuition discounts...................................................... 124
Tuition templates
applying to current record .................................. 114
posting to all records.......................................... 115
posting to selected records ................................ 114
removing ............................................................ 115
setting up ........................................................... 112
using .................................................................. 112
types of fields ......................................................... 299
updating
installation .......................................................... 331
system................................................................ 331
User Drawer Check List Report.............................. 194
User Drawer Contacts Report ................................ 195
User Drawer Notes Report ............................. 195, 197
user-defined drawers
description............................................................ 17
users
adding new......................................................... 262
editing existing ................................................... 262
setting up passwords ......................................... 267
vaccinations....................................See immunizations
variable rates.......................................................... 109
viewing
data, tools for ....................................................... 85
Wait List by Class/Priority/Date report.................... 198
Version 7.0
May 2010
EZ-CARE2
Wait List by Priority/Date report ..............................199
Wait List Statistics report ........................................198
Waiting List Mailing Labels report ...........................197
Waiting List User Drawer Checklist Report.............197
Waiting List User Drawer Contacts Report .............197
Web site, SofterWare................................................28
width, changing column ............................................22
Word document, merging records
using File Export.................................................255
using Select-A-Merge .........................................353
Version 7.0
May 2010
Index
Year to Date Payment Summary Report................ 217
Year to Date Summary Report ............................... 218
year-end procedures
accumulate YTD payments.................................. 95
collapse transactions ......................................... 156
preparing for new year ....................................... 334
year-end statements, producing............................. 334
year-to-date payments ............................................. 95
ZIP codes, settings for............................................ 321
Page 379
Index
EZ-CARE2
This page intentionally left blank.
Page 380
Version 7.0
May 2010