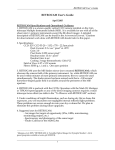
1
Chiron GUI User's Manual CTIO 60 inches Chiron CHI60S1.2 La Serena, Jan 2011 Chiron User's Manual / CTIO 60 inches Chiron CHI60S1.2 1 Contents Introduction.....................................................................................................................................................3 Chapter 1: Getting Things Running................................................................................................................4 1.1 Hardware Setup................................................................................................................................4 1.2 Software Startup..............................................................................................................................4 1.3 Software Shutdown..........................................................................................................................5 Chapter 2: Main GUI Reference.....................................................................................................................6 2.1 MAIN_GUI > Exposure Progress (readonly)................................................................................7 2.2 MAIN_GUI > Temperatures (readonly)........................................................................................8 2.3 MAIN_GUI > TCS (readonly).......................................................................................................9 2.4 MAIN_GUI > ASYNC / ERROR box (readonly).......................................................................10 2.5 MAIN_GUI > Exposure Setup (write)..........................................................................................11 2.6 MAIN_GUI > Exposure Control (write)......................................................................................15 2.7 MAIN_GUI > Preset modes..........................................................................................................16 2.8 MAIN_GUI > PlugIns (write).......................................................................................................18 Chapter 3: PlugIns Reference.......................................................................................................................19 3.1 PlugIns > DISPLAY.....................................................................................................................20 3.2 PlugIns > GEOMETRY...............................................................................................................22 3.3 PlugIns > LAMPS........................................................................................................................24 3.4 PlugIns > IODCEL.......................................................................................................................26 3.5 PlugIns > SLICER........................................................................................................................27 3.6 PlugIns > FOCUS........................................................................................................................28 Appendix A: Header......................................................................................................................................29 Chiron User's Manual / CTIO 60 inches Chiron CHI60S1.2 2 Introduction The following document is a reference to the CTIO 60 inches Chiron Software. It provides a way of understanding both handling and capabilities. The software provides a Graphic Interface (GUI) for an easy manual operation; since the core of the software is ASCIIcommands driven, using scripting is a natural way of handling the system. So, the user can use the GUI only or, if he/she prefers, can run the software fully based on scripts of any type (python, csh, tcl , cl, pearl or whatever the user prefer). See the scripting reference manual for scripting details (CHI60S3.X) The document describes how to startup and shutdown the software (chapter 1), and also how to operate the main and auxiliary GUIs (called PlugIns, chapter 2 and 3)). As complimentary information there is a description of the fits headers on Appendix A The CHIRON software system consist really in two applications: CHIRON itself, and CHIRTEMP, that takes care of all the temperatures of the system. So to startup/shutdown, we will refer to both independently. Note that CHIRTEMP should usually be running, even when the instrument is not in use in the sky, so the temperatures are always being logged Chiron User's Manual / CTIO 60 inches Chiron CHI60S1.2 3 Chapter 1: Getting Things Running 1.1 Hardware Setup Before firing up the CHIRON software there are two hardware parts that should be powered: a) Orange monsoon controller b) Comparison Lamps control box. c) Motor Control Box (slicer/focus) d) Data I/O, RTD control (iodine cell, temperatures RTD) e) Lakeshore temperature controller 1.2 Software Startup The user should be logged into the observer's account. From the regular X window, there are three ways of starting up the software: To start CHIRTEMP a) Icon: click on the desktop icon called “start_CHIRTEMP” b) type in any terminal or console: “start_CHIRTEMP” c) type, in any terminal or console: “start_application CHIRTEMP” In general you should start CHIRTEMP first. To start CHIRON: a) Icon: click on the desktop icon called “start_CHIRON” b) type in any terminal or console: “start_CHIRON” c) type, in any terminal or console: “start_application CHIRON” Note that in both cases, if the application is already running, the second instance will NOT be started you need to shutdown the running one first. So there is no risk of starting CHIRTEMP, for example, even if it is already running. The startup scripts (located on $HOME/apps/CHIRON/bin and $HOME/apps/bin) will startup all the software components (detector controller, TCS and Lamps modules, for detail see document CHI60S2.X (Software architecture)). The startup process consists of a series of xterm windows (green for the Chiron User's Manual / CTIO 60 inches Chiron CHI60S1.2 4 application, gray for panview, the detector controller server) showing the startup progress. During this process the Main GUI will remain with a busy cursor; once all is done the GUI will become active and the cursor will come to normal. For details on the startup scripts please see document CHI60S2.X on architecture and maintenance 1.3 Software Shutdown To shutdown the software there are four ways: a) GUI: click on the red “Exit” button on the main GUI b) icon: click on the desktop icon called “shutdown_CHIRON” c) type, on any terminal or console, “shutdown_CHIRON” d) type, in any terminal or console, “shutdown_application CHIRON” In all cases a red xterm will appear showing the shutdown process. To shutdown CHIRTEMP the procdure is similar, but remember that CHIRTEMP should NOT be shutdown normally only if the instrument will be taken apart, or the RTDs will be disconnected, etc. CHIRTEMP should normally be running so it always gather the log files. Chiron User's Manual / CTIO 60 inches Chiron CHI60S1.2 5 Chapter 2: Main GUI Reference When the application has started and it is ready, the user is presented with a single window. When the startup process started with no failures, then the three LEDs on the upper right corner of the GUI should appear GREEN, stating that the detector controller, TCS connection and temperature controller are initialized and ready. Figure 2.1 shows the main GUI and its LEDs Figure 2.1: Main GUI and LEDs Chiron User's Manual / CTIO 60 inches Chiron CHI60S1.2 6 2.1 MAIN_GUI > Exposure Progress (readonly) The exposure progress area shows information regarding the image status when an observation is in progress. Exp Done (upper yellow bar): shows the sequence (how many images has been done compared to the total amount of images requested Dark Time: shows the total amount of dark time in the current exposure (seconds) Pause Time: shows the total amount of time elapsed since pause in the current exposure (seconds) Exposure time (lower yellow bar): shows the total amount of exposure (integration time) elapsed (seconds) Figure 2.2: Exposure progress Readout (upper cyan bar): shows the percentage of current image readout Write progress (lower cyan bar): shows the percentage of current image write Controller State: shows the detector state: IDLE – EXPOSING – READING Image State: shows the image state: IDLE – WAITING – WRITING – DONE Chiron User's Manual / CTIO 60 inches Chiron CHI60S1.2 7 2.2 MAIN_GUI > Temperatures (readonly) The temperatures information area shows the current temperature of different points of interest in the system, Currently the only information corresponds to the detector (CCD) controller, but in the future there will be some others added (Echelle body, coude room temperature, etc). The upper part shows the temperature name, then comes the actual temperature (in Celsius degrees) and finally an LED that remains green if the correspondent temperature is in reasonable ranges, and that turns red when the temperature goes out of the allowed limits (alarm). Under this condition an actual text warning message is displayed I the async/error dialog (see 2.4) Figure 2.3: temperatures indicator Chiron User's Manual / CTIO 60 inches Chiron CHI60S1.2 8 2.3 MAIN_GUI > TCS (readonly) This part shows the Telescope information as returned by the Telescope Control System (TCS) by itself. Each field (box) name is selfexplanatory. The information update rate is a parameter (see document ECH60S2.0 on administration), but by default it is 3 seconds (so the fields will be updated every 3 seconds) Figure 2.4: TCS info indicators Chiron User's Manual / CTIO 60 inches Chiron CHI60S1.2 9 2.4 MAIN_GUI > ASYNC / ERROR box (readonly) An asynchronous message is something not related to any specific command/request from the user, as a alarm, warning, etc (for example, if the CCD temperature is too high, etc). An error is a condition caused by a direct user command (for example, if the image could not be written because there is no enough disk space). This box displays both errors and asynchronous messages. If the asynchronous message is an alarm it may also have another associated action (like a beep) Figure 2.5: async / err box Chiron User's Manual / CTIO 60 inches Chiron CHI60S1.2 10 2.5 MAIN_GUI > Exposure Setup (write) This areas are for the exposure setup itself. These fields are all settable by the user. It allows to setup the exposure before it actually starts. Figure 2.6 a) shows the image setup information: Path: directory where the image will be written Seq. Num: initial image number. It will increment automatically for every new image Basename: base name for images These three variables define the image on disk as: <Path>/<Basename><Seq.Num>.fits The number is set with 4 places, and it is leftfilled with zeros, so it always has 4 digits (%04d) Example: if Basename is “test”, and Path is “/data”,and Seq.Num is “2”, the next image will be /data/test0002.fits Figure 2.6 a): Image setup controls Chiron User's Manual / CTIO 60 inches Chiron CHI60S1.2 11 The red bar shows the available space on the chosen file system (the disk where the chosen directory is. This is, of course, readonly). The check box “Set type as basename”, if checked, will make that every time the image type (see below) changes, the base name changes accordingly (for example, if image type is “Dark”, the image base name will switch to “dark”, etc). The check box “write image” enables or disables writing the image to disk. The normal state is TRUE, so every image taken is written to disk. Figure 2.6 b) shows the exposure setup controls: Figure 2.6 b): exposure setup Observer: Observer (s) name. This information will appear on the “observer” fits key Chiron User's Manual / CTIO 60 inches Chiron CHI60S1.2 12 Observation Tile (Object): This sets the object name. This will appear as the key “object” in the image headers Observation Type: This sets what kind of image will be taken. This goes on the “imagetyp” key header. The available image types are settable through the configuration file, but the “standard” ones are: Object : regular object observation : clear > shutter_open > integration > shutter_close > readout When this type is selected there will also appear a drop down menu to select the position of the IODINE cell (IN or OUT). Based on the selection the iodine cell will be moved IN or OUT of the light path (at the moment of the selection) Dark: dark image no light : clear > integration > readout Bias: zero (bias) frame no integration : clear > readout If this type is selected the “ExpTime” control will not be present (always 0 exposure time) Flat / Calibration: calibration (reference) image using comparison lamps. Regular observation (as an object) but the selected comparison lamps is turned “on” : lamp on > clear > shutter_open > integration />shutter_close > readout > lamp off If this type is selected, there will appear a dropdown menu showing the available lamps, and there the user can choose what lamp will be used for the calibration. The lamp will be turned off automatically after the sequence, so the the user does not need to worry about turning on/off the lamp. When this type is selected there will also appear a drop down menu to select the position of the IODINE cell (IN or OUT). Based on the selection the iodine cell will be moved IN or OUT of the light path (at the moment of the selection) ExpTime (sec): controls the length, in seconds, of the integration (goes into the “exptime” key header) #Exp: controls how many exposures to do using all the above settings Comments: Any desired commentary. This goes into the fits header as a standard fits COMMENT Chiron User's Manual / CTIO 60 inches Chiron CHI60S1.2 13 Chiron User's Manual / CTIO 60 inches Chiron CHI60S1.2 14 2.6 MAIN_GUI > Exposure Control (write) This allows to start the actual exposure (s) and to control it once it is in progress Start: once the exposure has been setup (see 2.5), by clicking this button the exposure will start Pause: allows to pause an exposure when it is on the integration phase. To resume it, press the same button again (the label will change to “resume”) Stop: Stops an exposure once it is on the integration phase. When stopped, it will stop integrating and will be readout immediately. The headers will show both the requested exposure and the actual exposure (see Appendix A: headers) Abort: Aborts an exposure/readout. This button will cause the exposure to finish immediately, but the image will not be readout data will be lost Figure 2.7: Exposure control Chiron User's Manual / CTIO 60 inches Chiron CHI60S1.2 15 2.7 MAIN_GUI > Preset modes This drop down menu allows to select any predefined “mode”. Figure 2.8: Predefined modes A “mode” is a set of predefined states for different mechanisms and parameters. By selecting an specific mode you ensure that the parameters will always be the same for that specific mode so ensures the “state” of the instrument to be the same. The drop down menu shows the available modes. These modes area ctually defined in some scriopts defined in $HOME/apps/CHIRON/bin. The scripts are called geom_<mode>, where <mode> are the names that appear on the dropdown menu. When the drop donw is selected, the geom_<mode> script is called. The effect of calling the geom_<mode> script manually through a terminal is exactly the same as calling it from the GUI. If a new “mode” is desired, a new geom_<newname> script must be created here. When this manual was released there where 5 predefined modes (5 scripts). The table below summarizes Chiron User's Manual / CTIO 60 inches Chiron CHI60S1.2 16 the states each mode produces name Iodine cell Slicer stage speed binning roi Fiber OUT fiber slow 8x8 full Iodine IN slicer fast 3x1 TBD Normal OUT slicer slow 3x1 full Slit OUT slit fast 3x1 full Narrow_slit OUT narrow_slit fast 3x1 full The name of each scrip is geom_<name>, where <name> is the name that appears in the table (for example, geom_Fiber, etc) Note that if the user changes manually any of the items that a mode predefines, the predefined “mode” will go automatically to “none”, because the state of each parameter is no longer guaranteed to correspond. Chiron User's Manual / CTIO 60 inches Chiron CHI60S1.2 17 2.8 MAIN_GUI > PlugIns (write) This area allows to access any PlugIn that may be available. A PlugIn is a subgui that allows to perform an specific task. It is an expansion to the functions of the main gui. New PlugIns can be added at any time. The “Select PI” drop down menu will show any available Plug In. The buttons “Display ...” and “Geometry ...” call some generic and useful PlugIns, described next The currently available PlugIns are described in th following chapter Figure 2.9: PlugIns dropdown Chiron User's Manual / CTIO 60 inches Chiron CHI60S1.2 18 Chapter 3: PlugIns Reference The PlugIns are “expansions” to the main GUI functionality. They are auxiliary guis that are specific to some specific tasks. The advantage of using PlugIns is that the main GUI does not get crowed with functionality that may not be used all the time; it allows to keep the man GUI as simple as possible. Also. It makes very easy to add functionality afterwards without affecting the main GUI. It provides modularity and the capability of natural expansion and compatibility between systems (you can have a common main gui for several different instruments). Chiron User's Manual / CTIO 60 inches Chiron CHI60S1.2 19 3.1 PlugIns > DISPLAY The DISPLAY PlugIn provides an interface to start and setup the real time display (RTD). The RTD is a graphic display that shows the last acquired image automatically. The DISPLAY feature can currently use ds9 or ximtool as the actual displays. This can be set on the configuration files (see ECH60S2.0 on system maintenance). To start the DISPLAY PlugIn the user can press the “Display ...” button at the bottom of the main GUI (see 2.7), or press in the PlugIns dropdown menu and select DISPLAY from the list Figure 3.1: Real Time Display PlugIn Enable: The round button with the green LED is to enable/disable the RTD operation. The “start” button allows to start the actual display device (ds9 or ximtool as configured) Scaling: autoscale: if set, the RTD module will scale the gray levels as best as possible to have a good contrast. In automatic mode it will always represent all the pixel values in the image. If set, the z1/z2 controls will be disabled (grayed out) If autoscale is not set, then the z1/z2 controls will be available (enabled). There the user can enter the minimum (z1) and maximum (z2) pixel value to be represented. This allows a better contrast in some desired area only. The indicators right to the z1 and z2 controls indicates the current z1/z2 values (either manual or the last automatic ones if autoscale is selected) strip_overscan: if this box is checked, the display will strip the overscan after the image has been read. Note that it does so for display purposes only; the actual image is not touched. This stripping is done Chiron User's Manual / CTIO 60 inches Chiron CHI60S1.2 20 by invoking a python script (“autodisplay.py”) that uses pyraf to redisplay the image. The script's description can be found in document ECH602.X (Software architecture) Chiron User's Manual / CTIO 60 inches Chiron CHI60S1.2 21 3.2 PlugIns > GEOMETRY This PlugIn allow to change image geometry/speed variables (parameters that can make the image smaller, or have a different aspect ratio, etc). Figure 3.2: Geometry PlugIn Readmodes: Amplifiers: select what amplifer to use. quad: use all four amplifers. This is the default and normal readout upperboth: use both upperright and upperleft amplifiers. Speed:select the readout speed to use: fast (noisier) or slow. Binning x: binning in columns y: binning in rows Apply: apply binning changes ROI: Select region of interest (subwindow) to read Chiron User's Manual / CTIO 60 inches Chiron CHI60S1.2 22 Enable: enables the selected ROI Disable: go back to fullframe mode X start: starting column of interest Y start: starting column of interest X box size: number of columns of region, starting at “X start” Y box size: number of rows of region, starting at “Y start” Apply: apply the specified ROI All the dimensions are in unbinned data pixels (so if binning is selected the ROI is still specified as for binning 1) In the upper right corned there is an indicator called “mode”. This shows the current predefined “mode” is in use. These modes can be selected from the main gui “pre set modes” drop down menu. The preselected modes will usually set automatically the binning, roi and speed besides other things like position of the image slicer, iodine cell motor, etc). Usually, when you change any geometry parameter “manually”, the predefined mode will be set to “none” this is because when changing the geometry manually not all the predefined mode parameters are ensured anymore. To come back to the predefined mode, the user needs to selected the mode from the main menu. Chiron User's Manual / CTIO 60 inches Chiron CHI60S1.2 23 3.3 PlugIns > LAMPS This PlugIn allow a direct and clear manipulation of the comparison lamps. This allows the user a “manual” operation of the comparison lamps, similar to the manual manipulation done through the actual, physical switches on the console The logic of the lamps control is described in detail on document ECH60S5.X on comparison lamps automation, and also on document ECH60S2.X on software architecture, so here we will just describe its main aspects. The actual control signal for the each lamps is an OR between the “manual” switch and the software command. The motor control signal is also an OR, but now between the lamps control signals. So, if any lamp is “ON” the motor will be “ON”, and any lamp will be “ON” if either its manual switch is “ON” or the software commands an “ON”. Figure 3.3: Lamps PlugIn The upper boxes (manual switches / motor out) show the status of each manual switch (name of the switch on top, LED shows on/off condition). The last of the upper boxes shows the status of the motor (labeled as MOTOR) The lower boxes show the name of the lamp, and the LED shows the status of the actual output control signal. The switch in the box indicates the software switch (status of software command) If the user turns ON the software switch, the LED on the same box should also turn “on”, showing that the actual control signal is ON (this LED is actually showing a real feedback on the control signal). Chiron User's Manual / CTIO 60 inches Chiron CHI60S1.2 24 The software provides some interlocks to avoid having two lamps turned “on” at the same time (if the user turns “on” a lamp when the other is “on”, he/she/ will see in the gui that the old lamp gets turned off before the new one is turned on). These interlocks are described in some details in document ECH60S2.X on software architecture. The software also provides a timer to set a maximum “on” time for the lamp. This time is a configurable parameter, but it is not available to the user from the GUI, but as a configuration file to be edited manually (see also ECH60S2.X) In general the user does not need to use this PlugIn, as the lamp will be automatically handled (including the lamp selection) when the observation type “calibration” is selected (see 2.5, under “observation types > calibration”). Chiron User's Manual / CTIO 60 inches Chiron CHI60S1.2 25 3.4 PlugIns > IODCEL This PlugIn allow a direct and clear manipulation of the iodine cell position. This allows the user a “manual” operation of the comparison lamps. The logic of the iodine cell operation is described in detail on document ECH60HF7.X on RTD / Data I/O box description, and also on document ECH60S2.X on software architecture, so here we will just describe its main aspects. The actual control signal for the motor is an OR between the “manual” switch and the software command. Figure 3.4: Iodine cell PlugIn The upper box (manual switch) show the status of the manual switch (name of the switch on top, LED shows on/off condition). The lower box show the iodine cell position. The LED shows the status of the actual output control signal. The switch in the box indicates the software switch (status of software command) If the user turns ON (IN) the software switch, the LED on the same box should also turn “on”, showing that the actual control signal is ON (IN) (this LED is actually showing a real feedback on the control signal). Chiron User's Manual / CTIO 60 inches Chiron CHI60S1.2 26 3.5 PlugIns > SLICER This PlugIn allow a direct manipulation of the image slicer motor position. This allows the user a “manual” operation of the slicer motor. The mechanism by which the slicer motor moves and its software and hardware components are described somewhere else (CHI60S2.X and CHI60SHF8.X),so here we will just say that the user can command any desired position of the stage, in mm, or request a homing of the mechanism (after which the position will be set to 0). Figure 3.5: slicer motor plugin The upper slider is an indicator that shows the actual read position. The lower slider is a control that the user can move to select the desired (target) position. The user can also change the lower digital control. Note that there is no “go” button; the movement will take place once the user has changed the controls. The user can also request a homing of the motor by clicking in the “home” upper button. The dropdown menu allow to use predefined positions this is in fact the most recommended way of using it. The predefined positions will take the slicer directly to the specified positon. The currently predefined positions are: fiber, slit, narrow_slit, slicer If the user moves the motor manually, then the predefined dropdown will go to “none” Chiron User's Manual / CTIO 60 inches Chiron CHI60S1.2 27 3.6 PlugIns > FOCUS This PlugIn allow a direct manipulation of the focus motor position. This allows the user a “manual” operation of the focus motor. The mechanism by which the focus motor moves and its software and hardware components are described somewhere else (CHI60S2.X and CHI60SHF8.X),so here we will just say that the user can command any desired position of the stage, in mm, or request a homing of the mechanism (after which the position will be set to 0). Figure 3.6: slicer motor plugin The upper slider is an indicator that shows the actual read position. The lower slider is a control that the user can move to select the desired (target) position. The user can also change the lower digital control. Note that there is no “go” button; the movement will take place once the user has changed the controls. The user can also request a homing of the motor by clicking in the “home” upper button. Chiron User's Manual / CTIO 60 inches Chiron CHI60S1.2 28 Appendix A: Header This appendix present some information in the standard header and its meaning. To consult how to edit/add headers dynamically please refer to document CHI60S3.0 on scripting. Note that we describe only the keywords which are particular to this instrument, not the standard fits keywords (the keys that belong to the fits standard, as NAXIS, BZERO, etc), which are always present in any fits file Effective integration time: shutter open time if object, dark time if dark EXPTIME = 12. / Exposure time in secs date/time of creation of the fits file DATE = '20091222T11:21:51' / file creation date (YYYYMMDDThh:mm:ss UT) Title of the image, as filled in the “Observation title” main GUI control OBJECT = 'none ' / Name of object observed Name of the observer, as filled in the “Observer” main GUI control OBSERVER= ' ' / observer Type of observation, as chosen in the “observation type” drop down menu in the main GUI IMAGETYP= 'object ' / Type of picture (object, dark, comp, etc) Image binning in x (columns) and y (rows) as selected in the Geometry PlugIn CCDSUM = '1 1 ' / On chip summation (X, Y) UT at which the shutter was open. This is set internal, and has an accuracy of ~ 2 ms UTSHUT = '20091222T11:21:31.683' / UT of shutter open Number and order of amplifiers in the y (vertical) and x (horizontal) directions. Set automatically depending on the amplifiers in use, selected on the “readmodes” dropdown menu in the Geometry Plug In NAMPSYX = '2 2 ' / Num amps in y and x (eg. '2 2=quad') AMPLIST = '11 12 21 22 ' / Readout order in y,x Image geometry. This are standard NOAO WCS keywords. They describe the are of the image that corresponds to amplifier (ASEC), Bias (BSEC), CCD (CSEC), Data (DSEC), trim (TSEC). The suffix (21 or 22) corresponds to the physical amplifier (21: upper left, 22: upper right, 11: lower left, 12: lower Chiron User's Manual / CTIO 60 inches Chiron CHI60S1.2 29 right) TSEC11 = '[52:2099,1:2056]' / Good section from det 1 amp 11 ASEC11 = '[1:2048,1:2056]' / CCD section in read order CSEC11 = '[1:2048,1:2056]' / CCD section from det 1 amp 11 BSEC11 = '[2100:2149,1:2056]' / Overscan section from det 1 amp 11 DSEC11 = '[52:2099,1:2056]' / Data section from det 1 amp 11 TSEC12 = '[2200:4247,1:2056]' / Good section from det 1 amp 12 ASEC12 = '[4096:2049,1:2056]' / CCD section in read order CSEC12 = '[2049:4096,1:2056]' / CCD section from det 1 amp 12 BSEC12 = '[2150:2199,1:2056]' / Overscan section from det 1 amp 12 DSEC12 = '[2200:4247,1:2056]' / Data section from det 1 amp 12 TSEC22 = '[2200:4247,2057:4112]' / Good section from det 1 amp 22 ASEC22 = '[4096:2049,4112:2057]' / CCD section in read order CSEC22 = '[2049:4096,2057:4112]' / CCD section from det 1 amp 22 BSEC22 = '[2150:2199,2057:4112]' / Overscan section from det 1 amp 22 DSEC22 = '[2200:4247,2057:4112]' / Data section from det 1 amp 22 TSEC21 = '[53:2100,2057:4112]' / Good section from det 1 amp 21 ASEC21 = '[1:2048,4112:2057]' / CCD section in read order CSEC21 = '[1:2048,2057:4112]' / CCD section from det 1 amp 21 BSEC21 = '[2101:2149,2057:4112]' / Overscan section from det 1 amp 21 DSEC21 = '[53:2100,2057:4112]' / Data section from det 1 amp 21 Detector and Focal plane array (FPA) ID, and detector characteristics (Read out noise (RON) and gain in e/adu) as measured in the lab / telescope DETECTOR= 'E2V4K' / Detector Identifier GAIN11 = 2.6 / Gain for Amp A (electrons/adu) RON11 = 10. / Read Noise for Amp 11 (electrons) Chiron User's Manual / CTIO 60 inches Chiron CHI60S1.2 30 GAIN12 = 3.73 / Gain for Amp B (electrons/adu) RON12 = 10. / Read Noise for Amp 12 (electrons) GAIN21 = 3.62 / Gain for Amp C (electrons/adu) RON21 = 10. / Read Noise for Amp 21 (electrons) GAIN22 = 3.17 / Gain for Amp D (electrons/adu) RON22 = 10. / Read Noise for Amp 22 (electrons) FPA = 'CHIRON' / focal plan array Observatory and telescope information OBSERVAT= 'CTIO ' / Origin of data TELESCOP= 'CTIO 1.5 meter telescope' / Specific system Information of the TCS, coming directly from the TCS and appended. The comment fields are self explanatory DATEOBS= '20091222T11:21:42.0' / date of observation start UT = '11:21:42.0' / UT of TCS coords RA = '12:45:28' / ra DEC = '64''36''''' / dec EPOCH = 2000. / epoch ALT = '260.0 ' / altitude HA = '00:30:16.1' / ha ST = '05:04:01.1' / sidereal time ZD = '12.5 ' / zenith distance AIRMASS = '1.015 ' / airmass Instrument and camera temperatures, in Celsius degrees CCDTEMP = 114.99 / detector temperature NECKTEMP = 154.88 / dewar neck temperature TEMPGRAT= 19.761 / temperature in grating (c) (OK) Chiron User's Manual / CTIO 60 inches Chiron CHI60S1.2 31 TEMPTLOW= 19.84 / temperature in low table (c) (OK) TEMPTCEN= 20.193 / temperature in center table (c) (OK) TEMPSTRU= 20.12 / temperature in structure (c) (OK) TEMPROOM= 20.11 / temperature in room (c) (OK) Comparison lamp status. States what lamp was in use (“none” if no lamps was ON) COMPLAMP = ' QUARTZ' / comparison lamp Iodine cell position in the light path (IN or OUT) IODCELL = 'OUT ' /iodine cell position Image slicer motor position, in mm and in position name (“decker”) SLICER = 2.6574 /image slicer position (mm) DECKER = 'fiber ' / decker position name focus motor position FOCUS = 12.5921 /focus position (mm) Requested exposure time. This value usually is the same as “exptime”, however, it may differ is the image was “stopped” during integration. In that case, “exptime” will show the actual (effective) integration, while this filed will show the originally requested exposure time REXPTIME= 12. / requested exposure time Dark current time. This shows how long the detector was acquiring dark current. This is usually the same as “exptime”, but it may differ is the exposition was paused / resumed. In this case “exptime” will show a smaller value than the dark time (the detector was generating dark current all the time, including the paused time) DARKTIME= 12. / dark current time in secs This in engineering information that may be useful: software/firmware versions, and hardware configuration: slot and card name, firmware version and electronic ID DHEINF = 'MNSN fermi hardware' / controller info DHEFIRM = '/home/observer/panview/fpas/_echelle/config/DETECTOR/auto_mcb.ucd' SLOT00 = 'MCB 0x134C243C 4.670000' / dhe board: <type> <serial> <firmware> SLOT02 = 'CLK 0x1411060F 4.400000' / dhe board: <type> <serial> <firmware> SLOT04 = 'CCD 0xB40BD6E 4.120000' / dhe board: <type> <serial> <firmware> Chiron User's Manual / CTIO 60 inches Chiron CHI60S1.2 32 Identification of the panview focal plane name and the Data Handling system in the main application. PANID = '_chiron' / PAN identification DHSID = 'DHSDEV' / DHS identification Comment as filled in the “Comments” control in the main Gui COMMENT none Shows the pixel time, the speed mode used, and the “geometry predefined mode” PIXTIME = 8.9/ pixel time SPEEDMOD=`normal` / speed mode used GEOMMOD = 'undef ' / geometry mode Chiron User's Manual / CTIO 60 inches Chiron CHI60S1.2 33