1
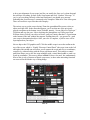
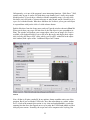
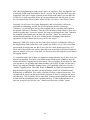
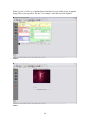
Deepsky for Dummies
A Deepsky Users’ Guide for the Rest of Us
Rod Mollise
As most of y’all know, I’ve long since turned away from planetarium programs when it
comes to astronomy software. Not that there aren’t some good ones out there. The Sky 6,
for example, is fantastic. For what it does. Which, mainly, is painting a hyper-realistic
picture of the sky on your PC screen. Unfortunately, that is not very useful for me in this
day of goto scopes. And it is the day of goto. Heck, even my 60mm wide field grab ‘n go
scope is computerized. Being able to go from object to object with a few pushes of a hand
controller button means there’s much less need for star charts—real or virtual—now.
Star charts, do still have their uses, of course. It is nice to be able to refer to a chart on the
computer screen when my scope finishes gotoing its goto, so that I can see what other
interesting objects might be in the area. Even so, seeing a beautiful and literal
representation of the sky on a the monitor is much less important to me these days than
having some help in deciding what I oughta be looking at in the first place. Enter
planning software. And enter Deepsky.
Yeah, what us goto folks need is not a gorgeous expanse of silicon sky, ala The Sky or
Starry Night. What we need is a computer program that tells us WHAT and WHEN.
What do we look at, and when can we look at it? That’s the jobs of astronomy planning
software, including the subject of this little guide/review/overview, Deepsky. Deepsky,
like its other planner brethren, is really nothing more than a gigantic database of deep sky
objects that can be searched and sorted for DSOs and times of visibility. In addition to the
databases, this and similar programs usually include logging facilities, goto telescope
control, and at least rudimentary chart drawing abilities. While new amateurs naturally
gravitate to something pretty like Starry Night, old hands are increasingly taking up the
planners. There are currently several major programs in this category, but, as you may
have guessed, I’m going to focus on one of the pioneers in this field, a long time favorite,
Deepsky, this time.
Deepsky has been around for the better part of a decade, and may be familiar to you in its
earlier incarnations as Deepsky 98, Deepsky 2000, etc. Originally, the author, Stephen
Tuma, appended the current year to the title of each new major upgrade/release. Recently,
he has dropped this convention—wisely in my opinion. Just “Deepsky” is simpler and
less confusing for new users. Technically, the program is actually called “Deepsky
Astronomy Software” or “DAS,” but its users and its creator usually just refer to it as
“Deepsky,” which I’ll do here.
What I propose to do here is a little different and a little more in-depth than what I
usually do in software reviews. In part, that’s because I’ve previously reviewed at least a
couple of Deepsky’s earlier versions, and partially because there seems to be some
1
misunderstanding in the Internet astronomy community, especially, about what Deepsky
does and how well it does it. Mostly, though, because this is a complex and deep
program. A two page review or summary just won’t give you a good idea of both what
the program is capable of and how easy it is to make it do these things.
Deepsky does take some explaining. It’s a big, sprawling program that can be a little
intimidating. Open it for the first time, and you are greeted by tons of menus, submenus,
buttons and windows. The program is actually pretty logically laid out, and very easy to
learn to use, but it sure doesn’t look that way at first glance. Unfortunately, at least a
couple of folks I know have given up on the program after an attempt or two. They think
it’s just too complicated. Luckily, that’s not the case, as just a little digging will sho w,
and dig we shall. I’m going to take you through Deepsky from installation, to use in
planning an observing session, to operation with a goto telescope, and, finally, to logging
your observations.
Don’t get that look on your face. I know, I know; you’re interested in astronomy, not
computer programming. Don’t worry; I’m going to do the above in the simplest possible
terms. I’m not going to talk about every button and function. I’m not going to tell you
every single way to do a task with Deepsky. My goal is to show you a way, a simple and
easy to understand way, to use the program. Something to get you started, and something
you can build on later by exploring the program’s myriad functions on your own, reading
the manual a few times, and talking to other Deepsky users online. Please don’t be
offended by the title of this piece, “Deepsky for Dummies,” either; when it comes to
software I am the CHIEF and original dummy.
Keep in mind, as you read this little guide, that what I am telling you herein may not
always be the best way or only way or the really CORRECT WAY to do things with the
program. If you do things my way, however, I assure you that you will be able to begin
using Deepsky productively. “Better” can come later.
Before we can get started you’ll need a copy of the software, of course. That’s pretty
easily accomplished, no matter how shallow your pockets are at the moment. If you need
to lowball it, Deepsky is available as a download from the author’s website
(http://www.deepsky2000.net) for a mere $29.99. The limitations of this format are fewer
stars on the built- in charts (it tops out at magnitude 11 rather than the 15.5 of the more
expensive editions), and fewer images, 109 versus 400,000 (that’s right, 400,000) for the
DVD version. A step up from digital download is the CD edition, which goes for the still
surprisingly modest price of $49.95. It is identical to the program’s top of the line DVD
version in most respects, but has a reduced image set of “only” (!) 11,000 pictures. If
your computer has a DVD drive, or you’re willing to upgrade to one (these devices are
insanely cheap now), the top-of-the- line DVD is really the way to go. For only $69.99,
you get everything, including the aforementioned 400,000 pictures of deep sky objects.
All three versions—including the el cheapo download--include all the “core” Deepsky
features, including 60 astronomical catalogs full of 708,000 objects.
2
Well, the DVD includes almost everything. Steve also sells some ancillary items that may
be of interest. If you bought the CD version, but find yourself wanting more pictures, two
additional CDs of images are available at $20.00 each. The most important “add on” in
the Deepsky store, though? A printed manual at $15.00. Yeah, I know you say you’ll
print out the manual included on the disk. But you know you never will. A printed manual
is always handy to have, and is indispensable when you’re learning Deepsky.
At least as desirable as a printed manual—or maybe moreso—is the Deepsky “training
disk.” This is a CD of instructional videos that is one of the best and most useful ideas
I’ve yet seen in the world of astronomy software. While these lessons can be downloaded
from the Deepsky website for free, unless you’ve got a broadband connection that’s not
very practical. The training video disk is only $9.99, anyway. Just buy it.
Once you have disks in hand or the downloaded file resident on your hard drive, it’s time
to get the Deepsky going. The installation procedure is basically identical for all versions.
If you did choose to go with the DVD, as most of you probably will, you’ll find yourself
with three disks: a program CD and two additional DVD disks containing images. Set the
DVDs aside for now, insert the CD program disk in your drive, and let’s get started.
I chose to install Deepsky on my laptop, a 3.4 GHz Toshiba Satellite (Windows XP) with
a DVD r/w drive, a gigabyte or RAM, a large hard drive and a fairly powerful
video/display system. Don’t panic! I know many amateurs will want to install the
program on the older PCs many of us use at the telescope. Rest assured it will work fine
there. I previously installed the program on a system as puny as my ancient 333 MHz
Compaq desktop, which is equipped with a mere 64mb of RAM, and it ran well.
Naturally, doing computer intensive things like retrieving massive numbers of objects
from the Deepsky database will be faster and more pleasant with a more modern
computer.
Once you’re ready to start installing—don’t start. First of all, before you do anything
else, read the printed pages included in the Deepsky package, those titled “Please Read
All of This First.” That means just what it says, pardner. Make sure you read and
understand everything in these pages before you start the installation; that’s the surest
way to keep yourself out of trouble. Remember, Deepsky is, at heart, a database, and
databases are one of those types of program where incorrect installation can cause a lot of
problems. You might also want to open the Deepsky user manual .pdf, either from the CD
or the website http://www.deepsky2000.net, and print the whole darned thing if you
haven’t taken my advice and shelled out for the printed version. Yes, I know you hate to
read manuals, but do it anyway.
One slight down-check for Deepsky is in getting the installation process going. Most
recent programs will begin their installations automatically when a program CD is
inserted into the drive. Deepsky did not. Instead, I had to select “run” from the Windows
Start button and browse to the setup program on the CD. Not a big deal, sure, and this
procedure is clearly explained in the installation directions in the “Read All of This”
3
pages, but for the computer-ignorant among us (which includes Old Uncle Rod), the
simpler the better.
Despite that minor quibble, I was very pleased with the installation procedure on my
machine. Once started, it ran without a hitch, and I was not asked to reboot the computer
following the installation or do other weird or annoying things. Earlier versions of
Deepsky sometimes proved troublesome to install, with hang- ups and multiple reboots
being the order of the day. Not this time. The new Deepsky (Version 2005.6.28 is current)
went onto my drive without complaint or hesitation, leaving me with an initial impression
of “solid” and “professional.”
Just because you’ve got the main program installed, that doesn’t mean you’re done
installing. If you want to control your goto telescope with Deepsky, you are required to
also install the ASCOM program, as well as any drivers that ASCOM furnishes for your
particular scope. A copy of ASCOM is included on the Deepsky CD, but you might want
to check the ASCOM website at http://ascom-standards.org/ to make sure you’ve got the
latest version. Please do this, as, depending on your scope model, having the latest
ASCOM can be very important for proper goto operation.
Also found on the Deepsky CD are Cartes du Ciel, Virtual Moon Atlas, Pocket Deepsky,
and several other apps. If you’re interested in any of these, go ahead and install them, too
(if you need detailed instructions for Cartes and Virtual Moon, check the websites of
these programs—instructions for Pocket Deepsky are found in the program manual).
Pocket Deepsky, by the way, looks like a very nice program, but since I’m a Palm user I
was, unfortunately, unable to evaluate it. The only one of these additional applications I
feel is a must is Cartes du Ciel. If your tastes in astronomy charting programs are like
mine, you’ll probably find yourself using the Cartes charts with Deepsky instead of the
built- in Dean Williams charting system. More on that later. For now, just trust me and go
ahead and set up Cartes du Ciel if it’s not already resident on your PC.
If you purchased the DVD version of Deepsky, you’ve got those two additional disks the,
DVDs, hanging around. These are the image disks, and you can, as the manual indicates,
either leave the data on the DVDs or copy their pictures and other materials onto your
hard drive. Be aware, though, that copying this much data will take a long, long time
even with fairly speedy equipment—hours in some cases. I chose to leave the data on the
DVDs. If you change your mind later, you can always go back and copy the DVDs to a
directory on your hard drive; just follow the instructions in the Deepsky installation
instructions.
When you’re done loading everything you want to load up, take a look at your desktop,
and you’ll notice that Deepsky has placed an attractive program icon there. Moment of
truth. Giver ‘er a click and see what happens. What should happen is that you’re greeted
with a window which calls itself a “set up wizard.” Answering the questions this wizard
asks will give the program the bare essentials of information it needs to start working for
you. Mainly, it wants to know where on your computer it can find the astronomical
catalog data and images the program uses. The manual and the Read Me guide outline
4
what you should answer here, but it’s pretty simple. The Tycho and Hubble Guidestar
(GSC) catalogs are in the Deepsky directory on your hard drive (which, you’ll find, the
install process has placed in the “programs” subdirectory of your drive). Pictures, unless
you’ve dumped the DVDs to your hard drive, will be in the “images” directory of the
DVD drive (make sure an images DVD is in your drive as you’re telling the setup wizard
where to look for pictures if you use the window’s browse button to furnish this
information).
When you’re done with this wizard, the program will run for the first time, and you’ll be
greeted by the main program screen. Actually, you’ll first be greeted by the window in
Plate 1. We’ll talk about that some later. For now, just close it. Closing should reveal
Deepsky’s “home” screen, seen in Plate 2, but you’re not close to being ready to explore
its many features–not yet. You’ve got some more setting up to do. Go straight to the Prefs
menu (found after File, Database, and Apps at the top of the screen in typical Windows
menu fashion). Once there, click “Date and Time,” which will present you with the
window seen in Plate 3.
Plate 1
5
Plate 2
As with most Astro programs, Deepsky can use the PC’s time and date settings, which is
what I initially told it to do, by checking the appropriate box in this window. This is the
most convenient way to use Deepsky—by linking it to your PC’s real time clock, you’ll
avoid the embarrassment of booting the program and being puzzled by winter objects in
the heat of summer if you haven’t used Deepsky in a while. You can always come back
here, uncheck the box, and enter a desired time and date if need be. Which will be often,
since you’ll want to set the program for a particular date and time when you’re planning
an observing run.
Plate 3
6
Next up is setting your geographic location (Plate 4). You can select your site from an
extensive list of world-wide cities, found under the “general locations” tab. Or if you’re a
stickler for precision like me, and/or travel to a lot of star parties, you can enter multiple
“personal observing sites” by name (with their geographic positions expressed in degrees,
minutes, and seconds of longitude) under the “personal observing location” tab of this
window. One peculiarity I noted here was that I was not allowed to leave any of the fields
blank to go back and correct errors in previous fields. The program insisted I first fill in
all the blanks for either lat or lon before I could go back and correct an error. Once
position data is entered, the selected observing site’s latitude and longitude (but not
name) will be displayed at the bottom of the main program screen. Oh, do be aware that
the longitude and latitude values you enter in either “general” or “personal” are used only
by the program for calculating object visibility. You will still need to enter latitude and
longitude in the ASCOM program setup if you’re using a goto scope.
Plate 4
Your next task is to select the equipment—scopes and eyepieces--you’ll be using, as seen
in Plate 5. You can choose your gear from lists displayed in this window or you can
create your own entries. Chances are, you’ll find your scope in Deepsky’s long list of
currently popular instruments. Note that, as with latitude and longitude, you’ll still need
7
to enter your scope type in ASCOM. Deepsky uses equipment data only for helping you
do observing log entries and other program specific tasks.
Plate 5
Scope or scopes selected? Ocular time. The eyepiece list, though it includes many oculars
from numerous manufacturers, is not quite as up-to-date as the telescope list. Many
popular imported eyepieces like the Orion Expanses aren’t there. It’s easy enough to add
your own eyepieces, of course. Have a CCD cam? Select that, too. In contrast to the
eyepiece listings, the CCD models are extensive, with even the fairly new Meade DSI
(but not the brand new DSI Pro) being present.
“Miscellaneous preferences” (Plate 6), the next menu item under Prefs, allows you to
enter or change file locations (of images and catalogs) if you haven’t done that already in
the Setup Wizard. This window also includes various other options, all of which can be
left at their defaults, at least for now (the forbidding sounding “partition logbook,” for
example).
8
Plate 6
“External applications” allows you to set up other programs—Cartes du Ciel, for
example, to run from the Deepsky’s Apps menu. To configure this, up, you enter each
program into the table by means of browsing to its location on your hard drive from this
window, and finding and clicking on the program’s executable file (usually identified by
name and a program icon that looks like the one installed on your desktop). This sounds
confusing, but is well-explained in the manual.
“Spreadsheet” (preferences), (Plate 7) allows you to change the colors of the spreadsheet,
among other things. I found the default yellow/green to be fine. The rest of the selections
under this window’s tabs can be left at their defaults for the moment.
9
Plate 7
“Star Chart Preferences,” the next Prefs menu choice, concerns some minor configuration
details of Deepsky’s included charting “module.” Like Miscellaneous Preferences, these
can be left at their defaults.
Whoo-eee…done setting up for now—finally! What next? You can start working with
the program immediately, but I STRONGLY suggest that you exit, insert the Training
CD and view it’s instructional videos. Maybe view ‘em a couple of times. This will really
help you get going without a lot of Uncle-Rod-style mucking around. Criticisms of this
disk’s “production values?” Steve’s voice is easily understood (and is much better than
my Southern drawl, for sure), but it might be nice at some point to corral somebody with
a good “announcer’s voice” to do the audio narration. Some occasional fluffs in the
lessons—clicking wrong items, etc. should be cleaned up as well.
The content of the training CD? These lessons are presented in the “animated
screen”/audio narration format familiar to anybody who’s ever taken any kind of software
training course. They are very helpful if you’ll just sit down and watch them, and I do not
understand why nobody else in the astronomy software biz has thought to do this. Man
alive, “videos” like this would be one heck of a life preserver for a big, complicated
program like The Sky 6. There are 11 videos on the CD that will take you from
Installation all the way to using SQL commands for database searches (if you want to).
Anything lacking? It might be nice to add a video- lesson that explains the most basic of
Deepsky basics, one that defines a fe w terms. It may not be apparent to everybody, for
example, what the difference is between an “observing plan” and the onscreen
spreadsheet list of objects that is displayed when you start the program. If you really want
10
to maximize the value of these videos, it might be a good idea to run them while you
follow along with the program itself—if your computer is up to running both videos and
Deepsky at the same time or if you have a second computer available.
Now it’s finally time for the nitty- gritty. This is what you shelled out the bucks for. If you
exited Deepsky to run the training disk, bring it back up. When you start the program,
you’ll first be presented with the aforementioned introductory window that allows you to
view the program’s online documentation, look at the training videos, contact the author
by email, check into the Deepsky User’s Group, and check for program updates. To do
these things, you’ll naturally need an Internet connection, and for everything except
checking the User Group, you’ll want this to be a high-speed connection. There’s a check
box that will prevent this window from being shown at subsequent start- ups if you get
tired of seeing it.
Dismissing the “help” window allows you to see what it’s been covering up, the main
program screen, a spreadsheet full of objects, the Messier objects, to be exact. No matter
what you set your filters to, you’ll always be greeted by these familiar Ms in spreadsheet
number one (you’ll notice, by the way, that there are tabs for five different spreadsheets
(see Plate 8)). Frankly, I really don’t like this. I’d much rather the program start up with
my last-used spreadsheet, but it only takes one button push to retrieve the previous sheet
of objects, so this is not a tremendous annoyance.
Plate 8
Remember: this is a spreadsheet, not an observing list. You’ll use spreadsheets to build
an observing list, which is called a “Plan” in Deepsky parlance. If you understand that,
you’ve basically got Deepsky licked, and everything else is mere mechanics. Before yo u
can create the observing list for the evening, you’ll have to have a set of objects to choose
targets from; the spreadsheet is that set of objects. Where does the spreadsheet come
from? You’ll retrieve spreadsheet objects from Deepsky’s massive database. That is your
first task in planning tonight’s observing run.
Before you begin using spreadsheets, though, it’s a good idea to set up the columns you
want to display. Not showing things like “galactic longitude” will mean you don’t have to
scroll horizontally to view all the data in a spreadsheet. Set this up by using the
“Spreadsheet” submenu under the same Prefs menu we visited earlier. Select the
11
“Formatting” tab in the window that appears and click “Select Columns to Display” to
arrange things to your liking.
You’ve got a spreadsheet full of Messier objects, but these likely don’t contain the
objects or all the objects you’re interested in observing. How do you get candidate DSOs
out of Deepsky’s databases and onto the spreadsheet so you can work with them? You
can do this the easy way with “Preferences and Filters,” or the hard way (for some of us
computerphobes, anyway) with queries.
To use Preferences and Filters to retrieve objects, begin by selecting the “Filters” tab at
bottom of spreadsheet. The first time you use Deepsky, you might want to set “minimum
altitude” here (See Plate 9). Entering a figure of “30,” for example, will exclude all
objects that are not at 30 degrees of altitude at the current time. Remember, of course, to
reset the progr am to the time you’ll be making your observations (in the Prefs date/time
menu) if you’ve previously told Deepsky to use your PC’s system date and time. There
are several other entries you can make in this window, but Altitude is the most important.
I normally also check “include altitude/azimuth” and “include rise/set times.” You can
leave everything else alone for now.
Plate 9
12
Next, you’ll begin selecting the range of objects that will go into your spreadsheet and
onto the screen. Click the “Select” tab, which is just to the right of Filters, and you’ll be
allowed to choose “constellation,” “catalog” (of objects, NGC, for example), and “type”
(as in type of deep sky object) via buttons and drop-down menus. For our example, let’s
select Scorpius, NGC 2000, and “all types.” One slight oddity here is that if you’ve used
Select previously, you must hit clear to enter a new constellation, catalog, or type. For
example, if you’ve entered “Ursa Major” in the constellation field in a previous session,
you’ll have to hit clear before you enter “Scorpius,” or you’ll wind up with both Scorpius
AND Ursa Major in your search/retrieval range.
You’re almost ready to hit the “go” button, but not quite. If you’re using a 4 inch
refractor from suburban skies, you may not want ALL the NGCs that Scorpius/NGC/all
types will deliver to your spreadsheet; some will be so dim they will surely elude your
little scope. You need to filter magnitudes. To do that, select the next tab over from
Select, “Ranges 1.” The fields you mostly need to worry about are those associated with
“Magnitude 1” (Plate 10). Let’s set “upper limit” (dimmest) to 10 (999, the default, will
retrieve all magnitudes). The lower limit (brightest) setting is –1, and you can leave that
as it is. Also, be sure to leave the “Include Blank” boxes in the Magnitude 2 and Size
fields checked. You should uncheck this same box for Magnitude 1. Doing these things
will ensure that objects for which size and/or magnitude is uncertain (many nebulae) will
be included in the spreadsheet, normally a good thing.
Plate 10
The tab to the right, “Ranges 2,” lets you set separations and position angles (for double
stars) as well as search parameters for object type. You can leave this alone unless you’re
going after doubles on your first Deepsky run.
13
The next tab, “Sort,” can also be bypassed at the moment. This, as you’d guess, sorts
object during lookup. It’s less confusing, at first, however, just to click on spreadsheet
columns to sort the objects after they’re displayed.
Now, you’re ready to light the fuse. I know it seems as if we’ve had to do a lot of work to
get here, but, normally, the only tab in this area you’ll come back to again and again is
Select, when you want to specify different constellations and object types and catalogs.
OK. Click the “Apply Filters” button to the left of the tabs we’ve been working with (the
button showing the current Moon phase…cool, huh?). When you do, the program will
think for a while—a progress bar will appear at the bottom of the screen--and your
spreadsheet display will eventually change and should show all the NGC objects in
Scorpius brighter than magnitude 10 and higher than 30 degrees in altitude for the time
you’ve specified.
Purty simple. But what if you want to narrow things down a little? That’s fairly easy to
do by altering your Ranges and Select choices. Unless you want to include only the
Messiers in Scorpius (or any other constellation). This is one of the few areas where
Deepsky offers no immediately obvious solutions—not using Filters/Ranges, anyway.
Oddly, there’s no “Messier” choice in Select or in any of the program’s catalogs menus.
You can easily display visible Messiers by clicking “Whats Up Messier” from the Query
menu (to the right of Prefs in the top of screen menu bar). Unfortunately, doing that
returns all the visible Messiers from all constellations, and there’s no way to modify
What’s Up Messier.
At first I was stymied and unhappy over this seeming limitation. I wanted just the
Scorpius Messiers, dangit. I cooled off for a minute, did some looking around and manual
reading (horrors), and found that there is an easy way to show a single constellation’s
Messier objects, but it involves using the Search function, which we’ll talk about in a
minute, rather than filters or wizards or queries.
And what about the Query function mentioned above. You can access this tool either by
clicking on the tab next to “Sort” at the bottom of the spreadsheet or by choosing “Query
Builder” from the Query menu at the top of the screen. If you’re used to using databases
and, in particular, SQL databases, you’ll find these query tools quite powerful, and I’m
sure they will allow you to select out Messiers or anything else you choose from any
constellation. If you know how to to use them. Unfortunately, if you’re as computerignorant as Unk Rod, you’ll find this whole query business a little scary and will stick to
“select,” “What’s Up Messier,” and the more powerful, but still easy, “What’s Up
Wizard.” That’s OK. You can do anything you want using Filters and the What’s Up
features along with Deepsky’s very powerful search function. You may not achieve
power-geek status by doing things the easy way, but your blood pressure will stay down
and your hairline will stay intact.
The “What’s Up Wizard” is one of the best features of the program, and really makes
thinking in SQL unnecessary for most of us. Just click on this Wizard in the Query menu
14
(see Plate 11), answer the questions it asks you, and you should have no trouble filling a
spreadsheet with the objects of your desire. No, it won’t pick out the Messiers, but it will
pick out anything else.
Plate 11
So, let’s say you’ve pushed the Filter button and you’ve now got a spreadsheet on screen.
What the aitch-E double-L can you do with this list of (let’s say) Scorpius NGCs? The
first thing you’ll want to do is sort them to suit your preferences. Maybe by object
number, maybe by rise time, maybe by magnitude. It’s up to you. To sort the chart by a
particular column value, just click on the column heading you’re interested in. Rise
(time) for example. By clicking a second time, you can reverse the order
ascending/descending. One annoyance here is that when you sort by M number, M100
comes after M10, and you don’t get M11 until after M109. M2? After M19. Ah, well.
You’ve got bunches of objects displayed, and you’ve sorted them into some kind of order
that’s meaningful to you. If you’re happy with what’s onscreen, you could just click the
li’l printer icon at the screen top left (it’s a member of a horizontal row of mostly useful
and identifiable toolbar icons) and print the spreadsheet you’ve got in front of you. If
that’s what you want, that’s fine. Deepsky does a fine job of printing, allowing you to
specify just how you want the finished hardcopy to look. But I think you’ll find that the
spreadsheet isn’t quite right. It either shows too many objects (the whole NGC bunch
from Scorpius, for example, some of which are not overly interesting visually) or not
enough (maybe you’re also interested in viewing objects in Sagittarius). What you really
want is not a spreadsheet, but the aforementioned Plan, an Observing Plan.
How do you move choice objects from the spreadsheet and into this hypothetical Plan?
Not so fast, not so fast. You may need help deciding if you really want a particular object
to go into your plan before you put it there. Is it suitable for you, your site and your
scope? To get this help, double click on an object’s ID. Let’s do that to M7, for example.
15
Plate 12
Place your cursor on this object’s ID field (NGC 6475) or its “Other ID” field (M7 –
Scorpion’s Tail), and double-click. In a few moments, you’ll be presented with a window
full of data, including a picture if one’s available as shown in Plate 12. Running along the
left are the cluster’s vital stats like magnitude, type, size, etc. While I wish Mr. Tuma had
included the Dreyer NGC “codes” in this data, what’s here, along with the copious
observer’s notes available for many objects by clicking the “notes” button of this window
(Plate 13), usually gives you more than enough information to decide whether a
particular DSO is something you really want to view.
Clicking the “charts” button in this window creates an attractive Dean Williams chart for
your object, which can be zoomed in and out (only the Williams charts are available here;
you can’t show a Cartes du Ciel chart in this window, apparently--unfortunately).
Once you’ve made up your mind whether M7 is an appropriate object to view on this
evening, close the info window, and look for a spreadsheet column called “pln” (this
should normally be the leftmost spreadsheet column).
Click this block for M7, and it will be added to an Observing Plan. The Plan is identical
to a spreadsheet, but it will only contain objects you select from other spreadsheets for
inclusion in this manner. Actually, clicking “pln” for M7, first delivers an informational
window asking you which “tab” you want to add the object to. This refers to the
spreadsheet tabs. If you click the “Spreadsheet 1” button, an acknowledgment window
16
Plate 13
will appear briefly, and you’ll be returned to your original spreadsheet, which will appear
unchanged except for an “X” that’s been placed in M7’s “pln” column. To see your Plan,
you must click “Show Plan,” the button directly beneath “Apply Filters” at the bottom
left of the screen. When you do that, the original spreadsheet will be replaced with one
containing a single object, M7. This is your plan, which can be sorted, saved and printed.
Once you’ve looked at the plan, you’ll probably want to go back to your original
spreadsheet to choose more objects for inclusion. Here we run into another of the
program’s minor peculiarities. The Observing Plan now occupies the Spreadsheet 1 tab.
To get the original spreadsheet back, you’ll need to either apply your filters again with a
click of the button or, if you’re working with the Messier list, click “What’s Up Messier”
again.
You can avoid this need to restore your spreadsheet by placing your Plan on one of the
other tabs, 2, 3, or 4 if you’ve got your working spreadsheet in tab 1, as you normally will
have. If you place the plan in one of the other tabs, you’ll be able to toggle back and forth
between it and tab 1 without clicking filters or anything else to restore the spreadsheet.
Oddly, though, if you do things this way, the program does not place an X in the pln
17
column on your spreadsheet, even though it places selected objects in the Plan. Keep in
mind that every time you add a new object to your Plan, you’ll have to click “Show Plan”
again to make the new object appear, no matter which tab you’ve placed the Plan in.
Plate 14
Once you’ve got a Plan going, you can continue to add objects to it, either from your
original spreadsheet, or from new spreadsheets you generate with the What’s Up Wizard,
Filters, or queries. Once your Plan is complete, be SURE to save it. If you don’t, it will
go bye-bye into Never-Neverland when you exit the program. To save it or bring it back,
go to the Plan menu in the top of the screen menu bar and choose “save” or “open
existing plan.” Normally, you’ll save into the Deepsky Astronomy Software directory on
your hard drive. In here, by the way, are MANY wonderful ready-made observing plans
for your use. Use “open existing plan” to load these useful Plans.
Once you’ve got a Plan ready, the next step is, guess what? Get out and observe. A look
out the window on this summer afternoon, though, shows there are still a few hours to go
18
before astronomical twilight arrives. While waiting, let’s explore a few of Deepsky’s
other useful features.
Just to the right of the “pln” column on your spreadsheet, you’ll find one titled “img.” If
there’s an “X” in this column, there’s a picture of this object available. Clicking on the X
for the object of your choice will bring up Deepsky’s built- in and rather full- featured
image processor (yes, this program does do almost anything) and display that image. If
your images are on a DVD or CD, be sure that disk is in the drive or nothing much will
happen, obviously.
What else? Highlight an object by clicking once on its ID field. Then right click. You’ll
be presented with a large menu of choices that includes selections for creating large scale
charts. You’ll have a choice of using the built in Williams charting module or Cartes du
Ciel, and also of displaying all the objects in your spreadsheet on the chart, or just the
selected object. Remember, please, that the charts, whether Deepsky or CdC generated,
will only display the objects contained in your spreadsheet. Which do I prefer Williams
or CdC? Both have their strengths. The Williams charts (see Plate 14) are pretty, and
give you access to the observing notes for objects (the latest version of Deepsky includes
over 8,000 notes from experienced observers) in a larger, easier to read format than in
CdC. You can access this useful data, whether in the Williams charts or CdC by clicking
on the object of interest. On the downside, the Dean Williams charts are comparatively
slow, not terribly interactive, and only the bright stars are clickable for information. CdC
is a wonderful and full- featured planetarium program and goes together with Deepsky
like ham and eggs, love and marriage, or a horse and a carriage. The right click menu also
includes numerous other tasks and options, the most important of which concern
controlling a goto scope, something we’ll take up later.
Returning back to the main spreadsheet screen, you’ll find a vertical row of attractive
toolbar buttons arrayed down the left side:
Spreadsheet takes you back to the spreadsheet from other functions.
The Quick Chart 1 and 2 buttons display the Williams charts with the first object on the
spreadsheet in view. This is just what the button says, a “quick chart.” While you can
move around and zoom in and out, you can’t click on objects or perform other
“interactive” operations. These buttons are occasionally useful, but never operated in an
intuitive manner it seemed to me. Yes, as above, they seemed to sometimes center the
chart on the first object in a spreadsheet. But several new spreadsheets later, they still
took me to this initial spot. Never did get these buttons quite figured out. When I wanted
a quick chart, I found it more efficacious just to go to the chart in the object information
window by double clicking on one of the DSOs in my spreadsheet. Course, you’re
probably a lot smarter than Old Uncle Rod and may be able to figure out what the
program does with these buttons. I couldn’t, though.
Interactive Charts is a lot more useful. It will display either clickable Williams charts, or,
if you change the default chart type in Prefs to Cartes du Ciel, it will bring up that fine
19
program. Like the Quick Chart buttons, it will center you on the first object in your
spreadsheet. Unlike Quick Chart, I was always placed at the first object of my current
spreadsheet.
The next “leftside” toolbar button is Logbook, which, as you might expect, brings up your
logbook, which we’ll get to after we get in some telescope time.
The last button, What’s Up, gives you quick access to that particular wizard.
Does your spreadsheet or plan contain every single object you want to observe tonight?
Anything left out? If you’ve got an object or two you need to add to the Plan, but which
you didn’t retrieve by using What’s Up or Filters or Queries, you’ll find the Deepsky
search function (Plate 15) to be a lifesaver, as it allows you to retrieve single objects
from that humongous database. Clicking on the cute binoculars icon in the toolbar brings
up this slightly daunting dialog. Don’t be afraid, though, it’s easy to use once you get it
Plate 15
20
figgered out. The Predefined Searches buttons at the bottom of the window are your
friends, boys and girls.
Want to show all Messiers? Just click the Messier pre-defined search button and the
Begin Search” button. Curio usly, unlike a spreadsheet sort, they are arrayed in correct
numerical order, with M11 coming after M10, and so forth. Want to look for a particular
Messier? Change the operator from > to = and from 0 to the M number of your choice on
the first line of the criteria field. Need an NGC? Click the NGC predefined search and
type an NGC number in the criteria field (you’ll have to type “NGC <space> number”).
Changing catalog numbers and clicking on the other predefined searches should make it
easy to find the objects of your desire. The search function can be frustrating at first, but
is an incredibly powerful tool.
After a little practice, I was also able to use Search to do the single thing I had not been
able to do with Deepsky previously, and which had been bugging me. I was, with a little
fiddling, able to display Messiers from the single constellation of my choice by clicking
the Messier button and changing “catalog” to constellation,” and “NGC 2000” to the
constellation of my choice (Plate 16). For many tasks, Search is actually a better tool
than the wizards and queries.
Plate 16
21
Now it’s fun time. If you don’t own a goto scope and/or a laptop computer, go ahead and
print your completed plan (Which you have saved under a unique name, right?) and head
outside. Hold on just a sec, though. Those of us into goto will be talking about logging in
just a few minutes, but since you’re intent on doing things the old fashioned way, you’ll
need some paper log sheets to record your observations for input into the Deepsky
logging system later. If you have a pre-designed sheet you use, fine, use that. But if you
don’t have one or don’t have one you like, Deepsky has you covered. Go to the Logbook
menu at the top of the screen, and click “Print Blank Logsheet.” Your printer soon will
spit out a nice page just right for an old- fashioned hard-copy logbook or for temporarily
recording observation data for entry into Deepsky. Want to get even fancier? Instead of
clicking “Print Blank Logsheet,” click “Print Logsheet for All Objects in Spreadsheet.”
When you do that, Deepsky produces log pages for all the objects in your Plan with
pertinent information like object names and positions already filled in.
If you’re like me, though, you’ve had enough of paper log pages, analog setting circles,
TELRADs and dim finder scopes. You’ve decided to go whole hog with computerized
amateur astronomy. In that case, get the scope outside, grab your laptop, and let’s click
our way to deep sky nirvana. Since Deepsky uses the stable and well-designed ASCOM
interface to talk to goto scopes, much of the pain of getting a goto instrument working
with Deepsky has been eliminated. In fact, the main problem is not configuring your
scope or configuring your computer. It’s hooking the two together.
What’s the problem there? Take a look at your laptop. At the rear panel of the computer.
What do you see? USB ports? Yep. A parallel port? Maybe. A serial RS-232 port?
Probably not. Not if your computer is less than a year or two old. PC makers have
recently chosen to eliminate serial ports, especially those on laptops, and for good reason.
The serial interface is slow and very few peripherals use it anymore. Except telescopes.
Unfortunately, scope makers are way behind the computer makers when it comes to i/o
issues. With one exception, every commercial scope still uses, good, old, clunky RS-232.
Unless you have invested in one of Meade’s new USB equipped RCX 400s, you’ll have
to figure out a way to make your computer talk serial if you want to use Deepsky to send
it to objects.
A solution, if not a perfect one, to this serial problem is a USB to serial converter cable.
This is a (relatively) inexpensive little device that takes the USB your computer spits out
and translates it to the serial your scope understands and vice- versa. This is not a perfect
solution since not all combinations of USB – serial converters, scopes, and computers
work well together. What has worked for me is a Belkin USB to serial cable. It’s worked
reliably with my Toshiba Satellite and my Nexstar 11 and AS GT scopes, that is, but I
cannot swear it will work as well for you depending on your type and vintage of gear. A
little asking around on your particular goto telescope’s Yahoo group should get you some
answers about what works best with your equipment when it comes to serial interfacing.
Once you’ve got a working link between scope and computer everything else is easy. Oh,
you do have to configure ASCOM, but this is simple. Just choose “Scope” and “Scope
22
Setup” from the menu bar at the top of the Deepsky screen. You’ll be presented with
ASCOM’s “Scope Chooser.” Select your brand from the long list provided (see Plate 17),
and, once you’ve done, that, push the “Properties” button. Doing so brings up the
configuration dialog shown in Plate 18, which will allow you to set up the driver for your
particular scope. Enter your scope model, position data, and the other requested
information, click OK, and you’re finished. If you’re using a Meade scope, you’ll find a
few more blanks to fill in, including data concerning the Meade LX200 focuser, which
can be operated from Deepsky.
With scope physically connected to computer (make your cable connections to both
before you turn on the power to either, please) and ASCOM configured, your next step is
Plate 17
Plate 18
23
to do a goto alignment of your scope just like you usually do. Once you’ve done that and
the telescope is tracking, go back to the Scope menu and click “Connect Telescope.” If
you’ve got everything correctly cabled and configured, you should get a message
indicating that your telescope is connected to the computer. What next? Goto some gotos.
There are two basic ways to do that with Deepsky.
The easiest way to get the scope slewing? From the spreadsheet/Plan screen, select an
object and right click. In the menu that appears, you’ll see that one of the previously
grayed-out options at the bottom is now clickable, namely, “Locate Object in Telescope.”
Click that and way she goes. Like to do things the planetarium way? Bring up a Dean
Williams chart, click on your object of choice, and you’ll notice that there’s a goto button
at the bottom of the info window that appears. Pushing that will—you guessed it—send
your scope to that particular object. Once your slew is complete, a yellow cross will be
superimposed on your object.
Not too hip to this GUI graphics stuff? Click the middle scope icon on the toolbar at the
top of the screen, which is “Enable Telescope Control Panel” (the scope icons to the left
and right of this middle one will allow you to connect the scope and slew to coordinates,
respectively, without fooling with the Scope pull-down menu). This enables a control
panel that allows you to slew the scope manually with a virtual hand paddle or send it to
typed-in coordinates. This screen, shown in Plate 19, does a lot more, but, unfortunately,
most of this is only of interest to Meade scope users, as these other interesting functions
are reserved for the Meade way of doing things.
Plate 19
24
Unfortunately, so is one of the program’s most interesting functions, “Slide Show.” Well,
actually only in part. It works well with other scope brands, but it’s really nicest under
Meade protocol. If you do have a Meade or Meade compatible scope, it is really slick.
Not that it isn’t slick with a Celestron telescope or other brand; maybe I should say it is
super slick with the Meades. What does slideshow do? It allows you to goto each object
in a spreadsheet with just the click of a slide advance button.
Enable slide show from the Scope menu, and you’ll get the window shown in Plate 20.
When you do that, your scope will also slew to the first object in your spreadsheet (or
Plan). The window will indicate your current object, show you an image of it if one is
available, offer logbook fields for you to fill in for the target, and display basic object
info (including the Dreyer NGC codes, which, you’ll recall, I wished for in the object
info window) with a press of the “Additional Object Info” button.
Plate 20
Now, all that is all quite wonderful. In my opinion, almost worth the entire cost of the
program. But if you are Meade LX200 user, Steve has taken things to a whole ‘nother
level. A look at the manual (this section is very clear and understandable), reveals the
amazing fact that Steve has figured out a way to make the LX200 hand paddle act like a
slide projector remote. Normally, the scope can’t tell a computer to do anything. But
25
with a bit of programming wizardry (don’t ask me to explain it), Steve has figured a way
to make the paddle send instructions to the PC, anyway. Set up the slide show as per the
instructions, and, with a couple of button presses on the hand control, you can make the
LX200 slew to each succeeding object in your spreadsheet/plan. Not only that, you can
set it to automatically fill- in log data. If that ain’t the cat’s meow, I don’t know what is.
Obviously, Deepsky has a lot of goto functionality, and, at first blush, it all seems
somewhat overwhelming. Luckily, the ASCOM program provides a telescope
“simulator,” so you can figure out how the computer end of everything works inside in
the daytime. Just select “Simulator” from the ASCOM menu of scope choices. There are a
couple of gotchas here. You must “unpark” the scope by clicking on the “Park” button on
the simulator control panel and you must also check the “Track” box on this same
simulated hand controller. If you don’t, nothing much will happen (other than the
appearance of error windows when you try to slew the scope).
What now? What I like to do is just slew from object to object via Slideshow, filling in
the simplified log fields (what Steve calls “generic log fields”) as I go. That’s more than
good enough for simple little me. But if you yearn for a more formal type of log, or if
you’re one of those folks who eschews goto and wants to initially record observations on
paper for transfer to Deepsky’s logs later, you’ll want to learn the program’s more fleshed
out logging features.
It’s a beautiful night. One of those rare Summer evenings when the sky is dark, clear, and
relatively transparent. You guide your faithful scope from deep sky wonder to deep sky
wonder effortlessly, logging marvel after marvel. Ah, yes, logging. If you choose to enter
your log data as you go along rather than recording it on a piece of paper for later entry,
and are not using the slideshow logging feature, you’ll probably want to use Deepsky’s
“outdoor” logging system. This form, shown in Plate 21, is a little less comprehensive
than the normal log pages, but it has one big advantage: mouse use is eliminated and
keyboard use is minimized. This can be a real help in a dark, cramped observatory. You
can make all the entries on this form with the exception of notes by using the tab, arrow,
and enter keys. Tab from entry field to entry field, selecting menus with Enter and items
to enter with the up and down arrows and the enter key. To enter logbook data for an
object in your plan, just click the “obs” column and choose the “Outside” option.
26
Plate 21
Once you’re back inside, you can edit or add to these brief entries using the normal log
format, which is available from the logbook menu by clicking “View Edit Logbook” or
by clicking the Log button on the leftmost toolbar. The logbook entry screen is a form
with four tabs. The first displays a spreadsheet type display of your logbook. Need to find
a particular object? Highlight the object ID column and use the right click menu’s “Enter
Filter Criteria” option. Enter “NGC 6903” in the Filter Criteria field, hit enter, and only
that object will be displayed. This is actually a handy tool to use with any spreadsheet at
any time, not just the logbook spreadsheet. To edit your already existing observations,
you Click, that’s right, the “Edit” button at the bottom of the window.
You’ll usually do initial logbook entries from the spreadsheet. When you want to make a
logbook entry for an object, all you have to do is, as above, click the “obs” column for
your object of choice. Assuming you’re back inside, choose “Standard” rather than
“Outside” to use the fullblown logbook format. You’ll be taken to the form in Plate 22.
You’ll then fill- in all the appropriate fields for your entry using the keyboard and drop
down menus. The info in the drop down menus--sites, telescopes, etc.--is that which you
entered into the program during its set up, in the Prefs menu. When you’ve completed all
the fields you want to fill- in, be sure to click the Add or Update button at the window
bottom when you’re done. Luckily, if you forget to save a new entry (add), the program
nags you to do so.
27
What if you’re a CCDer or a confirmed astro-sketcher? Deepsky makes it easy to append
image files to your log entries. Hit the “View Images” tab at the top of the logbook
Plate 22
Plate 23
28
window, and you’ll be taken to the window shown in Plate 23. To attach an image to an
entry, just click the little folder icon and browse to its location. You’ll also find buttons
that will let you detach an image from an entry and perform simple image processing
functions. What kinds of images? Most popular file formats are supported, though .fits is
unfortunately not among them. If your files are in this format, you’ll need to convert
them before placing them in your log. Naturally, if you’ve done a sketch, you’ll have to
get it onto your hard drive via a scanner before you can add it to the logbook. Once it’s
scanned, you’ll be able to attach your drawing to an entry like any other image.
That’s really all there is to logging. Open your plan, click on the obs column for the
objects you’ve observed, and enter your notes. What’s that you say, Cool Breeze? You
don’t want to record your observations on a computer outside as you work, and wonder
whether it’s really worth the trouble to transcribe them into the computer later? I’ll say it
is. The main thing that keeps amateur logs from being useful is the fact that it’s just too
hard to find a particular entry for a particular object in the average observer’s logbook.
Sure, you can cross index entries on cards like I did for years, but that means you must
add a note to an index card in addition to making an entry in your log. Every time. Will
you do it every time? No. I didn’t, anyway. Deepsky, on the other hand, allows you to
easily find a log entry using its advanced search tools. Paranoid about letting your
treasured entries exist on a hard drive? Don’t be. If you’re super paranoid, like me, you
can print out each observation. Most of you will be OK with just backing up the logbook
file occasionally via the “Backup Logbook” option in the top menu’s “Logbook”
selection (if you’re forgetful, like I am, you can set the program to automatically backup
your logbook).
And so we come to the end of a beautiful evening’s observing run and our tour of
Deepsky. Did I tell you all there is to know about the program? Not hardly. I didn’t even
mention the program’s online/Internet functions. Barely touched on the image processing
features. Skipped over the many logbook options that are available (did you know you
can keep an unlimited number of different logs on your hard drive?). But it was not my
goal to cover everything. As I said at the beginning, this little guide’s purpose is to get
you started using this complex program easily, doing things in an easy—but not
necessarily optimum--way. Once you’ve got the hang of Deepsky, which shouldn’t take
long, you can begin to explore the many rich features this software offers. You can learn
about them by exploring the User Manual, and, even better, by hanging out on the
Deepsky User’s Group at http://www.deepsky2000.net.
What’s left to say? How about, “Thank you Steve Tuma for giving amateurs a wonderful
program, one which, I’m sure, has helped many of us see far more than we ever dreamed
possible.” Is Deepsky perfect? Uh- uh. As I’ve said in every review I’ve written, no
program is. But some are better than others. What separates the good from the bad in
software? The author’s commitment to users. Believe me, Mssr. Tuma, who’s been
steadily improving this program for 10 years, has demonstrated this commitment. It
29
shows both in the loyalty of his users and in the usefulness of his wonderful Deepsky
Astronomy Software.
30