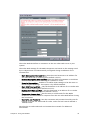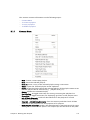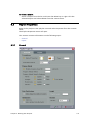
1
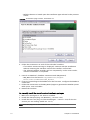
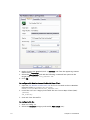
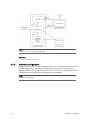
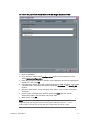
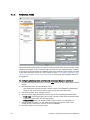
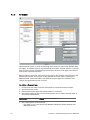
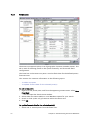
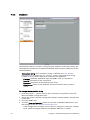
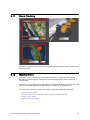
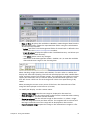
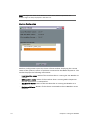
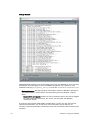
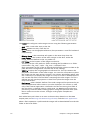
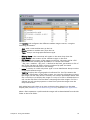
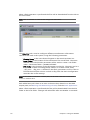
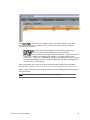
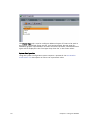
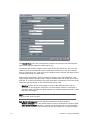
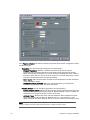
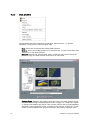
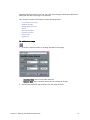
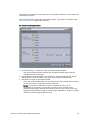
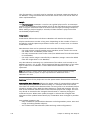
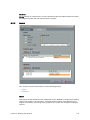
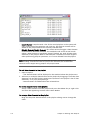
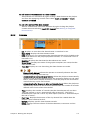
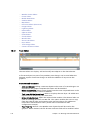
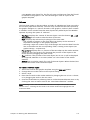
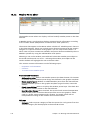
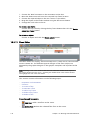
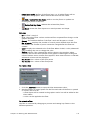
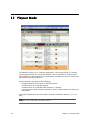
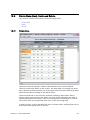
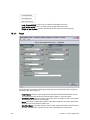
• Point ID: Displays the name of the weather point (city name). The options in
the dropdown list are the list defined in Requested Points Tab, in the Data
Import section. Points are filtered according to the selected category.
• Style: Displays the available styles (design) of the weather point node. The
options in the drop down list are the exported weather point designs in the
graphic template. Selecting a style will create a copy of the design and insert
the data from the line in the table into the corresponding fields, creating a
weather point object in the renderer (see graphic Design: export weather point
design).
• Pos X: position of the point on the X axis of the screen (Viz values), or an
offset used to move a point from its geographical location.
• Pos Y: position of the point on the Y axis of the screen (Viz values), or an
offset used to move a point from its geographical location.
• Day: time of the weather forecast displayed. Options for the drop-down menu
are either the default values or the values defined in the configuration menu:
Configuration->Fetch Parameters->Forecast Time.
• Geo: if checked the weather point will be positioned on the map using it’s
longitude and latitude values in reference to the map used (the map must be
geo-referenced, i.e. imported from a geotiff image or from Viz Curious Maps).
• Orig: Indicates that this weather point was in the graphic template (scene), and
was not added from the Viz Weather GUI. A point defined as Orig cannot be
deleted from the data element. The graphic designer sets the default value of
a new weather point in the graphic template: if the point is geo referenced or
not. Checking a value in the UI will override the default value.
• Visible: this attribute defines if the weather point will be displayed in the
graphics or not.
To create a new weather point
1. Click the Add weather point button to add a weather point node to the scene.
2. Select a weather point name from the WPointID drop down list.
• The list of cities contains the cities shown in the Points Data tab under the
Data import window.
3. Select the weather point’s style.
4. Select the time of data to be displayed.
5. Locate the weather point in the render window by changing the Pos X, Pos Y
values or by dragging the point in the Viz scene.
6. Save the created data by selecting Save As under the Data Element menu or by
clicking the Save As button next to the “Saved Data Elements” window.
10.3.3
Fronts Editor
Chapter 10: Working with Data Elements
129