1
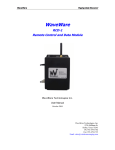
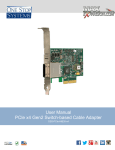
PDR3000
Paging Data Receiver
User Manual
www.wipath.com
January 2009
1
Introduction
The PDR3000 Paging Data Receiver is a multi-function paging data receiver/ off air
decoder capable of receiving paged messages and processing them in a variety of
ways. It is able to print messages direct to a parallel or serial printer or output the
message data via the two serial ports in a number of different formats and protocols.
The PDR3000 has four relay control outputs internally or may be interfaced with the
RCM3000 Relay Control Module for multiple relay control. Other options include an
inbuilt pocsag paging encoder for repeater or rebroadcast applications and other
specialised serial data inputs and outputs for control of devices such as LED signs,
synchronized clocks etc. The PDR also has an inbuilt search and replace text facility for
manipulating the incoming messages.
Features
Very large capcode capacity
Programmable data outputs
Serial outputs
Parallel output
Relay outputs
Individual capcode output
programmability
Receivers available for most paging
bands (VHF, UHF, 900MHz)
Battery backed real time clock
Pocsag and Flex versions available
Pocsag encoder output
Transmitter control
Applications
Message logging
Message forwarding
Message printing
Network monitoring
LED sign control
Machinery switching and control
Coverage expansion
Transmitter monitoring
Alarm transmission
Remote telemetry control
2
Specifications
Protocols
Available in Pocsag and Flex
Outputs
1 parallel port, 2 serial ports (I/O), 4 Relays, 12 alarm inputs (Opt)
Receiver
Synthesized FM/FSK
Frequencies
134-139, 148-174, 408-412, 450-470, 929-932 MHz
Channel Spacing
25 KHz (12.5kHz optional)
Data rate
512-2400 pocsag, 1600/2 -6400/4 Flex
Freq. Deviation
+/- 4,5 KHz
Rx Sensitivity
5 uV at 1200 bps
Selectivity
better than 60 dB
Image Rejection
better than 55 dB
Spurious Rejection
better than 55 dB
Frequency Stability
10 ppm at -10C~+60C
Antenna
50 Ohm BNC (VHF & UHF), SMA (900MHz)
Power
10-32VDC (12VDC nominal)
Current
Typical 30mA in standby, 300mA max
Physical
230 x 94 x 56 mm (~9 x 3.5 x 2in) (excl. bracket)
Operating Temp.
-10 -+70degC (-40 - +70degC version available)
Relays
Rated 1A @ 12VDC
General
On board real time clock with back up battery
Up to 12 alarm inputs
Pocsag data encoder
Transmitter control output - PTT and data
PINOUTS
3
Installing the PDR3000
Installing the PDR3000 is generally a simple matter of attaching the antenna, plugging it
into a suitable power supply and programming it from a PC using the PDT3P
programming kit (see below.) If the PDR3000 was preprogrammed for you by the
dealer then PDT3P is not required.
The PDR3000 requires 12VDC/500mA for operation. An optional plug pack power
supply is available. If using an alternative power supply the fused DC power cable
supplied should be used. (Note that the RJ45 ports may also be used to supply
12VDC.) We recommend that any power supply be fused 2A.
Peripheral devices may be plugged into the various I/O ports according to the
information above.
If using with LogPage the PDR3000 will connect to the PC running LogPage using the
same null modem serial cable used for programming.
Programming the PDR3000
To program the PDR3000 you will require a null modem RS232 cable (DB9F-DB9F)
and the PDT3P software. These can be purchased as a kit.
All programming functionality is fully explained in detail in the PDT3P help file.
You should receive with PDT3P a template key which will activate the programming
template for the PDR3000 you have purchased (Flex or pocsag.) If you did not receive
this key contact WiPath or your dealer. Please ensure that you always use the same
version of PDT3P as the version of firmware contained in your PDR3000. This can be
read from the PDR3000 using PDT3P.
If the firmware version is older than the PDT3P version carry out an ES Upgrade (see
below). If there is a specific reason to use an older version of firmware (for compatibility
with other units, for example,) make sure you only use the older version of PDT3P for
programming.
IMPORTANT: Always do a “Download from Pager” and save the config (xxx.ses)
file before carrying out any programming changes.
4
Firmware Upgrading
1.
2.
FTP - First Time Programming
ES (Embedded System) Upgrade
Important notice –
2000 generation units – up to version 5.1 only
3000 generation units – version 6 onwards.
1. FTP (This is only to be done on instruction from WiPath)
Open winflash_p
Select your comport
Place a 2.54mm jumper over JP1
Click on the “…” button and select the rom file
2000 generation - pdt_ftp_PEv2.6.rom
3000 generation –pdt_ftp_PEV6.0.rom
Click the “Flash” button
Apply power to the unit – wait to the bar at the bottom goes to 100%
Remove power
Remove the Jumper on JP1
2. ES Upgrade
Open Latest version of PDT3P (or specified version).
Select your template
Click ES / Upgrade / Flash / Pdt_Flash_PEv(version type)
Apply power to the unit – wait until the bar at the bottom goes to 100%
Apply power to the unit – a warning will be displayed, click “no” and wait until the bar at
the bottom goes to 100%
Enter your settings or open a saved file and click “upload to pager”.
(Note: If the settings file (*.ses) is from a different firmware version it may not load and
the settings will have to be reconfigured manually in PDT3P)
Available Software interfaces
Logpage -
message logging software
All application software is available for free 30 day trial from www.wipath.com
5
Troubleshooting
Unit not receiving
Unit is not beeping
Serial outputs not working
Relay outputs not working
Can’t download from unit
Can’t upload to unit
Check whether you are in a paging coverage area.
Check correct capcodes are set
Check the frequency is within the range of the receiver (see Notes
section in PDT3P.
Check that correct protocol template is loaded (Flex/pocsag)
Check that receiver settings are correct (Inverted/baud rate etc)
Check the unit is programmed to the correct receiver type (All later
units are RCM).
Check alert options enabled. Check unit is receiving.
Check that outputs are set for each capcode in Capcodes window
and are correctly set in the Serial options window
Check that outputs are set for each capcode in Capcodes window
and are correctly set in the Msg-relay options window
Check serial cable is null modem.
Check power is available and connected
Check software version is compatible with PDT3P
If you have no response from the unit, perform an ES Upgrade which
may require a power cycle or contact your local service agent.
CONTACTS
WiPath New Zealand
3/2 Haultain Street,
Eden Tce,
Auckland 1024
New Zealand
+64- 9- 3021142
[email protected]
www.wipath.co.nz
WiPath Australia
Unit 44, 8 Avenue of
Americas, Newington,
Sydney, NSW 2127,
Australia
+61-2- 81978275
[email protected]
www.wipath.com.au
WiPath USA
4845 Dumbbarton Court,
Cumming,
GA 30040-9606,
USA
+1-770-844 6218
[email protected]
www.wipath.com
WIPATH DISCLAIM ALL LIABLILITY FOR ANY USE OF THIS PRODUCT IN A WAY THAT MAY
CAUSE ACCIDENTS, DAMAGE OR VIOLATE THE LAW.
Compliance
This device complies with part 15 of the FCC rules. Operation is subject to the following conditions.
(1) – This device many not cause harmful interference, and (2) – this device must accept any
interference received, including interference that may cause undesired operation.
Copyright
WiPath and PDT3000 are registered trademarks. All rights reserved.
All other trademarks and registrations are the property of the respective owners.
Flex is a licensed trademark of Motorola.
Notes
6