1
4.2 Plugging In Your DT100 Throttle
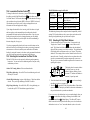
Initial DT100 Power Up & Throttle Option Set Up:
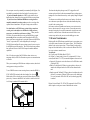
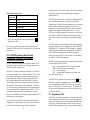
1. Install a 9V battery in your DT100 in the battery compartment. The
positive "+" and "-" terminals are marked inside the battery compartment.
(The DT100 is protected against incorrect battery polarity so, don't worry if
you install the battery "backwards.")
2. The DT100 will beep & show a 4 digit unique ID code # for about 1.5
seconds.
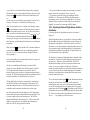
3. The DT100 will display the throttle set up option codes. Use these initial
defaults by following these instructions. The primary option code #
"oP:01" will be displayed. If you do nothing, in about 12 seconds the
DT100 throttle will automatically go to "idLE" and the default values will
be used when operating this throttle. Twelve seconds can seem like a long
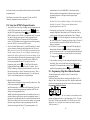
time so, you can speed up things by pressing the
key. The DT100
display will change to the secondary option display "oS:03". Press the
key once again to accept the default settings for the secondary options. The
DT100 will display "idLE." Once your DT100 has "idLE" in the display
you can proceed to the next step.
See section 20.0 for available throttle options & how to set them up.
Logging Onto The LocoNet System:
1. Plug the DT100 into either LocoNet Jack on the DCS100.
2. The DT100 will beep & the LCD display will change from "idLE". If the
DCS100 Booster section is not supplying track power to the rails, both the
DT100's direction indicators will be steady ORANGE, the DCS100's
Track Status indicator will be off and DCS100’s Over Temp Indicator will
be on. If you already have more than one booster on your layout, the
DCS100 is commanding all other boosters to have their track power OFF,
too.
Turn On Track Power:
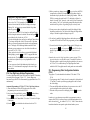
1. Press down & hold the
key then also press the
key. This
commands the system to turn on Track power.
2. The combination
&
will turn off all system track power.
Checking For Run State:
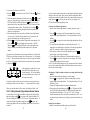
1. The DT100's direction indicators
will be flashing ORANGE if the
track is powered but is in "Stop" where all mobile decoders are powered
but commanded to stop. The DCS100’s Over Temp indicator will be lit.
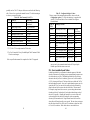
2. To change from "Stop" to "Run," press down & hold the
key then also
press the
key. The direction indicators
will no longer be ORANGE
but will show the direction of the decoder assigned to the adjacent throttle
knob. GREEN for Forward, RED for Reverse & OFF for no address
selected. The DCS100’s Over Temp indicator will no longer be lit. Each
13
time you hold the
&
keys down the system will toggle between
"Run" & "Stop" with track power on.
Connect The Layout To The Chief:
1. The DCS100 track status indicator should now glow ORANGE, indicating
that the track is powered.
2. Connect the Rail A/B terminals to your track. (You can also connect the
Programming A/B terminals to a separate isolated Programming track that
is not connected to any of the rest of the layout at this time if you wish.)
Note: During your initial installation, we recommend that you make these
connections after powering up the DCS100 & DT100 so that you will be
able to determine that your DCC equipment is working properly prior to
introducing any potential outside wiring problems. Once you have
completed the initial installation, these 2 sets of wires usually remain
permanently connected from their respective tracks to the DCS100. If your
layout has any short circuits & you connect it to the DCS100's RAIL A/B
terminals, when you power up the DCS100 it will beep up to 5 times &
shut down the RAIL A/B terminals until the fault is cleared.
Once your track is powered without any faults, you can proceed to select &
run DCC and analog locomotives. We recommend that you run an analog
locomotive first.
4.3 Run An Analog Loco on Address "00"
Note: If you are running a German Version of the DCS100, you will not be
able to use the analog feature described below. In this case, continue with
section 4.4 after you have installed a DCC decoder in your locomotive.
How to Select Address "00":
Note: With the DT100 you can control two different addresses at the same
time, one on the Left Throttle and another on the Right Throttle. Because
only one throttle can be displayed on the DT100's LCD screen at a time,
we use the direction indicator to indicate which side is currently "display
active". The "display active" throttle is the one with the flashing RED or
GREEN direction indicator .
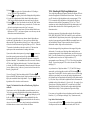
1. Turn the Right Throttle Knob "R" a 1/4 turn in either direction to activate
the Right Throttle. The display will show SE:L-, indicating that no
Locomotive is selected on the Right Throttle & prompting you that the
key must be pressed to activate a selection in this throttle.
14