Download Model FLI-225 User`s Manual - Standard Scale & Supply Company
Transcript
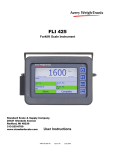
FLI 225 Forklift instrument Standard Scale & Supply Company 25421 Glendale Avenue Redford, MI 48239 313-255-6700 www.standardscale.com User AWT 35-500143 Instructions Issue AB July 2009 © Avery Weigh-Tronix group of companies 2009. All rights reserved. No part of this publication may be reproduced, stored in an electronic retrieval system, or transmitted in any form or by any means, electronic, mechanical, photocopying, recording or otherwise without the prior written consent of the copyright owner, or as permitted by law or under license. Full acknowledgment of the source must be given. Avery Weigh-Tronix is a registered trade mark of the Avery Weigh-Tronix group of companies. This publication was correct at the time of going to print however, Avery Weigh-Tronix reserves the right to alter without notice the specification, design, price or conditions of supply of any product or service at any time. All third party brands and product names used within this document are trademarks or registered trademarks of their respective holders. FLI225_u_en_500143.book Daily operation quick reference Below is a brief overview of how to use this system during a work shift. Complete instructions are covered in the body of this manual. Classic Mode Classic Mode simplifies lift truck weighing and keeps the display simple and easy to read. Figure 1 FLI 225 Classic Mode Front Panel FLI 225 User Instructions 1. Press to turn the instrument on. 2. Lift the forks off the floor. 3. Press 4. Lift a loaded pallet. 5. Press 6. Repeat steps 3 through 5 until complete. if not showing zero. if required. 3 Expanded Mode Expanded Mode allows the user to enter more information for record keeping purposes. Figure 2 Expanded Mode Front Panel 1. Press to turn the instrument on. 2. Key in or scan OPER number. 3. Key in or scan ID number. 4. Key in estimated number of pallets. For information on how to key in alphanumeric characters, see Data Entry Procedure on page 16. 5. Lift the forks off the floor. 6. Press 7. Lift a loaded pallet. 8. Press 9. Repeat steps 6 through 8 until complete. if not showing zero. if required. NOTE: The ID number, OPER number and estimated number of pallets will remain constant until changed. 4 FLI 225 User Instructions Table of Contents page Daily operation quick reference ............................................................................................................... 3 Classic Mode ..................................................................................................................... 3 Expanded Mode ................................................................................................................. 4 Chapter 1 General information and warnings ......................................................................................... 7 About this manual .............................................................................................................. 7 Text conventions ......................................................................................................... 7 Special messages ....................................................................................................... 7 Installation .......................................................................................................................... 8 Safe handling of equipment with batteries .................................................................. 8 Routine maintenance ......................................................................................................... 8 Cleaning the machine ........................................................................................................ 9 Training .............................................................................................................................. 9 Sharp objects ..................................................................................................................... 9 FCC and EMC declarations of compliance ........................................................................ 9 Chapter 2 Introduction ............................................................................................................................ 12 About the FLI 225 ............................................................................................................ 12 Front Panel and Keys ...................................................................................................... 12 Display and Annunciators ................................................................................................ 14 Operator Messages ......................................................................................................... 15 Data Entry Procedure ...................................................................................................... 16 FLR 100 Remote Display Option ..................................................................................... 17 Chapter 3 Classic Mode .......................................................................................................................... 18 Overview .......................................................................................................................... 18 Powering the Instrument .................................................................................................. 18 Weighing ......................................................................................................................... 19 Gross Weighing ......................................................................................................... 19 Tares and Net Weighing ............................................................................................ 19 Print .................................................................................................................................. 21 Print a Transaction .................................................................................................... 21 Print Accumulator Report (Classic w/Accumulate only) ..................................................................................... 23 Chapter 4 Expanded Mode ...................................................................................................................... 24 Overview .......................................................................................................................... 24 Data Entry Procedure ...................................................................................................... 25 Scan in Data .............................................................................................................. 25 Key in Data ............................................................................................................... 26 Report Printing ................................................................................................................. 27 Access Report Menu ................................................................................................. 27 Print Accumulator Report .......................................................................................... 27 Print Transaction Report ........................................................................................... 28 Clear Totals ............................................................................................................... 28 Chapter 5 User Management .................................................................................................................. 29 Overview of User Management ....................................................................................... 29 Access User Management ............................................................................................... 30 User Settings ............................................................................................................ 31 Daily Inspection Checklist for Forklift Scale ......................................................................................... 37 FLI 225 User Instructions 5 6 FLI 225 User Instructions About this manual 1 1.1 General information and warnings About this manual This manual is divided into chapters by the chapter number and the large text at the top of a page. Subsections are labeled as shown by the 1 and 1.1 headings shown above. The names of the chapter and the next subsection level appear at the top of alternating pages of the manual to remind you of where you are in the manual. The manual name and page numbers appear at the bottom of the pages. This manual covers the general user instructions for the FLI 225 instrument for multiple regions worldwide. 1.1.1 Text conventions Key names are shown in bold and reflect the case of the key being described. This applies to hard keys and onscreen or soft keys. Displayed messages appear in bold italic type and reflect the case of the displayed message. 1.1.2 Special messages Examples of special messages you will see in this manual are defined below. The signal words have specific meanings to alert you to additional information or the relative level of hazard. ELECTRICAL WARNING! THIS IS AN ELECTRICAL WARNING SYMBOL. ELECTRICAL WARNINGS MEAN THAT FAILURE TO FOLLOW SPECIFIC PRACTICES OR PROCEDURES MAY RESULT IN ELECTROCUTION, ARC BURNS, EXPLOSIONS OR OTHER HAZARDS THAT MAY CAUSE INJURY OR DEATH. CAUTION! This is a Caution symbol. Cautions give information about procedures that, if not observed, could result in damage to equipment or corruption to and loss of data. NOTE: This is a Note symbol. Notes give additional and important information, hints and tips that help you to use your product. FLI 225 User Instructions 7 General information and warnings 1.2 Installation DANGER: RISK OF ELECTRICAL SHOCK. NO USER SERVICEABLE PARTS. REFER TO QUALIFIED SERVICE PERSONNEL FOR SERVICE. 1.2.1 Safe handling of equipment with batteries CAUTION: Danger of explosion if battery is incorrectly replaced. Replace only with the same or equivalent type recommended by the manufacturer. Dispose of used batteries according to the manufacturer’s instructions. ATTENTION: Il y a danger d'explosion s'il y a remplacement incorrect de la batterie, remplacer uniquement avec une batterie du même type ou d'un type équivalent recommandé par le constructeur. Mettre au rebut les batteries usagées conformément aux instructions du fabricant. 1.3 Routine maintenance IMPORTANT: This equipment must be routinely checked for proper operation and calibration. Application and usage will determine the frequency of calibration required for safe operation. Always turn off the machine and isolate from the power supply before starting any routine maintenance to avoid the possibility of electric shock. Make sure that it is placed securely on a flat and level surface. 8 FLI 225 User Instructions Cleaning the machine 1.4 Cleaning the machine Table 1.1 Cleaning DOs and DON’Ts DO DO NOT Wipe down the outside of standard products Attempt to clean the inside of the machine with a clean cloth, moistened with water and Use harsh abrasives, solvents, scouring cleaners or a small amount of mild detergent alkaline cleaning solutions 1.5 Training Do not attempt to operate or complete any procedure on a machine unless you have received the appropriate training or read the instruction books. To avoid the risk of RSI (Repetitive Strain Injury), place the machine on a surface which is ergonomically satisfactory to the user. Take frequent breaks during prolonged usage. 1.6 Sharp objects Do not use sharp objects such as screwdrivers or long fingernails to operate the keys. 1.7 FCC and EMC declarations of compliance This equipment has been tested and found to comply with the limits for a Class A digital device, pursuant to Part 15 of the FCC Rules. These limits are designed to provide reasonable protection against harmful interference when the equipment is operated in a commercial environment. This equipment generates, uses, and can radiate radio frequency energy and, if not installed and used in accordance with the instruction manual, may cause harmful interference to radio communications. Operation of this equipment in a residential area is likely to cause harmful interference in which case the user will be required to correct the interference at his own expense. European Countries WARNING: This is a Class A product. In a domestic environment, this product may cause radio interference in which the user may be required to take adequate measures. FLI 225 User Instructions 9 General information and warnings 10 FLI 225 User Instructions FCC and EMC declarations of compliance FLI 225 User Instructions 11 Introduction 2 2.1 Introduction About the FLI 225 The FLI 225 instrument is part of a system for weighing, storing and transmitting information to peripherals such as a computer system directly from the forklift. Your instrument will have one of the following configurations: Classic Mode with Print Classic Mode with Print is the most general application available. It combines a powerful weighing and printing utility with ease of use. Classic Mode with Accumulate Classic Mode with Accumulate adds the ability to accumulate totals and generate reports to the easy-to-use interface and powerful weighing and printing functions. For more information on either of the Classic Modes, see chapter 3, Classic Mode. Expanded Mode Expanded Mode adds features that set it apart from the two classic modes. These functions are explained in detail in chapter 4, Expanded Mode. This manual explains the general operation of the FLI 225. Most of the functions are the same regardless of instrument configuration. When a function is not available to all modes, the appropriate mode is noted in parenthesis. 2.2 Front Panel and Keys The FLI 225’s high-contrast, backlit dot graphic display lets the operator quickly view large weight values in a variety of lighting conditions. The 5 hard keys and 4 softkeys on the front panel of the FLI 225 provide access to all the basic weighing functions as well as access to information, menus, instrument tests and settings. Each key has multiple functions and will be explained. Figure 2.1 FLI 225 Classic Mode Front Panel 12 FLI 225 User Instructions Front Panel and Keys The softkeys (F1 - F4) are so called because their functions change as their labels change. Each of the hard keys has specific functions. This table details the functions of the hard keys. Table 2.1 Key Definitions Reference Key Name Key Function(s) 1 TARE Tare the weight on the scale for net weighing. Factory default for this key is OFF and must be enabled for use. 2 STANDBY 3 SELECT Toggle Gross, Tare, Net and Transaction views. Factory default for this function is OFF and must be enabled for use. Backspace (delete previous character) when in data entry mode. 4 PRINT Send data to a printer or other connected device. Store (save) transactions for future download, depending on configuration. Access report menu in certain modes. 5 ZERO Zero the instrument to compensate for minor weight changes. Move to the right in data entry mode. Turn the instrument on. Put the instrument into standby mode. Instrument configurations vary and some functions may not be enabled on your instrument. If a function that you require has not been enabled, please contact your Avery Weigh-Tronix distributor or service provider for assistance. The following table shows the factory default settings for the FLI 225, for each region. Table 2.2 Default Settings by Region Setting FLI 225 User Instructions North America (NA) Default Europe (EU) Defaults Gravity Compensation 9.8043 9.8043 Calibration Unit lb kg Enabled Unit(s) lb kg Weight Capacity 5000 lb 2500 kg Weight Division 5 lb 2 kg Calibration Full Weight 4000 lb 2000 kg Calibration Half Weight 2000 lb 1000 kg Gross Zero Band 50 lb (10 divisions) 20 kg (10 divisions) Over/Under range basis percentage divisions Over range 105% 9 divisions (i.e. 2518 kg) Under range 20% 250 divisions (i.e.-500 kg) Zero range 100% 2% Auto print range 0% (disabled) 0% (disabled) Separator decimal point decimal point Time format 12 hr (AM/PM) 24 hr (Military) Date format MM/DD/YYYY DD/MM/YYYY 13 Introduction 2.3 Display and Annunciators The FLI 225 has several annunciators which provide the operator with information about the current application. Throughout this manual, annunciators are typically shown in italics and in the case they appear. Therefore, Gross indicates the annunciator for gross weight, etc. The most common annunciators are explained below. Table 2.3 Definition of Annunciators Annunciator Description ~ Indicates that the weight is in motion and is not stable. >0< Gross Zero Band indicates that the instrument is within the zero range. lb Indicates that the weight displayed is in pounds. kg Indicates that the weight displayed is in kilograms. – Indicates a negative weight. Gross Indicates that the instrument is in gross weight mode. Weight displayed is the gross weight. Net Indicates that the instrument is in net weight mode. Weight displayed is the net weight. Tare Weight displayed is the tare weight only. Underload Indicates that the scale is outside the gross zero range (under weight). Overload Indicates that the scale is overloaded. Over Angle Indicates that the scale is tipped (right, left, forward or back) too far. ( Y) Indicates that the instrument is set to FLSC Wireless and is communicating wirelessly with the carriage. Y Indicates that the instrument is set to FLSC Wireless but wireless communications to the carriage has been interrupted. Indicates the approximate charge remaining on the battery used for wireless communications from the scale carriage to the instrument. 14 FLI 225 User Instructions Operator Messages 2.4 Operator Messages The area below the weight value can display a variety of operator messages such as: FLI 225 User Instructions Printing: Data is being transmitted to a peripheral. Print Failed: RTZ Instrument must return to zero between printing. Print Failed: Overload Instrument could not print. Excessive weight. Print Failed: Underload Instrument could not print. Insufficient weight. Print Failed: Motion Instrument could not print. Weight was unstable or the scale was in motion. Accum Failed: RTZ Instrument must return to gross zero between accumulations. Accum Failed: Overload Instrument could not accumulate. Excessive weight. Accum Failed: Underload Instrument could not accumulate. Insufficient weight. Accum Failed: Motion Instrument could not accumulate because the weight was unstable or the scale was in motion. Accum Failed: Negative Wt. Instrument could not accumulate because a negative weight was displayed. FLJ 100 Init Failure! Instrument could not communicate with the digital junction box on startup. FLJ 100 Comm Failure There is no communication between the digital carriage and the instrument. Analog Option Init Failure! Instrument could not communicate with the analog option card on startup. No Analog Option Installed! Instrument is set to QTLTSC or QTLTS but the analog option card has not been installed. Calibration Required! Contact distributor or service provider. 15 Introduction 2.5 Data Entry Procedure Some screens require you to key in alphanumeric information. In those cases, you will be presented with four softkeys: Esc, Up Arrow, Down Arrow, Enter. Figure 2.2 Common Data Entry Keys You can key in: 0-9, A-Z, a-z and space. Follow these instructions for data entry. The table below provides a detailed description of Figure 2.2 Table 2.4 Data Entry Keys Explained Ref # 16 Key Name Key Details 1 Esc softkey Press F1 to use the Esc softkey. Press the Esc softkey to abort. 2 Up Arrow softkey Press F2 to use the Up Arrow softkey. Press the Up Arrow softkey to scroll up from zero. 3 Down Arrow softkey Press F3 to use the Down Arrow softkey. Press the Down Arrow softkey to scroll backwards. 4 Enter softkey Press F4 to use the Enter softkey. Press the Enter softkey to accept an entry. 5 SELECT key In data entry mode, press the SELECT key to backspace and delete the previous character 6 ZERO key In data entry mode, press the ZERO key to move the cursor to the next position (move right). FLI 225 User Instructions FLR 100 Remote Display Option 2.6 FLR 100 Remote Display Option Figure 2.3 shows the FLR 100 remote display option. This small display with three keys connects to one of the COM ports inside the instrument and must be installed and configured by your Avery Weigh-Tronix service provider. Figure 2.3 FLR 100 Remote display option This display can be mounted where it is convenient for the operator to see and press the keys. Key function FLI 225 User Instructions F1 key Not used at present PRINT key Mimics the function of the PRINT key on the FLI 225 instrument ZERO key Mimics the function of the ZERO key on the FLI 225 instrument 17 Classic Mode 3 3.1 Classic Mode Overview Classic with Print and Classic with Accumulate provide powerful tools for weighing and printing while keeping the display easy to read. This section explains the general operation for both classic modes. 3.2 Powering the Instrument If the instrument has been put into standby mode (instrument appears to be off), press and hold the STANDBY key for approximately one second to restore full power. The instrument will show an informational screen similar to the one below while completing the boot sequence and will then start in standard operating mode. Figure 3.1 Information Screen If there is no activity for four hours, the FLI 225 will automatically enter standby mode. Press and hold the STANDBY key for approximately one second to restore full power. Please contact your Avery Weigh-Tronix distributor or service provider to change your timeout settings. You can manually place the instrument into standby mode. Press and hold the STANDBY key for approximately one second. Release the key and the instrument will enter standby mode. The instrument must be in normal weigh mode for the STANDBY key to work. 18 FLI 225 User Instructions Weighing 3.3 Weighing 3.3.1 Gross Weighing Gross weighing is the simplest form of weighing. It is the combined weight of the pallet and its load. The weight is displayed in the selected unit of measure. 1. Begin with the instrument powered on and the forks off the ground and level. 2. Press the ZERO key if the instrument does not show zero. 3. Lift the load with the forks. The gross weight is displayed on the instrument until the load is removed. Figure 3.2 Gross Weight Display 3.3.2 Tares and Net Weighing Net weighing lets you tare off (subtract) the weight of the pallet so that the weight you see is the weight of the product only. There are two parts to net weighing: l setting the tare l performing the net weighment This section details both of these items. Setting a Tare The FLI 225 allows you to subtract the weight of the pallet with the push of a button. Instrument configurations vary. If there is no change in the display when you press the TARE key, this function has not been enabled. Contact your Avery Weigh-Tronix distributor or service provider if you need this function. 1. Begin with the instrument on and the forks off the ground and level. 2. Press ZERO if the scale does not return to zero. 3. Lift the empty pallet off the ground. The gross weight of the pallet will be displayed. FLI 225 User Instructions 19 Classic Mode 4. Once the weight is stable, press the TARE key. The instrument returns to zero and the annunciator changes from Gross to Net. This tare will remain active until it is cleared. Figure 3.3 Zero Net Weight Net Weighing The instructions for net weighing continue from the previous section. 5. Once the tare has been set, lower the empty pallet to the ground and move the lift truck away from the pallet if necessary. The display shows the value of the tare as a negative net weight. 6. Load the pallet as usual. 7. Raise the loaded pallet. The display shows the net weight of the load. Figure 3.4 Net Weight Display You can scroll through available display options using the SELECT key, if enabled. This allows you to easily change between the Gross, Tare, Net and Transactions displays.Transactions will only display when the displayed weight is zero and the instrument is configured to display them. Clear a Tare Clearing a tare sets an existing tare back to zero and returns the FLI 225 to gross weigh mode. 1. 20 Lower the pallet to the floor and move the lift truck away from the pallet. FLI 225 User Instructions Print 2. Make sure that the forks are not touching the floor. The instrument displays a negative weight equal to the tare while displaying >0<. Figure 3.5 Negative Net Weight with Zero Band Annunciator 3. Press the TARE key. The display returns to gross weigh mode and shows zero. Figure 3.6 Zero Gross Weight 3.4 Print You can use the PRINT key to print a transaction or a variety of information. 3.4.1 Print a Transaction Depending on configuration, you can print a transaction or send the information to another device. The device must be connected to one of the available COM ports. FLI 225 User Instructions 1. Perform a weighment. 2. Wait for the weight to stabilize. 21 Classic Mode 3. Press the PRINT key. The instrument sends the Gross, Tare, or Net information to the printer or other connected device. If the accumulator is active, the transaction is stored. Figure 3.7 Sample Printed Transaction The instrument must return to Gross Zero before printing the next transaction. Default Print Format The default print format (as shown in figure 3.7) uses the following string: <SP>I<SP>WWWW.WW<SP><UU><SP><CR><LF> where: Table 3.1 Definition of print string variables 22 Variable Definition I= weight type indentifier (G for Gross, T for Tare or N for Net) SP = Space W= Weight character U= Units character CR = Carriage Return LF = Line Feed FLI 225 User Instructions Print 3.4.2 Print Accumulator Report (Classic w/Accumulate only) If the accumulate function is active on the FLI 225, you can print the accumulator report and clear the totals. 1. Press and hold the PRINT key for approximately 5 seconds. The screen will flash and the accumulator report will be sent to the printer or other connected device. Figure 3.8 Sample Accumulator Report 2. Press the Yes softkey to clear the totals when prompted or press the No softkey to leave the totals. The totals are cleared and the instrument returns to normal weighing mode. FLI 225 User Instructions 23 Expanded Mode 4 Expanded Mode When the FLI 225 is configured for “Expanded Mode,” the instrument operates the same as in Classic Mode with the addition of a few features. For details on the standard functions, please refer to Classic Mode on page 18. 4.1 Overview Expanded Mode provides the user the option to enter an identification number (ID), an estimated number of pallets (Pallet) and an operator number (Oper). With these options, you can store up to 350 transactions. Each transaction consists of the identification number (such as the PRO # or Bill of Lading #), time, date and net weight. By default, the ID number and Oper number are included when printing transactions. If your instrument is configured for Classic Mode and you need the functions available in Expanded Mode, please contact your Avery Weigh-Tronix distributor or service provider. ID The ID number provides a reference for the weight and data collected. It can be any combination of letters and numbers up to 16 characters and can either be scanned in or manually keyed in. Pallet The Pallet function lets the user input the estimated number of pallets for a particular shipment. Oper The Oper softkey allows an employee or operator to log in to the instrument. It can be any combination of letters and numbers up to 16 characters and can either be scanned in or manually keyed in. Regardless of how the information is entered into the instrument, it will stay active until it is changed. 24 FLI 225 User Instructions Data Entry Procedure 4.2 Data Entry Procedure Some screens require you to key in alphanumeric information. In those cases, you will be presented with four softkeys: Esc, Up Arrow, Down Arrow, Enter. You can key in: 0-9, A-Z, a-z and space. Follow these instructions for data entry. 1. Press the Up Arrow softkey to scroll up from zero. or 1. Press the Down Arrow softkey to scroll backwards. 2. When the character you need is displayed, press the ZERO key to move the cursor to the next position (move right) or press the SELECT key to backspace and delete the previous character. 3. After entering all the characters, press the Enter softkey to accept or press the Esc softkey to abort. 4.2.1 Scan in Data If your system is equipped with a scanner, you can scan in the data for the ID and Oper fields instead of manually keying it in. 1. Press the appropriate softkey (ID, Pallet, Oper). Scanned in data is automatically assigned to the ID field if no softkey is pressed before scanning. 2. Scan in the data using an attached scanner. A screen similar to the example below appears. Figure 4.1 Sample ID number FLI 225 User Instructions 3. Press the Enter softkey if necessary. 4. Begin weighing. 25 Expanded Mode 4.2.2 Key in Data If no scanner is available, follow these instructions to key in the data for these fields. 1. Press the appropriate softkey (ID, Pallet, Oper) A data entry screen similar to the example below appears. Figure 4.2 Sample Data Entry Screen If the information is not entered within 15 seconds, the display will return to the normal operating view. 2. Use the Up or Down Arrow softkeys to scroll in the data. Depending on the field, you can enter 0-9, A-Z or a-z. 3. Press the ZERO key to advance one position to the right or press the SELECT key to backspace and delete one character. 4. After entering the information, press the Enter softkey to accept and save or the Esc softkey to exit without saving. A dash (-) or a decimal point (.) may appear when keying in the pallet information, however it is not possible to enter a negative or decimal value in this field. A blank space is available for the ID and Oper fields. . Figure 4.3 Sample Completed Data Entry Screen 26 FLI 225 User Instructions Report Printing 4.3 Report Printing When the FLI 225 is configured for Expanded Mode, it can transmit a variety of reports. The details of these reports are explained in this section. 4.3.1 Access Report Menu In order to print the reports, you must enter the Report Menu. 1. Press and hold the PRINT key for approximately five seconds. The screen flashes. 2. Release the PRINT key. The Report Menu is displayed. Figure 4.4 Report Menu 3. Press the Esc softkey to return to operator mode when finished. 4.3.2 Print Accumulator Report The accumulator report lets you see valuable information associated with multiple transactions. Instructions for printing the accumulator report follow. 1. From the Report Menu, press the Up or Down Arrow softkey to highlight Print Accumulator Report. 2. Press the Enter softkey to send the accumulator report to the printer or other connected device. Figure 4.5 Sample Accumulator Report FLI 225 User Instructions 27 Expanded Mode 4.3.3 Print Transaction Report The transaction report gives you a summary of all transactions at a glance. Unlike the accumulator report, the transactions are not totalized. In Expanded Mode, the FLI 225 can store up to 350 total transactions. This is dependent on the number of IDs stored. Therefore, if there are two stored IDs, the maximum number of transactions is 175. 1. From the Report Menu, press the Up or Down Arrow softkey to highlight Print Transaction Report. 2. Press the Enter softkey to send the transaction report to the printer or other connected device. Figure 4.6 Sample Transaction Report. You can print both reports on one ticket by selecting the Print Both Reports option from the Report Menu. 4.3.4 Clear Totals Clearing the totals resets the accumulator and transactions to zero. 1. From the Report Menu screen, use the Up or Down arrow key to highlight the Clear Totals option. 2. Press the Enter softkey. 3. Press the Yes softkey to confirm deletion of totals or No to exit without clearing totals. The totals are cleared and the instrument returns to the Report Menu. 28 FLI 225 User Instructions Overview of User Management 5 User Management User Management User Settings Time Date About FLI 225 Audit Trail Viewer Display Contrast Control Figure 5.1 User Management 5.1 Overview of User Management Entering password 111 provides access to the set of menus known as User Management and is divided into three modules. User Settings The User Settings module lets you set the Time, Date and the Display Contrast. For more information, see User Settings on page 31. About FLI 225 This module shows you the revision and part number of the firmware. For more information, see View Part Number and Firmware Data on page 34. Audit Trail Viewer This module displays a list of items that have been changed on the instrument and the dates and times of the changes. This list cannot be changed or deleted but it can be printed if necessary. For more information, see Audit Trail Viewer on page 34. Audit Trail Counter This module shows the number of times the calibration information has changed. FLI 225 User Instructions 29 User Management 5.2 Access User Management 1. From normal operating mode, press and hold the SELECT key for approximately five seconds. The screen will flash to indicate when to release the key. 2. Release the SELECT key. The screen prompts you for a password. Figure 5.2 Password Screen If a password is not entered within 15 seconds, the display will return to the normal operating view. 3. Key in the password 111. When entering the password, the numbers will be visible as you scroll through them but will change to asterisks (*) once you move to the next space . Figure 5.3 Password Entry in Progress 30 FLI 225 User Instructions Access User Management 4. Press the Enter softkey. The display shows the User Management main menu and available modules. Figure 5.4 “111 Menu” 5.2.1 5. Use the Up or Down Arrow softkeys to scroll through the available options. 6. Press the Enter softkey to select a highlighted option. 7. Press the Esc softkey to exit User Management and return to normal operating mode. User Settings The User Settings menu allows the operator to change the time, date and contrast as explained in the following sections. 1. From the User Management heading, press the Up or Down Arrow softkeys as necessary to highlight User Settings. 2. Press the Enter softkey. The configurable options are displayed. Figure 5.5 User Settings 3. Press the Up or Down Arrow softkey to highlight an option. 4. Press the Enter softkey to select the highlighted option. 5. Press the Esc softkey to exit User Settings and return to User Management. Set the time Regardless of the format that the time is displayed, you must enter the time in 24 hour format. So for 5:05 p.m., enter the time as 17:05. 1. FLI 225 User Instructions From the User Settings module, press the Up or Down Arrow softkey as necessary to highlight Time. 31 User Management 2. Press the Enter softkey. The time is displayed in real time, 24 hour format. Figure 5.6 Time Menu 3. Repeatedly press the Up or Down Arrow softkey until the first digit of the hour is displayed. (In the example above, the number one.) The current time will no longer be visible once you begin scrolling in the new value. If you make a mistake, press SELECT to backspace and delete one character or press the Esc softkey to exit without saving. 4. Press the ZERO key to move to the next position. 5. Repeatedly press the Up or Down Arrow softkey until the second digit of the hour is displayed. (In the example above, the number one.) The hour is set. 6. Repeat steps 3 through 5 until the time is complete. If you do not know the seconds value, you can go to step 7 after entering the minutes. The seconds value will continue from when you started. 7. Press the Enter softkey to save the changes and return to the User Settings screen. 8. Press the Esc softkey to exit and return to User Management. 9. Press the Esc softkey to exit User Management. The instrument saves the changes, powers off and restarts in normal operating mode. Set the date 1. 32 From the User Settings module, press the Up or Down Arrow softkey as necessary to highlight Date. FLI 225 User Instructions Access User Management 2. Press the Enter softkey. The stored date is displayed. Figure 5.7 Edit Date Screen The current date will no longer be visible once you begin scrolling in the new value. If you make a mistake, press SELECT to backspace and delete one character or press the Esc softkey to exit without saving. 3. Repeatedly press the Up or Down Arrow softkey until the first digit of the month is displayed. (In the example above, the number zero.) 4. Press the ZERO key to move to the next position. 5. Repeatedly press the Up or Down Arrow softkey until the second digit of the month is displayed. (In the example above, the number eight.) The month is set. 6. Repeat steps 3 through 5 until the date is complete. 7. Press the Enter softkey to save the changes and return to the User Settings screen. 8. Press the Esc softkey to exit User Settings. 9. Press the Esc softkey to exit User Management. The instrument saves the changes, powers off and restarts in normal operating mode. Change Display Contrast To allow for various lighting environments, you can adjust the display contrast settings. 1. From the User Settings module, press the Up or Down Arrow softkey as necessary to highlight Display Contrast. 2. Press the Enter softkey. Figure 5.8 Sample Display Contrast Screen FLI 225 User Instructions 33 User Management 3. Select a value between 1 and 5 using the Up or Down Arrow softkeys. (Default setting is 3.) 4. Press the Enter softkey to accept and save the change. The value is changed and the display returns to the User Settings screen. 5. Exit User Settings. 6. Exit User Management. The instrument saves the changes, powers off and restarts in normal operating mode. View Part Number and Firmware Data When you select the About FLI 225 option, the instrument briefly shows the current firmware version and then the part number for the instrument. This information may be useful for support personnel. 1. From the User Management heading, press the Up or Down Arrow softkey as necessary to highlight About FLI 225. 2. Press the Enter softkey. After displaying this information, the FLI 225 returns to the User Management screen. 3. Press the Esc softkey to return to normal operating mode. Audit Trail Viewer The Audit Trail Viewer lets you view details about the number of times the scale has been configured and the details of these configurations. This information may be useful when communicating with authorized service personnel or weighing certification inspectors. You can view the dates and times of these changes or select an entry to view more details for that entry. View the Audit Trail 1. Access the User Management screen. See Access User Management on page 30 for details. 2. Press the Down Arrow softkey two times to highlight Audit Trail Viewer. 3. Press the Enter softkey. A list of dates and times is displayed. This is the general view of the audit trail. Figure 5.9 Sample Audit Trail 34 FLI 225 User Instructions Access User Management Print the Audit Trail While viewing the audit trail, press the PRINT key to send the report to a printer, PC running HyperTerminal or other connected device. Figure 5.10 Sample Audit Trail Report View Audit Trail Record To view a specific record or entry in the audit trail, continue with the following instructions. 4. From the Audit Trail Viewer, press the Up or Down Arrow softkeys to select the record. 5. With the correct entry highlighted, press the Enter softkey. The details for that record display. Figure 5.11 Sample Audit Trail Record 6. Press the Enter or Esc softkey to return to the Audit Trail Viewer when finished. Exit Audit Trail Viewer 7. From the Audit Trail Viewer, press the Esc softkey. The instrument returns to the User Management options. 8. FLI 225 User Instructions Press Esc to exit to normal operating mode. 35 User Management Audit Trail Counter When you select the Audit Trail Counter option, the instrument shows the number of times the system has been calibrated. This information may be useful for support personnel. This information can not be altered. 1. From the User Management heading, press the Up or Down Arrow softkey as necessary to highlight Audit Trail Counter. 2. Press the Enter softkey. The FLI 225 displays the current audit count. 3. 36 Press the Enter or Esc softkey to return to the User Management screen. FLI 225 User Instructions Daily Inspection Checklist for Forklift Scale This list covers digital (wired and wireless) and analog carriages. Mechanical Check scale carriage for loose, worn, bent, broken or missing components. Inspect forks for damage. Check locking pins on forks for proper function. Make sure wire egress and junction box guards are fastened properly. Make sure junction box cover on analog scale is in place with all fasteners. Check center pin located on top of back carriage for wear. Replace if edges are worn, bent, broken or missing. Check that the fastener(s) for the center pin is in place. Check clamp fasteners at the bottom of scale carriage. Check Weigh Bar fasteners on back of scale carriage. Make sure instrument mounting is secure. Check instrument isolation mounts are not loose or cracked. Check and adjust the forklift chain so the heels of the forks have 1/2” to 1” of clearance from the floor when the carriage is down and the mast is vertical. Electrical Make sure the power cable to the instrument is routed and fastened out of harms way. Tighten all cable connections at the instrument. Inspect that all cable clamps and cable ties are secure. Inspect the power cable to the instrument for nicks, cuts or wear. If the coiled cable between the scale carriage and instrument is stretched, readjust its attachment to remove any drooping. Check the instrument is active with applied power. Make sure cable connections from attached peripheral devices are tight. Scale System FLI 225 User Instructions Check battery pack charge for wireless scale carriage to instrument. Make sure the instrument will show zero weight with forks raised, empty and upon pressing the ZERO key. Apply a load to the scale to make sure the instrument is receiving a weight value from the scale carriage. 37 38 FLI 225 User Instructions Standard Scale & Supply Company 25421 Glendale Avenue Redford, MI 48239 313-255-6700 www.standardscale.com Avery Weigh-Tronix USA 1000 Armstrong Dr. Fairmont MN 56031 USA Tel:507-238-4461 Fax:507-238-4195 Email: [email protected] www.wtxweb.com Avery Weigh-Tronix UK Foundry Lane, Smethwick, West Midlands, England B66 2LP Tel:+44 (0) 8453 66 77 88 Fax: +44 (0)121 224 8183 Email: [email protected] www.averyweigh-tronix.com


