1
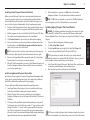
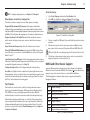
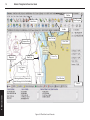
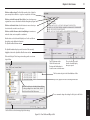
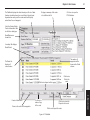
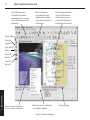
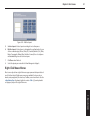
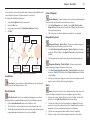
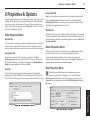
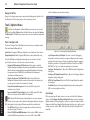
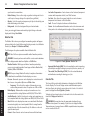
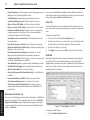
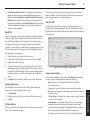
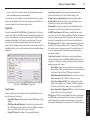
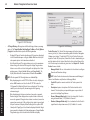
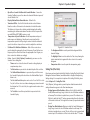
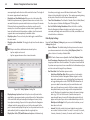
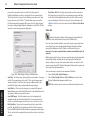
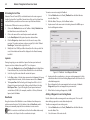
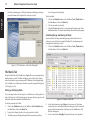
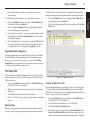
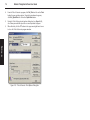
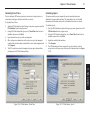
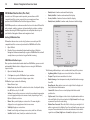
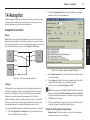
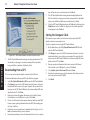
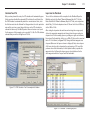
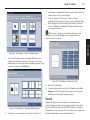
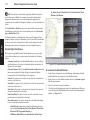
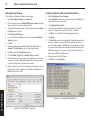
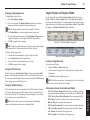
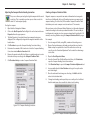
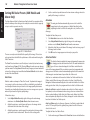
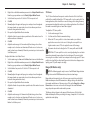
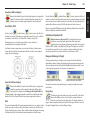
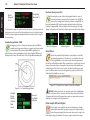
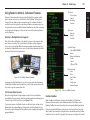
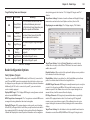
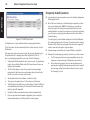
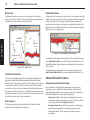
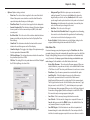
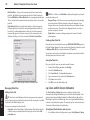
68
Nobeltec® Navigation Software User’s Guide
9 - PlanBook
Estimating Arrival Time
Estimated Time of Arrival (ETA) is calculated based on the route segment
lengths (legs) and the Speed Over Ground entered for each leg. Arrival time
can start from the present time or from a user-specified time and date.
To determine ETA based on a user specified time:
1. Click on the PlanBook button on the ToolBar or Tools | PlanBook from
the Main Menu to view the Routes Tab.
2. Click on the name of the route that you want to work with.
3. In the Route Options field, input a departure date and time.
4. Click the Origin drop-down list and select the vessel or any of the
previous 10 locations you have used as an origin. Or, click the "Select
New Origin..." button to the right of the list.
5. Modify the Vessel SOG (Speed Over Ground) to reflect the speed of the
vessel. Arrival date and time will be displayed in the Route Summary
text field.
To create a new route using the PlanBook:
1. Click on PlanBook or select Tools | PlanBook from the Main Menu to
view the Routes Tab.
2. With the Routes Tab open, click the New... button.
3. Input a name for the new route in the dialog box and click OK to open
the Insert Waypoint window.
Layovers
During a long trip, you can establish a Layover for time spent anchored.
Layovers are then calculated into your ETA's. To set a Layover:
1. Click on the PlanBook button or Tools | PlanBook from the Main Menu.
From the Routes Tab, select the Route Detail Tab for a selected Route.
2. Select the leg of the route that will contain the layover.
3. In the Type column, click the down arrow and select Layover. To change
a waypoint back to normal, click the down arrow and select Normal.
4. The Layover Time field for that leg will change from N/A to 0:00:00.
Change the layover time by right-clicking on that field and selecting
Edit Layover Time... Type in the length of your layover time based
on total hours (36:45:00, for example, would be a 36 hour, 45 minute
layover) and click Enter.
New Route
Along the bottom of the PlanBook is a row of buttons that allow you to
perform various functions. The first button is labeled New Route, which
allows you to manually input Lat/Lon coordinates to create a route.
NOTE: It is easiest to use the Route tool. Use the New Route button only
when you have a list of precise Lat/Lon coordinates to input.
Figure 9.2 - PlanBook - Insert Waypoint Window
4.
5.
6.
Input your Lat/Lon coordinates, or, to use an existing waypoint, click the
radio button labeled Select an Existing Waypoint and select from the list
of available waypoints.
Once information for the new waypoint has been input, click Insert
Waypoint. Repeat for each waypoint in your new route.
When finished entering all waypoints, click OK.
Adding a Waypoint to an Existing Route
Use this feature to add a new waypoint to an existing route. This is useful
when adding segments to a route that already exists.
To add a new waypoint to an existing route:
1. Click on PlanBook or select Tools | PlanBook from the Main Menu to
view the Routes Tab.
2. Select the name of the route to edit.