1
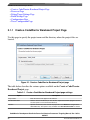
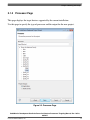
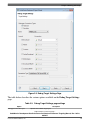
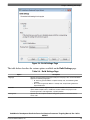
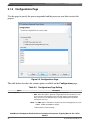
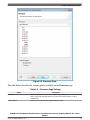
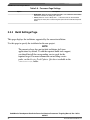
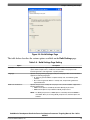
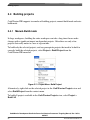
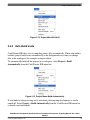
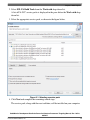
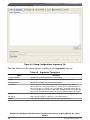
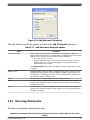
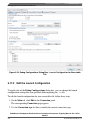
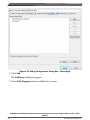
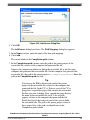
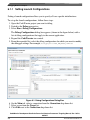
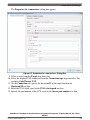
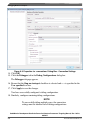
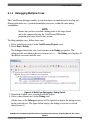
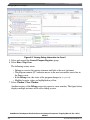
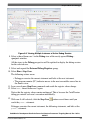
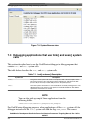
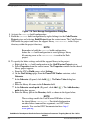
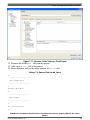
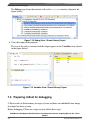
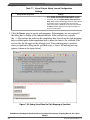
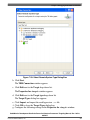
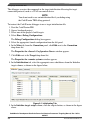
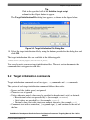
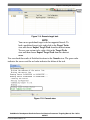
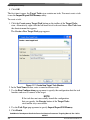
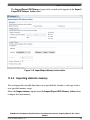
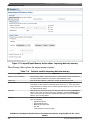
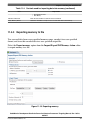
Chapter 7 Debugging Embedded Linux Software
7.5.3 Configure hardware to use U-Boot image
To configure the hardware to use U-Boot image, you need to burn the U-Boot image to
the flash memory of the hardware.
NOTE
See the Burning U-Boot to Flash cheat sheet for the entire
procedure for burning U-Boot to flash. To access the cheat
sheets, select Help > Cheat Sheets from the CodeWarrior IDE
menu bar.
7.5.4 Create a CodeWarrior project to debug U-Boot
Create a new CodeWarrior project to debug U-Boot on the target system.
To create a CodeWarrior project, use these steps:
1.
2.
3.
4.
Launch CodeWarrior IDE.
Select File > Import. The Import wizard appears.
Expand the CodeWarrior group and select CodeWarrior Executable Importer.
Click Next.
The Import a CodeWarrior Executable file page appears.
5. Specify a name for the project, to be imported, in the Project name text box.
6. If you do not want to create your project in the default workspace:
a. Clear the Use default location checkbox.
b. Click Browse and select the desired location from the Browse For Folder
dialog box.
c. In the Location text box, append the location with the name of the directory in
which you want to create your project.
NOTE
An existing directory cannot be specified for the project
location.
7. Click Next.
The Import C/C++/Assembler Executable Files page appears.
8. Click Browse next to the Executable field.
CodeWarrior Development Studio for Power Architecture Processors Targeting Manual, Rev. 10.5.0,
06/2015
Freescale Semiconductor, Inc.
275