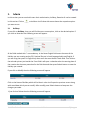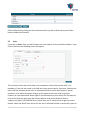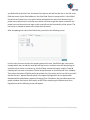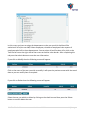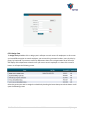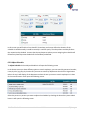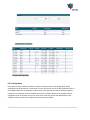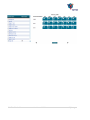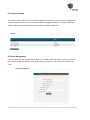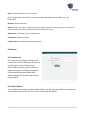
1
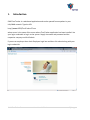
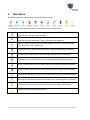
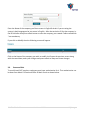
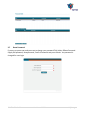
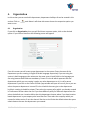
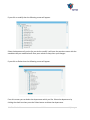
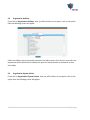
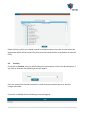
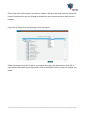
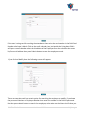
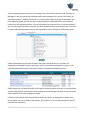
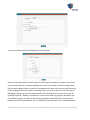
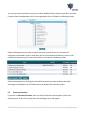
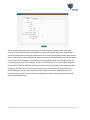
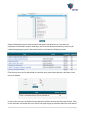
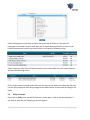
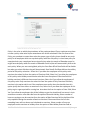
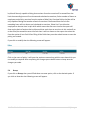
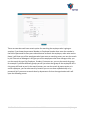
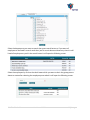
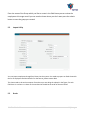
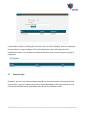
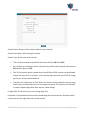
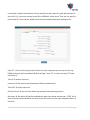
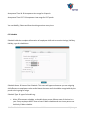
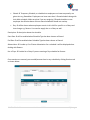
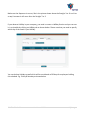
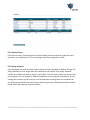
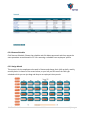
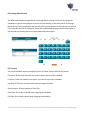
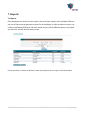
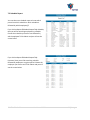
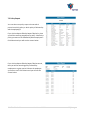
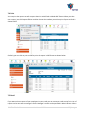
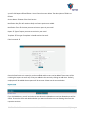
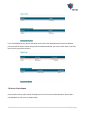
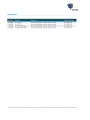
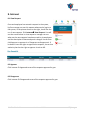
Time Tracker™
User Manual
V 2.0.4
SMA TimeTracker™
User Manual V2.0.4
1|Page
TABLE OF CONTENTS
1.
Introduction ...............................................................................................................................5
2.
Main Menu ................................................................................................................................6
3.
Admin ........................................................................................................................................7
4.
5.
3.1
Holidays ........................................................................................................................................ 7
3.2
Remarks ........................................................................................................................................ 8
3.3
Users ............................................................................................................................................. 9
3.4
Role ............................................................................................................................................. 12
3.5
Company ..................................................................................................................................... 12
3.6
Personnel Role ............................................................................................................................ 13
3.7
Reset Password........................................................................................................................... 14
Organization............................................................................................................................. 15
4.1
Organization ............................................................................................................................... 15
4.2
Organization Holidays................................................................................................................. 17
4.3
Organization System Policies...................................................................................................... 17
4.4
Location ...................................................................................................................................... 18
Personnel ................................................................................................................................. 20
5.1
Personnel .................................................................................................................................... 20
5.2
Personnel Vacation..................................................................................................................... 24
5.3
Policy Personnel ......................................................................................................................... 28
5.4
Group .......................................................................................................................................... 30
5.5
Import Utility .............................................................................................................................. 33
5.5
Grade .......................................................................................................................................... 33
5.6
Out Permission ........................................................................................................................... 34
5.7
Personnel Type ........................................................................................................................... 35
6. Schedule ..................................................................................................................................... 36
6.1 Session .............................................................................................................................................. 36
6.2 Schedule ........................................................................................................................................... 39
6.3 Assign................................................................................................................................................ 42
SMA TimeTracker™
User Manual V2.0.4
2|Page
6.3.1 Assign Policy .............................................................................................................................. 42
6.3.2 Remove Policy ........................................................................................................................... 43
6.3.3 Assign Schedule ......................................................................................................................... 43
6.3.4 Remove Schedule ...................................................................................................................... 44
6.3.5 Assign Month ............................................................................................................................. 44
6.3.6 Assign Month Group.................................................................................................................. 45
6.3.7 Import ........................................................................................................................................ 45
6.3.8 Assign Year................................................................................................................................. 46
6.3.9 Adjust Schedule ......................................................................................................................... 47
6.3.10 Assign Week ............................................................................................................................ 48
7. Reports ........................................................................................................................................ 50
7.1 Reports ............................................................................................................................................. 50
7.2 Schedule Report ........................................................................................................................... 51
7.3 Policy Report................................................................................................................................. 52
7.4 Print .............................................................................................................................................. 53
7.5 Email ............................................................................................................................................. 53
7.6 Device Failure Report ................................................................................................................... 55
8. Intranet ....................................................................................................................................... 57
8.1 View Request .................................................................................................................................... 57
8.2 Approve ............................................................................................................................................ 57
8.3 Disapprove ........................................................................................................................................ 57
8. Gantner ....................................................................................................................................... 58
8.1 User Management ............................................................................................................................ 58
8.1.1 Transfer to Device ..................................................................................................................... 58
8.1.2 Delete Personnel ....................................................................................................................... 58
8.1.3 Enroll Personnel......................................................................................................................... 59
8.1.4 Import Template........................................................................................................................ 60
8.2 Device Management......................................................................................................................... 60
8.3 Reasons............................................................................................................................................. 61
8.3.1 New Reason ............................................................................................................................... 61
SMA TimeTracker™
User Manual V2.0.4
3|Page
8.3.2 Delete Reason............................................................................................................................ 61
8.3.3 Transfer to Device ..................................................................................................................... 62
8.4 Report ............................................................................................................................................... 63
SMA TimeTracker™
User Manual V2.0.4
4|Page
1.
Introduction
SMA TimeTracker is a web-based application and can be opened from anywhere in your
LAN/WAN network. Type the URL
http://server:5050/TimeTrackerST-war
where server is the name of the server where TimeTracker application has been installed. Use
your login credentials to log in to the system. Supply Username and password and the
respective company and click Submit.
If you are an employee then check Employee Login box and then click submit along with your
login credentials.
SMA TimeTracker™
User Manual V2.0.4
5|Page
2.
Main Menu
The following picture contains all the major links of the system.
For more detail check the below table to know which Link is used for what.
Intranet this link is used for approving or disapproving of the employee’s time
edited by them by their direct manager.
Preference this link is used for tuning the system. Here you can define services,
view event log, HR integration, Finger print device key codes etc.
Admin this link is used for administration purpose. Here you can define system
user, Role of the User, Holidays etc.
Organization link is used to deal all the issues regarding Department/Company.
Personnel link used to deal all the issues regarding personnel / Employees.
Schedule link is used to deal all the issues regarding Shifts/Schedules/session.
Report link will take you to the screen where you can generate different Reports.
Gantner link will take you to the screen where you can manage Gartner devices.
Suprema link will take you to the screen where you can manage Suprema devices.
Bioscrypt link will take you to the screen where you can manage Bioscrypt device.
AEOS link will take you to the screen where you can manage AEOS devices.
Logout will log you out from the system.
SMA TimeTracker™
User Manual V2.0.4
6|Page
3.
Admin
In this section you can work with users their authorization, holidays, Remarks all can be treated
in this section. Click on
you want to use.
3.1
main Menu it will show side menu choose the respective option
Holidays
If you click on Holidays, then you will find there are some option, click on the desired option. If
you click on New then the following screen will appear.
Al the fields marked with * are mandatory. In the Name English field enter the name of the
Holiday you are creating such as EID, National Day etc in both language Arabic and English. If
you are using the system in English only then enter the same Name in both field. Then click on
the calendar picture just beside the From field it will open a calendar select the starting date of
the vacation do the same procedure for the End date and then press Submit button to save the
Holiday you created.
If you click on Modify then the following screen will appear.
Click on the Name of Holiday which will be blue in color it will open the previous screen along
with saved data which you can modify. After modify press Submit button to keep save the
changes you made.
If you click on Delete then the following screen will appear.
SMA TimeTracker™
User Manual V2.0.4
7|Page
Select the Holiday by clicking on the check box which you like to delete then press Delete
button to delete the Holiday.
3.2
Remarks
If you click on Remarks, then you will find there are some option, click on the desired option. If
you click on New then the following screen will appear.
Al the fields marked with * are mandatory. In the Remark English field enter the name of the
Remark you are creating such as Present, Absent etc in both language Arabic and English. If you
are using the system in English only then enter the same Name in both field. Then Enter the
Remark of the Client for example if the client want that on the report instead of Present “P” will
appear so he have to write “P” in the Remark client field for Present.
If you click on Modify then the following screen will appear.
Click on the Remark which you want to modify, the previous screen will appear along with the
saved data which you can edit after editing press submit button to keep the changes save.
If you click on Modify then the following screen will appear.
SMA TimeTracker™
User Manual V2.0.4
8|Page
Select the Remark by clicking on the check boxes which you like to delete then press Delete
button to delete the Remarks.
3.3
Users
If you click on Users, then you will find there are some option, click on the desired option. If you
click on New then the following screen will appear.
This screen has three tabs and all have to be completed. All the fields marked with * are
mandatory, Enter the user name in the field user name such as Admin, Supervisor, Mansoor etc
then enter the password of that user in the password field it can be alpha numeric, special
characters, then select the option of logon to the system of that user either use Active
Directory or normal password & user logon if use Active directory then select YES else keep No.
If use active directory then enter the Domain address of the Active directory such as
smapps.com, ldap:// 192.168.100.10 etc consult with your IT administrator to get the correct
domain. Select the Role ID from the list for the user it will allow him/her to access the system as
SMA TimeTracker™
User Manual V2.0.4
9|Page
you defined for that Role. Enter the Name of the person who will use this user in the Full name
field then enter his/her Email address in the Email field. Enter his personnel No. in the field of
Personnel No. System user is the option which distinguishes the users from Normal user to
power users, Normal users are those users which are create to get the report via email & the
power users are those who can logon to the system & use the functionality of the system. The
user which is marked as system user will be count in license.
After completing user tab click on Default tab, you will see the following screen.
In this screen you have to select the proper option of the user, Cutoff Override is the option
through which user can edit his back date off day from his vacation so the Off days during his
vacation will not count in vacation e.g. A took 10 days vacation during his vacation Friday &
Saturday will not count as vacation in those 10 days because its normal day off in his schedule.
Then select the option of Edit Record by drop down list if you select Yes he can edit his record if
No then he can’t. Approve Record option is the option through which he can approved &
disapproved his subordinates request of changing Time. Schedule is the time table selects the
proper schedule for him/her & the policy as well. After completing the Default tab click on
Organization tab the following screen will appear.
SMA TimeTracker™
User Manual V2.0.4
10 | P a g e
In this screen you have to assign the departments to the user on which he/she will be
authorized. So he/she can Add, Delete employees, schedule of employees view reports of
employees who falls in those departments. You can select all and De select all by click on the
Tree kind of Icon at the right side of the screen at the blue color border. After completing this
tab press the submit button to save the user information.
If you click on Modify then the following screen will appear.
Click on the name of the user you wish to modify it will open the previous screen with the saved
data so you can modify them as required.
If you click on Delete then the following screen will appear.
Select the user you which to delete by clicking on the check box and then press the Delete
button to confirm delete the user.
SMA TimeTracker™
User Manual V2.0.4
11 | P a g e
3.4
Role
If you click on Roles, then you will find there are some option, click on the desired option. If you
click on New then the following screen will appear.
In this screen you are defining the Roles/ Authorization means one can do what. Enter the
name of Role in the Role Name files such as Admin, Supervisor, and HR etc then select the
option by clicking on the option. Every checked option means that the holders of this role have
this facility. You can select all instead of one by one by clicking on the tree Icon on the top of
the right screen just below the Scroll bar.
If you click on Modify then the following screen will appear.
Click on the Role you want to modify then it will open the previous screen do your required
changes.
3.5
Company
If you click on Company, then you will find there are some option, click on the desired option. If
you click on New then the following screen will appear.
SMA TimeTracker™
User Manual V2.0.4
12 | P a g e
Enter the Name of the company you like to create in English & Arabic if you are using the
system in both languages else just enters in English. After that write the ID for that company in
the ID field after that press submit button to save the company you created. Fields marked with
* are mandatory.
If you click on Modify then the following screen will appear.
Click on the Name of the company you wish to modify it will open the previous screen along
with the saved data; make your changes and press submit to keep save those changes.
3.6
Personnel Role
To mark IN and OUT punches, employees must have authorization for it. That authorization can
be done from Admin Personnel Role Mark Punch as shown below.
SMA TimeTracker™
User Manual V2.0.4
13 | P a g e
3.7
Reset Password
If you are a system user and you want to change your password Click AdminReset Password.
Supply Old password, New password, Confirm Password and press Submit. You password is
changed for next login.
SMA TimeTracker™
User Manual V2.0.4
14 | P a g e
4.
Organization
In this section you can work with department, department holidays all can be treated in this
section. Click on
want to use.
4.1
main Menu it will show side menu choose the respective option you
Organization
If you click on Organization, then you will find there are some option, click on the desired
option. If you click on New then the following screen will appear.
From this screen you will create a new department in the system. Enter the name of the
Department you are creating in English & Arabic language respectively if you are using the
system in both languages other wise enter the same name in both fields in the language you
are using because both fields are mandatory. Parent ID is the id which represent that the
department which you are creating is under any other department or it is it self a parent
department if you click on the Parent ID field a pop window will open in front of you so you can
select the parent department. Internal ID is the id which the users give to the department
he/she is creating it should be unique. Then select the system policy which you already created
in Preferences Section select the one if you have different policy for different department else
select the default one. Location define that this department locates where if you have location
based department in you company else leave like that. Then select the company which you
created in Admin section if not then leave is like that so it will take the default value then press
submit button the save the department you created.
SMA TimeTracker™
User Manual V2.0.4
15 | P a g e
If you click on modify then the following screen will appear.
Select the department from the list you wish to modify it will open the previous screen with the
saved data do your modification & then press submit to keep save your changes.
If you click on Delete then the following screen will appear.
From this screen you can delete the department which you like. Select the department by
clicking the check box then press the Delete button to delete the department.
SMA TimeTracker™
User Manual V2.0.4
16 | P a g e
4.2
Organization Holidays
If you click on Organization Holidays, then you will find there is one option, click on the option
then the following screen will appear.
Select the Holiday which you already created in the Admin section from the list then select the
department which will have that holiday then press the submit button at the bottom to save
the holiday.
4.3
Organization System Policies
If you click on Organization System Policies, then you will find there is one option, click on the
option then the following screen will appear.
SMA TimeTracker™
User Manual V2.0.4
17 | P a g e
Select the Policy which you already created in the Admin section from the list then select the
department which will have that Policy then press the submit button at the bottom to save the
Policy.
4.4
Location
If you click on Location, then you will find there are some option, click on the desired option. If
you click on New then the following screen will appear.
Entre the name of the location you want to create then press submit button to save the
changes you made.
If you click on Modify then the following screen will appear.
SMA TimeTracker™
User Manual V2.0.4
18 | P a g e
Click on the name of the location you want to modify it will open the same previous screen with
name of location which you can change as desired then press submit button to keep save the
changes.
If you click on Assign then the following screen will appear.
Select the Location from the list which you created then select the departments which fall in
that location after selecting the department click on the Submit button to save the changes you
made.
SMA TimeTracker™
User Manual V2.0.4
19 | P a g e
5.
Personnel
In this section you can work with Employees, Employees holidays and Groups etc all can be
treated in this section. Click on
option you want to use.
5.1
main Menu it will show side menu choose the respective
Personnel
If you click on Personnel, then you will find there are some option, click on the desired option.
If you click on New then the following screen will appear.
This screen has two tabs in the first tab you have to fill personnel information. Enter the
personnel Number, Employee ID or Pay code which will be unique by employee by employee.
Then Enter the name of the Employee you are adding in both languages if you are using the
system in both languages otherwise enter the same thing in both Field in the language you are
using. Then enter the title of the Employee which is his/her designation or post where he/she is
doing work. Select the type either he/she is student, Teacher, Employee or contractor then
select the activation status means either he/she working or on leave or resign means in-active.
Then marked the proper gender. In organization you select the department in which he/she will
work click on the field organization a small pop up window will appear with all the departments
select the one in which he is working. After completing this tab click on others tab it will open
the following form.
SMA TimeTracker™
User Manual V2.0.4
20 | P a g e
If the user is using card for marking the attendance then write the card number in the field Card
Number else leave it blank. Click on the small calendar icon just beside the hiring date field it
will open a small calendar select the hired date of the Employee from the calendar then enter
his/her email address then press Submit button to save the employee record.
If you click on Modify then the following screen will appear.
There are two tabs each has certain option for searching the employee to modify. If you know
the personnel Number or Employee Number then enter the number in the field of personnel
No then press submit button to search the employee, other wise use the Name it will show you
SMA TimeTracker™
User Manual V2.0.4
21 | P a g e
all the employees who have same or matching name, you can also search by Job Title such as
Managers it will give you all the employees who have managers title, you can also search by
type like Employee , Student, Contractor etc, you can also search by group for example if you
have different groups you will just select that group all the employees fall in this group will
listed as you hit the search button, you can also search by status active or in active employees,
you can also search by location you can sort them alphabetically or by personnel No if you want
to search them by department click on the organization tab it will open the following screen.
Select the department you want to search then press search button or if you want all
employees to be listed in search result then just hit search button without any criteria it will
listed all employees as you hit the search button it will open the following screen.
Select the person you wish to modify it will open the same screen as you seen in new employee
section along with all the save data of the employee do the changes you want to then press the
submit button to save the changes you made.
In Others, you will find some more details that you can put for an employee as shown in the
screen below such as its Grade, Card number, Hiring Date, E-mail, Intranet password. None of
the fields are mandatory.
SMA TimeTracker™
User Manual V2.0.4
22 | P a g e
If you click on Delete then the following screen will appear.
There are two tabs each has certain option for searching the employee to delete. If you know
the personnel Number or Employee Number then enter the number in the field of personnel
No then press submit button to search the employee, other wise use the Name it will show you
all the employees who have same or matching name, you can also search by Job Title such as
Managers it will give you all the employees who have managers title, you can also search by
type like Employee , Student, Contractor etc, you can also search by group for example if you
have different groups you will just select that group all the employees fall in this group will
listed as you hit the search button, you can also search by status active or in active employees,
SMA TimeTracker™
User Manual V2.0.4
23 | P a g e
you can also search by location you can sort them alphabetically or by personnel No if you want
to search them by department click on the organization tab it will open the following screen.
Select the department you want to search then press search button or if you want all
employees to be listed in search result then just hit search button without any criteria it will
listed all employees as you hit the search button it will open the following screen.
Select the employees by clicking one the check box which you want to delete then after
selecting the employees click on Delete button to delete them from the system.
5.2
Personnel Vacation
If you click on Personnel Vacation, then you will find there are some option, click on the
desired option. If you click on New then the following screen will appear.
SMA TimeTracker™
User Manual V2.0.4
24 | P a g e
There are two tabs each have certain option for searching the employee who is going on
vacation. If you know the personnel Number or Employee Number then enter the number in
the field of personnel No then press submit button to search the employee, other wise use the
Name it will show you all the employees who have same or matching name, you can also search
by Job Title such as Managers it will give you all the employees who have managers title, you
can also search by type like Employee , Student, Contractor etc, you can also search by group
for example if you have different groups you will just select that group all the employees fall in
this group will listed as you hit the search button, you can also search by status active or in
active employees, you can also search by location you can sort them alphabetically or by
personnel No if you want to search them by department click on the organization tab it will
open the following screen.
SMA TimeTracker™
User Manual V2.0.4
25 | P a g e
Select the department you want to search then press search button or if you want all
employees to be listed in search result then just hit search button without any criteria it will
listed all employees as you hit the search button it will open the following screen.
Click the one from the list who asked for vacation then press submit button it will open a new
screen as follows.
In this screen you have to define the time period of his/her vacation and the type of leave. Click
on the calendar icon beside the From Filed it will open a pop up calendar select the start date of
SMA TimeTracker™
User Manual V2.0.4
26 | P a g e
his/her leave do the same for end date of leave then select the proper remark for the leave
such as annual vacation, Medical Leave, Business Trip, Training etc. then press submit button to
save the vacation you made.
If you click on Modify then the following screen will appear.
There are two tabs each have certain option for searching the employee who is going on
vacation. If you know the personnel Number or Employee Number then enter the number in
the field of personnel No then press submit button to search the employee, other wise use the
Name it will show you all the employees who have same or matching name, you can also search
by Job Title such as Managers it will give you all the employees who have managers title, you
can also search by type like Employee , Student, Contractor etc, you can also search by group
for example if you have different groups you will just select that group all the employees fall in
this group will listed as you hit the search button, you can also search by status active or in
active employees, you can also search by location you can sort them alphabetically or by
personnel No if you want to search them by department click on the organization tab it will
open the following screen.
SMA TimeTracker™
User Manual V2.0.4
27 | P a g e
Select the department you want to search then press search button or if you want all
employees to be listed in search result then just hit search button without any criteria it will
listed all employees as you hit the search button it will open the following screen.
Select employees from the list of whom vacation have to be modify then click submit button it
will open the following screen.
Click on the personnel number and it will open the same screen where you adjust the date and
remark of the employee after doing changes press submit button to keep save the changes you
made.
5.3
Policy Personnel
If you click on Policy, then you will find there are some option, click on the desired option. If
you click on New then the following screen will appear.
SMA TimeTracker™
User Manual V2.0.4
28 | P a g e
Policy is the rules on which the attendance of the employee based. Every employee must have
to have a policy other wise his/her attendance will not be calculated. Enter the name of the
Policy you are about to create then select the proper type of policy there should be one main
policy for all employee which we says basic policy while the sub policy is a time base policy for
example whole year a employee have main policy but when the month of Ramadan come he
might have sub policy when the month of Ramadan finish he/she will automatically shift to the
main policy. When you are creating Main policy the Start Date & End Date fields will be disable
but when you select Sub then they will be activated. Start Date & End Date defines the validity
period of Sub policy activation. Select Yes if you allow the employees of this policy to do
overtime else select No from the option of Overtime field, Select Yes if you allow the employees
of this policy to do Holiday overtime else select No from the option of Overtime field the
holiday overtime is different then normal overtime, Select Yes if you allow the employees of
this policy to do Early overtime else select No from the option of Early Overtime field early
overtime is the option which use if the employee come earlier then the schedule time this
option justify that time either as overtime or not, Select Yes if you allow the employees of this
policy to give a grace period for coming late else select No from the option of Late field, Select
Yes if you allow the employees that all the holidays as per the schedule will not count in their
vacation as vacation else select No from the option of Override Holiday, Select number of
hours an employee can do overtime from the option of Max Overtime field so he/she will be
only capable of doing that number of work as overtime if he exceed from the limit the
exceeding hours will not shown and calculated as overtime, Select number of hours an
employee can do overtime on holidays from the option of Max Holiday Overtime field so
SMA TimeTracker™
User Manual V2.0.4
29 | P a g e
he/she will be only capable of doing that number of work as overtime if he exceed from the
limit the exceeding hours will not shown and calculated as overtime, Select number of hours an
employee can do Early overtime from the option of Max Early Overtime field so he/she will be
only capable of doing that number of work as overtime if he exceed from the limit the
exceeding hours will not shown and calculated as overtime, Select Yes if you allow the
employees to do over time in split shifts which means that the over time on the report will
show on the basis of session that he/she work that much time as over time in this session & so
on but if he/she exceed the over time limit then it will not shown on the report else select No
from the option of Late field. After filling all the fields then press the submit button to save the
policy you created.
If you click on modify then the following screen will appear.
Click on the name of policy it will open the previous screen along with the save data which you
can modify as required after completing the changes press submit button to keep save the
changes you made.
5.4
Group
If you click on Group, then you will find there are some option, click on the desired option. If
you click on New then the following screen will appear.
SMA TimeTracker™
User Manual V2.0.4
30 | P a g e
There are two tabs each have certain option for searching the employee who is going on
vacation. If you know the personnel Number or Employee Number then enter the number in
the field of personnel No then press submit button to search the employee, other wise use the
Name it will show you all the employees who have same or matching name, you can also search
by Job Title such as Managers it will give you all the employees who have managers title, you
can also search by type like Employee , Student, Contractor etc, you can also search by group
for example if you have different groups you will just select that group all the employees fall in
this group will listed as you hit the search button, you can also search by status active or in
active employees, you can also search by location you can sort them alphabetically or by
personnel No if you want to search them by department click on the organization tab it will
open the following screen.
SMA TimeTracker™
User Manual V2.0.4
31 | P a g e
Select the department you want to search then press search button or if you want all
employees to be listed in search result then just hit search button without any criteria it will
listed all employees as you hit the search button it will open the following screen.
Select the employees by click on the check boxes which you want to be in the group you are
about to create after selecting the employee press submit it will open the following screen.
SMA TimeTracker™
User Manual V2.0.4
32 | P a g e
Enter the name of the Group which you like to create in the field Name you can review the
employee at this stage as well you can unselect those whom you don’t want press the submit
button to save the group you created.
5.5
Import Utility
You can import employees through Excel sheet into the system. You need to prepare an Excel sheet with
the list of employees and their details. For the format, please contact SMA.
This sheet needs to be at the computer from where you are doing the upload. In the figure, for each
field there is a column no. shown in the text box this should be the order of the excel sheet.
5.5
Grade
SMA TimeTracker™
User Manual V2.0.4
33 | P a g e
In Grade, you can create grades which can then be assigned to employees as additional
information. You will see the above screen when you will click PersonnelGradeNew. Enter
the Grade name e.g. Grade 12. You can associate a Schedule and Policy with a grade so that
when a new employee with this grade will be entered in the system, the employee will
automatically get the schedule and policy this Grade employees should have. You can Modify,
Delete and Search Grades as well.
5.6
Out Permission
Out permission is a feature which can be used for employees seeking special permission to go
out inside the office timings for acceptable reasons. Their manager can select them and assign
them a permission as shown in the screen below.
SMA TimeTracker™
User Manual V2.0.4
34 | P a g e
If you need to modify an existing Out Permission you can click on Modify, select the employee
and you will see a screen as below. Click on the description and it will take you to the
modification screen. You can Delete and Search Out permission for an employee or group of
employees.
5.7
Personnel Type
By default, there are two Personnel types provided in the system which are Employee(E) and
Contractor(C). you can create more personnel types depending on the type of staff you have.
Go to PersonnelPersonnel TypeNew and you will see the below screen.
SMA TimeTracker™
User Manual V2.0.4
35 | P a g e
Provide the name of the type and its abbreviation. These types can be modified at any time.
However, these types can only be deleted when no Personnel is holding that personnel type.
6. Schedule
6.1 Session
Session represents the time part of a schedule and the type of session represents the mode in
which it will be used. The description of fields is as follows:-
SMA TimeTracker™
User Manual V2.0.4
36 | P a g e
Session Name Name of the session. Make it easy to identify
Session Description Describing the session
Session Type the mode of the session
•
Time when acceptance period will be used to Pick first IN & last OUT.
•
Key When on a biometric device a function key will be used to specify which punch is
IN and which punch is OUT
•
Free this session can be created when from 00:00 to 23:59 a person can be allowed
to work any time for X no. of hours. In this session there won’t be any IN & OUT timings
just the no. of hours will be defined.
•
Time Key a combination of Time & Key, this session can be used when you are using
function key yet would want to have an acceptance period. This session can be helpful
to tackle complex night shifts when there is a date change.
Is Night Shift Check this if you are creating night shift
Is Optional an optional session can be created along with normal session. Good for people
come to work in the night after their normal session.
SMA TimeTracker™
User Manual V2.0.4
37 | P a g e
Lunch Break define the duration of lunch break if you don’t want to create split sessions for
your shift. E.g. if you have timings from 9:00 to 18:00 with 1 hour lunch. Then you can specify a
lunch break of 1 hour and this would not be counted towards employees working hours.
Early O.T. if you want to give early Overtime to your employees you can put the time e.g.
08:00 so whoever will come before 08:00 he will get 1 hour O.T. in case of no early O.T. leave
the field as is.
Time IN session start time
Late starts the time on which employees will be considered late
Time OUT session stop time
Overtime Starts the time from which the employee starts getting overtime
Min hours Min hours field will be enabled only when you choose session type = ‘FREE’ for all
other sessions it will be disabled. You need to put min hours a person must complete while in a
free shift.
SMA TimeTracker™
User Manual V2.0.4
38 | P a g e
Acceptance Time IN Acceptance time range for IN punch.
Acceptance Time OUT Acceptance time range for OUT punch.
You can Modify, Delete and Search existing sessions at any time.
6.2 Schedule
Schedule holds the complete information of employees shift such as session timings, Half day,
Holiday, type of schedule etc.
Schedule Name Name of the Schedule. This name will appear whenever you are assigning
shifts/Rosters to employees so be careful about the name and it should be recognizable by the
person who is going to assign.
Schedule Type type of schedule e.g.
•
Main Permanent schedule, a schedule that a person follows most of the time in a
year. Every employee MUST have at least 1 Main schedule and at a time a person can
hold only 1 Main schedule.
SMA TimeTracker™
User Manual V2.0.4
39 | P a g e
•
Shared Temporary Schedule, a schedule that employees can have temporarily at a
given time e.g. Ramadhan. Employees can have more than 1 Shared schedule along with
their Main schedule. Make sure that if you are assigning 2 Shared schedules to one
employee the effective dates of those shared schedules should not overlap.
•
Day will be chosen when employees remain in this shift for specific no. of days and
then change e.g. Rosters. You need to supply the no. of days as well.
Description description about the schedule.
Start Date will be enabled when Schedule Type has been chosen as Shared
End Date will be enabled when Schedule Type has been chosen as Shared
Abbreviation Provide up 3 to 5 letter abbreviation for a schedule it will be displayed when
dealing with Rosters.
No. of Days Provide No. of days if you are creating a Day schedule for Rosters.
Once sessions are created, you can add/remove them in any schedule by clicking Sessions tab
as shown below.
SMA TimeTracker™
User Manual V2.0.4
40 | P a g e
Make sure the Sequence is correct, like in the picture shown above the Straight 3 to 11 can’t be
at seq 1 because it will occur after the Straight 7 to 3.
If you observe Halfday in your company, you need to create a Halfday Session and you can use
it in a schedule by clicking on Halfday tab as shown below. Please note that you need to specify
which day of the week is your Halfday.
You can declare Holidays as well which will be considered as Off-days for employees holding
this schedule. E.g. Friday & Saturday as shown below.
SMA TimeTracker™
User Manual V2.0.4
41 | P a g e
Once created you can Modify, Delete and Search the schedules. Please note that if any
modification happens the changes will be applied from the day onwards and no previous
records will get affected by this modification.
6.3 Assign
6.3.1 Assign Policy
Once employees are entered in the system, they must have a policy. Schedule Assign Assign Policy you can assign them the policy they fit in. Click Assign Policy, choose the policy
you want to assign. Press Submit. You will come up with the search screen for employees. You
can choose an individual employee as well as group of employees. By just clicking Search button
you will see the list of all employees holding the policy you have chosen and the ones who have
not been assigned this policy separately as shown below. Select the employee and press
Submit.
SMA TimeTracker™
User Manual V2.0.4
42 | P a g e
6.3.2 Remove Policy
Click Remove Policy, Choose the policy and click delete personnel and then repeat the same
procedure as mentioned in 6.3.1 for removing a Policy from employees’ profile.
6.3.3 Assign Schedule
Once employees are entered in the system, they must have a schedule. Schedule Assign Assign Schedule you can assign them the schedule they will follow. Click Assign Schedule,
choose the schedule you want to assign. Press Submit. You will come up with the search screen
for employees. You can choose an individual employee as well as group of employees. By just
clicking Search button you will see the list of all employees working under this schedule that
you have chosen and the ones who have not been assigned this schedule separately as shown
below. Select the employee and press Submit.
SMA TimeTracker™
User Manual V2.0.4
43 | P a g e
6.3.4 Remove Schedule
Click Remove Schedule, Choose the schedule and click delete personnel and then repeat the
same procedure as mentioned in 6.3.3 for removing a schedule from employees’ profile.
6.3.5 Assign Month
This screen is for the employees who work in Rosters and change their shifts on daily, weekly,
monthly basis. As shown in the screen below, on your left you will see all the DAY type
schedules which you can just drag and drop to an employee’s duty month.
SMA TimeTracker™
User Manual V2.0.4
44 | P a g e
6.3.6 Assign Month Group
The difference between Assign Month and Assign Month |Group is that you can assign the
schedule to a group of employees at once if they are working in the same batch. Click Assign
Month Group. Select employees and you will see the screen below. On the left side you will see
list of schedule and list of employees. Select the schedule and employee and mark the date in
the calendar by checking the box in those dates and press submit.
6.3.7 Import
You can do schedule import through an Excel file. Please contact SMA for the format.
File name you need to browse the location where the excel file is located.
First Row the row number from which you need to import the schedules
Last Row Till which row you need to do the import schedule.
Sheet number Sheet number of Excel file.
Start Date the date it should start assigning the schedules
End Date the date it should stop assigning the schedules.
SMA TimeTracker™
User Manual V2.0.4
45 | P a g e
6.3.8 Assign Year
To Assign Yearly Schedule click on Assign year it will open a search screen for employees. In this screen
you have different option to search employee, you can search by personnel number, name, by title, by
group, by location & if you want to search by department then click on Organization tab on the top it
will display all the department select the one you want to search employee on it then click on search
button. It will open the following screen.
Select the person you want to assign the schedule by checking the boxes then press submit button it will
open the following screen
SMA TimeTracker™
User Manual V2.0.4
46 | P a g e
In this screen you will find the From Date & To Date here you have to define the duration of the
schedule it could be weekly it could be monthly it could be yearly. Then drop down each day & select
the respective day schedule. It means that the employees to whom you are assigning the schedule will
follow every Saturday same schedule till the End date you defined.
6.3.9 Adjust Schedule
To Adjust Schedule click on Adjust Schedule it will open the following screen
In the above screen you have different option to search employee, you can search by personnel number,
name, by title, by group, by location & if you want to search by department then click on Organization
tab on the top it will display all the department select the one you want to search employee on it then
click on search button. It will open the following screen.
Select the person or persons you want to adjust the schedule by checking the boxes then press submit
button it will open the following screen.
SMA TimeTracker™
User Manual V2.0.4
47 | P a g e
6.3.10 Assign Week
If you want to assign a weekly schedule to a batch of employees then click Assign Week. Select
employees and you will see the screen below. On your left you will see all the Day schedules listed. In
the middle you will see the employee numbers and on the right side you will the respective weekly
calendar for an employee. Choose Schedule and click on a weekly calendar of an employee who is
supposed to work on that day. As soon as you tick the check box you will see abbreviation of the
schedule showing in that date. Complete the Roster and press Submit.
SMA TimeTracker™
User Manual V2.0.4
48 | P a g e
SMA TimeTracker™
User Manual V2.0.4
49 | P a g e
7. Reports
7.1 Reports
Once employees are entered in the system, they must have a policy and a schedule. Without
any one of these you can generate a report for an employee. In order to take out report, you
need to click ReportsReports and then choose any one of the different reports. Any report
you will click, you will see the search screen
Choose the dates or choose the duration. Select the employees for the reports. Click Show Report.
SMA TimeTracker™
User Manual V2.0.4
50 | P a g e
7.2 Schedule Report
You can take out a schedule report to know which
person has which schedule or which schedule is
followed by which employee(s)?
If you click on ReportSchedule ReportBy Schedule,
then you will be searching employees by schedule.
Choose the schedule you want to see followed by
which employees? Click Submit and you will see the
screen below
If you click on ReportSchedule ReportBy
Personnel, then you will be searching schedule
followed by employees at a given period. Choose the
employee you want to see? Click Submit and you will
see the screen below
SMA TimeTracker™
User Manual V2.0.4
51 | P a g e
7.3 Policy Report
You can take out a policy report to know which
person has which policy or which policy is followed by
which employee(s)?
If you click on ReportPolicy ReportBy Policy, then
you will be searching employees by policy. Choose the
policy you want to see followed by which employees?
Click Submit and you will see the screen below
If you click on ReportPolicy ReportBy Personnel,
then you will be searching policy followed by
employees at a given period. Choose the employee
you want to see? Click Submit and you will see the
screen below
SMA TimeTracker™
User Manual V2.0.4
52 | P a g e
7.4 Print
You can print the reports as well as export them in an MS Excel or Adobe PDF format. When you take
out a report, just click ReportsPrint and then choose the medium you wish to print. Export to Excel is
shown below.
Similarly you can click on print on PDF to print the report in PDF format as shown below.
7.5 Email
If you want to have reports of your employees in your email you can create an email service for it. No. of
reports can be sent out to manager’s emails. Manager’s emails can be specified in AdminUsers. When
SMA TimeTracker™
User Manual V2.0.4
53 | P a g e
you will click ReportsEmailNew. You will see the screen below. The description of fields is as
follows:
Service Name Name of the Email service
Notification Day it will remain as Daily until more options are added.
Notification Time the time you want to have a report in your email.
Report Type of report you want to receive in your email.
Template The type of template it should send to the email.
Filter Personnel Once the Email service is created, it can be modified and the users can be added. These users will be
receiving the reports in email only if they are added in the service by clicking on Add Users. Similarly,
employees will be added whose reports will be sent out. Please see the screens below.
If you click Add Users, you will see below screen where the allowed users and not allowed users will be
shown. Choose the users and decide whether you want to allow them or not allowing them from the
respective sections.
SMA TimeTracker™
User Manual V2.0.4
54 | P a g e
If you click Add Personnel, you will see below screen where the allowed personnel and not allowed
personnel will be shown. Choose the personnel and decide whether you want to filter them or not filter
them from the respective sections.
7.6 Device Failure Report
Click on Device failure report which will display the list of occurrences when biometric devices were
unreachable from the server as shown below.
SMA TimeTracker™
User Manual V2.0.4
55 | P a g e
SMA TimeTracker™
User Manual V2.0.4
56 | P a g e
8. Intranet
8.1 View Request
Once and employee has entered a request in the system,
his/her manager can see this request whenever he logs in to
the system, In the picture shown on the right, he will see the
no. of new requests. Click Intranet
View Request. You will
see the screen below. In view request a manager can see
what are the new requests have been made by its employees
and the description of leave and punch changes. He can then
click Approve to approve it or Disapprove to disapprove it. If
he doesn’t have the rights to approve the requests, he can then only forward it to the higher
authority that has the right to approve it such as HR.
8.2 Approve
Click Intranet Approved to see all the requests approved by you.
8.3 Disapprove
Click Intranet Disapproved to see all the requests approved by you.
SMA TimeTracker™
User Manual V2.0.4
57 | P a g e
8. Gantner
8.1 User Management
8.1.1 Transfer to Device
Click GantnerUser ManagementTransfer to Device. You will see the search screen to search
employees. Select the employees, you wish their profiles and fingerprint templates to be sent to the
Gantner devices. Choose the employees and the devices and their records will be updated in the
terminals. If you want to be a master user in the device (for enrolment purposes), then choose Master
as Yes. Click Transfer Personnel.
8.1.2 Delete Personnel
Should you want to delete a person’s record from a device or more than 1 device you can click on
Gantner User Management Delete Personnel. Choose the person or persons to delete from the
device(s). Select the devices you wish to delete from and click Delete button.
SMA TimeTracker™
User Manual V2.0.4
58 | P a g e
8.1.3 Enroll Personnel
For enrolment from any client PC, a USB scanner must have been plugged to that PC along with the
BIOBridge utility which has to be running. Click Gantner User Management Enroll Personnel. Select
the employee; you will see the screen below. The screen should show Connected to BIOBridge.
Click Enroll button, it will ask you to put and remove finger 3 times, then it will show Done. You must
click Save Template at this point. Select another finger from the dropdown and enroll and save again.
SMA TimeTracker™
User Manual V2.0.4
59 | P a g e
8.1.4 Import Template
The Gantner devices that have the enrolment feature from the terminal, those enrolments/fingerprints
can be imported into TimeTracker from GantnerUser ManagementImport Templates. Select the
devices in which the new persons have been enrolled. Click Import Personnel.
8.2 Device Management
From this option you can manage Gantner Devices, Click New to enter new devices, once you entered
them you can modify and delete as well. When entering new devices, you need to fill the following
fields.
SMA TimeTracker™
User Manual V2.0.4
60 | P a g e
Name Name of the device e.g. First Floor
IP IP of the device. If the device you are entering is a GSM device then put SIM no. in it e.g.
0501234567
Direction Keep it Not Use.
Status status of the device. Should be Active in order to pull the events by the system. If you don’t
want to pull the events from a device then choose Status as In-Active.
GSM Device indicates if this is a GSM device?
Terminal ID Make it 1 always.
Company Name Company the device belongs to.
8.3 Reasons
8.3.1 New Reason
The reasons for the Gantner device can be
created from GantnerReasons New. Fill
out the reason name in English and in
Arabic. Make sure that you remember the
code and this same code will be mapped in
PreferencesPreferencesKey code.
Without doing this Function report cannot
be generated.
8.3.2 Delete Reason
You can delete the reasons, as shown below. Make sure that you have delete from the devices
as mentioned in the section 8.3.3. Select the reason and click Delete.
SMA TimeTracker™
User Manual V2.0.4
61 | P a g e
8.3.3 Transfer to Device
After creating the reasons, you can then send it to the Terminals by clicking
GantnerReasonsTransfer to Device. Choose all the reasons, then the Terminals you wish to
send to and click Transfer.
SMA TimeTracker™
User Manual V2.0.4
62 | P a g e
8.4 Report
You can see which employees have their fingerprint template stored inside the system by
clicking GantnerReportTemplate. Choose the searching criteria from the search screen and
click search. The below screen then will show list of employees separately which employees are
with and without their templates saved in the database.
SMA TimeTracker™
User Manual V2.0.4
63 | P a g e