1
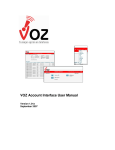
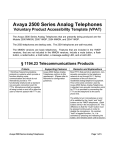
User Manual
Contents
Prioritize Plus
1. Getting Started
1.1. Login User Portal
1.2. Change Password
1.3. Add Contact to Phonebook and Buddy List
1.4. Set up Business NETVIGATOR webmail
1.5. Set up faxmail
1.6. Set up voicemail
1.7. Logout User Portal
P.2-9
P.2
P.3
P.4
P.6
P.7
P.7
P.9
2. Phonebook
2.1. Import phonebook
2.2. Export phonebook
P.10-12
P.10
P.12
3. Buddy List
3.1. Your Status
3.2. Buddy List Settings
P.13-14
P.13
P.14
4. Manage calls in User Portal
4.1. Make Call
4.2. Make a Conference call
4.3. End Call
P.15-17
P.15
P.16
P.17
5. Manage voicemail
5.1. Voicemail Setting
5.2. Click to listen to voicemails
5.3. Check voicemails in email inbox
5.4. Check voicemails by phone
5.5. Delete voicemails
P.18-21
P.18
P.19
P.20
P.21
P.21
6. Personal Fax
6.1. Set up faxmail
6.2. Receive a fax
6.3. Send a fax
6.4. Reject junk fax
P.22-25
P.22
P.22
P.23
P.25
7. View Messages in Single Interface
7.1. Set up Business NETVIGATOR
7.2 Access webmail in User Web
P.26
P.26
P.26
8. Customize Prioritize Plus
8.1 Change password
8.2 IDD Services
8.3 Display caller number
P.27-28
P.27
P.27
P.28
9. Remote Access Using Active Phone
9.1 Programme your active phone
9.2 Change your active phone
P.29
P.29
P.29
10. Appendix A: Major Functions in User Portal
P.31
11. Appendix B: Number Formats
P.32
User Manual
P.1
1. Getting Started
Prioritize Plus
Welcome to Prioritize Plus. Prioritize Plus allows you to
handle your fax, voicemail, email message according
to priority with a single view. All the important contacts
are centralized and always available. You can save your
dialing time by click-to-call. Furthermore, any phone could
become your office phone.
Simply follow the below procedures to set up your
Prioritize Plus and enjoy the multiple benefits now!
1.1 Login User Portal
Follow these three steps to login User Web.
Step 1
Connect your PC to internet and launch browser. Prioritize
Plus supports Microsoft® Internet Explorer 6.0 SP1, Mozilla
1.7.3 or Firefox 1.0. Screen resolution of 1024 x 768 or
above is required.
Step 2
Enter this URL to go to the User Web.
http://ppuser.pccw-cvg.com
Step 3
Enter User Name, Directory Number and Password then
click Login .
If you have forgotten your Prioritize Plus login password,
please inform your Company Administrator. Prioritize Plus
Administrator Portal allows your Company Administrator
to quickly and easily change or reset your login password.
If you are using your own PC, you can check the box
√ Remember Me. It saves your next login time by
remembering your User Name, Directory Number and
your Active Phone.
P.2
User Manual
1. Getting Started
Prioritize Plus
User Manual
1.2 Change Password
You are recommended to change your password
periodically and at your first time login. Simply follow
these three steps to change your password.
Step 1
Select
Profile Settings
- - Go to - -
from the
menu.
Step 2
Click Change Password
Step 3
Enter your old password, then enter your new password
twice. Password should be at most 16 letters of
alphanumeric. Then click Save .
P.3
1. Getting Started
Prioritize Plus
1.3 Add Contact to Phonebook and
Buddy List
Prioritize Plus Phonebook is a full-featured database listing
everyone of importance to you. Essentially, Prioritize Plus
has two separate phonebooks.
Personal Phonebook – List all your personal contact
numbers. Only you can view and update the list anytime
anywhere.
Corporate Phonebook – This centrally managed list of
contacts is available to all Prioritize Plus users in your
organization. The list can be updated by Company
Administrator in Administrator Portal.
To access your phonebook, simply select Phonebooks
from the - - Go to - menu. Then select to view
Corporate Phonebook or Personal Phonebook by the
phonebook selector.
You can add entries to your Personal Phonebook one-byone or import a list of entries from CSV file.
Add Contacts
Simply follows two steps to add one entry into your
Personal Phonebook.
Step 1
Click Add Contact in the Phonebook to go to the Personal
Phonebook – Add Contact page.
Step 2
Input the contact information and click Save .
The following fields are mandatory:
• First name and Last name (at least one)
• Phone numbers (at least one)
P.4
User Manual
1. Getting Started
Prioritize Plus
User Manual
Import Personal Phonebook
You can import a CSV file from local hard disk into your
Personal Phonebook. Below is a sample template of the
CSV file
Step 1
Select CSV file for import
Click Import in the Phonebook. Then click Browse to
choose the .csv file in your local hard disk for uploading.
Then click Upload .
Note:
Tick √ First row of CSV file is column header box
Step 2
Map the Column Header with Phonebook field
Map the Column Header of CSV File with Phonebook
field. Then click Save to continue.
The following phonebook fields are mandatory:
• First name and Last name (at least one)
• Phone numbers (at least one)
Step 3
Select Records to Import
Select which records to import or select all to import all
entries. Then click Save to confirm the import into the
database.
P.5
1. Getting Started
Prioritize Plus
Add Buddy to Buddy List
The Buddy List enables you to see which of your working
partners and colleagues are online. You can always see
your buddies in your User Web. Hence, you will probably
want to put on your Buddy List the people you call the
most.
Your Buddy List can include up to 100 buddies from your
Phonebook. You can create up to 5 groups in the list for
organizing your buddies. A buddy can be listed in one of
the group.
Simply follow two steps to add buddy to your Buddy List.
Step 1
Select Phonebooks
from the
menu to go to your Phonebook.
- - Go to - -
Step 2
Select the Phonebook entries you want to add to your
Buddy List. Then click Add Buddy .
Your buddy will receive a system request to authorize you
to view his status. If your buddy rejects your request, you
can still keep him on your list, but you cannot view his
status.
Note:
• A buddy (one Phonebook entry) can be added to your
Buddy List once and listed in one of the groups.
• You can add non-Prioritize Plus users to your Buddy List,
but you cannot see their online status.
1.4 Set up Business NETVIGATOR
You can seamlessly access your Business NETVIGATOR
webmail in the Prioritize Plus User Web. Simply follow two
steps to set up.
Step 1
Select Profile Settings
from the - - Go to - menu. Then Click Webmail Setting .
Step 2
Enter your Business NETVIGATOR email address and
password. Then click Save .
P.6
User Manual
1. Getting Started
Prioritize Plus
User Manual
To access your Business NETVIGATOR webmail, simply
select Webmail
from the - - Go to - menu. To compose a new email, simply click
Compose Email in the Call List.
Note:
• You can add multiple entries to the Call List by clicking
icon of the entries in Buddy List or Phonebook.
1.5 Set up faxmail
Prioritize Plus Personal Fax feature allows users to receive
fax in the email inbox and send faxes through the User
Web.
Each user of Prioritize Plus is assigned a Personal Fax
number. Fax documents sent to your number will arrive in
your email inbox – even you are not logged into Prioritize
Plus.
Before you use your Personal Fax service, your Company
Administrator will assign you a Personal Fax number and
the associated Email Address. You can view your assigned
service in My Subscription of Profile Settings.
Note:
• You can use any email service to receive your Personal
Faxmail, such as Business NETVIGATOR mailbox
or your company email server. Simply check if your
email address is correct, i.e. you can receive and access
email to this email address.
1.6 Set up voicemail
Prioritize Plus Voicemail is easier to handle than
conventional voicemail. It quickly prioritizes voicemail
messages. You may listen to them in any order.
Note:
• Prioritize Plus Voicemail is not available to PABX users.
P.7
1. Getting Started
Prioritize Plus
User Manual
Simply follow two steps to set up your voicemail.
Step 1
Select Profile Settings
from the
menu. Then Click Voicemail
- - Go to - -
Send voicemail to inbox – whenever your receive a
voicemail, an additional copy will be sent to your email
address. Then you can save into your local hard disk or
even forward to others by email.
Change password – change your 4-digit PIN to access
your voicemail system by * 9 0 or remote access by
28883888 (Chinese) & 28883838 (English).
Click Save to save your settings.
Step 2
Access your voicemail system to set up your personal
greeting:
• Dial * 9 0 using your office phone or 2888 3888
(Chinese) & 2888 3838 (English) by any phone
Enter your 4–digit PIN
• Press 9 to Change your mailbox settings
• Press 1 to Change your personal greeting
• Press 1 to Record your personal greeting
• Press 1 to Start Record and then # to Stop Record
• Press 1 to Save your greeting
Note:
On special occasions (e.g. you are on vacation), you can
record and use a temporary Special Greeting. Simply
follow these steps:
• Dial * 9 0 using your office phone or 2888 3888
(Chinese) & 2888 3838 (English) by any phone
• Enter your 4–digit PIN
• Press 9 to Change your mailbox settings
• Press 1 to Change your personal greeting
• Press 2 to Record and use special greeting
• Press 1 to Start Record and then # to Stop Record
• Press 1 to Save your greeting
P.8
After you are return to your office, simply cancel the
Special Greeting. Your original greeting will be in use
again:
• Dial * 9 0 using your office phone or 2888 3888
(Chinese) & 2888 3838 (English) by any phone
• Enter your 4-digit PIN
• Press 9 to Change your mailbox settings
• Press 2 to Delete your personal greeting
• Press 2 to Delete and cancel special greeting
1. Getting Started
Prioritize Plus
User Manual
1.7 Logout User Web
We recommend you to logout User Web and close the
browser whenever your leave your office. Simply click
Logout.
P.9
2. Phonebook
Prioritize Plus
Prioritize Plus Phonebook is a full-featured database listing
everyone of importance to you.
To access your phonebook, simply select Phonebooks
from the - - Go to - menu. Essentially, Prioritize
Plus has two separate phonebooks.
Personal Phonebook – List all your personal contact
numbers. Only you can view and update the list anytime.
Corporate Phonebook – This centrally managed list of
contacts is available to all Prioritize Plus users in your
organization. The list can be updated by Company
Administrator in Administrator Portal.
You can add entries to your Personal Phonebook one by
one or import a list of entries from CSV file.
Add Contacts
Simply follows two steps to add one entry into your
Personal Phonebook.
Step 1
Click Add Contact in the Phonebook to go to the Personal
Phonebook – Add Contact page.
Step 2
Input the contact information and click Save .
The following fields are mandatory:
• First name or Last name (at least one)
• Phone numbers (at least one)
Find Contact
Simply type a name or number to search the phonebook.
Step 1
Type any part of the name you want to find in the Find
box. Then press Enter.
Step 2
The searched entries are listed below. Click
window.
P.10
to close the
User Manual
2. Phonebook
Prioritize Plus
User Manual
Advanced Find
Prioritize Plus allows you to search your phonebook by
multiple criteria. Simply follows the three steps.
Step 1
Click Advanced Find .
Step 2
Enter your multiple criteria into the boxes. Click Start Search
to start the searching.
Step 3
The searched entries are listed below. Click Hide Advanced
Search to hide the search screen.
2.1 Import Personal Phonebook
You can import a CSV file from local hard disk into your
Personal Phonebook. Below is a sample template of the CSV
file.
Step 1
Select CSV file for import
Click Import in the Phonebook. Then click Browse to
choose the .csv file in your local hard disk for uploading.
Then click Upload .
Note:
Tick √ First row of CSV file is column header box
Step 2
Map the Column Header with Phonebook field
Map the Column Header of CSV File with Phonebook field.
Then click Save to continue.
The following phonebook fields are mandatory:
• First name and Last name (at least one)
• Phone numbers (at least one)
P.11
2. Phonebook
Prioritize Plus
Step 3
Select Records to Import
Select which records to import or select all to import all
entries. Then click Save to confirm the import into the
database.
2.2 Export Phonebook
You can choose to export your Corporate or Personal
Phonebook entries to your local hard disk as a CSV file.
Simply follow three steps.
Step 1
Select phonebook folders to export. Click Next
Step 2
Map the Phonebook field with your preferred column
headers for the CSV file. Click Export
Step 3
Wait for a few seconds for the system to make your CSV
file. After the File Download page appears, click Save
this file to disk to save the file to your local hard disk.
P.12
User Manual
3. Buddy List
Prioritize Plus
User Manual
The Buddy List enables you to see which of your working
partners and colleagues are online. You can always see
your buddies in your User Web. Hence, you will probably
want to put on your Buddy List the people you call the
most.
Your Buddy List can include up to 100 buddies from your
Phonebook. You can create up to 5 groups in the list for
organizing your buddies. A buddy can be listed in one of
the group.
3.1 Your Status
The Status box shows what appears to your online
buddies. Four possible settings are available:
Online – You are logged into Prioritize Plus and are at
your PC.
Away – You are logged into Prioritize Plus but are not
at your PC.
Invisible – You are logged into Prioritize Plus but appear
offline to your buddies.
Offline – You are not logged into Prioritize Plus.
3.2 Buddy List Settings
You can create different groups of buddies. For example,
one group may consist of all your working partners.
Another may consist of your customers.
Add Buddy
Simply follow two steps to add buddy to your Buddy List.
Step 1
Select - - Go to - from the
menu to go to your Phonebook.
Phonebooks
Step 2
Select the Phonebook entries you want to add to your
Buddy List. Then click Add Buddy .
P.13
3. Buddy List
Prioritize Plus
Your buddy will receive a system request to authorize you
to view his status. If your buddy rejects your request, you
can still keep him on your list, but you cannot view his
status.
Note:
• A buddy (one Phonebook entry) can be added to your
Buddy List once and listed in one of the groups.
• You can add non-Prioritize Plus users to your Buddy List,
but you cannot see their online status.
Buddy List Settings
You can customize your Buddy List easily. Simply click List
Settings in the Buddy List.
Add Group
– You can create a new group. Enter the
name of the new group.
Rename Group – Rename the highlighted group.
Delete Group
– Delete the highlighted group.
Show Members – Show the buddy members in the
highlighted group.
Move to Group – Move the highlight buddies to the
highlighted group.
P.14
User Manual
4. Manage Calls in User Portal
Prioritize Plus
User Manual
4.1 Make Call
You can make call directly in User Web by the following
two ways.
Click-to-Call from Buddy List, Phonebook or Voicemail
Step 1
Simply click on the hyper-linked name in Buddy List,
Phonebook or Voicemail.
Step 2
Your phone will ring. Pick up your handset and you will be
connected to the number.
Step 3
You can view the talking status. To end the call, simply put
back your handset.
Click-to-Call from Call List
Alternatively, you can make call by entering the phone
number into the Call List.
Step 1
Enter the number in the Dial box.
P.15
4. Manage Calls in User Portal
Prioritize Plus
Step 2
Click Call. Your phone will ring. Pick up your handset and
you will be connected to the number.
Note:
• During click-to-call, if you find that your phone does
not ring, you can cancel the call by clicking End Call.
Please check if your phone is already off-hook or has
activated call forward or hunting features.
4.2 Make a Conference call
Prioritize Plus provides powerful teleconferencing features.
You can have three callers in a conference call. You can
start a conference call by two ways.
Invite callers one by one
Step 1
Click-to-call the first caller from Buddy List, Phonebook,
Voicemail (simply click on the name) or Click-to-call from
Call List (type the number in the Dial box, and click Call).
Step 2
When you start talking with the first caller. Click-to-call the
second caller from Buddy List, Phonebook, Voicemail or
Call List.
P.16
User Manual
4. Manage Calls in User Portal
Prioritize Plus
User Manual
Step 3
You can view the talking status. To end the conference call,
simply put back your handset.
Invite two callers simultaneously
Alternatively, you can start a conference by inviting two
callers simultaneously.
Step 1
Add two entries into the Call List by clicking
icon of the
entries in Buddy List, Phonebook or Voicemail. You can
also type the phone number in the Dial box and press
Enter to add to the Call List.
Step 2
Click Call to start the conference call. Your phone will ring.
Pick up your handset and you will be connected to the
numbers immediately.
Note:
• During click-to-call, if you find that your phone does not
ring, you can cancel the call by clicking End Call. Please
check if your phone is already off-hook or has activated
call forwarding or hunting features.
4.3 End Call
To end a call completely, simply put back your handset.
Alternatively, you can click End Call to end one party of a
conference call:
• One party is talking and another is connecting: Stop
calling the connecting party
• Both parties are talking: End call with the second party
(or the second caller in the Call List)
P.17
5. Manage Voicemail
Prioritize Plus
Prioritize Plus Voicemail is easier to handle than
conventional voicemail. It quickly prioritizes voicemail
messages. You may listen to them in any order.
Note:
• Prioritize Plus Voicemail is not available to PABX users.
5.1 Voicemail Setting
Simply follow two steps to set up your voicemail.
Step 1
Select Profile Settings
from the
menu. Then Click Voicemail
- - Go to - -
Send voicemail to inbox – whenever your receive a
voicemail, an additional copy will be sent to your email
address. Then you can save into your local hard disk
permanently or even forward to others by email.
Automatically delete “read” after seven days – delete
“read” voicemails in your voicemail system after seven
days. This will not delete the copy sent to your email
inbox.
Change password – change your 4-digit PIN to access
your voicemail system by * 9 0 or remote access by
28883888 (Chinese) & 28883838 (English).
Voicemail Greeting Language – change the language of
your voicemail system.
Click Save to save your settings.
Step 2
Access your voicemail system to set up your personal
greeting:
• Dial * 9 0 using your office phone or 28883 888
(Chinese) & 2888 3838 (English) by any phone
• Enter your 4-digit PIN
• Press 9 to Change your mailbox settings
• Press 1 to Change your personal greeting
• Press 1 to Record your personal greeting
• Press 1 to Start Record and then # to Stop Record
• Press 1 to Save your greeting
P.18
User Manual
5. Manage Voicemail
Prioritize Plus
User Manual
Note:
On special occasions (e.g. you are on vacation), you can
record and use a temporary Special Greeting. Simply
follow these steps:
• Dial * 9 0 using your office phone or 2888 3888
(Chinese) & 2888 3838 (English) by any phone
• Enter your 4-digit PIN
• Press 9 to Change your mailbox settings
• Press 1 to Change your personal greeting
• Press 2 to Record and use special greeting
• Press 1 to Start Record and then # to Stop Record
• Press 1 to Save your greeting
After you are return to your office, simply cancel the
Special Greeting. Your original greeting will be in use
again:
• Dial * 9 0 using your office phone or 2888 3888
(Chinese) & 2888 3838 (English) by any phone
• Enter your 4-digit PIN
• Press 9 to Change your mailbox settings
• Press 2 to Delete your personal greeting
• Press 2 to Delete and cancel special greeting
5.2 Click to Listen to Voicemails
To view and click-to-listen to your voicemails, simply follow
three steps :
Step 1
Click on New Voicemail hyperlink to go to the Voicemail
page. You can see who leaves you voicemails, as well as
the time and the duration of the voicemails.
Step 2
Select the entries then click Listen to Voicemail. Or simply
click on the Listen hyperlink to listen to that voicemail only.
Step 3
Your phone will ring. Pick up your handset and you will
hear your selected messages.
P.19
5. Manage Voicemail
Prioritize Plus
To stop listening to the current message, simply click Stop
Listening. Furthermore, you can then select other messages
and play again.
5.2.1 Other Useful Functions in Voicemail
Other useful functions are available in Voicemail
Reply Call – Simply click on the hyper-linked name to
make a call to the caller
Send Fax or Company Email – Add entries into the Call
List by clicking
icon. Then click Send Fax or Compose
Email.
Add Contact – Select the entries and click Add Contact to
add contact to your Personal Phonebook.
5.3 Check voicemails in email inbox
If you have set up Send voicemail to inbox in Voicemail
Settings, whenever your receive a voicemail, an additional
copy will be sent to your email address. Then you can
save into your local hard disk permanently or even
forward to others by email.
P.20
User Manual
5. Manage Voicemail
Prioritize Plus
User Manual
5.4 Check voicemails by phone
You can also check your voicemail messages without
logging into User Web.
Call the Voicemail System by dialing * 9 0 by
your office phone; or you can call from any phone at
28883888 (for Chinese) & 28883838 (for English).
• Enter your 4-digit PIN
• You will hear You have X new messages and Y saved
messages
• Press 1 to To listen to new message
o Messages are played in chronological order. After
hearing a message,
– Press 1 to play the message again
– Press 2 to play the next message
– Press 3 to delete the message
– Press 9 to return to the Main Menu
• Or, Press 3 to Change your mailbox setting
o Press 1 to record your personal greeting
o Press 2 to delete your personal greeting
o Press 3 to change your password
o Press 4 to change your mailbox language
o Press 5 to change date/time stamp function
o Press 9 to return to main menu
5.5 Delete voicemails
You can housekeep and delete voicemails in your mailbox
by two ways.
• Select the entries and click Delete to delete the
voicemail.
• Call the Voicemail System by dialing * 9 0 by
your office phone or you can call from any phone at
2888 3888 (for Chinese) & 2888 3838 (for English).
Then listen and delete your voicemail one by one.
Note:
• Deleting voicemails in your Voicemail System will not
delete the copy sent to your email inbox.
P.21
6. Personal Fax
Prioritize Plus
Prioritize Plus Personal Fax feature allows users to receive
fax in the email inbox and send faxes through the User
Web.
Each user of Prioritize Plus is assigned a Personal Fax
number. Fax documents sent to your number will arrive in
your email inbox – even you are not logged into Prioritize
Plus.
6.1 Set up faxmail
Before you use your Personal Fax service, your Company
Administrator will assign you a Personal Fax number and
the associated Email Address. You can view your assigned
service in My Subscription of Profile Settings.
Note:
• You can use any email service to receive your Personal
Faxmail, such as Business NETVIGATOR mailbox
or your company email server. Simply check if your
email address is correct, i.e. you can receive and
access email to this email address.
6.2 Receive a fax
Faxes sent to your personal fax number are digitized in TIF
format and sent to your e-mail address as an attachment.
Open the attachment using any image viewer software to
view or print a fax.
Troubleshooting
Under some circumstances that you may fail to receive a
fax that was sent to your Personal Fax number.
Too many pages
If the number of pages of incoming fax to your Personal
Fax Number exceeds the limit (20 pages for Low & High
volume plan, 50 pages for Superior plan), the fax server
will stop this fax transmission. The send fax machine will
know that only 20 or 50 pages are successfully sent.
You will still receive an incoming faxmail attaching 20
or 50 received pages with a warning message The fax
exceeds the page limit per incoming fax - 20
pages.
P.22
User Manual
6. Personal Fax
Prioritize Plus
User Manual
Line Busy
As with a real fax machine, your Personal Fax number can
only receive one fax at a time. The calling fax machine
will receive the busy tone and need to retry later.
Note:
• Upgrade to Superior Plan! Personal Fax number with
Superior Plan can receive three simultaneous incoming
fax calls.
Email account cannot receive email
If the fax was sent successfully but you do not receive an
email, you may try to send an ordinary email to yourself to
check if your email account is working properly.
Incorrect personal fax number and email
address settings
You may check in your Profile Settings to verify that the
email address for receiving Personal Fax is correct. If not,
please approach your Company Administrator to change
the setting.
6.3 Send a fax
With Prioritize Plus you can easily send documents as
faxes anywhere anytime. Simple follow three steps:
Step 1
Add any fax recipient into the Call List by clicking
icon
of the entries in Buddy List, Phonebook or Voicemail. You
can also type the fax number in the Dial box and press
Enter to add to the Call List.
Click Send Fax to go to the Send Fax page.
Step 2
Add more fax numbers by typing in Fax Number input box
and press Enter. Or select additional entries
From Phonebook
P.23
6. Personal Fax
Prioritize Plus
Step 3
Click Browse to search your file directories for the
document to fax. Supported document formats include
Microsoft® Office documents, Acrobat PDF documents and
image files (e.g. “tif” and “jpg”).
Click Send to start sending.
You will see the page Your fax is sending in progress.
To check the status of the outgoing fax, simply click
Sent Fax History . You can view the sent fax history for
the recent three days.
Furthermore, after the fax has been transmitted, you should
receive an acknowledgement email from Prioritize Plus.
Your daily fax quota is updated.
Troubleshooting
Under some circumstances that your outgoing fax may be
not be completed successfully. You can view the reason
for failure in the acknowledgement email or in Sent Fax
History page. Common error is:
Destination is busy / no answer
If the destination fax line is busy / not answered, Prioritize
Plus will retry two more times to reach the destination.
Transmission incomplete
The destination fax machine is out of paper such that the
whole fax document is not completely sent.
P.24
User Manual
6. Personal Fax
Prioritize Plus
User Manual
6.4 Reject junk fax
If you are using Personal Fax with Superior Volume Plan,
you can enjoy this powerful feature to help you to filter
incoming junk faxes!
To set up junk fax rejection, simply follow four steps:
Step 1
Select Profile Settings
from the
menu. Then Click Personal Fax
- - Go to - -
Step 2
Input fax number in the text box then press Enter. Or click
From Phonebook to select from your phonebook.
Note:
• You can enter just the first few digits of the fax number
to reject fax from the whole number range. For
example, input 2777 then press Enter; fax call from any
fax number starting with 2777 (e.g. 27771234) will be
rejected.
• You can enter at most 10 entries into the list.
Step 3
Select Long-distance call and/or Anonymous call if
required.
Step 4
Click Save
P.25
7. View Messages in Single Interface
Prioritize Plus
7.1 Set up Business NETVIGATOR
webmail
You can seamlessly access your Business NETVIGATOR
webmail in the Prioritize Plus User Web. Simply follow two
steps to set up.
Step 1
Select Profile Settings
from the - - Go to - menu. Then Click Webmail Settings.
Step 2
Enter your Business NETVIGATOR email address and
password. Then click Save
7.2 Access webmail in User Web
Access your inbox – To access your Business NETVIGATOR
webmail inbox, simply select Webmail
from the
menu.
- - Go to - Compose new email – To compose a new email, simply
click Compose Email in the Call List. You can add multiple
entries to the Call List first by clicking
icon of the entries
in Buddy List, Phonebook or Voicemail.
Compose Email to a Phonebook Entry – To compose email
to a phonebook entry, simply click on the
icon.
P.26
User Manual
8. Customize Prioritize Plus
Prioritize Plus
User Manual
8.1 Change password
Each Prioritize Plus user has a unique user name and
password. You are recommended to change your
password periodically and at your first time login.
Simply follow these three steps to change your password:
Step 1
Select
menu.
Profile Settings
from the
- - Go to - -
Step 2
Click Change Password
Step 3
Enter your old password, then enter your new password
twice. Password should be at most 16 letters of
alphanumeric. Then click Save .
8.2 IDD Services
IDD Services is optionally subscribed for each Prioritize
Plus user. You can view your subscribed IDD services in
My Subscription of Profile Settings.
• Click-to-call IDD: Allow you to make IDD call in User
Web by simple click to call
• IDD Fax: Allow you to send fax to IDD numbers in User
Web
Note:
• To make call or save an overseas number into your
phonebook, simple add a ”+” prefix then follows with
the country code, area code and directory number e.g.
+86 206777 2222
P.27
8. Customize Prioritize Plus
Prioritize Plus
To change your Default IDD Service for Click-to-call – Go
to IDD Service in My Settings of Profile Settings. Then
select your default IDD service and click Save .
To change your Default IDD Service for Personal Fax – Go
to Personal Fax in Profile Settings. Then select your default
IDD service and click Save .
8.3 Display caller number
If your office phone line allows caller number presentation
on outgoing calls, you can decide whether you want to
present your caller number on outgoing click-to-call.
Simply follow two steps:
Step 1
Go to My Settings of Profile Settings. Then click Active
Phone & Caller ID.
Step 2
Uncheck this box if you wish to conceal your Caller ID on
outgoing click-to-call. Then click Save .
P.28
User Manual
9. Remote Access Using Active Phone
Prioritize Plus
User Manual
Prioritize Plus provides you superior convenience
during out-of-office. You can access this service by any
PC connecting to internet - you can handle your fax,
voicemail, email message and phonebook contacts
anywhere anytime. Furthermore, any phone could become
your office phone.
You can change your active phone to any phone number.
Then you can click-to-call, click-to-conference and click-tolisten-to-voicemail using this active phone.
9.1 Programme your active phone
To specify the numbers of your various Active Phone
options, follow the two steps:
Step 1
Click Active Phone hyperlink.
Step 2
Input the phone number for each Active Phone. Then click
Save . Examples of valid phone numbers are:
• Home : Full directory number e.g. 2888 1234
• Mobile : Full mobile number e.g. 9345 6789
• Others : Full directory number e.g. 2888 1234 for
local number; ”+” plus country code plus
directory number e.g. +86 207777 6666 for
overseas number
9.2 Change your active phone
You can change your active phone by two ways:
When you login
Simply select your preferred active phone when you login.
Furthermore, this setting will be saved for your next login if
the box √ Remember me is checked.
P.29
9. Remote Access Using Active Phone
Prioritize Plus
After you login
Click the Active Phone menu to change your active phone
anytime after you login.
P.30
User Manual
10. Appendix A:
Major Functions of Prioritize Plus User Web
Prioritize Plus
User Manual
Here are the quick reference of the major functions in Prioritize Plus User Web:
(1) Dial box:
Dial:
Enter a phone number (e.g. 27778888 for local number or +86206666888 for overseas number) in the box and press
Enter to add to the Call List. Then simply click Call to call the number or Send Fax to send fax to the number.
(2) Call List:
For you to make action easily. To add entries into the list, enter the number in Dial box and press Enter; OR click
the entries in Buddy List or Phonebook or Voicemail page.
Call the entries in the Call List
(3) Call:
Add the entries in the Call List to your buddy list
(4) Add Buddy:
Send email to the entries in the Call List
(5) Compose Email:
Send fax to the entries in the Call List
(6) Send Fax:
(7) Logout:
Logout Prioritize Plus
(8) Traditional Chinese/Simplified Chinese: Change Prioritize Plus to Traditional Chinese
(9) User:
(10) Fax:
icon of
User: Peter Chan
Fax: 23704010
or Simplified Chinese
version
Your name. Your Company Administrator can change your name in Administrator Portal
Your personal fax number
(11) Tel: Tel: 29180329 Your office number
(12) New Voicemail:
1 New Voicemail
Number of new voicemails in your mailbox. Simply click on the hyperlink to view your
voicemails
(13)
: Select to go to the major functions of Prioritize Plus e.g. Personal Fax, Phonebook, Profile Settings,
- - Go to - -
Voicemail and Webmail
(14) Active phone:
Active phone
Office
Select to change your active phone. To register your active phone number, simply
click on the hyperlink
(15) Talking with:
Talking with:
Online
(16) Online status:
(17) Add to Call List:
Shows the status of your click-to-call or click-to-conference
Select to change your online status as displayed to your buddies
Add the entry to the Call List for further action such as Call or Send Fax
You buddy’s online status
(18) Buddy Status:
(19) Hyper-linked name:
Admin Manager Simply
(20) Phone number selector:
[O] 29180394
click on any hyper-linked name to make a call!
Select one from the multiple phone numbers of your buddy. Then simply click
on your buddy’s name to make a call
(21) Find:
Enter a name or a phone number to search your phonebook
Find:
(22) Advanced Find:
(23) Compose Email:
(24) Properties:
Advance Find >>
Search your phonebook by one or many criteria
Compose email to this phonebook entry
View or edit the phonebook details of this entry
P.31
11. Appendix B: Number Formats
Prioritize Plus
User Manual
Prioritize Plus has many options that allow you to enter phone number. This appendix describes the valid phone number
formats in different contexts:
For Hong Kong Local Number
Overseas Phone Number
Full Directory Number
“+” plus country code and directory
number e.g. +862066667777
OR
IDD Prefix followed by country
and directory number e.g.
0060862066667777
Phonebook phone numbers
Full Directory Number
“+” plus country code and directory
number e.g. +862066667777
Active phone
• Home
• Mobile
Full Directory Number
Not applicable
Active phone
• Other
Full Directory Number
“+” plus country code and directory
number e.g. +862066667777
Send Fax
Full Fax Number
“+” plus country code and directory
number e.g. +862066667777
OR
IDD Prefix followed by country
and directory number e.g.
0060862066667777
Dial:
P.32