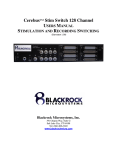
Download CerePlex Direct - Blackrock Microsystems
Transcript
CerePlex Direct Instruction for Use Blackrock Microsystems, Inc. 391 Chipeta Way, Suite G Salt Lake City, UT 84108 Tel: (866) 806-3692 www.blackrockmicro.com Blackrock CerePlex Direct - Instruction for Use Table of Contents 1 Contraindications, Warnings, Cautions, and Specifications.............................. 5 1.1 1.2 1.3 1.4 Contraindications ................................................................................................................................ 5 Warnings .............................................................................................................................................. 5 Cautions ............................................................................................................................................... 5 Specifications ...................................................................................................................................... 5 2 Introduction...................................................................................................................... 6 2.1 2.2 System Requirements ....................................................................................................................... 6 Packing Contents ............................................................................................................................... 7 3 Hardware ........................................................................................................................... 7 3.1 3.2 3.2.1 CerePlex Direct ................................................................................................................................... 7 CerePlex Direct Input ......................................................................................................................... 8 Digital Headstage ..................................................................................................................................8 3.2.2 Analog Input ...........................................................................................................................................8 3.2.3 Digital Input ............................................................................................................................................9 3.3.1 CerePlex Direct Output ...................................................................................................................... 9 NeuroMotive Camera Sync..................................................................................................................9 3.3.2 Host PC ..................................................................................................................................................9 3.3.3 Audio Output ........................................................................................................................................ 10 3.3.4 Patient Ground .................................................................................................................................... 10 3.3 3.4 CerePlex Direct Status Indicators .................................................................................................. 10 4 Setup ................................................................................................................................ 10 4.1 4.2 4.3 4.3.1 Hardware Setup ................................................................................................................................ 10 Software Setup ................................................................................................................................. 10 NeuroMotive Setup .......................................................................................................................... 11 Physically Connecting the PC’s ........................................................................................................ 11 4.3.2 Assigning the NeuroMotive IP Address ........................................................................................... 11 4.3.3 Assigning the CerePlex Direct IP Address ...................................................................................... 11 4.3.4 Configuring the CerePlex Direct Software to Talk to the NeuroMotive Software ...................... 12 5 Software .......................................................................................................................... 12 5.1 5.2 CerePlex Direct Suite ...................................................................................................................... 12 Central Suite ..................................................................................................................................... 12 6 How To ............................................................................................................................ 42 7 Hardware Specification ............................................................................................... 49 8 Troubleshooting ........................................................................................................... 50 8.1 8.2 8.3 8.4 8.5 8.6 LB-0462 Unable to Open Instrument Network ............................................................................................. 50 Data Recording Terminated ............................................................................................................ 50 Audio Output has distorted noise ................................................................................................... 51 nPlayServer has Stopped Working ................................................................................................ 51 Digital Headstage Data Appears Noisy ......................................................................................... 51 USB LED ........................................................................................................................................... 51 3.00 Page 2 of 53 Blackrock CerePlex Direct - Instruction for Use 8.7 8.8 8.9 9 Digital Headstage LED .................................................................................................................... 52 Increased Noisefloor on Digital Headstge Signal ........................................................................ 52 Contact Customer support for help in resolving any issues ....................................................... 52 Warranty.......................................................................................................................... 53 9.1 LB-0462 Return Merchandise Authorization (RMA) .................................................................................... 53 3.00 Page 3 of 53 Blackrock CerePlex Direct - Instruction for Use Table of Figures Figure 2-2-1: Blackrock CerePlex Direct with CerePlex M Set-up ......................................................................6 Figure 3-1 Front Panel of the CerePlex Direct .......................................................................................................7 Figure 3-2 Back Panel of the CerePlex Direct ........................................................................................................8 Figure 3-3 HDMI Connector Pin-Out ........................................................................................................................8 Figure 3-4 Digital Input Pin-Out ................................................................................................................................ 9 Figure 3-5 NeuroMotive Camera Sync Connector .................................................................................................9 Figure 4-1 Installing Device Drivers ....................................................................................................................... 11 Figure 4-2 Device Driver Installed Successfully ................................................................................................... 11 Figure 5-1 - Central Main Application .................................................................................................................... 14 Figure 5-2 - Thresholding Window ......................................................................................................................... 15 Figure 5-3 - Central Options .................................................................................................................................... 16 Figure 5-4 - Hardware Configuration ..................................................................................................................... 17 Figure 5-5 - Front-End Input Properties ................................................................................................................. 18 Figure 5-6 - Analog Input Properties ...................................................................................................................... 19 Figure 5-7 - Analog Output Properties ................................................................................................................... 19 Figure 5-8 - Digital Input Properties ....................................................................................................................... 20 Figure 5-9 - Digital Output Properties .................................................................................................................... 21 Figure 5-10 - Serial I/O Properties ......................................................................................................................... 22 Figure 5-11 - Audio Properties ................................................................................................................................ 22 Figure 5-12 - Global Settings .................................................................................................................................. 23 Figure 5-13 - Filter Properties ................................................................................................................................. 24 Figure 5-14 - Auto Thresholding Properties .......................................................................................................... 24 Figure 5-15 – Histogram Peak Count Spike-sorting Properties ......................................................................... 25 Figure 5-16 – Manual PCA Spike-sorting Properties........................................................................................... 26 Figure 5-17 - Adaptive Filtering .............................................................................................................................. 27 Figure 5-18 - N-Trode Properties ........................................................................................................................... 27 Figure 5-19 - Spike Panel ........................................................................................................................................ 28 Figure 5-20 – Raster Plot ......................................................................................................................................... 29 Figure 5-21 - Single Neural Channel ..................................................................................................................... 30 Figure 5-22 - File Storage – TOC Interface .......................................................................................................... 31 Figure 5-23 - File Storage - 2.x Interface .............................................................................................................. 32 Figure 5-24 - File Storage Options ......................................................................................................................... 33 Figure 5-25 - Digital Oscilloscope View ................................................................................................................. 34 Figure 5-26 - Custom Sliders .................................................................................................................................. 35 Figure 5-27 - Digital Filter Editor ............................................................................................................................. 36 Figure 5-28 - Activity Monitor .................................................................................................................................. 37 Figure 5-29 - Signal to Noise Ratio ........................................................................................................................ 38 Figure 5-30 - Neural Modulation ............................................................................................................................. 38 Figure 5-31 - Auto Impedance ................................................................................................................................ 39 Figure 5-32 - Crosstalk ............................................................................................................................................. 40 Figure 5-33 - N-Trode Utility .................................................................................................................................... 41 Figure 6-1 - Click on icon to display the units window......................................................................................... 44 Figure 6-2 - Sorted Spikes ....................................................................................................................................... 44 Figure 6-3 - PCA Space ........................................................................................................................................... 45 Figure 6-4 - Sample CMP file .................................................................................................................................. 48 Figure 6-5 - Sample Spike Panel ............................................................................................................................ 48 Figure 8-1 Unable to Open Instrument Network Error......................................................................................... 50 Figure 8-2 Data Recording Terminated ................................................................................................................. 50 Figure 8-3 nPlay Server Has Stopped Working ................................................................................................... 51 LB-0462 3.00 Page 4 of 53 Blackrock CerePlex Direct - Instruction for Use 1 Contraindications, Warnings, Cautions, and Specifications 1.1 Contraindications 1.2 Warnings 1.3 The CerePlex Direct is part of a recording system and should not be used in applications involving stimulation. Do not use with devices not approved by Blackrock Microsystems. 1.4 Do not touch any exposed electrical conductors, or use damaged HDMI cables when using the CerePlex Direct. Keep cables out of traffic paths. Injury to user or patient can occur. The user/patient/subject should not attempt to open the CerePlex Direct. Use caution when operating the CerePlex Direct, especially when connecting and disconnecting cables to minimize risk of CerePlex Direct falling and/or injury. Do not rest objects on or against the CerePlex Direct. Avoid strong static discharges from sources like television or computer monitors; they may damage the electrical components of the system. Keep the CerePlex Direct away from liquids. Contact with water, shower spray, or wet surfaces can lead to the CerePlex Direct malfunctioning and/or electrical shock. Connection of external instruments to the CerePlex Direct may compromise electrical safety. Always use antistatic or electrostatic discharge (ESD) safe gloves when connecting the CerePlex Direct. Use only Blackrock Microsystems supplied components (CerePlex Direct, CerePlex Headstages, Blackrock Microsystems Cables and Adaptors). Substitution of components not supplied by Blackrock Microsystems may affect system performance and patient / subject safety. Do not leave the patient / subject connected to the CerePlex Direct when system is not in use. Plug in all connections and wires to the patient / subject and the system prior to powering on the CerePlex Direct. Power off the system prior to removing or disconnecting any cables from the patient / subject and the system. Regularly inspect cables for compromised insulation or bad connections. This can help prevent electrical shock as well as data corruption. Cautions Read this entire manual prior to using the device. This product is for non-human use only. This model is not for use with human subjects. Specifications Model Name Blackrock CerePlex Direct Power Requirements 110 (at 60 Hz) or 220 (at 50 Hz) VAC, 220 mA / 118mA maximum load Serviceable Fuses .25” x 1.25”, 250V, 2 A, Slow Blow Sampling Frequency 30 KHz data acquisition, 50MHz data transfer Mode of Operation Continuous Input Protocol Low-voltage differential signaling Water Ingress Protection Ordinary Equipment, not fluid resistant, IP20 Operating Environment 10˚C to 40˚C, 5 to 95% R.H. (non-condensing) Storage Environment -20˚C to 50˚C, 5 to 100% R.H. (non-condensing) LB-0462 3.00 Page 5 of 53 Blackrock CerePlex Direct - Instruction for Use 2 Introduction The Blackrock CerePlex Direct is a data acquisition system. It can capture up to three 32 channel (or any combination totaling 96 channels) Blackrock 16-bit CerePlex Headstages for high fidelity transmission and recording of bio-potential signals. Data is sampled at 30 Ks/S and sent to a Host PC via Hi-Speed USB at 50MHz. The data is in digital format from the Headstages up; the overall noise of the system is reduced. Figure 2-1 below shows an application overview of how the CerePlex Direct fits into a complete neural recording system. Figure 2-2-1: Blackrock CerePlex Direct with CerePlex M Set-up 2.1 System Requirements The specifications listed below are the minimum required by the software to run. Blackrock supplies an optional Host PC that is configured and tested by our engineers before it ships with your CerePlex Direct system. Please contact [email protected] for more information. Microsoft Windows XP Professional (32-bit) or Microsoft Windows 7 Professional (32-bit or 64bit) AMD or Intel 2.2 GHz Quad Core CPU 4 GB of RAM 1 TB 3 Gbit/s SATA II HDD LB-0462 3.00 Page 6 of 53 Blackrock CerePlex Direct - Instruction for Use 2.2 Packing Contents CerePlex Direct Rubber Feet Rack Mounting Hardware Power Cable USB Cable Cat 5e Ethernet Cable CerePlex Direct User’s Manual and Software Disk Optional CerePlex Headstages Optional Flexible HDMI Cable Optional NeuroMotive Camera Sync Cable Optional NeuroMotive Camera 3 Hardware 3.1 CerePlex Direct The CerePlex Direct is a non-real-time data acquisition system. It serves as the main processing unit that collects data from up to 96 digital data channels, 3 analog inputs, and 16 digital inputs. This information is sampled at 30 Ks/S and transmitted over Hi-Speed USB to a Host PC with a bandwidth of 50 Mbps. This data is then read from file and broadcast over UDP to the Central Software Suite. The CerePlex Direct consists of several islands of isolation, which lead to several different ground potentials in the system. The digital input, analog input, and digital headstage each have their own grounds. The case is tied to earth ground. Patient ground is found on the Digital Headstage connections as well as the touch proof ground connector (G) on the front panel. It is recommended to not bridge these isolated ground planes as it could introduce noise into the signal and violate the safety isolation of the patient circuitry. Figure 3-1 Front Panel of the CerePlex Direct LB-0462 3.00 Page 7 of 53 Blackrock CerePlex Direct - Instruction for Use Figure 3-2 Back Panel of the CerePlex Direct 3.2 3.2.1 CerePlex Direct Input Digital Headstage The CerePlex Direct has several possible configurations which arise from its ability to transmit 96 channels of data. For instance, the CerePlex Direct can be used with one 96 channel Headstage, three 32-channel Headstages or a 32 channel and a 64-channel Headstage. The Three Banks of inputs are labeled A,B,C; where A is the highest priority and C the lowest. This means that if two 64 channel CerePlex Headstages are plugged into Bank B and Bank C, then only the first 32 Channels of Bank C will be valid. The CerePlex Direct will always process the first 96 Channels in this way, unless there are less than 96 Channels, then it will send as many channels as it has and the other Channels will be filled with 0 data. The Connectors for the Banks are the Female adapter for a male A-D HDMI cable. HDMI/D Pin # Figure 3-3 HDMI Connector Pin-Out 3.2.2 LB-0462 3.00 Description 10 12 Clock+ Clock- 17 V- 19 Ground 18 V+ 7 Data+ 9 Data- Analog Input Auxiliary analog signals can be recorded through the 3 analog input BNC ports. The Analog range is ±5.0 V and should come from a source impedance of less than 100 Ohm. Page 8 of 53 Blackrock CerePlex Direct - Instruction for Use 3.2.3 Digital Input Digital events can be recorded through the 16-bit DB37 input port. The Pin diagram is shown below. Digital Input Pin# Description 1,18,19 2 NC Dig In 0 3 Dig In 1 … … 16 Dig In 14 17 Dig In 15 20-37 GND Figure 3-4 Digital Input Pin-Out 3.3 3.3.1 CerePlex Direct Output NeuroMotive Camera Sync This allows synchronization between the CerePlex Direct data acquisition and taking pictures with a NeuroMotive Camera System. The Connector is a 3 pin mini din connector. The NeuroMotive Camera provides +3.3V on Pin 1 and Gnd on Pin 2, while the CerePlex Direct outputs a trigger on Pin 3. The NeuroMotive Camera Sync Cable can be purchased and is BRMS PN 7690. The PinOut of the mini din connector is shown below. Mini Din Pin # Description 1 2 +3.3V Gnd 3 Trigger Figure 3-5 NeuroMotive Camera Sync Connector 3.3.2 LB-0462 3.00 Host PC This is a Hi-Speed USB 2.0 B Connector that connects the CerePlex Direct to the Host PC. Page 9 of 53 Blackrock CerePlex Direct - Instruction for Use 3.3.3 Audio Output The System sends a ±1 V line-level audio signal of the selected data channel to an audio port on the Host PC that is selected in the Central Software. 3.3.4 Patient Ground This Connector is located on the Front Panel and is labeled with “G”. This is the patient ground connector if needed for a reference ground. 3.4 CerePlex Direct Status Indicators There are five LED’s on the CerePlex Direct which can give the user information about the device status. Power LED – This LED is off when the System is Powered down and Blue when power is applied to the system and the pushbutton is pushed in. USB Status LED – This LED has 3 states; Off, Blue, and Red. When off it means data is not being sent from the CerePlex Direct to the Host PC. This could be if there is no USB Cable Plugged in, or if the CerePlex Direct Software is not running. It is Blue when valid data is being sent. If invalid data is sent it will turn Red for a half second for every bad data packet. Upon first starting the software this LED should go Red for a brief second then Blue. Digital Headstage Status LEDs – These LEDs have 3 states as well; Off, Blue and Red. When off it means that either no data is being sent from that Bank, or that the Data being collected is not being used, in the case that a higher priority Bank is already sending 96 Channels. It will be Blue if the data being sent is valid. If invalid data is sent then for every packet received it will turn Red for a half second. Upon first plugging in a CerePlex Headstage the LED should go Red then Blue. 4 Setup 4.1 Hardware Setup The CerePlex Direct is designed as a 1U rack mountable enclosure to be placed in standard rack configurations, or as a desktop unit. Below are the series of steps required to setup the CerePlex Direct in either of the two configurations. If rack mounting your CerePlex Direct, Remove the mounting hardware from the antistatic bag and screw the ears into both sides of the CerePlex Direct with the supplied Hardware. Place the CerePlex Direct in the desired rack location and use the supplied hardware to secure it to the rack. If leaving on a desktop, Separate the four rubber feet and remove the adhesive backing. Place on the underside of the CerePlex Direct in the four Corners. Plug the Power Cord into the Power AC Inlet on the back face of the CerePlex Direct; ensure that the fuse rating on the outlet is set appropriately for your AC voltage. (Red Window should show 115V for 110VAC and 230 for 220VAC) Plug the other end of the power cord into your AC Outlet. Plug in the USB Cable to the Host PC slot on the back face plate. Do not plug the other end into your computer until after installing the software. Ensure that the Power is off before connecting any CerePlex Headstages. Plug the HDMI Cable into the Headstage prior to connecting it to the CerePlex Direct. **After recording, turn off power before disconnecting any cables. 4.2 Software Setup The software CD has two installation packages on it. The first is the CerePlex Direct Software Suite, and the second is the Matlab Compiler Runtime. The CerePlex Direct Software installation package will install LB-0462 3.00 Page 10 of 53 Blackrock CerePlex Direct - Instruction for Use the software suite and USB drivers for communicating with the CerePlex Direct. The Matlab Compiler Runtime is required for creating custom digital filters. Follow the onscreen instructions from the installation wizard for installing the software suite and MCR. After installing the software you can plug in the USB cable to your PC. Prior to running the CerePlex Direct Software Suite let windows install the drivers. You should see the following two messages to notify you of this process. Any time you change the USB port that the CerePlex Direct is plugged into, Windows will reinstall these drivers for that port. Figure 4-1 Installing Device Drivers Figure 4-2 Device Driver Installed Successfully 4.3 NeuroMotive Setup The CerePlex Direct is capable of syncing data with a NeuroMotive Tracking system. This is possible with either hardware sync, or software sync. Under both configurations, the two PC’s (NeuroMotive PC and CerePlex Direct PC) need to be configured to communicate with each other. This is accomplished by creating a network between the two computers by manually assigning IP addresses to them and connecting the two computers directly together with an Ethernet cable. Below are the steps for connecting the CerePlex Direct PC to the NeuroMotive PC. 4.3.1 Physically Connecting the PC’s Connect both PC’s together by plugging in the supplied Ethernet cable or standard cat 5e Ethernet cable to the network port on both computers 4.3.2 Assigning the NeuroMotive IP Address On the PC that is connected to the IR or Color Camera (NeuroMotive PC) open the network and sharing center Under Connections click on the local area connection. On the window that pops up click on the Properties button. Double click on the Internet Protocol Version 4 (TCP/IPv4) Properties. Click the radio button “Use the following IP Address” followed by the advanced button at the bottom. On the IP Settings tab click the Add button. For IP Address enter 192.168.137.2, for Subnet Mask enter 255.255.255.0 and click Add. Close out of the settings. 4.3.3 Assigning the CerePlex Direct IP Address On the PC that is connected to the CerePlex Direct, follow the steps for assigning the NeuroMotive IP Address, but enter the following two IP Addresses instead. LB-0462 3.00 Page 11 of 53 Blackrock CerePlex Direct - Instruction for Use For the first IP Address enter 192.168.137.1 and for the Subnet Mask enter 255.255.255.0 and click Add. After adding the first IP Address click Add again to assign a second IP Address. For the second IP Address enter 192.168.137.128 and for the Subnet Mask 255.255.255.0 and click Add. Close out of the settings. 4.3.4 Configuring the CerePlex Direct Software to Talk to the NeuroMotive Software Right click on the shortcut used to launch the CerePlex Direct Software. Select Properties. On the Shortcut tab in the text box located next to the Target: label, add ‘-n’ at the very end of the string following the closing quotation mark. 5 Software 5.1 CerePlex Direct Suite The CerePlex Direct Software Suite consists of two applications that run simultaneous. The first is nPlayServer, this application is communicating with the CerePlex Direct via the Cheetah Host Adapter board. It receives the data from the CerePlex Direct and then broadcasts it to the second application which is the main user interface via nPlay File Control. The user interface is the central software, except nPlay File Control is locked down so that none of the settings can be changed. This lock down of features is required for nPlayServer to broadcast the data from the Direct to the Central Software. Since nPlay File Control is not accessible from the CerePlex Direct Software, the Central Software Suite must also be installed to play back files. 5.2 Central Suite Sorting Algorithms The program can sort detected action potentials using three sorting algorithms. o Hoops: This is a manual method. A time-amplitude algorithm, which involves manually placing “hoops” to specify where the detected spike waveform must go through to be classified as a defined unit. o Manual PCA: This is a manual method. The system calculates the first three principle components on a representative sample group then projects each new waveform into the same 3D PCA space. The user draws an ellipsoid around each cluster to sort the group. o Histogram Peak Count: This is an automatic method. The sorting algorithm is described in o Spike Sorting on page 25. Sampling Rates The CerePlex Direct samples signals at rates of 30 kS/s. o 30 kS/s: Records at 30k samples/second. Channels recorded at this frequency will be saved in the NS5 file format. Digital Filters The sampled signals are analog filtered by the FEA at cut-off frequencies of 0.3 Hz and 7.5 kHz. Additionally, the Central Software has standard digital filters that can be applied to signals from the CerePlex Direct and the auxiliary analog inputs. These filters are described below: o None: No digital filter is applied. o HP 750Hz (Spike Narrow): High-pass filter at 750 Hz. LB-0462 3.00 Page 12 of 53 Blackrock CerePlex Direct - Instruction for Use o HP 250Hz (Spike Medium): High-pass filter at 250 Hz. o HP 100Hz (Spike Wide): High-pass filter at 100 Hz. o LP 50Hz (LFP Narrow): Low-pass filter at 50 Hz. o LP 125Hz (LFP Medium): Low-pass filter at 125 Hz. o LP 250Hz (LFP Wide): Low-pass filter at 250 Hz. o LP 500Hz (LFP X-Wide): Low-pass filter at 500 Hz. o LP 150Hz (EEG/ECG/EOG/ERG): Low-pass filter at 150 Hz. o BP 10Hz-250Hz (EMG/Motor Unit): Band-pass filter at 10 Hz and 250 Hz. o LP 2.5kHz (Activity): Low-pass filter at 2.5 kHz. o LP 2kHz (2kHz Low Pass): Low-pass filter at 2 kHz. o BP 250Hz-5kHz (Spike Contents): Band-pass filter at 250 Hz and 5 kHz. File Specification File specifications define what is saved in the data files (NEV and NSx). Newer file specifications contain more information than older file specifications. For example, file specification version 2.3 is capable of storing comments in the data file whereas file specification version 2.1 is not. Also, file specification version 2.1 does not save channel information, such as filters used, in the NSx file. We always recommend using the latest file specification version to record your file. Note that this selection is only available when using 2.x File App interface (Page File Storage 31). o File Specification 2.1: Both NEV and NSx files are saved using their respective file format versions 2.1. o File Specification 2.2: Both NEV and NSx files are saved using their respective file format versions 2.2. o File Specification 2.3: NEV file is saved using file format version 2.3; NSx is saved using file format version 2.3. o TOC File App: TOC file app automatically uses NEV 2.3 and NSx 2.3 This combination cannot be changed. LB-0462 3.00 Page 13 of 53 Blackrock CerePlex Direct - Instruction for Use Central Central is the main app launcher. This app has shortcuts to all the other apps in the suite. Clicking each button will open the corresponding app. Clicking Reset will set the timestamps on the Central Software back to zero. Using reset mid-experiment will reset all digital event timestamps and is not recommended. Figure 5-1 - Central Main Application The File menu contains functions to load & save various configuration files as well as the option to close applications. o Load System Settings: Load previously saved channel settings. (default.ccf is preconfigured for 96 channels sampled at 30Ks/S and AIN0-3) o Load Sorting Rules: Load previously saved system-calculated sorting rules. o Load Digital Filters: Load custom digital filter previously created and saved using the Digital Filter Editor. o Load PCA Basis: Load previously saved system-calculated PCA basis vectors. o Save System Settings: Saves the channel settings made in Hardware Configuration. o Save Sorting Rules: Saves spike-sorting details. o Save PCA Basis: Saves PCA basis vectors. o Close Applications: Closes Central and all associated applications. o Hardware Standby and Close: Closes Central and all associated applications. o Hardware Shutdown and Close: Closes Central, all its associated applications. LB-0462 3.00 Page 14 of 53 Blackrock CerePlex Direct - Instruction for Use The Tools menu contains functions regarding thresholding, spike-sorting and general application settings. o Thresholding: Set the manual threshold level for all channels by an RMS multiplier or by a fixed voltage value. o Options: See below. o Lock Unit Statistics: The statistics used for the automatic spike-sorting algorithm are adaptive over time. Selecting this disables the adaptive part of the algorithm. o Rebuild Spike-sorting Model: This option restarts the automatic spike-sorting function. o Continuous Spike Sorting: Selecting this item will continuously adjust the spike-sorting statistics including the splitting and merging of units. This is not recommended for use while recording. Figure 5-2 - Thresholding Window LB-0462 3.00 Page 15 of 53 Blackrock CerePlex Direct - Instruction for Use Options: Set to various general options for the Central app. o Figure 5-3 - Central Options Allows multiple instances of: This section lets you open more than one of the window types that are checked. o Do Not Log Sort Changes: Will not automatically log sort changes. o Log Sorting Changes on ‘Record’: Will automatically log the spike-sorting model, the signal to noise ratio summary, and the crosstalk summary only if gets rebuilt during a recording session. o Log Sorting Changes “Always”: Will log the spike-sorting model, the signal to noise ratio summary, and the crosstalk summary any time it gets rebuilt. o Log PCA coordinates on “Record”: Will log the spike-sorting model only when recording is started. o File Storage App Interface: Choose between the 2.x interface and the TOC interface for the File app. The TOC is usually used in a clinical setting where patient information is entered. The TOC version takes care of automatically naming the data as well. The 2.x is usually preferred in a research setting, where the naming is taken care of by the researcher. o Single App Interface: Choose between being able to see the configuration controls in the Single Neural Channel window or in a separate window. Configuration on Window will allow the researcher to make changes to the channel configuration in Single Neural Channel app without having to open a separate window. Configuration in Properties Dialog is the default behavior. o Enable Autoload: If this option is checked, upon opening Central a pre-determined CCF file will be opened and the settings will be loaded. If the field is left blank, Central will allow the operator to select a CCF file. o Prompt before load: Will prompt the user before loading the CCF file. The Windows menu: Has information on the system and the software as well as shortcuts to the various apps. o About Central: This option displays the version of the software. These version numbers may be needed if you contact technical support. LB-0462 3.00 Page 16 of 53 Blackrock CerePlex Direct - Instruction for Use o System Summary: Opens the System Summary window. Hardware Configuration To access the hardware configuration app click on Hardware Configuration on the Central app. This app is for setting up channels and various other parameters. It also allows the user to define the sampling frequency, filtering parameters, and many other features for each individual channel. Further, the user can set other global and spikesorting variables too. Figure 5-4 - Hardware Configuration By default, only one instance of Hardware Configuration can be opened. To open multiple instances enable this feature in Central under Tools Options. The CerePlex Direct Channels consist of Front-end Amplifier Inputs (digital Headstages), Analog Inputs, Digital Inputs, and Audio outputs. The Hardware Configuration window contains a toolbar with buttons in the upper left corner to change the view of the window. The buttons (from left to right) are Icon View, List View, Detail View, and Full Row Details. To configure any of these channels, select the channel type on the left side of the window. Each individual channel is displayed on the right side of the window for the channel type that was selected. You can configure the channels individually, by groups of channels, or select all channels. To configure an individual channel, double click the channel to display the channel properties. To configure a group of channels, hold down the <Shift> or <Ctrl> and click on channels. Once the group of channels to configure has been selected, click the Channel Properties icon located at the top right side of the toolbar. LB-0462 3.00 Page 17 of 53 Blackrock CerePlex Direct - Instruction for Use Front-end Amplifier (FEA) Inputs This window will allow the user to set different properties of a specific channel or a group of selected FEA channels. Figure 5-5 - Front-End Input Properties Label: A user-defined name for the specific channel. When configuring a group of channels you can label them on a global basis by clicking the Edit button. Digital and Analog Range: Fixed values for informational purposes. External Gain: Set the gain to match the Headstage gain value. Raw Data: If selected, an NS6 file containing full bandwidth data without any digital filters sampled at 30 kHz is created. Amplitude Rejection: Rejects any waveform that falls outside user-defined amplitude. Spike Extraction: When enabled (default), the system will display the spike-triggered events. Use the drop down menu to pick a digital filter as described in Digital Filters on page 12. Threshold Method: This determines the method used to extract spikes. If Level is chosen, the waveforms crossing the Threshold Value will be extracted. If Auto is chosen, the spike extraction is automated as described in Auto Thresholding on page 24. Sorting Algorithm: Sets the sorting algorithm for a channel as described in Sorting Algorithms on page 12. Continuous Acquisition: By enabling this option, the software records continuous waveforms. Use the drop down menu to pick a sampling rate, as described in Sampling Rates on page 12, and a filter, as described in Digital Filters on page 12. Line Noise Cancellation: This enables the line noise cancellation (LNC) filter. With the LNC filter enabled, you can set the time constant in the drop down menu to adapt to the 50 or 60 Hz line noise. A time constant of 10s is the default and recommended setting. However, you may set the time constant from 1s to 60s, instantaneous or to hold. Reference Electrode: In addition to the hardware reference, this selection allows you to specify a software reference electrode. The software reference can be applied to either the raw data stream which affects both LFP and spike data, or it can be applied to only the spike data stream. LB-0462 3.00 Page 18 of 53 Blackrock CerePlex Direct - Instruction for Use Analog Input This window will allow the user to set different properties of a specific or a group of selected analog input channels. All the options are the same as those of the FEA inputs except that the coupling can also be determined for each analog input channel. Figure 5-6 - Analog Input Properties AC Coupling: The coupling for each analog input channel is user selectable between AC and DC coupled. By default, channels 1-8 are AC coupled and channels 9-16 are DC coupled. Analog Output This window will allow the user to set the properties of the analog outputs transmitted to other equipment connected to the Host PC. Figure 5-7 - Analog Output Properties LB-0462 3.00 Page 19 of 53 Blackrock CerePlex Direct - Instruction for Use Label: A user-defined name for the specific channel. Input and Output Range: Fixed values for informational purposes. Track Most Recently Selected: When this box is checked the channel source will change based on whichever channel is selected from Spike Panel, Single Neural Channel, or Raster Plot. Function: Choose whether to output LFP or Spike signal streams through the analog output. Additionally, a custom waveform can be generated and sent out through analog output ports. Source Channel: Select the channel to monitor through the analog output. Digital In This window will allow the user to set the properties of the digital inputs received from other equipment connected to the CerePlex Direct. Figure 5-8 - Digital Input Properties Label: A user-defined name for the specific channel. Function: The functions may include: 16-bit on word strobe: reads 16-bits on strobe. 16-bit on bit changes: reads 16-bits when any bits change, falling or rising. 16-bit on rising edge: read 16-bits when any bits get set high. 16-bit on falling edge: read 16-bits when any bits get set low. 8-bit strobe / 8 bit changes: reads 8-bits on strobe and the other 8-bits on any bit changes, rising or falling. 8-bit strobe / 8 bit rising edge: reads 8-bits on strobe and the other 8-bits when any bits get set high. 8-bit strobe / 8 bit falling edge: reads 8-bits on strobe and the other 8-bits when any bit gets set low. NOTE: Strobe input is disabled for the CerePlex Direct system. All digital input changes cause a digital event to be recorded. LB-0462 3.00 Page 20 of 53 Blackrock CerePlex Direct - Instruction for Use Digital Out This window will allow the user to set the properties of the digital outputs transmitted to other equipment connected to the Host PC. Figure 5-9 - Digital Output Properties Label: A user-defined name for the specific channel. Properties: The user has the option to Monitor Electrodes, which will send a TTL pulse from that specific Digital Output every time a spike is detected on a specific channel or unit of a channel. As a second option, the user can select Timed to output a user specified frequency range with a specified duty cycle and offset. The low and high samplings show the number of clock cycles the square wave is set to high or low. The offset unit is clock cycles and can offset the trigger of one channel from the other output channels. Each clock cycle is 1/30,000 seconds long. Track Most Recently Selected: When this box is checked the channel source will change based on whichever channel is selected from Spike Panel, Single Neural Channel, or Raster Plot. Source: Select a source channel to monitor. Monitor Units: The user can select which units to monitor from the source channel through the digital output ports. The user can monitor unclassified units and/or classified units defined online. LB-0462 3.00 Page 21 of 53 Blackrock CerePlex Direct - Instruction for Use Serial I/O This window displays the serial communication parameters, and allows the user to enable serial communication with the Host PC. These values cannot be changed. Figure 5-10 - Serial I/O Properties Audio This window allows the user to set the properties of the audio outputs transmitted to other equipment connected to the Host PC. Figure 5-11 - Audio Properties Label: A user-defined name for the specific channel. Track Most Recently Selected: When this box is checked the channel source will change based on whichever channel is selected from Spike Panel, Single Neural Channel, or Raster Plot. Function: Choose whether to output LFP or Spike signal streams through the audio out channel. Additionally, a custom waveform can be generated and sent out through audio output ports. Source: Select the channel to monitor through the analog output. LB-0462 3.00 Page 22 of 53 Blackrock CerePlex Direct - Instruction for Use Global Settings Figure 5-12 - Global Settings Spike Properties: Define variables related to the size of a spike-triggered spike. Spike Width: Allows a user definable number of samples to be collected in the spike-triggered processing window. The default value is 48 samples. This would collect spike-triggered waveforms for 1.6-ms. the spike width can be set as small as 30 samples (1.0 ms) and as large as 128 samples (4.3 ms). The longer this value the larger the size of a spike-triggered waveform. Prethreshold Samples: The number of samples to capture before the threshold is crossed. The default value is 10, meaning that 10 samples, before the point of crossing threshold, are captured. Line Noise Frequency: The line frequency of the system, either 50 Hz or 60 Hz. This value changes in different countries. For example, line noise frequency in the Unites States is 60 Hz, but it is 50 Hz in the Europe. LNC Reference Channel: The reference channel used to extract the line noise. The extracted line noise for each channel can be viewed in Single Neural Channel when the Raw/LNC button is checked. LB-0462 3.00 Page 23 of 53 Blackrock CerePlex Direct - Instruction for Use Filters This window provides specifications of the various filters set in the CerePlex Direct system. The filters can be set for each channel individually. For graphical details and specifications, click the digital filter dropdown box and select a filter. Figure 5-13 - Filter Properties Auto Thresholding This window allows the user to specify the auto thresholding properties for spike detection. Figure 5-14 - Auto Thresholding Properties LB-0462 3.00 Page 24 of 53 Blackrock CerePlex Direct - Instruction for Use Threshold Multiplier: The signal is filtered between 1-5 kHz (2nd-order Butterworth) for spike detection and the noise in that band is estimated. The signal value has to cross the average noise times the Threshold Multiplier. This value should typically be between 2.0 and 3.0. X,Y,Z dimensions of the noise ellipsoid: Radius of the Noise Ellipsoid in the feature space along each axis. This parameter can also be set graphically by dragging the outside of the ellipsoid in the feature space view of the analog properties window. X,Y,Z center location of the noise ellipsoid: The center point of the Noise Ellipsoid along the X, Y, and Z axis. This parameter can also be set graphically by dragging the center of the ellipsoid in the feature space view of the analog properties window. X,Y,Z axis rotation of the noise ellipsoid: The rotation angle of the Noise Ellipsoid along each axis. This parameter can also be set graphically by dragging the rotation handles of the ellipsoid in the feature space view of the analog properties window. Reset to Default: Pressing this button will reset the X,Y,Z values above to default for all channels. Apply to All: Pressing this button will apply the X,Y,Z values above to all channels. Spike Sorting This window allows the user to specify the rules and settings used with the automatic spike sorting. The default settings are recommended, but can be changed to user preference. Figure 5-15 – Histogram Peak Count Spike-sorting Properties LB-0462 3.00 Page 25 of 53 Blackrock CerePlex Direct - Instruction for Use Figure 5-16 – Manual PCA Spike-sorting Properties Method: Choose between the automatic Histogram Peak Count and Manual PCA methods. Method Histogram Peak Count: Collected waveforms are processed and waveform sample points are projected into a feature space containing a high-frequency component and a low-frequency component of the waveforms on its axis. A histogram is constructed. Clusters are then estimated by determining peaks and valleys and are sorted into units. Valley Percentage: The first peak from the origin is detected and marked. To find a valley the valley height needs to be less than the first peak’s height x the valley percentage value (valley height < first peak height x valley percentage). Close Peak Percentage: For a second peak to be found, the second peak height needs to be greater than the height of the valley + the height of the 3 points around the peak * the close peak percentage (second peak height > valley height + (3-point mean around valley * close peak percentage)). Freeze Time (minutes): Time Specified in minutes that the spike-sorting process of determining the number of units per channels runs. Update Rate (# spikes): Specifies the number of spikes that needs to be collected per unit before spike-sorting statistics is updated. Assume one unit per channel at the beginning. Minimum Peak Percentage: Histogram peaks have to have a minimum height which is calculated by adding the valley height (or zero) to the value of total # of samples used * minimum peak percentage. Method Manual PCA: Uses Principle Component Analysis method to sort units recorded on an electrode. Wave Basis Size: The number of waveforms to use to calculate the PCA basis vectors. Example, 250 waveforms are needed to create the PCA basis vectors. Update Basis Multiplier: The multiplier of the basis size. This number is used to recreate the basis after so many waveforms. For example, if this number is 5 and the Wave Basis Size is 250 then after 1250 (250 x 5) waveforms the PCA basis vectors are recalculated. Artifact Rejection: This feature is used to reject spike events that occur simultaneously across multiple channels. Maximum Simultaneous Channels: If more than X channels contain simultaneous spike events, the events are rejected and are not use in spike sorting and the corresponding waveforms are not recorded in the NEV file. Refractory Period: Spike detection is turned off for X samples after an event has been detected. LB-0462 3.00 Page 26 of 53 Blackrock CerePlex Direct - Instruction for Use Adaptive Filtering Recorded signals may contain some noise from any known sources of external noise, such as magnetic eye-tracking systems. Such external noise sources may be plugged into the CerePlex Direct System and tested for extraneous noise levels. The Adaptive Filtering utility provides a means to determine how much of the recorded signal is comprised of noise so that parameters can be set to eliminate the noise from the signal. Figure 5-17 - Adaptive Filtering Plug the peripheral equipment into the CerePlex Direct then click on Hardware Configuration Adaptive Filtering, right-click the channel icon then select Properties. Use the drop down menu to activate the settings. The Reference Channels can be set as 1 or 2 Channel filtering of spike and continuous data or just the spike stream data. Click Apply to activate adaptive filtering and remove the noise. N-Trode Groups An N-Trode is a set of electrode channels that are defined by the user. N-Trodes are often used in electrophysiology to record extracellular field potentials and spikes. The bundle of electrodes can record signals from an overlapping population of neurons and therefore it can be used as a powerful tool to enhance spike sorting. In Central, the user can have multiple N-Trode sets. Each N-Trode set can contain up to 4 electrodes. When using a multi electrode array or an electrode shank with multiple recording sites, this software allows the user to define the single channels associated to the multiple recording points and perform sorting on the N-Trode as an entity. To define N-Trode groups open a group and double click on available channels to assign them to a group. Press OK to save changes. Figure 5-18 - N-Trode Properties LB-0462 3.00 Page 27 of 53 Blackrock CerePlex Direct - Instruction for Use Spike Panel This app displays the detected spikes on all of the front-end channels. Double click on any channel to display its events in the Single Neural Channel window (explained later). Use the <Shift> or <Ctrl> keys to select several channels to highlight. Channel selection and other display properties can be turned on or off through the right-click context menu. A map file can be applied to the display to change the spatial arrangement of the channels on the screen to match the electrode array in use. Figure below displays channels of a 10x10 electrode array. If spikesorting rules are defined, the spikes belonging to different units will be displayed in different colors. Figure 5-19 - Spike Panel Load Map File: The default map file for the spike panel is a 16x8 grid. A custom map file can be loaded to change the layout to match the spatial arrangement of the channels on the screen to match the electrode array in use. Contact Blackrock Customer Service to obtain the map file specific to your electrode array. Load Default Map File: By selecting this button, the default 16x8 grid of 128 channels will be loaded. Map File Information: Displays information about the map file currently loaded. Time to screen refresh: The drop down tool allows the user to select the time until the spike panel display will refresh. The refresh rate can be set to refresh every 2, 5, 10, or 20 seconds, or Never to stop the refresh. Open Selected Channels: After selecting a channel, or group of channels, to display in the Single Neural Channel window, click this button to open the selected channels or right click after selecting channels then click Open Selected Channels. Refresh Screen: Select the refresh button to manually refresh the spike panel display. Magnify Current Channel: Select this button to magnify the channels in the spike panel. Move the mouse over the channel to magnify the channel. When magnify is turned on, the channels will only be magnified if the spike panel display window has been sized down. Level of Criticality (LOC): The LOC button displays the load on the PC. LB-0462 3.00 Page 28 of 53 Blackrock CerePlex Direct - Instruction for Use Raster Plot The Raster Plot screen displays spikes as a pixelized image, each pixel representing a signal impulse sampled for the length of time set by the user in the drop-down box. In this example, 50 pix/sec indicates that each second of data is represented by 50 pixels on the screen. Continuous analog data can also be shown. Figure 5-20 – Raster Plot Play: When selected, Raster Plot displays wrap. Scroll: When selected, Raster Plot displays scrolls. Pause: When selected, the Raster Plot display will pause. One Line per Channel: When selected, all spike events on a channel will be displayed on one line. Split Channel: Splits single channels in the raster plot display. A channel can be displayed by online classification rules and continuous waveforms. Rate: Lets the user select the scrolling speed at which the raster plot displays the data. Set the range from 4 pix/sec to 100 pix/sec (pixels per seconds). Decrease size, Increase size, Minimize, and Maximize Channels: Select a channel (or group of channels) in the raster plot to increase or decrease the size of the selected channels. Delete Channel: Click this button after selecting a channel or group of channels to delete them from the raster plot display. Move Down, Move Up: Use these buttons to move one or a group of channels up or down in order on the raster plot display. Scale Continuous Data: Use this button to display continuous waveform in the raster plot module and adjust the scale for display. Refresh: Refreshes the raster plot display. Sort: This button sorts the channels in the raster plot display. Click the drop down arrow to display the sorting types then select sort by Channel ID, Recording Mode, or Unit ID. Choose Channels, Add All, Clear All: Click the Choose Channels button to select a group of channels to add or remove from the raster plot display. To add all channels to the display, click the Add All button. The Clear All button will remove all channels from the raster display. Open Selected Channels: After selecting a channel or group of channels to display in Neural Channel, click this button to open the selected channels. LB-0462 3.00 Page 29 of 53 Blackrock CerePlex Direct - Instruction for Use Single Neural Channel This app displays the activity of a single channel. It is also where units can be defined for the manual spike-sorting algorithms. Figure 5-21 - Single Neural Channel Channel ID: From the drop down box, change the channel displayed. Auto: Toggles thresholding between adaptive threshold and a user defined fixed value. Properties: Display and change the settings of the current channel. Spike Display: The signal is displayed as time stamped events. Use the vertical slide button at the right of the screen to set the voltage range. The default time scale of the spike display window is 1.6 ms / 48 samples spike width. The time scale / spike width samples can be defined in the Global Settings section in the Hardware Configuration module in a range from 1.0 ms to 4.3 ms (30 samples to 128 samples). Clear: This button clears the spike display until new spikes are triggered. Specify in the drop down box how many events will be displayed before clearing. Spike Count Drop Menu: Specify how many spikes are displayed before the screen is refreshed. Show Spikes Drop Menu: You may specify which waveform types are displayed in the spike Display. Waves/Pattern: View spikes in waveform or 2D or 3D pattern view. Continuous: This allows the display of the continuous waveform signal and spike display in raster format. Raw/LNC: Click this button to display the raw data and any applicable line noise. LB-0462 3.00 Page 30 of 53 Blackrock CerePlex Direct - Instruction for Use Manual Override options: A user can override the automatic spike sorting on an individual channel by clicking on the Pattern view. Click the Edit button next to the classified spike to override the auto spike-sorting function for that sorted unit and resort to a manual sorting option. Press <C> to see all available controls. Hold down the <Ctrl> key and draw an ellipse in the Pattern view around the cluster that you would like to define as a spike. You may also change the size of the ellipse to make the diameter larger or smaller. Once the ellipse is placed in the cluster that you are defining, the word “Overridden” will appear next to the sorted unit. You can also change the threshold radius by changing the diameter of the grey ellipse in the center of the Pattern Display. Any units that occur in the grey circle will not be displayed as a spike. 3D PCA On-line Spike Classification: If manual PCA is selected, spike sorting is performed using online PCA analysis within the PCA space. PCA spike sorting can classify up to five different signals per channel, each selected signal receives a separate color. An ISI Histogram is also displayed for each classified spike. A user can sort an individual channel by clicking on the Pattern. Click the Define button next to the classified spike to sort that unit. Hold the Ctrl key and draw around the cluster. An ellipsoid will be created which is used to define a unit. You may also change the size of the ellipsoid by pressing R then moving the handle. Hoops Spike sorting: If Hoops spike sorting is selected, you can click on Define (not shown above) next to each unit window box. A color box will appear in the spike window. Drag the box to place a hoop anywhere on the screen so that spikes go through that hoop. Any spike going through the hoop will be classified as that unit. Multiple hoops can be placed and only spikes that go through all hoops will be classified. Unit Mapping: Another override option can be performed by clicking the unit-mapping button. Rules can be remapped, combined, or classified as noise. File Storage TOC Interface Use the File Storage Interface screen to record data. The user can enter patient information and select a path for the files that are created when the session is initiated. The CerePlex Direct Software assigns a numeric name to the files. The numeric file name indicated the data and time of recording. For example, 20110124-152145 indicated that the data file was recorded on January 24, 2011 at 3:21:45 PM. File Storage will also save the settings, in the same folder as the data file, at the beginning of a recording session. Figure 5-22 - File Storage – TOC Interface LB-0462 3.00 Page 31 of 53 Blackrock CerePlex Direct - Instruction for Use File Splitting: The software can split recorded data files during a recording session to allow smaller file sizes for offline analysis. The file size and time limit before the system will create a new file can be user defined by clicking the view drop down menu Options. To disable file splitting, check the disable file-splitting box in the file storage module. File Description: Use the dialog to add comments up to 256 characters long to the data files. Multiple lines can be entered by pressing the <Enter> key, but the user should not enter more than eight lines in this field. Comments need to be entered prior to recording a data file. Record For: With the Record For box checked, specify an amount of time (in seconds) that the CerePlex Direct system will record data. Once the time has expired, the recording will stop automatically. Start/Stop Recording: Press the Record button to start recording data. Press the Stop button to stop the data acquisition cycle. This is an acceptable way to stop acquisition cycles as it simply closes the data file and preserves all file content up to the point of acquisition termination. Remote Recording Control: Check the remote recording box to Start, Stop, Pause, and Resume file recording from an external source through the digital input port, or the serial I/O port. Click the Setup button below the remote recording check box to set user-defined hex values for each remote recording function. For example, to start recording as soon as HEX value 0001 is read on the digital port and ignoring bits 5-12 choose Digital Input, enter 000F for the first HEX box (mask) and enter 0001 for the second HEX box (read value). 2.x Interface Use this window to record data. Some of the controls are similar to the TOC Interface. There are some additional controls that are described below. Figure 5-23 - File Storage - 2.x Interface File Options allows the user to enable or disable recording of a certain frequency data. File Name and Path: Click on Browse to choose a folder to record in and name the data file. Auto-Increment: If checked, it enables automatically incrementing the data filename every time recording is stopped. For example, if the data file is named SampleData then the first file will be recorded as SampleData001, the next SampleData002, etc. File Spec: Choose between the different file specifications. Refer to the File Format for information of the different file specs. LB-0462 3.00 Page 32 of 53 Blackrock CerePlex Direct - Instruction for Use File Storage Options Click on View and then Options to set file storage options. Figure 5-24 - File Storage Options Enable Sync Pulse: Will send a sync on Digital Output 1. The sync signal is a unique waveform pattern sent every 14 seconds and repeats itself every hour. Each 14 seconds the pattern changes. This can be used to synchronize recordings with external equipment. Invert Sync Pulse: It will invert the sync pulse. The pulse will start high and will go low. Remove Noise: Enabling this option will remove noise-classified waveforms (unit 255) from the recorded file. Sync with NeuroMotive Recording: It will enable syncing with the NeuroMotive Video Recording and Tracking System, if present. Split File Interval: The recorded file will be split every so often. The user can enter either duration or a file size that the split should occur at. If file size is entered click on “Calculate Time” to automatically populate the “Estimated Time” field. LB-0462 3.00 Page 33 of 53 Blackrock CerePlex Direct - Instruction for Use Digital Oscilloscope The oscilloscope app is capable of displaying up to two traces of analog input channels on the screen at a very high resolution of 0.1 ms/div. Figure 5-25 - Digital Oscilloscope View Channel Enable: The user can enable up to two channels per instance of the oscilloscope. Channel Selection: Select any channel from the drop down menu. Color Selection: Allows the user to select a color for either of the traces. Settings: It will open up the Properties window for each channel. Note: a sampling rate other than <none> needs to be selected or the trace will not appear on the screen. Invert: Selecting this option will invert the trace for a given channel. Delay: This option will display the channel 2 trace with a delay compared to channel 1. Trace Amplitude: Modifying the sliders for each channel will change the signal amplitude. The top trace changes the range and the lower slider is used to choose a value within the given range. Time/Frequency selection: Selecting time will operate the oscilloscope in the time domain. Selecting frequency will operate the oscilloscope in the frequency domain. Time Resolution: Modifying the sliders will change the resolution of the signal. The upper sliders change the range of resolution and the lower slider is used to choose a value within the given range. Trigger Type: choose between Auto, Normal and Single. LB-0462 3.00 Page 34 of 53 Blackrock CerePlex Direct - Instruction for Use Auto: The trace will display continuous signal until the trace crosses the trigger level. When the trace crosses the trigger level, it will momentarily pause until either the trace crosses the trigger level again, or after a short pause, will resume displaying the continuous signal. Normal: The trace will freeze as soon as the trace crosses threshold until the trace crosses the trigger level again in which case the screen will update with the new trace. Single: A single trace is captured as soon as it crosses the trigger level. To capture another thresholdcrossed trace click on Single again. You can set the trigger lever by either entering a voltage value in the field or by sliding the trigger up and down manually using a mouse. Assign a trigger delay. Note that at 0, the trigger will be placed at the very left edge of the screen and may not be visible. Set a negative value to push the trigger point to the right. Figure 5-26 - Custom Sliders The slider has a range slider (on top) and a value slider (button). The range and values can also be manually defined by entering numbers in the boxes below the slider. LB-0462 3.00 Page 35 of 53 Blackrock CerePlex Direct - Instruction for Use Digital Filter Design This tool is used to design custom digital filters. The allowable filter types of “High Pass”, “Low Pass”, “Band Pass”’, and “Band Reject”. This application depends on MATLAB Compiler Runtime installation. This file is included in your installation CD. Please contact [email protected] if you need a copy of this file. Figure 5-27 - Digital Filter Editor The user can select one of the filter types and then select the desired frequency range. The “Filter Status” window will display whether the filter is stable or not. The “Bode Plot” and the “Nyquist Plot” of the given filter are displayed. Once the filter parameters are set, click on “Save” to save the digital filter. Refer to “How To” section to learn how to create digital filter. LB-0462 3.00 Page 36 of 53 Blackrock CerePlex Direct - Instruction for Use Analysis Software Activity Map This app gives the user an overview of the firing rates of each electrode spatially organized over time. A map file can be loaded to change the electrode arrangement. The spiking activity of each channel is binned and smoothed. Binning is counting the number of spikes that occur over a fixed time window (20ms). Smoothing adds steps between events and non-events both between channels and over time on a channel, smoothing out the event horizon that would otherwise be too abrupt a change and could possibly cause signals to be missed by the observer. Figure 5-28 - Activity Monitor Pause: When checked, the display will pause. The activity map will resume when the box is clicked again to clear. Reset Button: Press to restart the display of the firing rates. Maximum Scale Range: Allows the user to set the maximum value of the Color Scale. Scale Eccentricity: This setting allows the user to set how eccentric and sensitive the colors are to the firing rates. Time Constant: A time specified in seconds is how long each electrode area color will retain prior to returning to blue. Load Map File: A map file can be loaded to change the layout of the grid. LB-0462 3.00 Page 37 of 53 Blackrock CerePlex Direct - Instruction for Use Signal-to-Noise Ratio Signal-to-Noise Ratio (SNR) displays the running amplitudes (µV) of the signal, noise, and signal-to-noise ratio for units on a particular channel. It also displays the signal-to-noise ratio as a function of time, which allows signal quality to be monitored across time. This information can be saved as a tab-delimited text file and opened in Excel or a compatible program for further analysis. In the example below the SNR for elec11 unit 3 is 9.50 meaning that the signal is 9.5 times bigger than the noise. Figure 5-29 - Signal to Noise Ratio Neural Modulation Neural Modulation displays changes over time of the firing frequency. The Modulation Index covers a range of 0 to 12.0 but a range of 2-5 is considered normal. Figure 5-30 - Neural Modulation LB-0462 3.00 Page 38 of 53 Blackrock CerePlex Direct - Instruction for Use Impedance Tester Note: A patient cable is required for impedance measurements. Contact Blackrock Microsystems Sales at [email protected] for more information Impedance Tester runs an analysis on each channel to ensure proper impedance of every electrode. When selected, a dialog box is displayed instructing the user to flip the impedance switch located on the patient cable to the impedance position, marked with a + sign. Data cannot be recorded when the system is in impedance mode. The impedance function can read impedances of about 50 kΩ (at 1 kHz) or greater. If an impedance measurement is below 50 kΩ (at 1 kHz) an information box will pop up on the screen stating that the electrode impedance is below 50 kΩ but will not give a number. Steps to measure impedances are stated below: Figure 5-31 - Auto Impedance 1) Click on Impedance Tester on Central. The Auto Impedance app will open. If data is being recorded, the user will be prompted to stop recording or cancel the impedance test. The user will also be given the chance to stop the recording from the dialog. 2) A dialog box will be displayed notifying that Auto Impedance is checking the impedance switch to ensure it is in the Impedance position. If not, the user will be prompted to flip the switch to Impedance mode. 3) Auto Impedance checks the array reference wires before beginning. 4) Impedance data is collected then the Auto Impedance screen is displayed. All channels are measured simultaneously. The measurement takes about one minute. Impedance readings are displayed for every channel. Tolerance is defaulted to 100-800 Ω. If any channels display numbers outside tolerance, the box will turn yellow (below) or red (over) to indicate out of range values. 5) Open View Options to display the Impedance Calculation Settings. 6) Open the Edit menu or right-click one of the bad channels to display the properties menu. 7) Select Disable Bad Channels to mark out-of-tolerance channels with a display border. 8) When the other Central modules are opened, the disabled channels will be blank or marked with an “X”. 9) Click File/Save Values to save the settings to a data in a text file on the hard drive. 10) Click File/Exit to quit Impedance testing. Auto Impedance will check the switch. 11) A dialog will be displayed instructing you to flip the Impedance switch to the Normal position. When the switch has been toggled to the Normal position, Auto Impedance restores original channel settings and will close. Do not leave the impedance switch in the Impedance position when not in the Auto Impedance feature. If the switch is accidentally switched to the Impedance position when not testing, significant noise will be present invalidating the recorded data. LB-0462 3.00 Page 39 of 53 Blackrock CerePlex Direct - Instruction for Use Crosstalk If you suspect that you may be looking at the same neural activity on more than one channel, the Crosstalk Diagnostic module will compare each channel for cross correlation. The Crosstalk Diagnostic Module will display each channel as green, yellow, or red. Figure 5-32 - Crosstalk Green indicates that no cross correlation to any other channel was found. Yellow indicates that possible cross correlation is found with another marked yellow channel, but not a significant cross correlation. It is suggested that the user closely compares any channels that turn yellow to determine if it is possible crosstalk. Red indicates that a high level of cross correlation is found with other red marked channels. You can flag any channels as “bad” and disable them from the Edit drop down menu. LB-0462 3.00 Page 40 of 53 Blackrock CerePlex Direct - Instruction for Use N-Trode The N-Trode utility is used when electrode types with multiple recording points are located on the same shank or in the same discrete area of an electrode array. Figure 5-33 - N-Trode Utility Before being able to use this utility N-Trode groups need to be defined in Hardware Configuration as described in N-Trode Groups on page 27. The N-Trode groups can also be defined from within the N-Trode application window. n-Trode: Use the drop down menu to switch between the different N-Trode groups. You can also use the arrows to flip through the various groups. N-Trode Properties: This will let you define an N-Trode group, or add/remove channels on an existing NTrode group. Channel Properties: This will edit all of the channels assigned to the currently selected N-Trode group. Hide Continuous: Checking this box will hide the continuous signal window on the bottom of the page to leave more room for the N-Trode display boxes. Magnification: It changes the magnification of the pattern window by zooming in and out. Define/Delete/Units: Select a unit then click on Define. Hold down the <Ctrl> key and using the mouse to draw a shape around a given cluster to define it as a unit. Repeat this process until all units are defined. To delete, select a unit and click on Delete button. LB-0462 3.00 Page 41 of 53 Blackrock CerePlex Direct - Instruction for Use 6 How To Create a Digital Filter Custom digital filters can be defined and used. To create digital filters do the following: 1) 2) 3) 4) 5) 6) 7) Open Central. Click on Digital Filter Editor. Allow for the Digital Filter Editor to open. This tool requires MATLAB Core Run-time which is available on the CerePlex Direct install CD or can be downloaded from our website. Choose a filter type and the corner frequencies desired. If the filter is unstable the filter design tool will warn you and suggest ways to make the filter more stable. Save the filter in a known location and close the program. On Central click on file and then Load Digital Filters. Locate the previously saved digital filter. At this point this newly added filter will be available in the drop down menu under Hardware Configuration for all analog inputs. Setup Channels for Data Acquisition The software will allow you to record three streams of data concurrently. The streams are wideband data sampled at 30 kHz, continuous data with custom digital filters, and threshold crossed spike waveforms and their associated timestamps along with other custom neural events, such as the digital and serial inputs. To setup the channels for data acquisitions do the following: 1) 2) 3) Open Central. Click on Hardware Configuration. Select a channel to configure. You can also select a few channels by holding down CTRL or select a range of channels by holding down the SHIFT key while making the selection. 4) Right click and choose Properties. Alternatively, you can click on the properties icon on the toolbar. 5) To enable the raw stream (wideband data sampled at 30 kHz) enable raw sampling by checking the Enable box. This data will be saved in a file with NS6 file extension. 6) To enable continuous data suitable for LFP or wideband acquisition, select a sampling rate from the pull down menu. Depending on the sampling rate, this stream will be saved in a file with NS1 (500 Hz), NS2 (1 kHz), NS3 (2 kHz), NS4 (10 NS4), or NS5 (30 kHz) file extensions. 7) (Optional) Choose a filter for the continuous streams. To record LFP signals, choose a low-pass filter, such as LP 150. To record the continuous spike stream, choose a high-pass filter such as HP 250. 8) To enable spike extraction, select Enable Spike Processing box. 9) Choose a filter for the spike stream. To properly extract spikes, a high pass filter needs to be applied to this stream. If you are not sure which filter to choose we recommend using HP 250. 10) A proper threshold needs to be set otherwise spikes may not be extracted. See “Set Spike Extraction Threshold” section below to learn how to setup threshold values. LB-0462 3.00 Page 42 of 53 Blackrock CerePlex Direct - Instruction for Use Set a Threshold Value for Spike Detection Spikes are extracted when the signal crosses a previously set threshold value. There are several ways to set threshold values for spike extraction. Automatic threshold 1) 2) 3) In Hardware Configuration, click on Analog Input and choose the channels of interest. Right click and choose Properties or click on the Properties icon on top of the window. Select Auto Threshold. The program will use the algorithm described under “Auto Thresholding” section. Fixed µV value 1) 2) 3) 4) In Hardware Configuration, click on Analog Input and choose the channels of interest. Right click and choose Properties or click on the Properties icon on top of the window. Enter a µV value in the Threshold Value box and click on Set All Thresholds. Alternatively, you can click on Thresholding on Central and then enter a µV value in the “Value (µV)” box and click on Set All Thresholds. This will set the given threshold value for all channels. Multiplier of the RMS of the noise 1) 2) 3) 4) Run Central. Click on Thresholding. Enter a value in the “RMS Multiplier” field. Click on Set All Thresholds. This method will independently calculate the RMS of the noise band for each channel and set the threshold at a multiplied value of the noise RMS. Sort Units The Central software offers three automatic and manual methods for real-time spike sorting. Histogram Peak Count (Automatic) 1) 2) 3) 4) 5) 6) 7) 8) Open Hardware Configuration window. Select the channels that need to be spike sorted. Right click and choose Properties or click on the properties icon. Choose “Histogram Peak Count” from the spike-sorting drop down menu. Click OK. Click on Central. Click on Tools. Click on Rebuild Spike Sorting Module. This step may take a few minutes. This step needs to be repeated for each experiment session as cells recorded during one session may not remain during a new session and new cells may appear instead. LB-0462 3.00 Page 43 of 53 Blackrock CerePlex Direct - Instruction for Use Hoops (Manual) 1) 2) 3) 4) 5) 6) 7) Open Hardware Configuration window. Select the channels that need to be spike sorted. Right click and choose Properties or click on the properties icon. Choose “Hoops” from the spike-sorting drop down menu. Open Single Neural Channel. From the drop down menu choose the desired channel. Make sure the unit icon is pressed down so you can see the units’ window. 8) 9) 10) 11) Click on Define All button. A series of colored bars will appear on the spike panel. Drag each colored bar out of its place. A car will appear. Place them so that a group of spikes can go through them. Repeat this process for all channels. Figure 6-1 - Click on icon to display the units window Figure 6-2 - Sorted Spikes LB-0462 3.00 Page 44 of 53 Blackrock CerePlex Direct - Instruction for Use Manual PCA 1) 2) 3) 4) 5) 6) 7) 8) Open Hardware Configuration window. Select the channels that need to be spike sorted. Right click and choose Properties or click on the properties icon. Choose “Manual PCA” from the spike sorting drop down menu. Open Single Neural Channel. From the drop down menu choose the desired channel. Make sure the unit icon is pressed down so you can see the units window. Click on the Feature tab. Figure 6-3 - PCA Space 9) Click on Build PCA. By default the program needs 250 waveforms to build the PCA basis vectors. This may take a few minutes. The default 250 number can be modified through Hardware Configuration => Spike Sorting. 10) On ther right side, click on Define for a given unit. 11) Hold down the CTRL key and draw a line around a given cluster. The progrm will automatiicaly create an ellipsoid around the cluster. Repeat this process for all the other units and channels. LB-0462 3.00 Page 45 of 53 Blackrock CerePlex Direct - Instruction for Use Record a Data File There are two file recording interfaces to choose from. These interfaces can be selected from the options under Central. To open this window click on Tools and then Options. Under “File Storage App Interface” there are two options to choose from. The “2.x Interface” allows a simple interface for recording files. The TOC Interface is generally used with the clinical research customers as it involves fields such as patient ID, etc. 2.x Interface 1) 2) 3) Open Central. Click on Tools and then Options. Choose “2.x Interface” under “File Storage App Interface”. This needs to be selected once. You can skip steps 2 and 3 if “2.x Interface” has already been selected. 4) Click on File Storage app. File Storage app will open. 5) Click on Browse to choose a folder to record into. 6) Type in a file name. If you choose auto-increment, every time the data recording is stopped and resumed without the filename being changes, XXX will be added to the end of the file where XXX stands for the Xth file being recorded. This will avoid overwriting the previous file. 7) (Optional) Enter a comment that describes your recording session. 8) (Optional) Choose a “File Specification” from the drop down menu. The latest File Format always supports more features and therefore is always recommended. 9) (Optional) Choose a “Record for” duration so the file recording stops after a set time period. 10) Click on Record. Once recording is done click on Stop. TOC Interface 1) 2) 3) Open Central. Click on Tools and then Options. Choose “TOC Interface” under “File Storage App Interface”. This needs to be selected once. You can skip steps 2 and 3 if “TOC Interface” has already been selected. 4) Click on File Storage app. File Storage app will open. 5) Fill out the Patient ID, Patient Name, Patient Last Name, etc. fields. 6) Click on Browse to choose a folder to record into. 7) File names are automatically chosen based on the time of recording (DATE-TIME. Example: 20110323-092312 indicated that the recording started on March 23, 2011 at 9:23:12 AM. Note that this time comes from the Host PC running Central and not from the CerePlex Direct. 8) (Optional) Enter a comment that describes your recording session (optional). 9) (Optional) Choose a “Record for” duration so the file recording stops after a set amount. 10) Click on Record. Once recording is done click on Stop. LB-0462 3.00 Page 46 of 53 Blackrock CerePlex Direct - Instruction for Use Remotely Control Data Recording The recording can be controlled remotely via an external device, such as a behavioral control system. The remote signal can be sent to the CerePlex Direct through the digital input. The recording can be remotely started, stopped, paused, or a new session can be started. To setup remote recording using individual digital bits do the following: 1) 2) 3) 4) 5) 6) Open Central. Open the File Storage app. Click on Remote Recording. Choose the input type to be Digital Bit Input for any of the four remotely controllable tasks. On the second column choose a bit to be used for this function. On the third column choose high or low for activating this tasks. For example, to setup remote recording so recording starts whenever digital bit 3 on the DB-37 is set to high set the second column to D3 and set the third column to High for “Start Recording” task. Visualize an Input Channel on the Digital Oscilloscope The digital oscilloscope app enables you to visualize up to two channels at a very high resolution. Triggering can also be setup for improved visualizing of the signal. To setup the oscilloscope do the following: 1) 2) 3) 4) 5) 6) 7) 8) 9) Open Central. Click on Oscilloscope. The Oscilloscope app will open. Enable Channel 1 and/or Channel 2. Select the channels from the drop down menus. Click on Settings to make sure a sampling rate is selected for the given channel. If <none> is selected for sampling rate then a trace will not appear in Oscilloscope. Set the amplitude of each trace by changing the slider bar for each channel. The upper slider modifies the range of values and the lower slider selects a value within the selected range. The units are µV/Division. Move the trace location up or down by dragging the small triangle on the left side of the trace. Set the time resolution by changing the resolution slider bar. The upper slider modifies the range of values and the lower slider selects a value within the selected range. The resolution can be as small as 0.1 milliseconds. (Optional) A trigger can be set for the traces. Select a trigger type (Single, Normal or Auto). a. Auto: The trace will display continuous signal until the trace crosses the trigger level. When the trace crosses the trigger level, it will momentarily pause until either the trace crosses the trigger level again, or after a short pause, will resume displaying the continuous signal. b. Normal: The trace will freeze as soon as the trace crosses threshold until the trace crosses the trigger level again in which case the screen will update with the new trace. c. Single: A single trace is captured as soon as it crosses the trigger level. To capture another threshold-crossed trace click on Single again. d. Choose a channel source to the trigger. e. You can set the trigger lever by either entering a voltage value in the field or by sliding the trigger up and down manually using a mouse. f. Assign a trigger delay. Note that at 0, the trigger will be placed at the very left edge of the screen and may not be visible. Set a negative value to push the trigger point to the right. LB-0462 3.00 Page 47 of 53 Blackrock CerePlex Direct - Instruction for Use Re-arrange the Electrodes on Spike Panel (i.e. Create a Map File) It is possible to re-arrange the electrode positions on Spike Panel and Activity Map. To do this, a plain text file needs to be created that contains information on where each channel is to be displayed on the screen in relation to all the other channels. The sample below is an example of such a map file and it’s resulting orientation. Figure 6-4 - Sample CMP file Figure 6-5 - Sample Spike Panel The map file contains five columns. The first column indicates the location of the spike window on the x-axis. The second column indicates the location of the spike panel on the y-axis. Point 0,0 is on the lower left corner of the screen. The third column indicates the bank the physical channel is located on (A, B, C, or D) and the fourth column indicates the bank pin the channel is connected to. The fifth column is optional and defines the label for the channel. In the example above, the first line indicates that the channel on bank A pin 1 is named elec04 and it’s located on the 1st column from left (0) and the 2nd row from the bottom (1). The last line indicates that the channel on bank A pin 6 (channel 6) is named elec03 and it should be placed on the 3 rd column (2) from left and the 1st row from bottom (0). Note that location positions start from 0. Note: Any line that starts with “//” will be used as comment and will be ignored. The first line after the last // line will also be ignored. LB-0462 3.00 Page 48 of 53 Blackrock CerePlex Direct - Instruction for Use 7 Hardware Specification Digital Signal Processing Adaptive Line Noise Cancellation filter, 4th-order hi/lo pass digital filtering for all channels. Separate filters for simultaneous continuous and spike streams along with online spike classification using time/amplitude and/or template matching. Neural Signal Inputs Up to 96-Channels Neural Signal Input Sample Rate 30,000 Samples/second Experimental Analog Inputs Three ±5 V, inputs for experiment or neural signal processing Analog to Digital Conversion 16-bit digital output, with 0.25 µV per bit resolution Maximum Input Voltage Range up to ±5.0 V between any input and ground Common Mode Rejection Ratio > 90 dB at 50/60 Hz Experimental Digital Inputs Sixteen 0-5V TTL Logic Level inputs for experiment event signaling Power Supply Standard 3-pin PC power connector accepting 110-240 VAC, 50-60 Hz PC Hardware Interface Hi-Speed USB 2.0 PC Software OS’s Supported Windows XP Pro or Windows 7 32 & 64 Bit LB-0462 3.00 Page 49 of 53 Blackrock CerePlex Direct - Instruction for Use 8 Troubleshooting 8.1 Unable to Open Instrument Network Figure 8-1 Unable to Open Instrument Network Error 8.2 Problem: This Error occurs when there is a problem with nPlayServer communicating with the Central Software. Causes: It can occur when the USB cable is not connected between the CerePlex Direct and the PC, or if the drivers have not been installed yet. Troubleshooting: Check to ensure the USB cable is plugged in. Unplug the USB cable and plug back in to another USB Port. Verify when USB cable is plugged in that Total Phase Cheetah Host Adapter shows up under the Universal Serial Bus Controllers in Device Manager. Data Recording Terminated Figure 8-2 Data Recording Terminated LB-0462 3.00 Problem: Overloaded Computer System, the load of the software is greater than the CPU can handle. Causes: Multiple applications running, or PC does not meet minimum computer system requirements, on antivirus software is running a scan. Troubleshooting: Close all other programs and restart the CerePlex Direct Software Suite. Check to ensure that your CPU is a quad core processor. Verify that CPU usage is not maxed out in Windows Task Manager. Verify that antivirus software is not running. Page 50 of 53 Blackrock CerePlex Direct - Instruction for Use 8.3 Audio Output has distorted noise 8.4 Problem: Overloaded computer system, samples are not able to be sent to audio out at a constant rate, which causes a frequency shift which sounds like garbled noise. Causes: Multiple applications running, or PC does not meet minimum computer system requirements, on antivirus software is running a scan. Troubleshooting: Close all other programs and restart the CerePlex Direct Software Suite. Check to ensure that your CPU is a quad core processor. Verify that CPU usage is not maxed out in Windows Task Manager. Verify that antivirus software is not running. nPlayServer has Stopped Working Figure 8-3 nPlay Server Has Stopped Working 8.5 Digital Headstage Data Appears Noisy 8.6 3.00 Problem: Digital Headstage data appears noisy in spike panel or in oscilloscope mode of the central software. Causes: Upon first plugging in a Headstage or first powering up the system digital data will appear noisy as the system is equilibrating. This could also occur if there is not an adequate reference signal or ground signal attached at the digital Headstage. Troubleshooting: Attach a digital ground connector to the patient ground connector on the green touch proof connector on the front of the CerePlex direct. Try changing reference signal and seeing if noise is reduced. Follow basic guidelines to reduce EMI noise around electrodes and Headstages to eliminate a noisy environment. USB LED LB-0462 Problem: nPlayServer crashed upon opening. Causes: USB drivers not installed correctly, or Cheetah Host Adapter library issues. Troubleshooting: Unplug USB cable and plug back in, ensure that cheetah.dll is located in your install directory under the nPlayServer folder. Problem: USB LED is red signifying that data sent from the CerePlex Direct to the Host PC is invalid. USB LED is off signifying that data is not being sent from the CerePlex Direct to the Host PC. Causes: Red LED means that the CRC for the packet that was sent is not valid and that the data is corrupted. The LED will be red for a half second after the last invalid packet. A Red LED could also occur if the header for the data packet is also incorrect. No LED means that no data is being sent or that the Cheetah Host Adapter is not receiving power or configured correctly. Troubleshooting: If LED is red, turn off the program and power down the system and remove the USB cable. Upon powering back up and plugging in the cable and starting the software verify that LED changed to blue. If the LED does not come back on, contact customer support as the cheetah board may have become damaged. NOTE: upon first starting the software the USB LED should flash red briefly signifying to the user that the LED is working Page 51 of 53 Blackrock CerePlex Direct - Instruction for Use and will alert the user to possible communication errors, ensuring that data being received is valid. If the LED does not flash red contact customer support. 8.7 Digital Headstage LED 8.8 Increased Noisefloor on Digital Headstge Signal 8.9 Problem: Digital Headstage bank LED is red signifying that the CerePlex Direct is receiving invalid data from the Digital Headstage. If the LED is off it signifies that the CerePlex Direct is not receiving or not processing data from that bank. Causes: Red LED can be caused if there is a bad connection between the Headstage and the CerePlex direct or if the data packets are not valid. No Led means that there is on Headstage plugged into that bank, or that the CerePlex Direct is already processing a full 96 channels from higher priority banks. Troubleshooting: For no LED check the cables and ensure plugged into both the Headstage and the CerePlex Direct and ensure that not more than 96 Channels are plugged into the higher priority banks. Bank A is the highest priority and Bank C the lowest. Red LED’s check the connectors on both the CerePlex Direct and the Headstage to ensure that there is no damage and that the connectors are not pulling out. Unplug the Headstage and plug it back in to reset it and see if it syncs back up. NOTE: upon first plugging in a Headstage the LED will flash red to verify that it is working; this will allow the user to be confident that if there is a problem they will be alerted. If the Headstage LED does not initially turn red or if the LED remains red contact customer support. Problem: The signal from the Digital Headstage input has increased noise on the line, making it difficult to see the data being received. Causes: Most likely a result of poor ground connections. Either the patient ground connection is poor, or a ground loop has occurred between the patient ground and one of the other ground planes found in the system. Troubleshooting: Run a patient ground connection from the CerePlex Direct Front Panel (G) down to the headstage / array implant. Ensure that earth ground, or analog ground is not creating a ground loop with the Patient Ground (do not have headstage connected to analog or digital inputs or the CerePlex direct case). Connecting the case to patient ground may reduce the noise, but bypasses the patient isolation circuitry. Contact Customer support for help in resolving any issues Web Address: Email: Phone: LB-0462 3.00 http://support.blackrockmicro.com [email protected] 1-801-839-1062 Page 52 of 53 Blackrock CerePlex Direct - Instruction for Use 9 Warranty Blackrock Microsystems, Inc. warrants that its products are free from defects in materials and manufacturing for a period of one year from the date of shipment. Blackrock will, at its option, repair or replace any product that does not comply with this warranty. This warranty is voided by: 1. Any modification or attempted modification to the product done by anyone other than an authorized Blackrock employee 2. Any abuse, negligent handling or misapplication of the product. This constitutes the sole warranty made by Blackrock, Inc. There are no other warranties, expressed or implied, which extend beyond those described herein or to anyone other than the original purchaser, including the implied warranties of merchantability and fitness for a particular purpose. In no event shall Blackrock Microsystems, Inc. be liable for any incidental or consequential damages, or for the infringement of any patent rights or third party rights due to the use of its products. 9.1 Return Merchandise Authorization (RMA) In the unlikely event that your adaptor needs to be returned to Blackrock for service or maintenance, do not send any equipment back without a Return Merchandise Authorization Number. An RMA number will be issued to you by a Blackrock representative. If you need to obtain an RMA number, you may contact a product support representative at (801) 582-5533 or toll free at (866) 806-3692. Once an RMA number has been issued, it is important to safely pack the returned item for shipping back to Blackrock. It is preferred that you save the original boxes and packing materials that your system arrived in for return shipment. Please address the package as follows: Blackrock Microsystems, Inc. ATTN: RMA# 391 Chipeta Way, Suite G Salt Lake City, UT 84108 USA Tel: (801) 582-5533 LB-0462 3.00 Page 53 of 53


